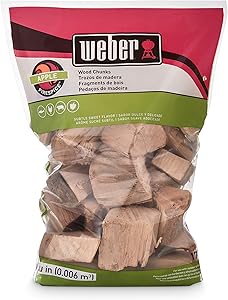
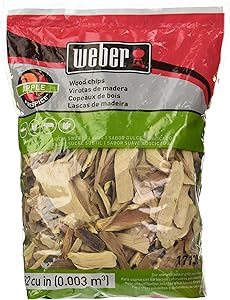
Weber Wood Cubic Meter Stephen Products 17138 Apple Chips, 192 cu. in. (0.003 cubi, m
- Make sure this fits by entering your model number.
- Subtle Sweet flavor
- Chip size pieces
- Two pound bag
- 192 cu. in. (0.003 m^3) sized bag

At what temperature do wood chips smoke? Guide to get it right
Thinking of smoking some steaks, poultry, or even fish?
I'm sure you have your favorite wood chip flavor ready to go, but do these chips make enough smoke?
When you use wood chips to smoke your favorite meaty cuts, you know the secret is in smoking at the perfect temperature.
Not all wood chips will give off that fantastic constant smoke, and many can even start to burn too quickly.
Therefore, you want to get the wood chips to the right temperature until they burn.
So, you are wondering, at what temperature are wood chips smoked?
Wood chips are smoked at a temperature between 570-750 degrees Fahrenheit or 300-400 degrees Celsius. All wood chips smoke when they reach these temperatures, but some woods burn and burn faster than others. As a general rule, fruit woods (apple, peach) burn faster than walnut woods like walnut and hardwoods like hickory and mesquite.
If your wood chips are below 570 degrees F, they will not burn or give your food a smoky flavor.
As you know, smoke is extremely important to your food because it gives meat that aroma and flavor that you can only achieve by smoking.
In this guide, I will discuss the different aspects of heat when smoking with wood chips .
Information on smoke and wood chips
First, what is smoke?Well, it is a complex combination of compounds that create flavor from the wood.
Each wood has a different flavor; therefore, you will get a much stronger aroma from walnut than from a light wood like apple, for example.
There is a difference between the temperature of the burned wood and the temperature of the smoker and the smoking environment.
When I talk about the ideal temperature for the wood chips to smoke, I mean the actual temperature of the wood chips, not the heat inside the smoker or grill.
So if you use a meat thermometer to measure the temperature of your food, don't rely on that reading to determine the actual temperature of the wood chips; that's something different.
Be sure to check the fries and not the air inside the smoker if you notice problems with the smoke.
At temperatures between 570 and 750 degrees F, wood chips smolder.
In fact, the ideal conditions for the smoky flavor are these lower temperatures because the wood does not simply turn to charcoal and smolders for longer.
As you can see, it is important to keep in mind this distinction between the temperature of the wood chips and the ideal temperature to smoke your food.
When you smoke most meats, the smoker temperature should be between 225 and 250 F (107 - 121 C).
How to control the temperature of wood chips
Since you want to get to that temperature where the chips start to smoke, you need to control the heat.So the goal is to lower oxygen levels to ensure the chips smoke rather than burn and burn too quickly.
The theory behind this is that as wood burns, it produces mostly heat and very little smoke.
When you cook and love meat, you want the smoke to add flavor to the food. Therefore, you must reduce the flames to promote smoldering.
When your wood chips are not giving you enough smoke, lower the oxygen level.
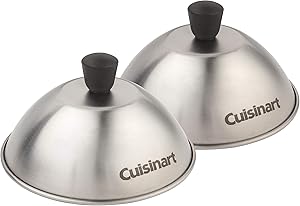
The best option is to place the chips in a special box for smoking . It is a great addition to your smoker.
How long does it take for wood chips to smoke?
It takes approximately 20 minutes for the wood chips to begin to smoke in your smoker or smoking attachment.In fact, only after 20 minutes does the wood begin to develop a delicious smoke flavor.
Should I soak the wood chips?
There is a common idea that wood chips should be soaked in water before using them in the smoker. This apparently prevents the chips from catching fire.
So is it really necessary to soak them?
While the theory that moisture slows down the combustion process makes sense, it is not entirely correct.
In fact, if you soak the fries for about an hour, they will actually release more steam, not a more flavorful smoke.
Soaked fries can lower the temperature of the smoker, which may not be what the meat really needs.
Wood chips need to get rid of all that moisture before they start to burn and smoke.
Only when the wood chips reach the boiling point of water (a temperature of 212 F or 100 degrees C) will they stop smoking.
So you have to wait a little longer to get your smoke.
Help, wood chips don't smoke!
Many smokers complain that some types of wood chips do not create enough smoke for an entire smoking session.The most common problem is that the wood is not wet enough and is too dry. This could be the result of too much seasoning.
The second most common problem is that the chips are not at the ideal temperature. Or they are below the minimum of 575 F required for smoking.
Or they're too hot and above 750 F, and in that case, they just burn quickly before your meat can get the delicious flavors.
What happens is that you are cooking the meat instead of smoking it.
The bottom line is to make sure your wood chips are at a temperature of 570-750 F (300-400 C) to get the most flavor out of the smoke.