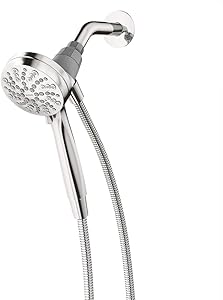
Moen 26100EP Engage Magnetix 3.5-Inch Six-Function Handheld Showerhead with Eco-Performance Magnetic Docking System, Chrome
- VERSATILE DESIGN: Chrome finish is highly reflective for a mirror-like look that works with any decorating style
- MAGNETIC BASE: The magnetic docking system allows you to easily detach and use as a handheld shower head or effortlessly replace it to dock with the snap of a magnet
- CUSTOMIZE YOUR SHOWER: Multiple distinct shower settings gives flexibility and variety
- ADA COMPLIANT: Complies with Americans with Disabilities Act (ADA) specifications
- BUILT TO LAST: Backed by Moen’s Limited Lifetime Warranty

How to Unclog a Shower: 3 Foolproof Techniques to Test at Home
It is common that, with daily use, the holes in the shower end up clogging. This happens because, along with the water, there are also minerals that end up depositing in this place. However, there is no reason to despair, as there are several ways to unclog the shower.
The part of the electric shower where the “holes” that clog over time are called the spreader, and that's where we'll focus our efforts. Next, you will learn about three foolproof techniques on how to unclog a shower at home. Read on and choose the one that looks most interesting to you!
How to unclog shower with vinegar
Vinegar is really quite a partner of household cleaning products and can be used for many different purposes. So it's no surprise that there's also (at least) a way to unclog a shower with vinegar, is there?
To test this tutorial on how to unclog shower with vinegar, you will need:
- 1 deep bowl or bowls
- VinegarWater
- Brush or sponge (for teeth or washing)
- Toothpick, paper clip or small wire
With these super easy-to-find items on hand, follow the following step-by-step steps on how to unclog shower with vinegar:
- Before starting the shower cleaning, turn off the circuit breaker or the main power switch;
- In a bowl, pour enough water to cover the spreader, add half a glass of water and mix well;
- Unscrew the spreader and immerse it in the bowl;
- Wait 1 hour, remove the air cap and brush the holes that are still clogged;
- If some holes are still clogged, use a toothpick, paper clip, or small wire to remove stubborn residue;
- Finally, screw the spreader back on and reset the circuit breaker.
How to clean shower without taking it off the wall
Did you try to remove the spreader and failed? Smoothly! Here we are going to go through a guide on how to clean shower without taking it off the wall.
To put into practice our tutorial on how to clean shower without taking it off the wall, you will need:
- 1 plastic bag
- Vinegar
- Warm water
- String
Do you already have all this at home? So let's go step-by-step on how to clean a shower without taking it off the wall:
- Turn off the circuit breaker or main power switch;
- Pour a glass of vinegar and a glass of warm water into the plastic bag;
- Tie the bag in the shower leaving the spreader immersed in the mixture of vinegar and water;
- Let it act for 1 hour, turn the circuit breaker back on, remove the bag and open the valve to rinse the spreader
- Take the time to act to clean other bathroom fixtures and wall coverings.
If your shower still has some clogged holes even after following this guide, we recommend imitating steps 4 to 6 from the previous tutorial on how to unclog shower with vinegar. Remember that all-purpose cabinets need to be clean too.
How to clean shower holes with a brush
Our latest guide on how to unclog the shower is just as practical as the last one, as it is also an alternative on how to clean the shower holes without having to remove it from the wall. To put it into practice, you will only need a washing brush or a toothbrush to clean your bathroom shower .
See how simple our instructions on how to clean the shower holes with a brush are:
- Turn off the circuit breaker or main power switch;
- Turn on the valve and, while the water falls, scrub the spreader with the washing brush or toothbrush;
- When you notice that the holes are all free, turn off the electro register and turn the circuit breaker back on.