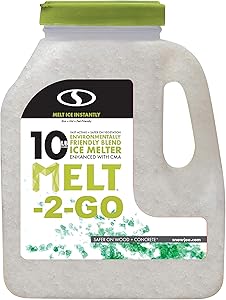
Snow Joe AZ-10-EB-JUG Melt-2-Go Nature + Pet Friendly CMA Blended Ice Melter, 10 lb Jug
- PET FRIENDLY: Formulated from nature’s own ingredients, EB Ice Melt provides a greener solution to deicing that is safer for pets. Unlikely to irritate paws or cause rashes.
- ENVIRONMENTALLY SAFE: Leaves no slimy residue behind, making it safe to use on grass, turf, around trees and other vegetation. Protects surrounding hardscapes and softscapes when used as directed.
- SAFE TO HANDLE: When used as directed, EB Ice Melt will not dry out or irritate the skin and can be safely and easily dispensed without requiring the use of protective clothing. MELT EB is specially treated with an anti-caking agent to extend shelf-life and improve dispersion.
- FAST-ACTING IN FREEZING TEMPERATURES: Goes to work immediately upon contact with snow and ice to accelerate the deicing and melting process. Pre-treating surfaces will also prevent ice and snow from accumulating.
- ANTI-CORROSION FORMULA: Enhanced with CMA (calcium magnesium acetate), an environmentally benign deicing agent, EB Ice Melt delivers fast and effective results without damaging surfaces such as concrete or metals.
- Power Source Type: Manual

How to remove ice from the sidewalk
An icy sidewalk can be a danger to you, your family, and your neighbors. Many cities have laws that require you to remove ice from the sidewalk that runs along your property. Knowing how to remove ice quickly, safely and efficiently is preferable.
Method 1 Use defrosters
1
Buy a defroster. You can find it at your local hardware store. It is preferable to buy several bags at the beginning of the season. When the first blizzard hits, stores may be out of stock. [one]
- You should store your defroster in a dry place, preferably in an airtight container to keep it away from moisture and sunlight. [2]
- It is made mostly of halite or sodium chloride, which has a lower freezing point than water. This allows it to spread through the ice, break it up and create a layer of water under it.
2
Use the appropriate product correctly. Defrosters can be harmful to your health, your sidewalk, your lawn, and your pets. Don't use much and broom it off after the ice has thawed. If you feel the need to use more than 2 to 4 ounces (59 to 118 milliliters) per square meter (square yard), you could be using the wrong product for your goal. Defrosters operate at various temperatures and melt at different speeds. [3]
- A hygroscopic de-icer removes moisture and can be very damaging to your skin and sidewalks. [4]
- Some of these products contain more chemicals than others. Sometimes urea is included in the mix, but it can cause sidewalk damage.
- Calcium chloride will melt ice at even lower temperatures than salt mixtures that do not contain it. It can work at -29 degrees Celsius (-20 degrees Fahrenheit), while salt is only good down to -10 degrees Celsius (15 degrees Fahrenheit). This is useful for melting the ice quickly when you need it on stairs or sidewalks, but you will need to reapply it frequently.
- Halite will take longer to melt ice, but it doesn't have to be reapplied as often. Use it in areas that are used less frequently, such as driveways.
3
Spray a small amount of de-icer on the icy sidewalk. You don't need to use a lot of salt. Create a thin layer of salt on top of the ice. You should use about 2 or 4 ounces (59 or 118 milliliters), or 1 or 2 handfuls per square meter (square yard). [5]
- It is preferable to sprinkle this layer of salt as soon as it starts to snow. When the ice thickens, it will be more difficult for the salt to be effective.
- The salt should start to work within 15 to 30 minutes. It won't melt the ice, but it must have seeped through and created a layer of water between the ice and the sidewalk, as well as breaking up the ice sheet and making it easier to shovel.
4
Shovel the ice off the sidewalk. Now that the ice has broken, it should be easy to separate it and remove it with a snow shovel. Insert the tip of the shovel blade into the ice to separate it.
- By placing one hand on top of the handle and the other 1 foot (30 centimeters) or along the length of the shovel, you place the blade under the broken ice.
- Place the shovel under as much ice as you can and lift it off the sidewalk.
- Turn and tilt the load of ice onto the side of the curb and keep shoveling it out.
5
Put a second layer of salt. You can use salt before, during and after a snow blizzard. Laying in a layer after you finish shoveling the snow will help prevent further snow formation. If the snow continues or reappears, you will already have a de-icer running at a lower level to make removing it later easier. [6]
Method 2 Make your own "ice melter"
1
Fill a 1 gallon (4-liter) drum with warm water. You will need to fill the container halfway to have a half gallon (2 liters) of warm water. Don't worry about making the water very hot. It still has to be cold enough to handle. [7]
2
Add dish soap. Use whatever liquid dish soap you have on hand and put six drops into the 1 gallon (4-liter) drum. Gently roll the doll to mix the soap in the water without lathering.
3
Finish the mixture with rubbing alcohol. Measure out 2 ounces (60 milliliters) of rubbing alcohol. You can use an alcohol meter to get an accurate measurement. Add the 2 ounces (60 milliliters) of rubbing alcohol to the 1 gallon (4 liter) drum. [8]
- Rubbing alcohol or rubbing alcohol can be dangerous. Take your precautions when handling them. Avoid skin contact when wearing gloves. Don't touch your face after handling it. Wash your hands with plenty of soap and water. [9]
4
Pour the mixture over the ice. While the water is still warm, pour it generously over the ice you would like to remove. The solution will separate the ice and make it easier to shovel it. [10]
5
Shovel the ice. You must remove it safely and efficiently. This means getting ice and snow out of the way for walking and driving without injuring yourself in the process. [eleven]
- Use a lightweight snow shovel that isn't too heavy for you.
- Decide where you will pile the snow and ice before you begin so that you don't end up blocking the path for walking or driving and need to start over with that area.
- Ideally, just push the snow and ice out, without lifting it.
- If you lift them, keep your knees bent and your back straight. Remember to do the lift with your legs and only lift them as far as necessary to move them towards the stack. If you twist, turn your entire body, instead of turning at the waist.
Method 3 Using a snow blower
1
Choose a heavy duty machine. A snow blower can take care of some of the ice and save your back from shovel injury. If there are chunks of ice mixed in with the snow, the appropriate snow blower will take care of them. [12]
- Avoid single-stage snow blowers, which use paddles, and go for a two-stage snow blower, which uses augers. Some bits have longer, sharper teeth, which is useful for breaking ice.
- Gas snow blowers are often more reliable and stronger than electric ones.
2
Break the ice. Snow blowers will not be able to remove an ice sheet. This could show up as solid ground, and the blower will roll on top of it. Break up large sheets of ice with a shovel before using a snow blower. [13]
3
Read the user manual. Each snow blower comes with different controls, options, and instructions. Make sure you understand all the parts that move and how to use them by reading the instruction manual before using the blower.
- Pay close attention to the way you operate the auger, the direction of the hopper, the clutch, and the steering levers.
- Prime the snow blower with gasoline, oil, stabilizers, or necessary extension cords.
- Look for accessories that might have come with the snow blower, such as blades, skid shoes, and shear bolts.
4
Plan the route. Know where you will place the snow and ice. Decide which side of the sidewalk you would like to blow the snow on and where to stack it. Never blow ice and snow onto cars, houses, or other people. Don't move the snow off your sidewalk onto someone's path. [14]
- If it's windy, don't blow the snow that way, as it will be heading towards yours.
- Avoid picking up and throwing gravel with the blower. If you are clearing a gravel surface, leave some snow on the gravel by lifting the necessary blades or augers to a height that does not completely reach the ground.
5
Start the snow blower in a ventilated area. You'll need to start the snow blower outdoors or in an open area. If you are in a shed or garage, make sure the doors are open for the discharge to come out. [fifteen]
6
Move the snow blower slowly over the area you are cleaning. Use both hands to drive the blower at a slow, steady pace, like mowing the lawn. Follow your planned route and be careful when turning. [16]
- Some two-stage blowers have power steering options to help make turns.
- Disable augers when turning and make sure the hopper is facing the correct direction before re-enabling them.
- Keep pushing the snow blower over the area and making turns until the sidewalk is completely clear.
Tips
- Take twenty-minute intervals to remove the ice and take a break when you have removed it completely.
- An ice sock can be used to extend the life and minimize the cost of ice melting crystals. This type of sock is a polyester or nylon sock, which resists breaking when frozen, is so strong (31 kilos or 70 pounds or better resistance) as to support several kilos or pounds of crystals to melt ice. In addition, it has a weft pattern that prevents tears from unraveling the weft, resists UV damage, resists mild acids, and is rechargeable. Filling an ice sock with crystals to melt the ice without staining and placing it next to stairs or on roof siding can prevent ice barriers and icy stairs all winter long with a single application.
Warnings
- Do not slip on the ice, this can break your bones or your head. Be very careful when you do it!
- Wear warm clothing.
- Never put your hands near the snow blower auger.
- Do not refuel the snow blower while it is running.
No comments:
Post a Comment