Cordless Ratchet Wrench Set, 3/8" 40 Ft-lbs 400 RPM 12V Electric Ratchet Wrench w/ 60-Min Fast Charge, Variable Speed Trigger, Power Ratchet Tool with 2.0Ah Lithium-Ion Battery
【Eliminate Cords & Loud Air Hose】With a max torque of 40 ft-lbs up to 400 RPM and a variable speed trigger, KIMO Cordless Electric Ratchet performs just like your air ratchet but without the annoying cords and the constant loud noise from the air hose.
【Compact & Lightweight】Weighs merely 2.2 lbs (w/ battery) plus its ultra-slim head design, KIMO power ratchet wrench can reach any tight spots to ratchet nuts and bolts effortlessly, making it perfect for any auto maintenance, construction or home repair work.
【Proudly Present KIMO Battery】Over 25 years, KIMO has kept updating its batteries to the best. It's estimated that the life expectancy of each KIMO 12V battery is at least 1,000 cycles. Stop worrying about dying batteries or batteries that won't charge after minimal usage. KIMO is a perfect choice!
【Built-in LED & Ergonomic Handle】 KIMO equipped this ratchet wrench with 2 pieces of rubber which makes it withstand corrosive materials and increase your comfort when using. And the built-in LED light of this cordless ratchet wrench 3/8 illuminates the work area while the on-board fuel gauge displays remaining run time.
【Power Ratchet Wrenches Set】Comes with 1 X Battery Ratchet Wrench, 1 X 1000-Charge Cycle 12V 2.0Ah KIMO Power Battery, 1 X 60-minute Fast Charge, 1 X KIMO Carrying Bag. KIMO tools has provided you with an all-you-need ratchet.
How to use a Ratchet Wrench
The Ratchet Wrench allows the user to tighten a bolt repeatedly without repositioning the tool at all times. An internal ratchet holds the socket in place while the wrench arm is repositioned. This makes the user's arms and hands less fatigued and reduces the risk of slipping and injuring themselves, as well as making work easier and faster. Once you experience the ease provided by the tool, you will hardly return to the old common tools . But how to use a Ratchet Wrench?
Wear a pair of gloves to protect your hands when using the key. Take a socket that fits the bolt or nut you intend to handle. On the back of it there is a notch which is where the switch is engaged (the socket in the head of the switch fits snugly into the socket of the socket). On the switch head body, shift the selector to the right to make sure it will turn clockwise. Position in the opposite direction if you need the wrench to unscrew counterclockwise. Place the wrench with the socket already positioned on the bolt or nut to be tightened. Confirm that the socket is properly secured and fitted to the screw head or nut. Replace with a smaller socket if it is too wide for the screw, or with a larger one if the chosen socket does not fit.
Keep one hand on the Ratchet Wrench's head to steady it in position. With the other hand, twist the wrench slowly but firmly clockwise in a semicircle on the bolt or nut. Return the wrench arm and listen for the ratchet clicks by repositioning inside the wrench. Repeat the movement, twist and return to position after the semicircle. Continue with the process until the bolt or nut is tightened as desired.
Remove the Ratchet Wrench with the bolt or nut socket. Detach the socket from the wrench and return them to the toolbox .
Hex ratchet wrench, applications and features!
Have you ever used a ratchet wrench? If you have a key that changes the way you work, it's the ratchet key, it makes the work much easier. In this article the World of Electrics shows how it works and how to use a hex ratchet wrench.
hex ratchet wrench The wrench with a ratchet system is one of the tools that makes the professional's life easier. There are several models of ratchet wrenches on the market, such as hexagonal, screwdriver, phillip, allen etc.
But the most used model is the hex ratchet wrench. The hex ratchet wrench is used for hex head screws and its mechanical system allows the wrench to turn only to one side, making it much easier to use for tightening or loosening hex screws.
When we use a common hex wrench, when tightening or loosening it is necessary to keep removing and placing the wrench to set the tightening position. With the ratchet wrench this is not necessary.
We will show two types of ratchet wrenches, the first is the standard ratchet wrench, with a chrome vanadium steel body, chrome finish, handle with special coating, reversible ratchet, quick release system and 45 teeth. Where it is possible to change the pipes for different sizes of screw heads.
And the second hex wrench is a kit of hex wrenches that all wrenches are ratchet and do not have a pipe exchange. It looks a lot like a common hex key, but with a ratchet, making it simpler.
How does the turnstile system work? In both types of ratchet wrench there is a wrench or lock, which when changing the position of the lock, the ratchet changes its function to tighten or loosen the screw.
In the standard pipe ratchet wrench, just turn the wrench on the top written tighten, to lock the ratchet to one side or the other.
In the hex wrench kit with ratchet, just push the latch up or down, thus locking the ratchet to one side or the other.
The ratchet system is simpler than it looks, it consists of a gear that rotates in both directions and a lock that prevents the gear from turning depending on the position the lock is in, see the image below.
This system that locks the turning to one side, but allows turning to the other, is the great differential of ratchet keys.
To change the standard ratchet wrench pipes, just press the button on the top of the wrench and remove the pipe. There is a ball at the bottom that prevents the pipe from entering or leaving, and when you press the button, the ball allows the pipe to be removed and fitted.
This feature in English is called “quick release”, which means quick release, it is very important when you want to change the socket using only one hand.
Pneumatic ratchet wrench Another type of ratchet wrench is pneumatic, pneumatic tools work by means of compressed air, generated by compressors that mechanically capture the air from the environment and increase its pressure, thus transforming the air into energy.
The use of pneumatic tools is more frequent in industries, but they can also be used in simple manual work. Pneumatic tools are used to replace human power in cases where continuous repetition of movement is required.
Decreasing the time to perform a task is always important and the ratchet system keys are a great investment to save time. Another tool that also helps to save time is the stripper pliers. In the video below the Mundo da Elétrica channel, we show how the stripper pliers work.
A powder-actuated tool ( PAT , commonly referred to generically as a Hilti or Ramset gun after their manufacturing companies) is a type of nail gun used in construction and manufacturing to bond materials to rigid substrates such as steel and concrete. Known as direct fixation , this technology is powered by a controlled explosion of a small charge of chemical propellant , similar to the process that fires a firearm .
Description Low speed powder driven tool cross section Powder powered tools are often used because of their speed of operation compared to other processes such as drilling and installing a threaded fastener. They can be used more easily in narrow or difficult locations, such as installing steel suspension clips on a concrete ceiling above the head.
Powder powered tools are powered by small explosive cartridges, which are triggered when a firing pin hits a primer, a sensitive explosive charge at the base of the cartridge. The primer ignites the main powder charge, which burns quickly. The hot gases released by burning the propellant quickly create pressure inside the cartridge, which pushes directly into the head of the fastener or a piston, accelerating the fastener out of the barrel.
Powder powered tools come in high and low speed types. On high-speed tools, the propellant charge acts directly on the fastener in a process similar to a firearm. Low speed tools introduce a piston into the chamber. The propellant acts on the piston, which then pushes the fastener into the substrate. The piston is analogous to the bolt of a stud gun.
A tool is considered low speed if the average fastener test speed is not more than 100 m / s (330 ft / s) with no single test having a speed of more than 108 m / s (350 ft / s). High-speed tools cannot be made or sold in the US [ citation needed? ] ; however, some made decades ago are still used in the shipbuilding and steel industries.
Powder actuated closures are made of special heat-treated steel; Ordinary nails are not safe for this application. There are many specialized fasteners designed for specific applications in the construction and manufacturing industries.
The main manufacturers of powder driven tools are Ramset, Hilti, Powers/DeWalt, Tomarco and Simpson Strong Tie.
Story Powder drive technology was developed for commercial use during World War II, when high speed fastening systems were used to temporarily repair damage to ships. In the event of hull breaks, these tools fixed steel plates over the damaged areas. [1] These tools were developed by Mine Safety Appliances, for the US Navy. [2] Powder powered tools were investigated and used prior to this development; they were used in hunting submarines during World War I and were the subject of a US patent in 1921 (US Patent No. 1365869). [3]
Types of tools A Ramset powder-operated fastening tool and supplies. The colored straws in the tray contain cartridges that are loaded individually into the tool. 75mm hardened steel nails with 8mm heads are also visible. Powder powered tools can be classified in several ways:
Direct acting (load acts directly on the nail head or high speed), or indirect (using an intermediate piston or low speed)
Single-shot or magazine-powered
Automatic or manual piston cycling
Automatic or manual charging of charges
Energy sources Strip-fed cartridges for a nail gun Powder powered tools are powered by specially designed empty firearm cartridges, also informally called "loads", "reinforcements", "rounds" or "loads".
In many cases, the charges are ordinary firearm cartridges with modified casings and bullets omitted. The .22 Short , developed by Smith & Wesson, is common. These loads can be fed manually (single dose) or manufactured and dispensed on a plastic strip.
color coding In brass colored casings: color coding Speed Gray 315 ft/s (96 m/s) Brown 385 ft/s (117 m/s) Green 490 ft/s (150 m/s) Yellow 575 ft/s (175 m/s) Red 675 ft/s (206 m/s) purple 755 ft/s (230 m/s)
In nickel casings (silver): color coding Speed Gray 845 ft/s (258 m/s) Brown 935 ft/s (285 m/s) Green 1,025 ft/s (312 m/s) Yellow 1,115 ft/s (340 m/s) Red 1,205 ft/s (367 m/s) purple 1,295 ft/s (395 m/s)
The three colors or single-dose intensities commonly sold to the general public are brown, green, and yellow in brass-colored casings.
Not all powder powered tools are rated for high capacity loads - the strongest load (purple nickel at 1,295 ft/s (395 m/s)), for example, is dangerous on a tool not rated for high pressures that generates . The table above is for a 350-grain (23 g) pack of a test device. [ citation needed ]
safety and regulation As with their air-fired cousins, gunpowder-fired guns have a muzzle safety lock. If the barrel is not pressed against a surface with sufficient force, the firing pin is blocked and cannot reach the load to fire it. This helps ensure that the weapon does not fire unsafely, causing the nail to become an unrestrained projectile.
Due to the potential for personal injury, US OSHA regulations require specific certification for the tool being used before anyone is allowed to rent or use powder-powered equipment. [4] Most powder-fired nail gun manufacturers offer training and certification, some with free online testing. In addition, special instructions are required if the potential user is not able to distinguish the colors used in the color coding system that identifies the proper power levels. Most certifications are accepted for life; however, in California, they must be renewed every three years. [5]
Ownership and use of these tools is regulated in Australia. The owner must register the tool, and the operator of one of these tools must be licensed and trained in its use. These laws are in line with Australia's extremely strict firearms laws.
What is the correct loading sequence when preparing a powder driven tool?
A powder-powered tool can only be loaded when it is being prepared for immediate use, and must be unloaded immediately if work is interrupted after loading [Sec. 12.56 (5)]. 4. The powder-powered tool should not be pointed at anyone [Sec.
Second, how do you carry a Remington powder powered tool? Load the Tool Prepare a shot by first putting one hand on the grip and the other on the muzzle, quickly pulling the barrel forward. The chamber will open and the piston will be set to fire. For safety, insert the drive pin into the PAT barrel first. Just then, put a power charge into the camera.
Also, what type of eye protection should be worn when using a powder-powered tool?
Handle Dust - Tools actuated with the same respect and safety precautions as weapons. Use the manufacturer's information as a guide for safe tool operation and maintenance . Wear safety glasses or goggles , or a face shield ( safely goggles or goggles ) and a helmet.
Which of the following are examples of powder driven tools?
The main manufacturers of powder driven tools are Ramset , Hilti, Powers/DeWalt, Tomarco and Simpson Strong Tie. Powder - actuated fasteners are made of special heat-treated steel. Ordinary nails are not usedfor powder - actuated fasteners.
29 answers to related questions found What is true when using powder-powered tools? Powder powered fastening tools must not be used in an explosive or flammable atmosphere. All tools must be used with the type of shield or mouth guard appropriate for a particular use. Fasteners should not be driven into existing holes unless a positive guide is used to ensure accurate alignment. What's wrong with using an impact tool with a mushroom head? If impact tools such as chisels, wedges or drift pins have mushroom heads, the heads can break on impact, sending sharp fragments to the user or other personnel. What is a powder actuated fixative? Powder powered tools, also called direct fasteners and explosives fired fasteners, use a small controlled explosion to drive a nail, pin or other specialized fastener into a solid base material such as steel, concrete or masonry. What type of tool poses similar hazards to a loaded weapon? Tools powered by explosive gunpowder operate like a loaded weapon and should be treated with the same respect and precautions. In fact, they are so dangerous that they should only be operated by specially trained or qualified personnel. Adequate protection for ears, eyes and face is essential when using a powder-powered tool. Which of the following causes the greatest risks from hand tools? Hand tools include anything from axes to wrenches. The greatest risks presented by hand tools result from misuse and inadequate maintenance. Some examples include the following: If a chisel is used as a screwdriver, the tip of the chisel may break and fly off, hitting the user or other personnel. When should outlets be inspected? In addition, each jack must be inspected according to the following schedule:
(1) for jacks used continuously or intermittently in one location - inspected at least once every 6 months,
(2) for jacks sent out of the shop for special jobs - inspected when shipped and inspected when returned, and
(3) for jacks subject to
Can I use a nail gun on concrete? You can use the nail gun to turn masonry, skin strips, underlay, concrete nailing and steel banding. Although it is designed for driving nails into wood and concrete, you need to know that the depth varies depending on the age of the concrete. Can you use ramset nails on a Hilti gun? Nails and nails for use in Ramset, Hilti, Simpson, Powers, Remington and other powder driven tools. Pins, nails and ramset pins meet and exceed performance and safety standards for all powder-powered tools. We are a full-line Ramset dealer, so if you can't find what you need, call and we can help.
What is the best concrete nail gun? Top 10 Senco SCP40XP Concrete Nail Guns. REVIEW. Max HN120 PowerLite. REVIEW. Bostitch MIII812CNCT. REVIEW. Freeman PCN65. REVIEW. Hitachi NC40G. REVIEW. Freeman PSSCP. REVIEW. Air Locker CN64A3. REVIEW. Apache LHT-64. REVIEW.
Will a ramset go through steel? Ramset's unique PowerPoint pins work well in the toughest steel and concrete fastening applications. They provide easier penetration into hard steel and concrete, which means fewer pin failures and higher retention values to make your jobs more productive.
Do you need a license for a ramset weapon? Do you need a license to operate powder powered tools? Employees do not need a “license” to operate a powder-powered tool. However, they must have a valid operator certificate. Certificates are usually provided by the tool supplier or manufacturer after training.
Low Speed Vs High Speed Powder Actuated Tool
When you're doing heavy construction, one of the most useful things you can have is a dust-powered tool. Powder powered tools are basically nail guns on steroids. They are used when you are trying to protect objects on surfaces such as concrete or steel. This is commonly called direct attachment.
How do powder powered tools work?
High speed
Low speed
Security and Regulations When you're doing heavy construction, one of the most useful things you can have is a powder-actuated tool . Powder powered tools are basically nail guns on steroids. They are used when you are trying to protect objects on surfaces such as concrete or steel. This is commonly called direct attachment. Powder powered tools are also commonly called Ramset or Hilti weapons. When you're deciding on the right fastener for the job, it's important to know the two different types, low speed and high speed. How do powder powered tools work? Powder powered tools are much more powerful than your standard nail gun. The reason is because direct clamping is possible due to a controlled explosion that is triggered inside the tool. This explosion is the result of combustible chemicals that emit a charge of chemical propellant. Technically, it's the same basic design used in most firearms. The tools were developed during World War II for use in repairing huge Navy ships. Commonly used fasteners include large reinforced nails and may even include threads or washers at the tip to secure softer surfaces.
High speed There are few differences between low speed and high speed powder driven tools. The main factor that differentiates one from the other is the overall speed at which they operate. High speed tools produce much more speed than low speed versions and must be handled with certain restrictions because of this.
For the high speed variety, there is no piston in the chamber, so the chemically induced impeller is directly loaded against the fastener. This type of Ramset weapon can carry the fastener well over 492 feet per second. This is the line that divides high and low speed powder driven tools. High-speed tools are not currently manufactured or sold in the United States, but some still exist (and are still in use). The operation of a high-speed powered tool is almost identical to that of a handgun.
Low speed Low speed powder driven tools produce a speed of less than 492 feet per second. The difference in tool mechanics is that low speed tools use a piston in the chamber. This piston absorbs the charge from the chemical propellant and fires into the fastener, decreasing the overall overall speed at which it is fired.
Security and Regulations Most powder powered tools (low and high speed) usually include a muzzle safety lock. If the tool barrel is not pressed firmly against a surface, it will block the firing pin and will not allow it to come loose. This prevents the tool from being triggered by mistake or being discarded. Most jobs that require the use of a Ramset weapon require proper training and certification before anyone can use the tool on a job. Other countries have additional regulations and laws in place to ensure that guns are operated safely at all times.
BLACK+DECKER 6-inch Random Orbit Waxer/Polisher (WP900)
Random-orbit action assures a uniform finish - fast for the car polisher
Comfortable two-handle design of the variable speed polisher reduces fatigue
10 ft. cord for great mobility
Includes foam applicator for easily applying wax or polish
Includes polishing bonnets for a high-quality finish
Runs on random orbit at 4,400 orbits per minute for a swirl-free finish
10-foot cord accommodates car and boat polishing projects
How to use a polisher in a practical way?
The correct use of the polisher will allow you to take full advantage of this tool to obtain excellent results in your work.
Get excellent results in your work using the polisher correctly. Learn how to use a polisher below.
How to use a polisher? 1. To use a polisher you have to hold it with both hands, one on the handle and the other on the trigger.
2. Ensures that the guard is always facing upward.
3. Position the tool on the side of your body.
4. Run the polisher when it is in the cutting position and always use it horizontally, cutting or grinding with the edge of the wheel.
5. When finished, it must be detached from the material worked, and only then turn it off, so that the disc does not jump or damage the surface.
In what tasks to use a polisher? Its use will depend on the characteristics of the project and the type of polisher.
As it is used in construction work and in industries, its use is aimed at cutting, roughing and polishing materials such as steel, ceramic and concrete.
Bench grinder: Its main function is to sharpen instruments such as chisels, brush blades, scissors, and also to remove rust.
Recommendations for use and maintenance for polishers Use tips - As a general rule, you must always change and tighten the disc with the polisher unplugged, for this change you must use a wrench that comes in the tool kit.
- Replace with the recommended diameter and type disc.
- Do not use worn discs.
Security advice - Wear a bib, ear plugs, goggles or a face mask, a mask depending on whether a lot of dust comes out, and leather gloves.
- Do not plug it into multiple.
- Keep the ventilation ducts clean and clear.
- The operator must be located outside the projection of the particles.
Maintenance tips - Upon reaching 300 hours of intense use, it is appropriate to carry out a general revision and maintenance of the tool, which should include: cleaning, greasing and replacement of parts and pieces that may have reached the end of their useful life, as could happen with coals. and, in some cases, bearings.
- In the case of bench grinders, new wheels sometimes need regrinding to make them round.
- To keep the tool in proper condition, you must use the accessories and parts for the specific model you have.
- Using accessories of different sizes or handmade, not only affect the performance of the polisher, it can also represent serious safety risks for those who use it.
- Store the equipment in dry environments.
- Periodically clean the ventilation grills to avoid overheating the engine.
DEWALT Thickness Planer, Two Speed, 13-Inch (DW735X)
Purchase includes one stationary 13" Planer, in/out feed tables with fasteners (attached to the base of the Planer base), extra blades and dust hose adapter. Stand is not included.
Three knife cutter head of the thickness planer delivers 30% longer knife life and makes knife change faster and easier
Two-speed gear box of the wood planer allows users to change feed speed to optimizing cuts per inch at 96 or 179 CPI
Fan-assisted chip ejection vacuums chip off of the cutter head and exhausts them out of the machine
19-3/4-inch cast aluminum base is 2 times more rigid than a standard 10-inch base and folding tables
Automatic carriage lock reduces the movement that causes snipe without the need for manual engagement by the user
Material removal gauge and extra large thickness scale deliver accurate cuts with every pass
Thickener and Desempenadeira Planers, know the differences
The Thickening and Desempenadeiras Planers have similar names, but they are used for different functions and still complement each other. How about knowing or remembering the difference between two essential pieces of equipment for working with wood?
The planer's basic function is to thin the wood, reducing it until reaching the desired dimensions required by the project. There are Manual Planers commonly used in joinery and carpentry, and Electric Planers that facilitate this process, as they require less effort from the professional.
Among the equipment models that form the basis for a joinery, the Desempenadeiras and Thickeners Planers are fundamental, as they will transform the raw wood into the ideal format for what the project requires.
But despite similar names, they are two devices with different functions, and they are what we are going to talk about today in this post!
understand the differences
The Planer Desempenadeira or Desempeno is a machine to produce a flat surface along the length of a wooden board that is warped. The configuration of a Desempenadeira Planer consists of a table with width and length according to the capacity specified by the manufacturer to fix the piece of wood to be thinned. The wood slides across the machine table, passing through the center where there is an opening in which the tool that will carry out the thinning is fixed. An important part of the straightening process is to use the correct setting of the machine so that there is no waste of wood.
The Planer Desengrossadeira or Desengrosso is used to adjust the thickness of a piece of wood, leaving it with a constant gauge. It will level out, remove thickness and thin out the natural wood, making it have the same shape as the base used as a reference.
Thickness alone will not be able to straighten a piece of wood, as it follows the twist of the warped piece. Consequently, if we pass the warped piece directly into the thickening, it will only reduce the thickness of the wood and will not give the desired finish, removing the irregularities of the piece, but without straightening.
Which one to choose for my workshop?
The ideal is to have both machines to offer professional jobs, as the planer will uniform the surface of the worked piece and the thickness will copy the reference face, equaling the thickness along the length, leaving both equal and level. That is, a straight edge cannot be used to create a board of uniform thickness along its length. For this task, after straightening a face, we use the Thickener.
To meet this need, there are some models of Thickening Planers and Desempenadeiras on the market in the same equipment. In this case, they are combined with the workpiece passing under the same rotating blade for thickening, but in the opposite direction.
Remember that it is very important to use Personal Protective Equipment (PPE), such as gloves, apron, glasses, ear protectors and even a mask (to prevent wood chips from hurting your face).
At FG stores , you can find models of portable Planers Thickeners and Smoothers, equipped with a motor with carbon brushes, without transmission by belts and brakes, being more accessible and useful in workshops in general.
Now that you know the differences between these two Planer models, how about finding out more about other essential woodworking equipment? Click and learn more about Tupia: main models and their functionalities .
Planer: know how to use it!
You can make woodworking with a planer in an easy way!
Did you buy a planer and already want to create or renovate many wooden things with it? So, you need to first prepare the place, the equipment and take some steps to work safely! Do you want to know how to do all this in a very practical and easy way? So, come with me and I'll tell you!
Invest in the ideal bench
If your planer is a hand, electric or bench plane, you will first need to prepare a place to work with it. Since, the workbench suitable for making joinery or carpentry is very firm and can withstand weight, knocks and larger pieces.
Its ideal height is between 85 and 98 centimeters, about 50 centimeters wide and between 1.5 to 2 meters wide. Thus, you can cut large or small pieces with plenty of space and safety! Always check if it is well fixed and retained because otherwise, your objects may be crooked later, ok?
work safely
Before starting work, always wear safety equipment. Goggles are essential because while you use the planer, splinters and wood chips can fly.
Another essential accessory is the glove , ok? With it, you don't run the risk of skinning or cutting your hands or even ending your day with splinters in your fingers. In fact, it has gloves for carpentry and carpentry, which are made of nylon and neoprene that are super resistant, antiperspirant and do not let your hand slip. Oh and they don't cover your fingers, which serves to give you more control and firmness in the grip of the planer.
The breathing mask is also very safe because wearing out the wood or finishing it creates a lot of sawdust. And the best part is that it has its own mask for carpentry, ok?
Prepare the bench according to the planer
Before starting to move the piece, make sure it does not have tacks, nails , staples or screws . Remove any of these items or remnants of resin, paint and varnish . Also keep an eye out for knots in the wood, which are ripples that can peel off and splinter. Then, to avoid accidents, moisten a cloth, pass the piece, sand from the center outwards. This way, everything will be in the right way before using the planer!
If you are going to use the manual planer type , secure the pieces to the bench, okay? This prevents them from escaping! Smaller pieces should be securely fixed to the countertops with their own clamps before you start using the planer. That way you don't run the risk of them slipping or jumping on you. Oh, and it's very important to work with the planer using both hands to give it better support, ok?
If it is a bench planer, the piece must first be fitted to the planer, with the correct guides, before you start the work.
In the case of the electric bench planer, the blades must always be placed all at once and mounted upwards. If your electric planer has support, you should use a protective cover for it, which serves to hide the blades. Always use a guide above the machine to move the piece of wood without it slipping or bent. Cool huh? Then you need to adjust the blade and depth manually to move the part.
The electric planer may have buttons for automatic depth adjustment
In the electronic planer you do this process automatically, using the buttons. Easy, right?
Then the preparation is ready! Now, just get to work. Always do this towards the wood. And to see which is the right direction of the piece, see which side of the wood that slips effortlessly when you run the planer on it.
Ah, to make cleaning easier after work, there's an electric planer with a suction adapter for a sawdust bag, which you can buy separately. It collects sawdust as it falls, cutting down on dust and mess.
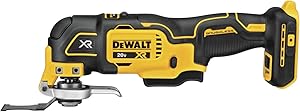
DEWALT 20V Max XR Oscillating Multi-Tool, Variable Speed, Tool Only (DCS356B)
The 3-speed selector of DEWALT 20V tools allows users to choose their speed setting based on application.
Brushless motor of DEWALT oscillating tool delivers up to 57% more run time over brushed
Dual-Grip variable speed trigger of DEWALT cordless tools gives users ultimate speed and application control
Universal accessory adapter for use with most oscillating tool accessory brands. Oscillations/min: 0-13,000/ 0-17,000/ 0-20,000 OPM
Quick-Change accessory system allows blades and attachments to be changed quickly without wrenches
Bright LED illuminates dark work surfaces for accurate cutting
Difference between oscillating tool and rotating tool
A typical deconstruction worker or craftsman will have a variety of tools for a project. While hand tools and power tools can make up the majority of tools used in the course of limitless home improvement and DIY projects, it's important to understand that tools can take many different forms. It is important to understand that various tools can be used for a specific application. While some tools work better than others, some may be more secure than others. For example, an angle grinder can be an important tool for removing large amounts of material quickly and effortlessly, but you can also use a bench angle grinder for more subtle shapes.
We're here to talk about the two most common power tools used for a different set of applications - an oscillating tool and a rotating tool. While the two are quite similar, considering they are cast in the same mold and are useful for all of your sculpture projects, they are surprisingly different. While an oscillating tool is a multi-purpose tool used for precision cutting in tight places, including plunge cuts, a rotary tool is not needed very often, but it is useful for smaller or more detailed jobs. With the right accessories, an oscillating tool or a rotating tool might be all you need for most sculpting projects.
What is an oscillating tool? An oscillating tool is an easy-to-use, all-in-one power tool used for quick and accurate work of traditionally hand-crafted jobs. The multiple tool was developed over 20 years ago and was originally marketed as a hobby tool, but now it can do many things. As the name suggests, the multi-tool can sand, cut, sculpt, polish, sculpt, scrape and grind almost anything when equipped with various attachments, although it is ideally used as a detail sander. It's a new type of tool that generates tens of thousands of oscillations per minute, with the vibrating head rotating 3 degrees back and forth, using a variable speed controller, making it one of the safest power tools available.
What is a rotary tool? A rotating tool is not needed very often, but it makes a big difference in a wide range of applications. Changing things is what a rotary tool is really good at. They are also useful for smaller or more detailed work. It is a power tool with a small, powerful, high-speed motor and a rotating tip that accepts a wide range of bits designed for many different tasks such as grinding, shaping, sanding, cutting and smoothing. With the right accessories, a rotating tool can be extremely useful for all your DIY sculpting projects. They are known for their incredible precision, only when in the hands of a handyman or professional craftsman. In the right hands, a rotating tool can work wonders.
Difference between oscillating tool and rotating tool
Basics of rotary and oscillating tool An oscillating tool is an easy-to-use, all-in-one power tool used for quick and accurate work of traditionally hand-crafted jobs. It is a battery-powered multipurpose power tool that can work with a variety of accessories. A rotary tool, on the other hand, is a power tool with a small, powerful, high-speed motor and a rotary tip that accepts a wide range of bits designed for many different tasks. While a rotary tool isn't needed very often, it can work wonders in the right hands.
Occupation An oscillating tool generates tens of thousands of oscillations per minute and its vibrating head rotates back and forth three degrees, making it one of the safest power tools available. One of its strengths is its ability to compensate for the angle of the tooling in relation to the handle, which is very useful in close quarters. A rotary tool has a small, powerful, high-speed motor with a chuck to accept a variety of bits. Unlike a drill, a rotary tool is designed to tolerate lateral forces on the drill.
Attachments A multi-purpose oscillating tool can accept a wide variety of accessories such as sanders, blades, rasps, scrapers and grinders, making it an all-purpose power tool. The most useful multi-tool attachments for woodworking are hook-and-loop sanding heads, thin-blade saws, and scraper blades, although they are better known as detail sanders. With the right accessories, a rotating tool can be extremely useful for all your DIY sculpting projects. It can accept different accessories like engraving bits, router bits, cutting bits, milling bits and sanders.
Uses A multi-swing tool was originally designed for home improvement and construction tasks, but over time it has gained popularity as a popular woodworking and craft tool due to its precise accuracy and ability to work in tight spaces. It can sand, cut, sculpt, polish, sculpt, scrape and grind almost anything when equipped with a variety of attachments. A rotary tool can work wonders when held in the right hand and can be used for a variety of applications such as sanding, cutting, grinding, shaping, polishing and smoothing.
Oscillating x Rotary tool summary
Well, the right tool makes all the difference in the right hands. With the right accessories, both power tools can do almost any job. While an oscillating tool is a multi-purpose tool used for precision cutting in tight places, a rotary tool is not needed very often but is useful for smaller or more detailed jobs. A multiple oscillating tool, as the name suggests, can sand, cut and grind almost anything when equipped with a variety of attachments. A rotary tool is a high-performance power tool that is just as good as a multi-tool and can be useful for jobs that would require a high level of precision.
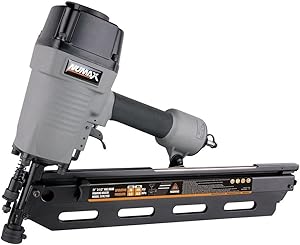
NuMax SFR2190 Pneumatic 21 Degree 3-1/2" Full Round Head Framing Nailer Ergonomic and Lightweight Nail Gun with Tool-Free Depth Adjust and No Mar Tip
Nailed It: This 21 degree pneumatic framing nailer features a lightweight and durable magnesium body, ergonomic secure handle, and interchangeable trigger for quick fire or single shot function. It's ideal for professional construction contractors and home DIY projects.
Versatile and Powerful: The framing nailer features depth adjustment and a no mar tip, making it adaptable for different working surfaces. It's perfect for framing, and it can also be used to install subfloors, roof decking, wood fencing, and sheathing.Minimum Recommended Air Delivery SCFM @ 90PSI:2.4
The Right Tool for the Job: We're committed to providing outstanding value, top tier customer service and long lasting, high quality products. We make nailers and staplers for every purpose, from roofing to siding to flooring and everything in between.
Quality and Durability: We manufacture tools with the most durable materials under strict quality control guidelines, suitable for professional contractors and do-it-yourselfers alike. Our tools are sold, distributed, serviced, and warrantied in the USA.
Tough and Dependable: We make an array of durable construction tools and accessories, including staplers and nailers for siding, flooring, framing, finish, and roofing. Compare our products to similar items by Makita, Hitachi, Bostitch, Senco, Paslode, and Dewalt.
DIY: FRAMED NICHE
Guys, do you remember that we showed here how to reuse a frame transforming it into a photo mural? Yeah, a nice solution if what you really need is space for photos. Today we are going to show you an idea a little bolder for reusing frames, but very simple and easy to do.
What we found most interesting about this idea is that a simple frame joined to a simple wooden niche has an incredible result. New face for the well-known niches, which we love, and are super useful when decorating any corner.
Materials:
– 1 frame (can be a portrait frame)
– 4 wood tops – MDP or MDF 15mm (width and height will vary according to the size of the frame)
– Wood glue
– Nails
– Sandpaper
– Hammer
– Wood paint (in whatever color you prefer)
First you will need to measure the span of the frame you are going to use, both width (X) and height (Y). You will need 2 X-tops and 2 Y-tops. You define the depth, but wall niches are usually no more than 20 cm deep. If they are just decorative, 10 cm is enough.
Most people don't have the tools at home to cut wood, so you can measure the frame and have a local woodworker cut the tops for you. As they won't be big pieces, you can even do it with leftover MDP or MDF.
In this step by step, wood glue and nails were used to join the tops and form the niche. In the image you can see that a nail fixing tool was used, a kind of pistol to fix nails, but you can use the good old hammer (for those who are not used to it, be careful not to get hurt). Ah, you can also fix it with screws.
Then just fix the frame in the niche. In this step, wood glue and nails were also used, but I believe that glue alone can be sufficient.
With the framed niche, let's go to the finish. Use spackle or wood putty to correct imperfections and mask nails. After a good sanding, which always contributes to a good finish, and finish by painting with the color of your choice. In this project, the piece was all white, but nothing prevents you from using one color in the niche and another in the frame, use your creativity!
Are you going to say that the niche doesn't look beautiful framed? Make several and with frames of different sizes!
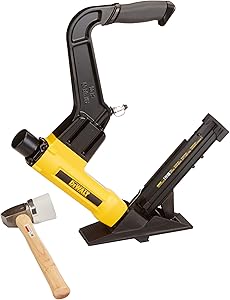
Lightweight at 10.6 lbs for better balance and control
Optimized for the most popular solid flooring fasteners, 15.5ga Staples and 16ga “L” Cleat Nails
Interchangeable, Non-marring base plates adjust to all sizes of flooring
Ergonomically designed with longer handle and comfortable rubber grip for ease of use
Lower CFM requirements for less compressor run-time
Can I use a nail gun to install a wooden floor?
Nail guns cut down on time and labor by replacing the old "swing-a-hammer" technique with automated nails. You can use certain types of nail guns to install a hardwood floor, but practice on scrap wood first to ensure you master the correct technique. You can use three types of guns on a hardwood floor: a floor nailer, a finish nailer or a floor and mallet nailer. Framing nail guns are not suitable due to the size and configuration of the nail.
The nailing process End hardwood planks fit end and side by side with a tongue and groove set. After installing the first plank in the corner of a room, each subsequent plank will snap together to form a smooth floor. The edge of the plank's groove faces the wall, and the tongue side faces outward; this is the part where you will insert your nails. The nails you use should have little or no heads so they will sink slightly below the surface of the wood and will not prevent a tight fit when you install the next row of planks. For the first course of planks, a hammer and a set nail may be needed for the face-to-nail.
Nailer flooring One of the best guns to use to install a hardwood floor is a pneumatic floor nailer or stapler. Made specifically to fit over the top edge of the board and the tongue, this fires a headless nailing nail through the tongue and into the sub-base or floor joist underneath. When positioned correctly, making a mistake with this nailer is difficult.
Finish Nailer Not everyone keeps a floor nailer around because it only has one use. If you are handy with a nail finish gun, you can use it to install a hardwood floor. A nail finish gun, designed for trim work, shoots an almost headless nail that doesn't mar the wood surface look, which makes an effective finishing nailer for installing hardwood floors as well. To use this nailer, position the nail shoe on the wooden tongue at a 15-degree angle downward and inward, toward the plank. Depress the shoe nails, keeping the nailer carefully in place, and pull the trigger. Use finishing nails that are long enough to run through the subfloor, if any, and at least 1/2 inch to the floor joists.
Floors and Mallet Nailer Even power nailers became common in the flooring industry, a manual floor nailer and hammer were standard, and it still does a good job today. Like the pneumatic floor nailer, the manual nailer keeps the nails paving and features a nail shoe shaped that fits snugly over the edge of the plank and tongue. After positioning the nailer, tap the cap by nailing it with the mallet to shoot a nail, staple or staple floor through the tongue. Flooring and mallet nailers can use gravity and a spring system to drive the nails, or they can employ compressed air to shoot the nails when you hit the lid by nailing with the mallet.
How do I choose the best floor nail gun?
When trying to choose the best nail gun for floors, it's important to identify the features that are most important to you. Most floor nail gun options are available in both air and fuel operated models. The pneumatic nail gun requires an air compressor as well as air hoses to operate in any job site. The fuel-powered weapon has the advantage of being cordless, however, the initial cost is generally higher than an air-powered weapon. After cost, the most common and important characteristics for many people are the weight, type and style of nails used, as well as other uses to which the weapon can be attributed.
The first thing you need to decide when looking for the best floor nail gun for any job is whether or not you want an air-powered model or a cordless style. The air-powered floor nail gun is almost always cheaper than a wireless gas-operated model; however, you have other considerations that will accompany the air-powered model. Unless you work for a company that has a large air compressor available at each job site, along with a connecting manifold, you will also need an air compressor and multiple air hoses to reach all areas of a job site. of works if you decide to buy an air. motorized nail gun. Furthermore,
When you factor in all the additional expenses associated with an air-powered floor nail gun, you may find that a wireless gas-powered model is much more to your liking. This style of floor nail gun uses an interchangeable fuel cartridge that injects a small amount of fuel into a chamber at the top of the nail. This fuel is ignited by a small electrical charge from a rechargeable battery inside the nail gun. This floor nail gun model uses no hoses or cables and is typically good for firing over 1,000 nails from each replaceable fuel container.
Other considerations that should be made to ensure you are purchasing the best floor nail gun are the style of nails used with the gun, along with other uses for the gun. Most nail guns use a straight nail clip or a large round nail roller. The nail roller will require fewer refills, although it weighs more than the straight nail clip. Also, to get the most for your money, you can choose to purchase a floor nail gun that can be used for other types of nail work as well as flooring.
Fixing the wooden floor
The drilling for the passage of nails and screws must be done with a drill. The hole can be in the surface, in the case of screws only, or in the male insert for nails or screws. In case of installation on beams, the hole must not reach the subfloor. When the floor is installed on joists, the screw must be fixed on the floor surface, provided it is rough as shown in the figure below.
Of the types of screws and nails found, the use of those made with galvanized steel is recommended, as they are more resistant to moisture and consequently to deterioration.
Mixed fixation
Mixed fixing consists of installing the wooden floor using adhesive and nail or adhesive and screw. This system is used when the piece of wood has a very accentuated warpage and is installed directly on the subfloor. In this case, the screw must be used to provide greater security in fixing.
On rough floors, with dimensions from 9.5cm in width and 2.0cm in thickness, glue, screws and 8.0mm dowels must be used, respecting a spacing of 40.0 to 50.0cm between the screws in the male fitting.
On varnished floors that are 9.5cm wide and 1.8cm thick, glue, screws and 6.0mm dowels must be used. In this case, the spacing between the screws is variable, depending on the specific situation of the installation.
For this type of fixation, it is important to emphasize that the dimensions of the floors will define the type of material to be used.