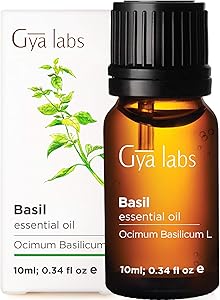
Gya Labs Basil Essential Oil for Focus and Pain Relief - Topical for Sore Muscles, Headache Relief, Migraine Relief, Improve Alertness - 100 Pure Therapeutic Grade Basil Oil for Aromatherapy - 10ml
Basil Essential Oil - Ocimum basilicum l
Fresh and Herbal - Our basil essential oils perspire a herbaceous and refreshing aroma as if you've chopped fresh basil leaves. With hints of lightly sweet notes, our sweet basil oil promotes focus, relieves headache and sore muscles.
Diffuse or Topical - Use basil oil for diffusers for home to strengthen focus with its fresh and invigorating aroma, or directly inhale to alleviate headaches. Try blending essential oil basil with carrier oils to relieve muscle aches as well.
Boost Focus - The energizing scent of basil linalol essential oil helps to improve concentration, ensuring you to stay focused for the day. Crush work goals with ease and ace your studies with organic 100 pure basil oils .
Relieve Sore Muscles - The cooling properties of basil oil essential oil naturally soothes tensed muscles and sore joints. Feel your body rejuvenated and strive for limitless productivity with basil fragrance oil.
Natural Ingredients - Gya Labs sweet basil essential oil organic is harvested from India and steam distilled to perfection. This organic basil essential oil is perfect for skin, for candles, for soap, for skin and hair, for diffuser, for face, for aromatherapy, use as basil oil for hair growth organic or ocimum basilicum oil for massage.
What are the benefits of aromatherapy?
Research on the efficacy of aromatherapy, the therapeutic use of essential oils extracted from plants, is limited.
However, some studies have shown that aromatherapy may have health benefits, including:
Relief from anxiety and depression
Improved quality of life, particularly for people with chronic diseases
Sleep improvement
Smaller studies suggest that lavender oil aromatherapy can help:
Reduce pain for people with knee osteoarthritis
Improve the quality of life of people with dementia
Reduce pain for people with kidney stones
Essential oils used in aromatherapy are typically extracted from various parts of plants and then distilled. Highly concentrated oils can be inhaled directly or indirectly, or applied to the skin with massages, lotions, or bath salts. Some essential oil manufacturers have oils that can be ingested, but research on the safety and effectiveness of this method is extremely limited.
Aromatherapy is believed to work by stimulating the olfactory receptors in the nose, which then send messages through the nervous system to the limbic system, the part of the brain that controls emotions.
Many essential oils have been shown to be safe when used as directed. However, essential oils used in aromatherapy are not regulated by the Food and Drug Administration.
When oils are applied to the skin, side effects can include allergic reactions, skin irritation, and sensitivity to the sun. Additionally, more research is needed to determine how essential oils might affect children and pregnant or breastfeeding women, as well as how the oils might interact with medications and other treatments.
If you are considering starting aromatherapy, consult your doctor and a trained aromatherapist about the possible risks and benefits.
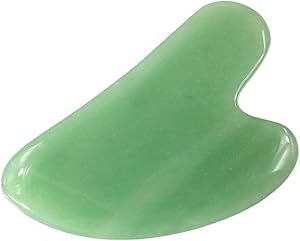
Gua Sha Facial Tool, Natural Jade Stone Guasha Board for SPA Acupuncture Therapy Trigger Point Treatment, Gua Sha Scraping Massage Tool
Magic Magic of the East: Gua sha tool was designed to improve general well-being of your body, improve the microcirculation of the facial blood vessels, increase the flow of blood, lymph and body fluids. Make you less stressed, more concentrated, look presentable, feel energized and healthy.
Natural Material: Gua sha scraping massage tool made by 100% natural pemium jade stone, which is beneficial minerals to skin beauty and body health. Long lasting, super easy to care, static free.
Whole Body Caring: Jade Gua sha can works great on neck, face, back hand, wrist, shoulders and foot. Offer you the most complete massage therapy.
Heart Shape: Approx 3.2 inch long, 2.2 inch wide, portable and handy. Ultra smooth touch feeling that never hurt your skin.
Perfect Gift: Exquisite gift box packaging. Jade gua sha tool is the best gift for Christmas, Birthday, Mother's day, Valentine's day, Labor day. Give a gift that's extremely practical but also not soon forgotten!
Health benefits of acupuncture
Acupuncture is a therapy that emerged from traditional Chinese medicine and is used to promote well-being and to treat various health problems. Acupuncture techniques consist of applying final needles, laser or mustard seeds to specific points on the body, called meridians, where nerve endings, tendons and muscle fibers are located.
The application of needles in the meridians aims to release the accumulated energy in the body and for the positive effects of this therapy to be felt, it is necessary to seek qualified professionals, who have knowledge of acupuncture techniques. It is also important to follow a doctor's treatment and recommendations. Find out more about how acupuncture is done.
Acupuncture is a safe therapy and the effectiveness of the techniques has been increasingly studied, with some known benefits being:
1. Complementary treatment of diseases Acupuncture can be used as a complementary treatment for various diseases such as gastritis, duodenal ulcer, rheumatoid arthritis, asthma and hormonal changes because by stimulating specific points in the body it can improve blood circulation, regulate the heartbeat and stimulate the defense cells of the body. body.
Through the application of fine needles to the correct meridians, the flow of energy in the body can be released, strengthening the immune system that produces substances that fight diseases. Find out more what are the main points of acupuncture and which organs stimulate . 2. Reduced anxiety and stress Acupuncture sessions can be recommended by a psychiatrist, psychologist or acupuncturist to improve symptoms caused by depression, anxiety and stress. The frequency and period of treatment by acupuncture is different from one person to another, depending on the symptoms and should be indicated by the professional who will perform the acupuncture.
For the benefits to be greater, it is important to include leisure activities on a daily basis, exercise, have a balanced diet, take the medications indicated by the doctor and change life habits that are harmful to health. Here's more to do to combat stress and anxiety . 3. Decrease in chronic pain Acupuncture helps to reduce back pain, migraine, menstrual cramps and reduces the pain caused by fibromyalgia, as the introduction of fine needles at specific points in the body can activate muscle fibers and this causes the spinal cord to stimulate the brain to release substances, such as endorphins, that reduce pain and promote relaxation and a sense of well-being.
One of the most used techniques for pain relief is auriculotherapy, which consists of applying needles to very precise regions of the ear. See more how auriculotherapy is done . 4. Relief from allergy symptoms Traditional Chinese medicine believes that allergies are caused because the reaction of the defense cells causes the body's energy flow to accumulate, causing symptoms caused by rhinitis, such as sneezing, runny nose and itching.
Acupuncture helps to improve these symptoms, as it releases the accumulated energy and stimulates the proper functioning of the immune system, in addition to increasing the flow of the bloodstream. Often, as the person is doing acupuncture sessions, it may reduce the need for anti-allergy medications.
5. Skin rejuvenation Acupuncture can be used for aesthetic purposes, as the application of fine needles in the face, neck and head can stimulate the production of collagen and help in the recovery and support of the muscles.
This process can improve the appearance of the skin, smoothing stretch marks and cellulite, as well as reducing body fat, as acupuncture also acts by decreasing appetite and increasing the body's metabolism. However, for acupuncture to be more effective, measures such as eating a balanced diet, drinking plenty of fluids and exercising are necessary.
6. Auxiliary treatment against the use of cigarettes, alcohol and drugs The application of fine needles performed in acupuncture can help in the treatment for people who want to quit smoking, as it reduces the desire to smoke. However, it must be carried out by trained professionals, since the introduction of fine needles must be made in very specific meridians.
This type of therapy can also help people who are undergoing treatment to stop using alcohol in excess and addiction. Check out other treatments indicated for chemical dependence .
When it is indicated Acupuncture must be performed by a qualified professional with a professional record and is indicated for anyone who has digestive, neurological and emotional disorders, such as anxiety, stress and depression.
Acupuncture is not recommended for people who have hematological diseases, mainly related to coagulation, nor for people who have allergies to metals. In addition, it is important that the person does not fast before the acupuncture session or drink coffee or black tea.
Usually acupuncture does not result in side effects, however, in some cases there may be the appearance of mild adverse effects, such as pain in the place where the needles were placed, dizziness and drowsiness, for example.
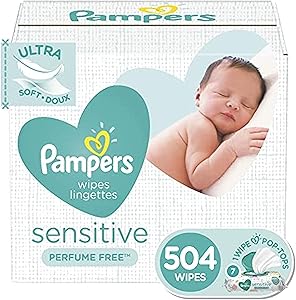
Baby Wipes, Pampers Sensitive Water Based Baby Diaper Wipes, Hypoallergenic and Unscented, 7 Pop-Top Packs, 504 Count Total Wipes (Packaging May Vary)
#1 Choice of U.S. Hospitals based on hospital sales data
Our exclusive one-wipe dispensing pop-top prevents unwanted wipes from coming out of the pack
pH balancing formula helps protect sensitive skin
Free of alcohol, perfume, parabens, phenoxyethanol, and dyes
20% thicker for a soft and comfortable clean vs. Pampers Complete Clean
Dermatologically tested and hypoallergenic
How to choose the disposable diaper?
Baby on the way and when setting up the layette always raises the famous question: which is the best disposable diaper? Not surprisingly , diapers are one of the main products that accompany them during a good part of their development . And with so many options on the market, a task that seems simple can become a major task. Thinking to help you, we separated everything you need to pay attention to when choosing your baby's disposable diaper. Check out!
Comfort should be the first item to be analyzed when buying the diaper The first thing to be tested on a diaper is how much comfort it can offer your baby. After all, nobody is calm when they feel any kind of discomfort, right? For this, the softer the diaper is, the greater the convenience. Therefore, it is important to check if the product has the dermatological approval seal, as it guarantees that your baby will be protected and using items of good quality.
A better-absorbed diaper ensures fewer changes during the day One thing is a fact: the greater the absorption of the diaper, the less your work will be throughout the day. Normally, changing diapers can reach up to 10 times a day, which decreases over time. But, if the chosen product is able to completely absorb the urine, you will not need to change your baby's diaper so often. To test the absorption of the item, simply open the diaper and pour a glass of water in the center. When you touch the wet spot, you will know what the baby will feel when the diaper is "full". With that you make sure that nothing will leak and, consequently, stain the baby's clothes .
Opt for disposable diapers that have hypoallergenic materials If you prefer to use the disposable diaper, you should always be aware of the materials contained therein. For being in direct contact with the baby's skin, it is essential to always opt for products that are dermatologically tested, that is, those that have hypoallergenic materials, to avoid any type of skin allergy. This can make all the difference in your baby's well-being and comfort.
Pay attention to the size of the diapers Because it is a phase in which the baby grows a lot , one of the main doubts when choosing disposable diapers is the size. Therefore, the ideal is to buy the RN size in smaller quantities, since they will probably only be used in the first weeks of life.
Those of size P are usually used in the first two months of the baby, while those of size M are used from the third to the sixth month. Those of size G are recommended from the seventh month until the baby is 1 year old. Finally, GG, or XG, can be used for 1 to 2 years. If your baby grows too fast, it may be a good idea to opt for XXG during this period. In the end, the important thing is that she is comfortable and without that feeling of tightness.
Goody Classics Contour Hair Clip 10, 0.343 Ounce, Colors May Vary (Pack of 3)
Assorted medium size contour clips
Great for both adults and Girls
Pefect for all Hair Types
Medium Contour Clips
Packaging may vary
How to use hair pins
A bobby pin is a hair accessory that helps to hold strands and keep hairstyles in place. They are usually smooth, and you can find them in different natural colors to match your hair tone. However, there are also fun flashy colors that contrast with the tone of the hair. Originally, the purpose of the pins was to hold the hair invisibly, but colorful designs with ornaments ended up emerging to make hairstyles more cheerful and original.
Method 1 Insert a hairpin into the hair
1 Buy a pack of hairpins at any store. Bobby pins are found in the hair accessory sections and are very cheap.
If you prefer, you can buy better quality forks. Hairdressers find that good quality bobby pins hold hair better. [one]
Try spraying cheap bobby pins with hairspray or adding texture to your hair before using them. Afterwards, the forks will offer better grip. [two]
2 Separate a strand of hair using a comb. Starting at the temple or hairline of your choice, slide the comb straight back along the scalp and in the direction of the crown.
Mouse tail combs are very useful for separating strands, thanks to their pointed handle.
If you don't have a comb handy, you can use your index finger. However, the part may not be straight.
3 Separate the highlighted section by lifting it up with your fingers. In this way, you will separate the strand without straining any hair from underneath.
4 Hold the strand separated between your index finger and thumb at the height where you want to attach the bobby pin. There are a couple of tips that you should follow when doing it:
If you've pushed the strand to the left side of your head, hold it with your left hand. In this way, the right hand will be free to slide the clip through the hair from the other side.
Similarly, if you have pushed the strand to the right side of your head, hold it with your right hand. This way, you won't have to cross your arms uncomfortably in front of your head.
5 Rotate the fork so that the wavy part is facing down. [3] When inserting the hairpin into the hair, the wavy part should be resting on the scalp.
This method provides a better grip on the hair, helping the hairpin stay in place.
6 Slide the bobby pin so that the smooth part is above the hair. Insert at an angle so that the strand of hair is held in place:
Slide the hairpin up toward the crown of your head, or at a slight angle toward the back of your head. Do not insert it horizontally or downwards, as this will cause the hair to come out.
This is a quick and easy method of pinning your hair back with bobby pins. However, the strands may not hold for long and you will need to reposition the pins at some point.
You may need to use multiple bobby pins to hold your hair in place for a longer time.
7 Remove any loose hair that is caught in the bobby pin. If these hairs do not belong to the lock that you wanted to hold with the pin, pull them gently to make the hairstyle more neat.
Method 2 Fastening a coiled section with bobby pins
1 Make sure you have bobby pins. If you don't have bobby pins, you can go to any store that stock hair accessories and buy a bundle. You can also buy high-quality bobby pins, which their manufacturers advertise hold hair better than cheap bobby pins from the supermarket or haberdashery, for example. [4]
2 Separate a section that is next to the face, at the hairline. Use your fingers or a comb to part and lift the strand, separating it from the rest of the hair.
Gently remove any loose hair that should not be in the separated strand.
By pulling the strands back, you will keep your face clear and prevent loose hair from standing up.
3 Gently pull the parted strand back towards the crown of the head so that it is perpendicular to the loose strands that naturally fall downward. Keep the strand straight and, if any lump appears when you push it back, straighten it without losing any hair.
Smooth out the bumps with your fingers or a comb. Be careful not to let any hair that belongs to the lock come loose.
4 Use your index finger to roll the strand a few times. You can roll the strand so that it is loose or tight, depending on the effect you want to achieve.
You will need to roll the strand at least five times to make it tight, but you will only have to roll it a couple of times if you want it to be looser.
5 Lay the curled strand along the side of the head. Gently place it at the height you want to hold it to, making sure, again, to avoid lumps.
It is best to extend the rolled strand at an angle (or at a certain height) so that it does not lift or cup over the hairline area when pulled back. If this happens, you will need to gently run your fingers over the curled section until the lumps are smoothed out.
Hold the curled strand in place with your hand on the same side. If the coiled strand is on the left side of the head, hold it in place with your left hand. Similarly, if the curled strand is on the right side of the head, hold it in place with your right hand.
6 Grab a bobby pin and pull it towards the back of your head. Reach the back of your head with your free hand to prepare the bobby pin to snap into place and hold the coiled strand.
Position the bobby pin so that its open end is facing your face. Make sure the wavy or rough part of the hairpin rests against your scalp.
7 Separate the two parts of the open end of the bobby pin with your fingers and place it where you want the curled section to end. Next, you will have to slide the hairpin under the coiled section so that most of the accessory is camouflaged and the hair stays in place. [5]
8 Slide the bobby pin under the curled section so that it is hidden behind the hair. We insist that you make sure that the wavy or rough part of the hairpin is resting against the scalp. [6]
When you finish inserting the bobby pin, most of it should be hidden behind the coiled strand.
Use bobby pins of a similar color to your hair to hide them better.
9 Remove any loose hair. Gently tuck the loose hair back into the strand, using your fingers, or gently pull it out if it is caught by accident and does not belong in the coiled strand.
Method 3 Raising a ponytail with bobby pins
1 Gather 1 or 2 bobby pins. If you don't have hairpins, you can buy a package at any haberdashery or supermarket. Look for them in the hair accessories section. However, hairdressers advise using high-quality bobby pins, which are more expensive but hold the hair better. [7]
2 Tie your hair into a ponytail. You can make your tail at any height, depending on the length of your hair and your preferences. Use a comb to straighten your hair while you do your ponytail.
3 Secure the ponytail with a hair tie. Avoid using rubber bands with metal closures, as they get tangled in the hair and damage it. Roll the rubber band around enough to hold the ponytail tight, but not so tight that it can break your hair. Three laps are usually sufficient.
4 Pull up the ponytail so that you can grab the ends from the front. If you have long enough hair, you can pull it over your head. If not, you can hold it with one hand. Hold the ponytail up and against the back of your head so that you can grab the ends.
5 Separate the two parts of the open end of the hairpin and direct them towards the ponytail, in the direction of the head. [8] This is the preparation to insert the hairpin into the ponytail and give it height.
6 Slide the bobby pin into the ponytail, right down the center. Insert at a slightly downward angle and push until it makes contact with the scalp. [9]
Be careful not to scratch yourself.
Be careful when putting on the hairpin, as it could be painful and cause scabs on your scalp if done incorrectly.
7 Reposition the ponytail normally and tighten it. Grab the ponytail and tighten it up, like when you put it up normally and want it to be more taut. [10]
Grab the side strands of the ponytail and pull them to the sides. In this way, the elastic band will be closer to the scalp, making the ponytail tighter.
You can also grab the top and bottom strands of the ponytail and pull them up and down respectively to give the updo more volume.
Method 4 Ensure the grip of the hairpin to the hair
1 Buy a pack of hairpins at any local store You can find them in the section of hair accessories, brushes and combs. Hairpins are usually quite cheap. Some women advise buying high-quality bobby pins, ensuring they hold hair better in place. [eleven]
If you can't afford professional bobby pins, try spraying cheaper ones with hairspray or adding texture to your hair before putting them on. In this way, the pins will offer a better grip to hold the hair. [12]
2 Use a comb to separate a strand of hair. Start at the temple and slide the comb straight back, flush with the scalp and in the direction of the crown.
Mouse tail combs are very useful for this, thanks to their pointed handle.
If you don't have a comb handy, you can use your index finger. However, you run the risk that the part will not be completely straight.
3 Pick up the separated strand using your fingers. This will pull your hair up so that you can separate loose hair from the roots.
4 Hold the strand out of the way between your index finger and thumb when you want to insert the bobby pin. Here are a couple of tips to do it:
If you have parted the strand on the left side of your head, hold it with your left hand. In this way, your right hand will be free and you can reach the lock from the other side to place the hairpin.
Similarly, if you have parted the strand on the right side of your head, hold it with your right hand. This way, you won't have to cross your arms uncomfortably in front of your head.
5 Rotate the fork so that the wavy part is facing down. [13] When you insert the hairpin into your hair, the wavy part should be resting against your scalp.
By placing the hairpin in this way, the grip will be better and the hair will stay in place.
6 Position the tip of the bobby pin just below where you are holding the lock with your fingers. Gently move the tip of the hairpin from one side to the other, so that it grabs a few hairs. [14]
7 Slide the bobby pin over a small part of the section that you want to hold. Then lift the bobby pin and pull it over the entire section of hair.
8 Position the tip so that the hairpin is vertical at the height where you want to hold the strand. Place your finger on the rounded end of the bobby pin and gently rock it from side to side to get a better grip on the hair. [fifteen]
9 Push the rounded end of the hairpin in the opposite direction so that the open end is now facing the direction you need to insert it. [16] The rounded end should now point to the opposite side above the head, and the open end down, in the direction of the ear and shoulder.
10 Slide the bobby pin down through the strand of hair that you want to pin. This will lock the fork in place and will not loosen or fall off. [17]
Carefully remove any loose hair that was caught when pinning and does not belong to the section you want to pin.
Advice
Some hairdressers advise against opening the hairpin to slide it over the hair, as it can give itself and lose its ability to grip quickly. However, there are also those who recommend the opposite. Use the method that works best for you to pin your hair up.
Warnings
Don't use bobby pins to hold a thick section of hair. If the strand is too thick for the hairpin, it is very likely that the hairpin will twist and bend, rendering it unusable.
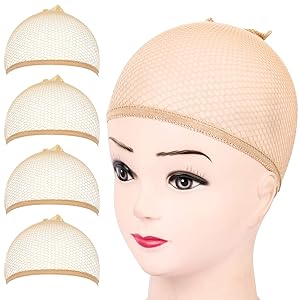
FANDAMEI Wig Cap, 4PCS Light Brown Mesh Wig Cap Net, Closed End Hair Mesh Net Wig Caps, Liner Weaving Caps for Women, Men, Kids
Package Included: Total 4 pieces light brown mesh net wig caps. Color: Light brown.
Closed End Design: The mesh wig cap have a closed design that can wrap you hair easily and help you hold your hair in place quickly.
Breathable and stretchable- The hair wig cap is made of soft, durable and stretchy nylon material. Mesh net design is breathable and sweat-absorption which makes you feel more comfortable even in summer. Not easy to break, prolong the using time. One size fits most people due to the great elasticity.
Natural looking- Lightweight and ultra-thin which can put your hair in order naturally and trimly; Natural color will not be easily noticed and provide a natural looking. Help you create a variety of styles. Not only fit women, but also men, kids.
Convenient to use- Easy to wear and take off. Washable and reusable that can keep the wig and your hair clean. Help you hold your hair in place easily and comfortable. It is an essential tool for Halloween, makeup party, cosplay, etc.
How to make a wig cap
Making a wig takes a long time, but the results are worth it. Although you can always buy a pre-made hat to sew or air the fibers over it, nothing guarantees that it will fit. If you make your own wig cap, you will be sure to make a good base that will fit perfectly. However, for that purpose, you will need a custom-sized wig mannequin head or you can modify one you already have to fit your measurements. If you are working with a mannequin head that does not have standard measurements, the wig cap (and the resulting wig) could be too small!
Part 1 Make a mold of your head
1 Pull your hair back in the same way that you would wear it under the wig. Some people like to do a French braid or two , while others go for African braids . The way you braid your hair is not very relevant because it will affect the size and shape of the wig cap. [two]
You need to make a mold of your head to modify the mannequin head for wigs. Otherwise, the wig cap will not fit. [3]
If you already have a canvas head to make wigs the same size as your head, you can skip this part and click here to continue.
2 Cover your hair with plastic wrap. Make sure to extend it beyond the hairline. That includes the ears, forehead, and nape. Extending the plastic wrap beyond the hairline will reduce the chances of the duct tape sticking to your hair in later steps. [4]
Use clear plastic wrap if possible. That way, subsequent steps will be easier.
If you have a nylon cap that you can wear under your wig, it is recommended that you put it on first.
If the plastic wrap is slipping around too much, secure it to your forehead with a piece of tape.
3 Cover the plastic wrap with two layers of clear packing tape. Wrap the tape around the hairline first, being careful to avoid the skin. Cover the rest of the wrapping plastic in overlapping rows of tape. Do this step twice. There should be no weak points. If you feel like one side is weak, that means you forgot the plastic wrap. Cover it with a piece of duct tape! [5]
The taped plastic will have a bit of excess, which is fine. It should not be soft, like fabric.
You must use clear packing tape. Otherwise, you won't be able to see the hairline in the next step.
4 Trace the hairline and ears with a permanent marker. It is recommended that you get someone to help you with this step, especially when you reach the rear. If you see yourself in the mirror, you should see the hairline through the plastic wrap. Trace around the hairline, from the forehead to the nape of the neck. Make sure to include the ears as well. [6]
Don't worry if the marker stains your skin or hair. That is why you extended the plastic wrap past the hairline!
If you don't have a helper, look into the mirror and hold a smaller mirror in front of you so that you can see the back of your head.
5 Remove the plastic wrap covered in duct tape. You should be able to slide it off your head easily. If not, dip your finger in the water, then run it along the inside edge of the hat to separate it from your skin. [7]
If you still can't remove the plastic, make a careful cut (preferably at the back), then slide it off.
If you previously put on a nylon wig cap, it could come off along with the plastic wrapper. Just remove it.
6 Use scissors to cut off excess tape and plastic wrap. Follow the line you drew with the marker, leaving a 1⁄2 to 1 inch (1 to 3 cm) border. Make sure to also trim the part of the ears. When you are done, you should have a hat that fits perfectly on your head, follows the hairline and the ears. [8]
7 Reinforce the inside of the plastic mold with more tape. If you make a cut in the mold, you will need to close it and tape it first. Next, cut small pieces of masking tape and use them to cover the inside of the mold, overlapping them as you go. For a nicer finish, you can wrap the masking tape around the cut edges of the hat. [9
Part 2 Modify the mannequin head
1 Get a styrofoam wig mannequin head. You can purchase styrofoam wig mannequin heads at well-stocked arts and crafts stores, wig stores, and beauty supply stores.
2 Place the mannequin head on a wig stand. You can find them online, wig stores, or some beauty supply stores. It can be the type of tall supports that you place on the floor or the shorter type that you put on the table.
If you don't have a wig stand, insert a dowel into a Christmas tree stand and use it as a wig stand. You can also insert the mannequin's head into a bucket full of rocks.
If you need a homemade wig stand board, you can use a paper towel holder. However, you may need to break the outer stick that comes in contact with the outer part of the paper towel.
3 Fill the inner part of the head mold to fit the wig mannequin head. You can do this with polyester padding, paper towels, or even cotton pads. The amount of filler you put in will depend on how large the head is compared to the head of the wig mannequin. Most styrofoam wig mannequin heads are small, so you may not have to overfill the mold. [10]
If you decide to use paper towels or even pieces of paper, be sure to tear them up and not bend them. This will make it easier to insert the pins later. [eleven]
4 Slide the head cast over the mannequin head and add more padding if necessary. Slide the mold with the filling onto the wig mannequin head. It should be padded enough so that it feels firm to the touch, without leaving too much room. If you see any dents you will need to fill the mold a bit more.
5 Secure the head mold to the wig mannequin head mold with pins. Place them along the edges of the mold, below the drawn hairline. It is best to use simple all-metal pins that look like nails. If you use the type of pins that have round glass or plastic heads on the ends, you will have a difficult time fitting the net into the wig cap. Once you do, you are ready to make a wig cap.
You can also secure the head-to-head wig mold with tape. Masking tape will work best for this purpose. If you cover the drawn hairline, be sure to trace it again. [12]
Part 3 Pinning the wig cap
1 Purchase a wig-weaving net from a wig-making supply store. It will be even better if you buy two nets and place them one on top of the other. That way, you will have a stronger base. You can buy them online and in stores that sell wig-making supplies. [13]
If you're buying nets from a fabric store, you'll need enough to cover your head and hairline, plus a few more inches.
You can also use French lace or other types of lace used to make wigs. If you are going to vent the fibers of the wig, you will need to purchase lace to vent wigs.
2 Pull the net tightly across the forehead and secure with sewing pins. Cover the mannequin head with a wig net with the front edge 1 to 2 inches (3-5 cm) below the hairline. Pull the net tightly across the forehead and secure with sewing pins. You will need a pin at the front center of the web and another at each temple. [14]
Insert the pins at a slight angle. This will prevent the net from slipping past the head of the pins.
3 Repeat the process for the back of the mannequin head. Work your way towards the back of your head. Pull the net down until it is snug across the top of your head. Secure it to the nape with more sewing pins. Place them about 1 inch (2.5 cm) below the drawn hairline. [fifteen]
4 Secure the sides of the net over the ears. Lower the net as you pin so it is snug and looks good. You need a pin in the front and behind each ear hole. Make sure the lace goes beyond the hairline. Otherwise, it will be off-center or too narrow. [16]
If the lace is too narrow, you will have to cut a larger piece and start over.
If the lace is not centered, you will need to snap it back into place and re-pin it.
5 Pin the net to create darts and make it tighter. You will need to create a clip in the front and behind each ear. Hold the edges of the net so that it stretches smoothly against the mannequin's head. Secure the clamp with pins following the curve of the mannequin's head. When you're done, the net should run neatly across the top of the mannequin head. [17]
Make sure to only pin the length of the web. Do not insert them into the mannequin head.
Part 4 Sewing and finishing the wig cap
1 Remove the pins from the edge, and then pull the hat off the mannequin head. Remove the pins securing the net to the mannequin head, then pin it out. Do not remove the pins that hold the clips together. Also, do not remove the mold that you previously secured to the mannequin head with pins. [18]
2 Sew the darts together using the inserted pins as a guide. You can do this on a sewing machine, overlocker, or by hand. If you are using a sewing machine, be sure to backstitch at the beginning and end of the seam. Remove the pins as you sew and be sure to use a colored thread that matches the lace. [19]
3 Cut the seams. In case you sewed the darts with a sewing machine or by hand, you will still see triangle flaps sticking out of the seams. Cut them until the seams are 1⁄4 to 1⁄2 inch (6 mm to 2 cm) wide.
Skip this step if you used a serger, as the machine will have already done it for you.
4 Run the machine over the raw edges using a zigzag stitch if desired. You don't have to, especially if you used a serger, but it will give you a nicer finish. Remember to use a matching thread color and topstitch (if you are using a sewing machine).
Skip this step if you used a serger. The seams will already be finished.
5 Cut loose threads. Check the wig cap and cut off any strands that are loose or dangling. For a nicer finish, consider hand-setting the seams so that they lie flat.
6 Finish the wig cap as desired. At this point, you can trim the excess lace to match your hairline. You can also hem the lace as desired, or sew it onto an elastic. Another alternative is to sew an elastic or a ventilation panel towards the top. Then cut the net under it. [twenty]
If you are making a lace front wig , do not cut the excess lace along the front hairline. You will need it to paste the wig.
Advice
You can find most supplies in beauty supply stores and wig stores. Online stores that specialize in wig-making supplies also have the products you need.
The exact type of lace you use will depend on the type of wig you are making. If you are simply sewing braids over the wig, you will only need to use lace to weave wigs. If you are going to make a vented wig, you will need something thinner.
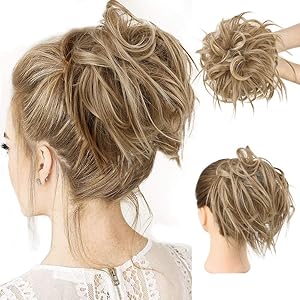
HMD Messy Bun Hair Piece Hair With Elastic Rubber Band Extensions Hairpiece Synthetic Hair Extensions Scrunchies Hairpiece for Women (Tousled Updo Bun, 12H24(Light Brown mix Natural Blonde)
Features - Messy Bun features adjustable buckle with drawstring and hair comb double clip, Clip in perfectly over your own ponytail.Perfect for adding volume and fullness to a bun or a ponytail,very comfortable and easy to use, elegant and lovely.
Material - Made by 100% high quality Synthetic fiber, it looks, moves and feels like real hair with affordable price.
Adjustable Size - Messy Bun can adjust size and easy to wear with light combs at both sides, fit most bun and ponytail, and uneasy to discover or fall.
Easy to Wear - Easy Stretch Updo Hair Chignons with combs at two sides brings you an elegant decent look in just a second, suitable for various occasions such as prom, wedding or going shopping.
Notice - Stretch Hair Comb and Messy Curly hairpiece are inseparable. Due to different computer monitor's color settings, Very slight Color difference may occur.
Hairpiece for party hairstyles
When naming hairpiece, we tend to think of the pieces that are applied for hair needs. But the reality is that despite not looking very popular, there is a great use of them to complement hairstyles and get a better image.
When used , the result achieved is spectacular.
There is a great variety of them. A hairpiece can be used to give more volume, to fill, to lengthen ... They are the best ally to give an extra touch to hairstyles and make them perfect. Below we are going to present some of them and discuss their possible uses:
Hair ties:
It is an elastic scrunchie with hair . Most are made with synthetic fibers as they keep their shape (they don't mess up) and hardly require maintenance. It offers a touch of volume and ease. Ideal both to enhance the day-to-day hairstyles and to wear it at events as you can see in the image of Miley Cirus.
Moldable hairpiece with comb:
Easy to install and very versatile. It is also like the previous one, a synthetic fiber hairpiece, which thanks to its wire system, allows it to be adapted so that it is the desired shape. It is also fully reversible, which increases the possibilities of use. It is one of the most used hairpieces and with a price for all budgets.
Ponytail with clip:
Ideal for a more pronounced length, more volume and movement. This false ponytail is a great resource when your hair itself is not showing off when you pick it up. This hairpiece also allows us to place it in 2 ways since it is also reversible. As it is placed, the tips face inward or outward.
Below you can see that the same type of hairpiece: the ponytail. It is available in various length and hairstyle options. So there are hairpieces for all tastes and hair types!
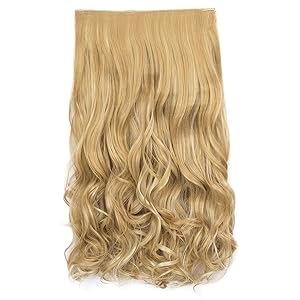
REECHO 14" Short Length 1-Pack 3/4 Full Head Curly Wavy Clips in on Synthetic Hair Extensions Hairpieces for Women 5 Clips 3.6 Oz per Piece - 25H613
The Model in the pitures is wearing 2 pieces hair extensions, If you have Thin / Fine / Baby hair, Try one first; Already have Thick hair, please order 2 pcs hair extensions to blend well; Length: Approx 14"; Package included: 1 piece of curly hair extensions (5 clips attached per piece)
UNLIKE the real human hair, the synthetic hair fiber may get tangled after 2-3 wears because the synthetic clothes that build up static,especilly in winter. Besides,the dust and moisture in the air may hurt the synthetic hair fiber.To prevent it,kindly you can get a spray bottle and put some conditioner in it, then fill it up with water. Spray it in the hair extensions.It will make the hair extensions not very dry and prevent getting tangled in some extent. Please understand
MATERIALS - Heat Resistant Fiber,able to resist the heat from styling tools to give you almost the same styling versatility as human hair (optimal temperature is 250-275 degrees). Going above 350 degrees is not recommended.With a matte looking, it looks real and you can restyled it with the scissors or curling iron
EASY TO WASH AND TAKE CARE - Just need a little mild shampoo and hair conditioner then washing in lukewarm water.then set on a flat towel and let them naturally dry.If the hair fiber has got tangled,kindly you can use little bit of laundry detergent and the water to soak and wash rinsed out then use a little bit of fabric softener and water to soak for conditioning then rinsed and let it air dry. Please don't blow-dry and don't wear it when sleeping or swimming
How many hair extensions do you need to achieve a voluminous mane?
If you've already decided to get extensions, congratulations! We congratulate you for taking the step to feel beautiful and strengthen your self-confidence . To achieve these goals it is necessary that the extensions you choose are of good quality, that they have a texture similar to your hair, that they are comfortable for you and also that you know how much hair is needed to get the hair you want. And that last is what we will help you choose in this post, how many extensions to put in the hair .
How to calculate how much hair you need to have a spectacular mane
Many people ask us: “How much hair do I need? How many microring extensions do I need? or how many adhesive extensions do I need? » But the truth is that each person is different and therefore has different needs and circumstances. That is why a specific amount cannot be said for all people. In order to calculate how much hair is needed, several factors must be taken into account .
First of all, how much hair is needed will depend on how thick you want your hair to be . If you want a discreet mane, which goes unnoticed, you will not need as many grams as you would need if you want a voluminous mane, which stands out.
On the other hand, there are other factors that also influence such as the size of your head, how you want to apply them, whether you are going to cut it, or even what type of cut you want to make. In these questions, the opinion of an extension expert can help you a lot, so do not hesitate to consult a professional you trust. You also have to take into account the length of your own hair. That is, if you have short hair and want to get a long hair with extensions, you will need more hair . However, if you already have long hair and you only want to lengthen a few centimeters, you will need fewer grams .
How many strands of extensions do I need?
If you like the type of extensions that are placed by highlights such as keratin or micro ring extensions, use at least 100 to 150 units (about 125 grams of hair ).
How many hair curtains do you need for short hair
In the case of the sewn curtain, we recommend buying one or two packages . Each pack has about 100 grams of hair . Remember that the longer the hair in the extensions, the less volume the curtain will have. This is because 100% human hair extensions are sold by the gram, so if the hair in the extensions is short, the bundle will have more hair strands, up to 100 grams, which is roughly what a bundle has. But in the case of extensions 60 cm , or more, the 100 grams have fewer strands, that is, less volume.
In the case of the adhesive curtain , keep in mind that the adhesive does not hold a lot of weight. That is why we do not recommend this method of placement if you have short hair and want a long hair with a lot of volume.
Also remember that if you choose extensions of more than 50 centimeters it is necessary to buy more grams to get enough volume.
How many curtains come out of an extension pack? One package brings a curtain between 1.20 and 1.30 centimeters wide . You must cut it to the measurements that are appropriate for you. But there are usually three large ones for the back of different sizes and two smaller ones for the sides of the head . They are all cut double, that is, in two layers, so that they are left with a little more volume. Of the three that go on the back of the head, you should put the smallest of the three first, in the lowest part. That is what determines the total length of the mane.
How to calculate how much hair I need depending on the texture of my hair If you have afro curly hair and you want extensions for the whole head you need about 250 to 300 grams . In this case, the most used are usually the hair curtains, sewn to the braided hair. Loose knotted hair is also often used. The amount we suggest works for both types of extensions.
When the hair texture is of the European type, 100 - 150 grams is usually sufficient . Although if you already have long hair and you only want to add volume and a few inches to your hair, less than 100 grams may be enough.
If you want to get adhesive extensions you can use just one pack. But if you want a hair with a lot of volume, we recommend two packages .
Something that you should also keep in mind is that if you are going to wear straight hair, your hair will look less voluminous than if you have it curly. This means that if you have curly hair and therefore use curly extensions , you will need fewer grams of hair in extensions. But with a straight hair you would need more grams , if you want it to look with enough volume.
If you have little and very fine hair, maybe 100 grams of hair in extensions will be enough. On the contrary, if your hair is thick or you have very marked layers, 100 grams is not enough.