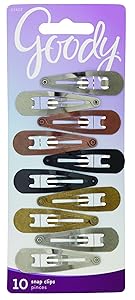
Goody Classics Contour Hair Clip 10, 0.343 Ounce, Colors May Vary (Pack of 3)
- Assorted medium size contour clips
- Great for both adults and Girls
- Pefect for all Hair Types
- Medium Contour Clips
- Packaging may vary

How to use hair pins
A bobby pin is a hair accessory that helps to hold strands and keep hairstyles in place. They are usually smooth, and you can find them in different natural colors to match your hair tone. However, there are also fun flashy colors that contrast with the tone of the hair. Originally, the purpose of the pins was to hold the hair invisibly, but colorful designs with ornaments ended up emerging to make hairstyles more cheerful and original.
Method 1 Insert a hairpin into the hair
1
Buy a pack of hairpins at any store. Bobby pins are found in the hair accessory sections and are very cheap.
- If you prefer, you can buy better quality forks. Hairdressers find that good quality bobby pins hold hair better. [one]
- Try spraying cheap bobby pins with hairspray or adding texture to your hair before using them. Afterwards, the forks will offer better grip. [two]
2
Separate a strand of hair using a comb. Starting at the temple or hairline of your choice, slide the comb straight back along the scalp and in the direction of the crown.
- Mouse tail combs are very useful for separating strands, thanks to their pointed handle.
- If you don't have a comb handy, you can use your index finger. However, the part may not be straight.
3
Separate the highlighted section by lifting it up with your fingers. In this way, you will separate the strand without straining any hair from underneath.
4
Hold the strand separated between your index finger and thumb at the height where you want to attach the bobby pin. There are a couple of tips that you should follow when doing it:
- If you've pushed the strand to the left side of your head, hold it with your left hand. In this way, the right hand will be free to slide the clip through the hair from the other side.
- Similarly, if you have pushed the strand to the right side of your head, hold it with your right hand. This way, you won't have to cross your arms uncomfortably in front of your head.
5
Rotate the fork so that the wavy part is facing down. [3] When inserting the hairpin into the hair, the wavy part should be resting on the scalp.
- This method provides a better grip on the hair, helping the hairpin stay in place.
6
Slide the bobby pin so that the smooth part is above the hair. Insert at an angle so that the strand of hair is held in place:
- Slide the hairpin up toward the crown of your head, or at a slight angle toward the back of your head. Do not insert it horizontally or downwards, as this will cause the hair to come out.
- This is a quick and easy method of pinning your hair back with bobby pins. However, the strands may not hold for long and you will need to reposition the pins at some point.
- You may need to use multiple bobby pins to hold your hair in place for a longer time.
7
Remove any loose hair that is caught in the bobby pin. If these hairs do not belong to the lock that you wanted to hold with the pin, pull them gently to make the hairstyle more neat.
Method 2 Fastening a coiled section with bobby pins
1
Make sure you have bobby pins. If you don't have bobby pins, you can go to any store that stock hair accessories and buy a bundle. You can also buy high-quality bobby pins, which their manufacturers advertise hold hair better than cheap bobby pins from the supermarket or haberdashery, for example. [4]
2
Separate a section that is next to the face, at the hairline. Use your fingers or a comb to part and lift the strand, separating it from the rest of the hair.
- Gently remove any loose hair that should not be in the separated strand.
- By pulling the strands back, you will keep your face clear and prevent loose hair from standing up.
3
Gently pull the parted strand back towards the crown of the head so that it is perpendicular to the loose strands that naturally fall downward. Keep the strand straight and, if any lump appears when you push it back, straighten it without losing any hair.
- Smooth out the bumps with your fingers or a comb. Be careful not to let any hair that belongs to the lock come loose.
4
Use your index finger to roll the strand a few times. You can roll the strand so that it is loose or tight, depending on the effect you want to achieve.
- You will need to roll the strand at least five times to make it tight, but you will only have to roll it a couple of times if you want it to be looser.
5
Lay the curled strand along the side of the head. Gently place it at the height you want to hold it to, making sure, again, to avoid lumps.
- It is best to extend the rolled strand at an angle (or at a certain height) so that it does not lift or cup over the hairline area when pulled back. If this happens, you will need to gently run your fingers over the curled section until the lumps are smoothed out.
- Hold the curled strand in place with your hand on the same side. If the coiled strand is on the left side of the head, hold it in place with your left hand. Similarly, if the curled strand is on the right side of the head, hold it in place with your right hand.
6
Grab a bobby pin and pull it towards the back of your head. Reach the back of your head with your free hand to prepare the bobby pin to snap into place and hold the coiled strand.
- Position the bobby pin so that its open end is facing your face. Make sure the wavy or rough part of the hairpin rests against your scalp.
7
Separate the two parts of the open end of the bobby pin with your fingers and place it where you want the curled section to end. Next, you will have to slide the hairpin under the coiled section so that most of the accessory is camouflaged and the hair stays in place. [5]
8
Slide the bobby pin under the curled section so that it is hidden behind the hair. We insist that you make sure that the wavy or rough part of the hairpin is resting against the scalp. [6]
- When you finish inserting the bobby pin, most of it should be hidden behind the coiled strand.
- Use bobby pins of a similar color to your hair to hide them better.
9
Remove any loose hair. Gently tuck the loose hair back into the strand, using your fingers, or gently pull it out if it is caught by accident and does not belong in the coiled strand.
Method 3 Raising a ponytail with bobby pins
1
Gather 1 or 2 bobby pins. If you don't have hairpins, you can buy a package at any haberdashery or supermarket. Look for them in the hair accessories section. However, hairdressers advise using high-quality bobby pins, which are more expensive but hold the hair better. [7]
2
Tie your hair into a ponytail. You can make your tail at any height, depending on the length of your hair and your preferences.
Use a comb to straighten your hair while you do your ponytail.
3
Secure the ponytail with a hair tie. Avoid using rubber bands with metal closures, as they get tangled in the hair and damage it.
Roll the rubber band around enough to hold the ponytail tight, but not so tight that it can break your hair. Three laps are usually sufficient.
4
Pull up the ponytail so that you can grab the ends from the front. If you have long enough hair, you can pull it over your head. If not, you can hold it with one hand.
Hold the ponytail up and against the back of your head so that you can grab the ends.
5
Separate the two parts of the open end of the hairpin and direct them towards the ponytail, in the direction of the head. [8] This is the preparation to insert the hairpin into the ponytail and give it height.
6
Slide the bobby pin into the ponytail, right down the center. Insert at a slightly downward angle and push until it makes contact with the scalp. [9]
- Be careful not to scratch yourself.
- Be careful when putting on the hairpin, as it could be painful and cause scabs on your scalp if done incorrectly.
7
Reposition the ponytail normally and tighten it. Grab the ponytail and tighten it up, like when you put it up normally and want it to be more taut. [10]
- Grab the side strands of the ponytail and pull them to the sides. In this way, the elastic band will be closer to the scalp, making the ponytail tighter.
- You can also grab the top and bottom strands of the ponytail and pull them up and down respectively to give the updo more volume.
Method 4 Ensure the grip of the hairpin to the hair
1
Buy a pack of hairpins at any local store You can find them in the section of hair accessories, brushes and combs. Hairpins are usually quite cheap.
Some women advise buying high-quality bobby pins, ensuring they hold hair better in place. [eleven]
- If you can't afford professional bobby pins, try spraying cheaper ones with hairspray or adding texture to your hair before putting them on. In this way, the pins will offer a better grip to hold the hair. [12]
2
Use a comb to separate a strand of hair. Start at the temple and slide the comb straight back, flush with the scalp and in the direction of the crown.
- Mouse tail combs are very useful for this, thanks to their pointed handle.
- If you don't have a comb handy, you can use your index finger. However, you run the risk that the part will not be completely straight.
3
Pick up the separated strand using your fingers. This will pull your hair up so that you can separate loose hair from the roots.
4
Hold the strand out of the way between your index finger and thumb when you want to insert the bobby pin. Here are a couple of tips to do it:
- If you have parted the strand on the left side of your head, hold it with your left hand. In this way, your right hand will be free and you can reach the lock from the other side to place the hairpin.
- Similarly, if you have parted the strand on the right side of your head, hold it with your right hand. This way, you won't have to cross your arms uncomfortably in front of your head.
5
Rotate the fork so that the wavy part is facing down. [13] When you insert the hairpin into your hair, the wavy part should be resting against your scalp.
- By placing the hairpin in this way, the grip will be better and the hair will stay in place.
6
Position the tip of the bobby pin just below where you are holding the lock with your fingers. Gently move the tip of the hairpin from one side to the other, so that it grabs a few hairs. [14]
7
Slide the bobby pin over a small part of the section that you want to hold. Then lift the bobby pin and pull it over the entire section of hair.
8
Position the tip so that the hairpin is vertical at the height where you want to hold the strand. Place your finger on the rounded end of the bobby pin and gently rock it from side to side to get a better grip on the hair. [fifteen]
9
Push the rounded end of the hairpin in the opposite direction so that the open end is now facing the direction you need to insert it. [16] The rounded end should now point to the opposite side above the head, and the open end down, in the direction of the ear and shoulder.
10
Slide the bobby pin down through the strand of hair that you want to pin. This will lock the fork in place and will not loosen or fall off. [17]
- Carefully remove any loose hair that was caught when pinning and does not belong to the section you want to pin.
Advice
- Some hairdressers advise against opening the hairpin to slide it over the hair, as it can give itself and lose its ability to grip quickly. However, there are also those who recommend the opposite. Use the method that works best for you to pin your hair up.
Warnings
- Don't use bobby pins to hold a thick section of hair. If the strand is too thick for the hairpin, it is very likely that the hairpin will twist and bend, rendering it unusable.
No comments:
Post a Comment