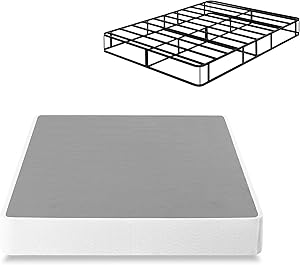
Zinus Van 16 Inch Metal Platform Bed Frame with Steel Slat Support / Mattress Foundation, Twin
- Strong support steel slats prevents sagging and increases mattress life
- Eliminates the need for a box spring
- Assembles easily in minutes 14 inches of clearance under the frame for valuable under bed storage space
- Foam padded tape is added to the steel frame for noise free use for Full, Queen and King sizes
- Available in Twin, Full, Queen and King sizes


Learn how to build a super practical pallet bed
Pallets are the great allies of do-it-yourself projects: they can be disassembled, sanded, painted and varnished and become coffee tables, coffee tables, benches and even beds!
These two tutorials teach you how to make a bed and a headboard out of pallets to leave the house with a rustic and creative atmosphere. Get inspired by the gallery of examples to create new models — after the first successful DIY, you never stop!
The most common model, short, is incredibly simple. All you'll need for a double-size bed is:
- 4 pallets in European standard (120 cm x 80 cm), made of quality heat treated wood
- Mountain range
- sandpaper
- nails
- adhesive felt
- 160 cm mattress
- Cut two of the pallets first, dividing them into two 80-centimeter pieces so that they form a square. The other two pallets will be left unbroken.
- Sand them carefully, eliminating any chips.
- Glue felt adhesives to the base of the pallets – it serves to minimize friction between the wood and the floor. Arrange them in the desired area, so that the uncut pallets are at the top of the bed and the 80 centimeters are at the foot of the bed.
- In the photos, two more pallets cut in 80 centimeters were used to make the headboard, nailed close to the bed.
Pallet headboard, by DIY Network
You already have the bed. It's time to make the headboard! This template can be used to complement an existing bed design or to frame a pallet structure you made yourself. You will need:
- 2 or 3 quality pallets (always check the quality of your pallet as well as the strength of the wood – species like oak are more resistant, better for this type of project)
- 2 leg boards
- construction sticker
- nails
- 80 and 220 grit sandpaper (if you have a sander, better!)
- brushes
- Sealant
- Drilling machine
- Mountain range
How to make:
- Cut the pallets from the back (with the planks facing up and the opening down), separating the planks from the frame and sawing through the nails. Separate about eight boards of varying widths — the differences make the final product more rustic and unique.
- Plan the height of the planks: it is the sum of the height of the bed and mattress plus 80 centimeters, which is the amount of wood that will be exposed and will serve as a headboard.
Take the separate leg boards and cut them to size. Make an intermediate support of 80 centimeters as well.
- Plan the layout by mixing boards from different pallets. Position the legs (vertically) on a surface intended for mounting the project so that the space between the outside sides is approximately six centimeters less than planned for the headboard's full width. Place a cut board to support them.
Apply construction adhesive on top of the three support boards: this is where you will glue the first horizontal board.
- Your headboard starts to take shape! Then fasten it securely with two nails at each vertical intersection.
- Continue gluing and nailing the boards alternately. They will always be the same length, but they can be different colors and widths – that's the fun!
Measure the height to ensure the headboard extends a little farther down from the top of the mattress.
- Use the 80 grit sandpaper in the roughest spaces and then the 220 grit sandpaper to even out the entire surface, including corners and edges.
- Apply a light coat of sealant. When it dries, apply another layer with the brush, this time thicker, to fill in any cracks. The transparent film will accentuate the colors and textures of the wood!
That's it: now you have a homemade headboard. Just attach it to the bed with carriage bolts or hang it on the wall with a cleat.