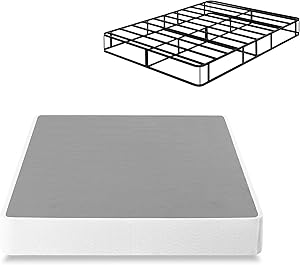
ZINUS 9 Inch Smart Metal Box Spring / Mattress Foundation / Strong Metal Frame / Easy Assembly, Twin
Steel Interior Frame With Knitted Polyester Cover
The last box spring you’ll ever need - Unlike a traditional box spring, the Armita is made of solid steel that comes together in no time.
DURABLY ENGINEERED - Durable steel is used to construct the inside framework of this foundation; Twin size supports a maximum weight capacity of 350 pounds, while all other sizes can support up to 700 pounds
HIGH PROFILE DESIGN - A 9 inch height is perfect for shorter mattresses or for those who enjoy their bed higher off the floor
Thoughtfully packaged- All parts, tools and instructions are packed into one compact box that ships straight to your door
Worry-free 5 year limited warranty included; Box spring only, a bed frame or platform bed is required to support this foundation and is sold separately
How to Build a Platform Bed
A platform bed is a type of bed that does not use a box or a metal frame. Instead, it consists of a wooden platform and a mattress, sometimes with sides, headboard or drawers. Platform beds have been around for centuries, while Box beds are newer, being somewhere between 150 years old. Platform beds can be simple or decorated. First-time woodworkers usually find this a very simple project.
Steps
1 Measure your mattress. Your platform should be 2-3 cm wider and longer than your mattress. So when you place the mattress on the finished platform bed, there will be approximately 1 cm of platform on each side.
2 Subtract 30 cm from the length and width of your mattress to get measurements for the base of your platform. The base should be smaller than the platform to prevent you from hitting your toe on the base when lying down.
3 Gather your materials. In addition to the wood for the platform bed, you'll need a variety of tools and accessories, including painting and sealing accessories.
4 Build the platform base using a 38X184 or 38X235 wood board. Take things like floor heaters, outlets, and the height of your mattress into account when deciding your platform height.
5 Cut the woods to the correct size for the base and arrange them into a rectangle. Measure and cut 2 or 3 cross pieces, depending on base size, to fit inside the rectangle. Space the cross pieces at regular intervals.
6 Attach the base using wood screws. Drill guide holes for screws in each wood and apply carpenter's glue to the cut edges to help seal the joints. Use a square to make sure all wood is at 90° angles.
7 Place small pieces of wood in the spaces between the cross pieces and screw them into place to help stabilize the base. Fit the pieces correctly.
8 Allow time for the glue to dry. Cover the screw heads with wood putty, then paint or stain the outside of the base.
9 Mount the platform in the same way as the base, remembering that the length and width of the platform will be 30 cm longer than the base.
10 Place the platform on the base, center carefully, and screw it where the platform boards meet the base boards. Use long deck screws, remembering to drill guide holes to keep the wood from cracking.
11 Attach an MDF board to the top of the platform. Carefully apply carpenter's glue to the edges of the wood board and screw the MDF to the deck, taking care that the screws do not pinch the MDF.
12 Attach edge tape to the MDF board to hide unfinished edges.
13 Allow time for the glue to dry, cover the screw heads with wood putty, then stain or paint the platform.
14 Finished.
Tips
Buy a mattress that is 6 inches taller than the tallest person who will sleep on it. As people change positions during sleep, they can often be on the verge of falling off a mattress that is too small.
Ask for quality finished wood for your platform bed. Soft wood (pine) is easier to work with and can be varnished or even painted after being properly conditioned. Hard wood is more attractive, but harder to cut and drill. If you're sure of your measurements, consider having your MDF board cut out at the store or locksmith.
Notices
Never assume you know your mattress measurements. Even among standard sizes, there are some variations; if you build your deck the wrong size, it will be difficult to make a change, if not impossible.
Build your platform bed in the room where it will be used. Depending on the size and design, you may find that a platform bed built in the garage won't fit through the doors when you try to bring it into the bedroom.
Don't buy your wood the same day you plan to build your deck. Instead, buy them two weeks in advance and keep them. Do not stack the boards, but support them against a wall, placing small pieces of wood between the planks, letting the air circulate.
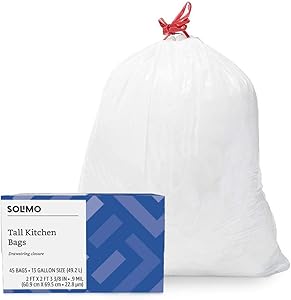
White trash bag with red drawstring closure for easy tying and carrying
Satisfaction Guarantee: We’re proud of our products. If you aren’t satisfied, we’ll refund you for any reason within a year of purchase. 1-877-485-0385
An Amazon brand
How to use the garbage bag correctly?
By separating the garbage for proper disposal, we are concerned with sending the garbage to the place where it really has to go. If we are careful to separate materials according to their raw material, this makes the work of recycling companies easier.
After cleaning the waste, it's time to choose the appropriate garbage bag for each type of material, especially if you are working in hospitals or restaurants, or even in your home, after all few residents know about conscientious disposal .
For each type of product we throw away every day, there is a type of plastic that can be used, see some examples:
1-Biodegradable waste Within this category, you can include the following types of products:
Vegetable peels;
Fruits;
Roots;
Vegetables;
Dry leaves.
As they are of vegetable origin, the most suitable is to store this product in bags that are also biodegradable, which are intended for products that must be taken to compost.
For this purpose, there are three types of plastics, including green, PLA, and starch plastic. Biodegradable waste can accumulate flies, and spread diseases, so this material must be disposed of in the right way, so as not to harm your health and the people around you.
2-Non-hazardous recyclables In this category we can add wooden sticks, cardboard, plastic bottles, glass bottles, aluminum cans, etc., which must be packed in a recycled garbage bag.
To avoid contamination, avoid the biodegradable bag, plastic has a long shelf life, but if disposed of incorrectly it can affect our food chain.
To pack sharp materials, such as broken cups, for example, the ideal is to pack with resistant material, such as cardboard, and leave it marked, warning that the material is sharp.
3-Hazardous waste These are materials that can be highly harmful to our health and the environment. There is a certain treatment and disposal, as these types of products can be flammable, corrosive, or reactive.
We can include the following products in this category:
Paint remains;
Hospital material;
Chemicals;
Fluorescent lamps;
Batteries.
We must never allow the disposal of this type of product in landfills, dumps or tap water, and even in the soil, its chemical substances can end up causing irreversible damage to nature and to human beings.
Why should we never use the inappropriate bag? Man accumulates a lot of garbage around the world every day, and many people are not aware that there are suitable bags for each type of material, as mentioned above.
Not being careful with the planet, not being careful with ourselves and our health, it is possible to research countless cases of people who are infected due to the incorrect disposal of garbage.
Turtles are the biggest victims of human irresponsibility, only the Tamar Project in Bahia has rescued several turtles that end up eating plastic that is thrown by people who go to the beaches every day.
Plastic is a very necessary material for our daily lives, but its incorrect use can harm many innocent lives, so we have to use it according to its purpose, that is, for each material a type of plastic bag.
Garbage bag and condominiums In condominiums, if there is no awareness of all residents, there may be a public health problem. First of all, it is necessary to know that it is not enough just to have resistance, to carry out the selective collection, the bag must be the right color.
See below, what are the most common colors for garbage bags, and how to apply them in your condominium:
Blue bag: is commonly used for dry garbage;
Black bag: generally suitable for organic waste;
White bag: recommended for hospitals, or environments that use biological or infectious waste.
It is essential that the manager pass this guidance on to the residents, as this facilitates the work of garbage collectors at the time of collection.
What types of bags are there? In markets and distributors we can find two models of bags, check out below which they are:
1-Line Flex It refers to lighter garbage, such as office supplies, bathrooms, etc., which do not need as much resistance to be taken away.
2-Premium Line It is used to carry heavier materials , and condominiums and large companies often use this type of bag.
The trash bag is perfect to maintain the hygiene of the environment, and the safety of everyone who frequents the place. However, we cannot forget that the materials are made from different raw materials, and for each one there is a bag model that must be used.
Conduct awareness campaigns
For those who live in condominiums, or work in companies, the fundamental thing to do is to promote disposal campaigns to reduce the impact on the environment.
Create incentive campaigns, and show residents or employees how important the garbage bag is, and why we have to use it correctly to keep the environment clean.
Give awards to employees or residents who engage in the campaign, and start using the garbage bag more often, and promote selective collection.
It all starts with the correct use of the bag, if we don't know what colors to use, how to use it, and where to put the garbage, the environment will never remain clean, it will always be full of flies, and it can still transmit diseases.
Show cases of real situations, so that people can reflect on their attitudes, especially if you are a manager or company supervisor, you can use this technique to convince your team.
Planet Earth belongs to all of us, and it is our duty to keep it clean so that other generations can enjoy the same way we are using it.
Conclusion Using the garbage bag properly is not complicated, but we have to learn what colors and where to discard each type of material, respect the environment and never throw garbage in the street or on the sidewalk.
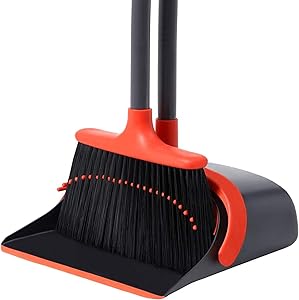
Broom and Dustpan Set, Dustpan and Broom Set, Long Handle Broom with Dustpan, Broom and Dustpan Combo for Office Home Kitchen Lobby Floor Use,Upright Standing Dustpan Broom Set
High-Quality: Broom/dustpan handle is made of high-quality stainless steel which is not easy to rust and break. Upgrade 52" long broom handle allow you to Stand upright for comfortable sweeping instead of bending over .
Efficient and Large Area Cleaning: This dustpan broom combo set is made of soft and heavy duty broom bristles which can effectively grab dust and dirt, full sized lobby broom head and large-capacity dustpan perfect for sweeping large areas.
Saving Space: Dustpan locks in open position for easy emptying , can easily dispose of dustpan's contents into the garbage. compact dustpan broom set design lets you hang the broom and dustpan together on the wall. It is a great way to save storage space .
Dustpan Teeth and Flexible Lip: Built in comb teeth for easy to scrape off the hair and rubbish of the broom silk into dustpan , no need to drag by hand, easy to clean human hair/pet hair and dust on the broom, a flexible rubber lip that conforms to surfaces so dust is not swept underneath it.
Satisfaction Service: in case any problem or you are not satisfied, please tell us without hesitation, we will try our best to solve your problem .
This is the most efficient way to sweep the floor, according to Science
If you don't like to do housework or if you don't have time for it, believe me, this story can greatly optimize your time. That's because there is a much more efficient way to sweep the floor and that few people have knowledge about, at least that's what scientists guarantee.
The big secret of cleaning, as you'll see, is strategizing. That's right, it's not enough just to pick up the broom and sweep the floor in a disorderly way.
To save effort and time, you first need to realize the environment that needs cleaning and intelligently divide it up. The place where you start sweeping the floor also counts a lot, especially when it comes to picking up the garbage, you know?
And, if you think cleaning ends there, you are mistaken (and cleaning your house very poorly). As you will see, there is no point in sweeping the floor without completing the job in order to ensure that even the smallest piles of dust disappear.
But, of course, no one needs to spend a lot of time on this kind of task. Below, in the list, is the step-by-step straight of how you should do to have a more efficient and faster cleaning.
This is the way you should sweep the floor:
1. A good broom
It all starts with choosing a good broom for the job.
It's no use picking up the one in the corner of the pantry, with its old, tangled bristles. Brooms like this only add to the effort and spread the dust even more across the floor.
2. Draw a strategy
It seems silly to say that, but having a strategy when sweeping the floor is important. This keeps you from working more.
So, choose a starting point and keep the same direction until you leave the room. Never start in the middle, as your effort to clean the whole place will be much greater.
Another good tip is never neglect the corners, so that dirt does not accumulate.
3. Divide quadrants
The best way to keep the pace of work, in fact, is to divide the room into quadrants.
From there, just start sweeping each quadrant of the corner, always bringing the dust into the middle of each section, using short, steady movements.
4. Don't be discouraged
No sweeping up all at once, taking the trash to the exit! You must finish each room by collecting the litter pile with a shovel.
And, to collect the rest of the garbage that is under the shovel, it can be easily cleaned with the help of a paper towel, ok?
5. Don't leave anything behind
As soon as you pick up the trash, make sure no dust is left behind by wiping the room with a damp cloth.
6. Ready
Once that's done, just make sure no one steps on the floor until it dries and that's it. You've just done a nice cleaning on your floor, which will stay clean for a lot longer.
And so, have you ever done something like this “technique”? Do you think it can really be valid when it comes to saving your time and making the service more efficient? Be sure to comment!
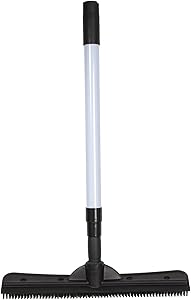
FURemover Broom, Pet Hair Removal Tool with Squeegee & Telescoping Handle That Extends from 3-5', Black & Yellow
INNOVATIVE AND VERSATILE CLEANING TOOL: Carpets, rugs, tile, windows and more – the Compact FURemover Broom gets your surfaces cleaner.
FUR REMOVER: The 100% natural rubber attracts pet hair like a magnet to easily remove fur from carpets, rugs, hardwood, and linoleum like regular brooms can never do.
BUILT IN SQUEEGEE EDGE: Cleans windows, showers, and windshields with ease. Works great to wipe away liquid spills on tile, concrete, or any hardwood surface such as patio decks or interior flooring
TELESCOPIC HANDLE: Easily adjust the handle length to suit any user. Handle extends from 3 inches to 5 inches
SUPER EASY CLEANUP: Simply wash away excess cat hair and dog hair on the rubber broom bristles by using soapy water to sanitize and renew. Natural rubber is easy to clean and requires little maintenance.
Included Components: Pole, Broomhead
How to get your pet's smell and fur out of your home
Animals are unanimous when it comes to companionship and cuteness, especially when it comes to dogs and cats. But having a pet , in addition to the benefits that everyone knows, can be a lot of work. The daily contact calls for some special care so that everyday problems do not appear. Quite common in everyday life, two of them are: the bad smell and the amount of hair that pets leave around the house.
Pet care at home
Here are some simple tips to remove the smell and hair left by your pet at home.
Take care of your dog and cat's hygiene To keep your house organized, the first step is to keep your pets clean. Contrary to popular belief, the smells that animals leave around the house come from themselves, which is why it is so important to regularly bathe your dog and cat.
Combing them frequently is a benefit for us and for them, as the hairs don't stick and fall out as much. In addition, the hygiene of other parts of the body, such as the mouth and ears, are essential for your pet's health.
sweep, vacuum and circulate There are 3 verbs that every pet owner should know. This trio simultaneously helps with both problems, as sweeping the floor causes the hair to spread less and, consequently, the smell. The most suitable brooms are rubber ones, as they create static electricity that makes the hairs to be extracted more easily.
Vacuuming furniture, rugs, carpets, among other things, helps to reduce dust and also to reach the hair that collects in the corners. Opening the windows is a simple movement that initiates a flow of air in the environment, alleviating the odor of animals (which are even more intense in winter).
Pet care at home
Use the right products There are numerous products on the market that combat the two problems mentioned in the post, but only a few of them are really effective. To ensure the quality of the merchandise, it is recommended to test it before distributing it throughout the house. Also check for proper use of it: whether it is for the floor, rug, or other purposes.
Many people tend to use homemade mixtures that, combined with everyday substances, do the same job as traditional products found in commerce. The tip is, for both the products and the solutions, to use them with care and moderation, as no one wants a house that is clean and, at the same time, stained.
at washing time Curtains, pillows, rugs and other household items smell like your pet even if you don't want to. Their contact with these objects leaves a characteristic odor, which can also be felt in your pet's bed and blankets. It is important to keep these items always clean, as in addition to reducing the smell, it also prevents the accumulation of dust, bacteria and hair, which are concentrated in your animal's resting place.
Training Your life can be simpler if your partner knows what he can and cannot do. That's why it's important that you teach your pet some ways, especially with regard to the place of needs and where he should or shouldn't be.
Getting your pet used, for example, to sleeping in the same place and not climbing on furniture, prevents its fur from spreading around the house. Instructing him to always go back to the same place to pee prevents the odor from taking hold throughout the house. If this is not possible, there are products on the market, such as Pipi Dog or hygienic mats , which encourage animals to take care of their needs in the chosen place and help you to keep the environment cleaner and more fragrant.
Pet care at homeAlso check out this article about pets in the apartment. Homemade tricks to remove the smell of urine: 1. Use a paper towel to soak up the pee. 2. Mix a pint of water, lemon juice and a spoonful of baking soda or alcohol vinegar. 3. Dip in a cloth and wipe on the spot. 4. Apply another damp cloth to rinse.
Tip to remove the smell of carpet and sofa: 1. Mix warm water, vinegar and baking soda. 2. Place in a spray bottle and rub over affected surfaces. 3. Vacuum the rug and sofa.
How to remove the smell from the floor in your home or apartment: At Home 1. Make a solution of alcohol, water and disinfectant. 2. Soak a cloth and wipe the floor.
From the backyard 1. Wash the floor with detergent and water. 2. Repeat the same process at home.
How to remove the smell of fabrics: 1. Mix a liter of water with half a cup of vinegar, a tablespoon of baking soda, ¼ cup of alcohol and a tablespoon of fabric softener. 2. Spray on fabrics and clothing. 3. Wash normally.
To remove hair from clothing or fabric: Adhesive Roller 1. Purchase an Adhesive Roller (contains an adhesive material that, upon contact with the surface, adheres the hairs to the roller). 2. Iron your clothes from top to bottom.
Masking Tape 1. Wrap the tape around your hand, glue side out. 2. Rub over fabric. Tissue or moistened cloth: 1. Get a tissue, paper towel or cloth. 2. Wet it with water. 3. Pass over clothing and repeat the movement, always in the same direction.
Any tip that helps to solve these problems is always welcome and, therefore, we have separated a Vine from Purina , a company that produces animal feed, which helps you and does not require many materials: just a rubber glove is enough to remove the hair from her pussy from the pillow. The Lopes adds: gloves that have texture are even more efficient, especially if you add a little water in them!
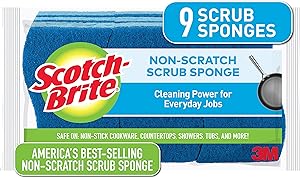
Safe on non-stick cookware, countertops, showers and tubs
Scrubbing fibers made from 100% recycled content
Selling scrub sponge brand
Long-lasting and durable
Clean in the dishwasher and reuse
Available in multiple pack sizes
Look for Scotch-Brite Extreme, Heavy Duty, and Gentle Scrub Sponges, too
KITCHEN SPONGES: HOW TO CORRECTLY USE THEM TO WASH DISHES
For many people, the worst housework is washing the dishes . To make this moment easier, TudoGostoso's blog has already published some articles with amazing tips for you to wash the dishes faster and 3 tips to clean a burnt pan . Today we are going to talk about kitchen sponges and give some tips for washing dishes properly . Check out!
Kitchen sponges: see how to use it correctly
What is each side of the sponge for? Most sponges have two sides: the green side, which is an abrasive fiber, and the yellow side, which is supersoft foam. And know: each one has a purpose. Used incorrectly, they can scratch your household items and even damage them. See what they are for:
Green side: Use the green side to clean utensils that are very dirty, such as cutlery, tins, grills, and barbecue utensils . Avoid using in non-stick pans and glass jars. By no means use it on porcelain with painted decorations, as it can even deform the paintings. For these cases, it is recommended to use only a damp, degreasing cloth .
Yellow side: Use the soft side of the sponge for the rest of utensils such as glass cups, stainless steel pans, non-stick pans and plastic containers.
Different kitchen sponges In addition to the traditional kitchen sponge, you can also find other types of sponge on the market. Check out some of the models below:
Steel wool: One of the biggest mistakes is using steel wool to clean food crusted pans. For these cases, the best thing to do is to soak the pan for a while and then try to wash it with a common sponge. Steel wool should be reserved for cleaning resistant products such as barbecue grills and skewers. It is also widely used outside the kitchen to clean and remove excess materials such as plaster.
Sponge saves nails: there is a model of the traditional sponge made to protect the nails. It's really horrible that I just made my nails look nice and, on the first wash of dishes, they get all ugly and peeling. To save people from this problem, it is possible to find a sponge with a perfect fit for your fingers.
Soft sponge : This sponge is designed to be used on delicate surfaces such as stove glass and kitchen tiles. Unlike the traditional one, it doesn't have the green side of abrasive tape.
Tips for washing dishes The sponge absorbs a lot of fat when washing the dishes, so let's give you 2 tips that will help you a lot at this time!
1) Always wash glasses first They tend to be less greasy than dishes and pans full of food. If you leave it to wash for last, they will have all the fat in the food. An extra tip is to use a sponge just for cups.
2) Wash the sponge Even if you change your sponge weekly, it should be washed every time you use it. To do this, add a little detergent and rub one end into the other to remove excess grease.
Mr. Clean Magic Eraser Extra Durable, Cleaning Pads with Durafoam, 10 Count
Mr. Clean Magic Eraser extra durable scrubber is 4x stronger with DURAFOAM cleaning performance vs. The leading all-purpose bleach Spray
This cleaning scrubber is tough on dirt, all around the house! Surface cleaner, wall cleaner, bathtub cleaner, bathroom cleaner, oven door cleaner, erases marks on light switches, doors & much more!
The Mr. Clean Magic Eraser provides a powerful clean with water alone.
No harsh chemicals added.
Magic Erasers are also available in extra durable, kitchen, and original forms
Find out how to clean tile floors and get rid of stains
The tile floors are known to be very beautiful and easy to clean, however, it appears as a stain or dirty you need to know how to clean the tile floor and leave it as new. In this article, we'll give you tips for cleaning matte and glossy ceramics, helping you to get rid of dirt quickly and easily.
That's because the stained floor draws attention and causes that discomfort right away, even if your house is clean and scented . For this reason, the floor deserves special attention in cleaning and maintenance.
Learn how to clean matte tile floors
Remember that each type of stain needs the use of a suitable product.
Therefore, for grease or sauce stains on matte ceramic in environments such as the kitchen or service area, a homemade mixture of vinegar and water is ideal.
Therefore, make a mixture of one part vinegar to four parts of water and apply the mixture on top of the stains. Afterwards, let it act for 10 minutes and, if the stain persists, scrub with a stiff bristle brush until the stain is removed. After that, clean with water and detergent.
To clean the frosted ceramic floor in the bathroom, use a little bleach in the mixture with water and vinegar. Thus, it prevents the proliferation of fungi and bacteria, in addition to preventing mold. But remember to dry the room well.
And now, see how to clean the shiny tile floor
And when we have shiny tile floors? For stains, follow the same procedures taught for frosted ceramic in kitchens, bathrooms and service areas.
But to avoid scratching the floor when getting rid of stains, use a sponge, damp cloth, broom, or soft-bristled brush. And, do not use baking soda or abrasive products to keep the ceramic shiny and avoid scratching.
See how to remove stains and grime from ceramic floors
Do you know when day-to-day cleaning is no longer effective, and the tile floor is still dirty and grimy? Let's teach another homemade recipe to eliminate this dirt.
First, make a mixture of 1 liter of water, 200 ml of white vinegar, 1 tablespoon of baking soda and 1 tablespoon of neutral detergent. Before applying the mixture, shake it and then apply it to the stained or grimy spot.
So, use a broom or brush to scrub where it's dirtiest, or leave it on for at least 10 minutes before scrubbing. Dry with a cloth and you're done.
Learn how to routinely clean your tile floor
Routine cleaning is also preventive cleaning, as it helps to prevent the appearance of stains and grime on the floor. Now we are going to teach you how to clean the tile floor on a daily basis.
First, use a mop or sponge, cloth or soft broom to dust off the floor. Then, wipe with a damp cloth with some product indicated for your type of floor.
In short, it's simple and easy, isn't it? But it makes all the difference over the years , and tile floors will always be as good as new.
Lugar Certo is full of tips on organizing and cleaning houses and apartments, as well as decorating and DIY tips. Everything you are looking for is here.
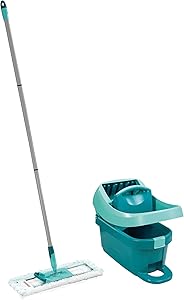
Leifheit Click System Wiper Press Profil XL, Mop and Bucket with Wringer Set Cleaning Tools, Turquoise/Silver
Cleaning has never been easier with this hassle-free Leifheit mop and bucket with wringer set.
Removable microfiber head and wringing device offers absorbency and mess-free cleaning.
Ideal for tile, hardwoods, laminates, and other smooth flooring options.
Crafted from steel and durable plastic to ensure stability and reliability through regular use.
Measurements- Handle 57.5" H, Mop Head 18" Long, Bucket 15.25" H x 8" L x 11" W
How to Clean Dirty Floors: Step by Step for Each Type
Your floor is very dirty and you don't know what else to do? Dr. Lava Tudo has separated tips on how to clean grimy floors so that you can get rid of that bothersome dirt once and for all.
After all, there's nothing better than arriving home and finding everything clean, shining with that clean smell . However, even keeping a routine of cleaning the house daily , it is common to find stains resulting from the day to day.
Arriving with a dirty foot from the street, dropping certain substances, accumulating fat… the list is endless. The floor is one of the most affected areas and it can beat that despair: how to clean dirty floor?
Importance of cleaning the floor correctly
how to clean grimy floor
Your floor may be clean, but it may not look clean. This situation is very common when he is dirty. But, the importance of solving this problem is not just aesthetic.
A well-kept floor is the guarantee that your porcelain , parquet or any other material that covers your floor has a long life, that the finish remains in perfect condition and that it doesn't need to be replaced anytime soon.
It is common for centuries-old houses to draw attention for their well-kept floors. It is worth remembering that several domestic workers were dedicated to this on a daily basis, a time that is no longer common nowadays. Therefore, check out practical tips that will facilitate this care in your home!
What is the best product for cleaning grimy floors?
If you're reading our article, you probably have this question. Did we get it right? Homemade products offer good value for money. We are talking about: detergent, vinegar, bicarbonate, alcohol, among others. So read on and discover homemade tips to end this headache using these items.
How to clean grimy floors with baking soda?
As an alternative to traditional cleaning products, baking soda has a lot of potential to make your grimy floor shine again. Learn this tip and test it at home!
Then mix the baking soda with a little hydrogen peroxide. Leave on for a few minutes and then scrub away the dirt with a soft brush or clean microfiber cloth. Then just remove the excess. And don't forget to test it first on a small area of your floor, huh?!
How to remove stains on the floor?
Stains on the floor always look bad. But rest assured, we brought a tip that solves most cases, using only 2 ingredients: salt and lemon.
Squeeze the lemon onto the floor until the stain is completely covered. Then sprinkle some salt on it. Let the 2 products act for a few minutes. Now, with a soft brush or sponge, gently rub the spot. Finally, wipe off with a dry cloth and remove the excess.
Miraculous Dirty Floor Cleaner Recipe
If you were looking for a miracle recipe for the best cleaning of grimy floors, you've just found it! Oh, and don't worry! All the ingredients are probably already in your house. Let's go to the list of materials needed:
1 grater;
1 bowl;
1 liter of hot water;
soap shavings;
200 ml of fabric softener;
100 ml of alcohol;
200 ml of vinegar.
Procedures:
Take the soaps, preferably the ones that are old, that you no longer use, and rub them on the grater. Put the zest into the bowl and pour in hot water until it dissolves. Add the other ingredients and mix well until smooth. If the floor cleaner has become too concentrated, add water. Store in a plastic bottle so you can use it whenever you need it!
To use the product, dilute 2 scoops of it in a bucket of water. Moisten a clean cloth in the mixture, apply to the floor, making gentle movements and spreading the mixture. Finally, remove the excess.
How to clean grimy floors with baking soda and vinegar?
Are you familiar with the dynamic duo vinegar and bicarbonate? These 2 products together have a huge cleaning potential ! And when we talk about cleaning grimy floors it couldn't be different. See, then, how to make this homemade mix:
You will need:
1 plastic pot;
400 ml of water;
5 tablespoons of neutral detergent;
100 ml of vinegar;
50 ml of alcohol;
2 tablespoons of baking soda;
1 tablespoon of salt.
Procedures:
Put all the ingredients in the plastic pot and mix until it forms a very homogeneous mixture. Apply to the floor, testing in a small area beforehand, and let it work for a few minutes.
Rub the product with a soft microfiber cloth all over the floor, making gentle movements. Finally, rinse and remove excess mixture.
Tips on how to clean grimy floors of different types
Each floor requires a different type of cleaning. Passing a broom and a damp cloth is almost universal, but some care is needed so that a certain type of floor is not spoiled and maintain its beauty, without soiling.
Some people have a habit of mixing cleaning products such as chlorine, bleach and disinfectants and soaking the floor. This can be fatal to the floor and make it more easily damaged.
In general, always avoid very strong products and follow the instructions for use on the packaging. Here's what not to do when cleaning your floor.
Also, check out the tips below on how to clean grimy floors properly.
Homemade product to clean grimy ceramics
How to clean grimy ceramic flooring
There are specific cleaning products to be applied to ceramics and porcelain. The tip is to read the labels and look for the one that best suits your situation. This floor allows the use of specific cleaning products. In rooms such as the bathroom and kitchen, where the presence of grease is a constant, degreasing and disinfectant mixtures are ideal.
To avoid grimy floors, thorough cleaning of the floor is important. To do this, mix detergent and water and apply to the floor with a broom. It is important to rub on the grout, as they are more prone to soiling. Then wipe off the solution with a wet cloth and dry the floor with a damp cloth.
How to clean wooden flooring
how to clean grimy wood floor
The wood brings a sense of warmth to the house, but it requires constant care and careful attention. Whether hardwood, hardwood or parquet, none of them can have much contact with moisture, as this spoils the wood, leaves it rotten and has many stains.
Therefore, cleaning should be done more often throughout the week, using a broom with soft bristles or a vacuum cleaner. Avoid piassava brooms!
After sweeping the environment, wipe with a damp cloth with water. Once a week you can dilute a little disinfectant specific to the area in the water. This will allow for deeper cleaning.
In both cases, the important thing is to dry well. So use two cloths. One wet to clean and one dry to remove moisture. This is the key to cleaning and not ruining the floor!
How to Clean Dirty Stone Floors
how to clean grimy stone floor
When the coating is made of stone, the surface is therefore more porous. If the stone is light, it's much easier for it to get grimy and lose all the beauty and class that this floor can give your home.
Using only water and neutral detergent, try to brush with a material with more rigid bristles, this way you can remove dirt that accumulates without using aggressive products.
Marble floor cleaning product how to clean grimy marble floor
Overall this is an easy-to-clean floor, although it is a porous material. Strong or greasy products should be avoided as they will keep the grimy from coming off. In fact, they can contribute to dirtying.
If you want to clean your marble, and learn how to clean white floors in general, the ideal solution is to put a spoonful of coconut detergent in a liter of water, use a cloth with the mixture and then another to dry.
From time to time, it's worth calling a professional company so that you can take care not to get dirty, especially if the floor is white !
How to Clean Dirty Laminate Flooring
how to clean grimy laminate flooring
Laminate flooring can be the terror for those who don't want to see any kind of stain on the floor. Lamination facilitates the accumulation of fat and the fixation of liquids that fall on it. This is the kind of floor where just a damp cloth will not solve the situation.
A tip for these cases is to mix vinegar, alcohol and water in a spray bottle, adding drops of detergent. After gathering these materials, just sprinkle them on the floor and wipe them with a microfiber cloth. This cloth is ideal for its softness.
How to clean non-slip grimy floor
First of all, avoid using bleach to clean the non-slip floor so that it is not damaged.
Remove excess dust and coarser dirt with a broom. Now mix in a bucket of water, a little disinfectant and mild detergent. Apply over the entire surface of the floor and let it act for a few minutes.
Use a broom in a circular motion to remove the remaining dirt and rinse off the excess mixture.
How to get the grime off the bathroom floor?
To learn how to clean grimy bathroom flooring and get it clean again, you will need:
2 liters of water;
200 ml of liquid soap or neutral detergent;
Essence to taste;
250 ml of bleach.
Mix all ingredients well and apply on the bathroom floor. If necessary, also apply on tiles. Scrub well with a broom and don't forget about the corners or grouts where you can use an old toothbrush. Wait for about 15 minutes before rinsing off all the excess mixture and you're done!
Take special care when handling bleach, which can stain clothes. Also, don't forget to wear gloves to avoid the strong smell this product can leave on your skin.
professional floor cleaning
After all these tips, you already know how to clean grimy floors. However, you may have noticed that it is not easy and that this type of cleaning deserves dedication.
Therefore, it is worth considering a professional cleaning service from a company that specializes in the service. In addition to saving your work, you save time and are sure that the result will be as expected. Dr. Lava Tudo, for example, has the ideal solution for each type of floor.
The guarantee of a better job is due to the use of innovative and specific machinery and products for each purpose. The company assesses the situation and performs the ideal procedure, in the shortest possible time.
When deciding to hire a company, instead of risking doing it yourself in the few moments of free time, you guarantee the hygiene of your home and you are sure that the products and care applied to your floor are the best to prolong the result. , without interfering with its useful life.