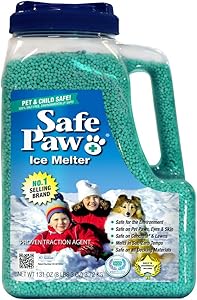
Safe Paw, Child Plant Dog Paw & Pet Safe Ice Melt -8lb, 100% Salt/Chloride Free -Non-Toxic, Vet Approved, No Concrete Damage, Fast Acting Formula, Last 3X Longer
- PEOPLE & PET SAFE - Imagine an ice melt you can put down and never worry about. It won’t harm animals or children, and it won’t damage your property. That’s Safe Paw. Unlike anything else on the market, Safe Paw can change how winter affects our planet. Your grass, plants, and foliage are safe! Safe on eyes, skin and paws. It’s safe around and if ingested. Best of all: 100% salt & chloride free.
- MELT AT LOW TEMPERATURES - Guaranteed to melt at low temperatures (-2°F), it’s non-toxic and biodegradable
- VETERINARIAN RECOMMENDED FORMULA - Unlike other Pet Safe Ice Melts, Safe Paw's patented formula is guaranteed to not hurt people, pets, and the planet.
- NON-CORROSIVE & LONG SHELF LIFE - It’s non corrosive and non-conductive. No damage to delicate machinery or worry about short circuits. Get instant melting without worrying about property damage. Concentrated formula assures long-term, maximum effectiveness from season to season.
- EXCELLENT SPREAD RATE - Allows a typical back yard to be treated to make a safe winter play land for pets and people. Can be used for a long time on small and large areas.

HOW TO MELT ICE FROM THE GROUND: HOMEMADE TRICKS
One of the problems that arise after a great snowfall, such as that experienced in Spain with the storm Filomena, is that any snow-covered surface later becomes a dangerous ice rink, so we must try to remove that ice as soon as possible. Let's see then how to melt the ice from the ground , with some of the best homemade tricks .
One of the best tricks to melt ice is salt , but if we just add this, we will get little. The best thing then is to resort to these other tricks that we list.
SALT AND WATER TO MELT ICE ON THE GROUND
How to melt ice from the ground tricks
How do we say, salt is a great remedy when it comes to snow and ice. First, because if we put salt on the ground before it snows, we will ensure that it does not set and with that it does not end up accumulating and second, if we put salt on the ice already formed, we will avoid the dreaded slips and falls. But salt also serves to melt that same ice and how? very easy mixing with water .
Therefore, if you want to melt the ice accumulated on the floor of your terrace, at the entrance of your house, in the area where you have parked or in a specific area over which you must pass, you just have to take a large container and add a good quantity of salt and a liter or two of water . We mix well until the salt has dissolved in the water and then we pour over the ice . You will see that in a matter of seconds it will have melted.
DISH SOAP AND ALCOHOL TO MELT ICE ON THE FLOOR
How to melt ground ice
Another of the great home remedies or tricks that we have at our disposal to melt that layer of ice that has formed on the ground after it has snowed, is to take a container and pour six drops of soap or dish detergent into it, 1 / 4 cup of isopropyl alcohol and 2.5 liters of hot water . You mix well and then you put it on the ground or on the sidewalk. You will see how bubbles begin to form immediately and how almost by magic, the ice melts. It will also be good to have a shovel in hand to break up the pieces of ice that may be a little thicker or those that have not completely melted since the hot water may have already cooled when in contact with it. ice.
HOT WATER TO MELT ICE ON THE GROUND
How to melt ice from the ground
Although mixing the hot water with the salt or with the ingredients mentioned above will be much more effective, in case you do not have any of the above, you can always resort to just pouring boiling water over the ice . This can in fact be a simple remedy in those cases in which we still have a small piece of ice left and you know that with hot water you will be able to finish melting it. It will also be good that once you add the water, you have a shovel at hand to crush the ice and with it, that it finishes breaking and with that it will be much easier for you to get it to melt completely.
PICKLE JUICE TO MELT ICE ON THE GROUND
How to melt ground ice pickles
A trick that may surprise you but that is completely effective is to pour the hot juice of some pickles on the ice, since the juice that is obtained by boiling some pickles in hot water is very salty, which helps in erosion. of ice. Now that yes, once you pour the hot juice on the ice, it will be good to have the shovel at hand to collect the remains that begin to dissolve and remove them. Also, do not let juice remain on the floor (you can remove it with a towel), because if it is still very cold or at night it freezes, you will see how much ice will have formed again on the floor.
BEET JUICE TO MELT ICE OFF THE GROUND
How to melt ice from the ground beet juice
Another remedy that may sound strange, but beet juice can also help defrost ice on the ground and sidewalks. A trick that is used a lot in the United States, but little by little it seems that it has "viralized" and more and more, are people who are surprised to discover that it is really effective.
Of course, the first thing we have to do is treat the soil or steel it with brine (salt water), then apply the beet juice . Beet juice lowers the freezing temperature of the brine, so the salt can melt ice in colder weather than it could otherwise. That is, if you live in an area where the temperatures are really low, this will undoubtedly be a great remedy.
So to be able to melt all the ice on the ground that has accumulated for example at the entrance of your house, with brine and beet juice, dissolve 1 1/2 cups of salt in 4 liters of water. Then pour in 240 milliliters of beet juice.
You have to keep in mind that, yes, beet juice can leave stains on lighter surfaces, such as concrete. Because brine is even more corrosive than rock salt, limit the amount you apply in your driveway or anywhere else you use this remedy.
If you can't get the ingredients for any of these listed tricks, try sprinkling fireplace ash, coffee grounds, or sand on icy surfaces. These materials do not melt ice directly, but their dark color allows them to absorb heat, which helps accelerate melting. They will also provide some traction.
Melting ice on steps, sidewalk and driveway doesn't have to mean investing in expensive commercial de-icer. With the ingredients that we have listed and that many of us can have at home, it will be possible to get the ice melt to clean our paved surfaces quickly and economically.