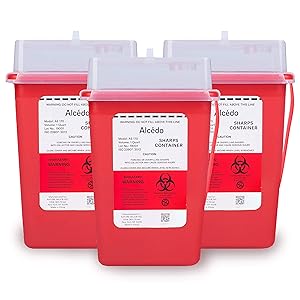
Alcedo Sharps Container for Home Use and Professional 1 Quart (3-Pack) | Biohazard Needle and Syringe Disposal | Small Portable Container for Travel
DURABLE AND HIGH QUALITY – The durable and high-quality sharps container is constructed of puncture and impact resistant material.
PERFECT FOR PROFESSIONAL AND HOME USE – The sharps container is ideal for use in hospitals, labs, and clinics or at home by diabetics who need a small transportable container to dispose of biohazard needles and syringes waste.
LIGHT WEIGHT AND COMPACT – The sturdy light-weight container is perfect for phlebotomists (blood draw professionals) or others who need a small portable sharps container. Use it at home, at work, anywhere you go.
EASY TO USE – The handle on the container allows easy carrying. Clear lid allows a view of the fill level, temporary closure for safety, and snap locks for final disposal.
STRICT QUALITY STANDARD – Each container is labeled with usage instructions to dispose of medical waste safely and responsibly. Meets OSHA and EPA requirements for local biohazard waste collection.
Handling needles and sharps
Send this page to a friend To print Facebook Twitter Pinterest Sharps are medical devices such as needles, scalpels, and other tools that cut or penetrate the skin. Learning to handle these objects safely is important to avoid accidental cuts and needle sticks .
Injury prevention Before using a sharp object such as a needle or scalpel, make sure you have all the items you need on hand. This includes items such as bandages, gauze pads, and alcohol wipes.
Also, know where the sharps disposal container is. Check that there is enough space in the container to accommodate the object. It should not be more than two-thirds full.
Some needles have a protective device, such as a cover, case, or blunt tip, that you actuate after removing the needle from the person. This allows you to safely handle the needle without the risk of exposure to blood or body fluids. If you are using this type of needle, make sure you know how it works before using it.
When working with sharps, follow these guidelines:
DO NOT uncover or unpack the sharp object until it is time to use it.
Keep the object pointed away from you and other people at all times.
Never recap or bend a sharp object.
Keep your fingers away from the tip of the object.
If the item is reusable, put it in a secure, closed container after use.
Never pass a sharp object to someone or put it on a tray for someone else to pick it up.
Let the people you work with know when you plan to drop off the item or pick it up.
Sharps disposal
Verify that the waste container is made to dispose of sharps. Replace containers when they are two-thirds full.
Other important tips include:
Never put your fingers in the sharps container.
If the needle has tubes attached to it, hold both the needle and tubes when putting them into the sharps container.
Sharps containers should be at eye level and within reach.
If a needle sticks out of the container, do not push it with your hands. Call to have the container removed. Or a trained person can use tweezers to push it back into the container.
If you find a sharp object uncovered outside a waste container, it is safe to pick it up only if you can grasp the end that is not sharp. If you can't, use tweezers to pick it up and throw it away.
Sanitary Practices for Disposable Syringes
Most immunization programs in the Americas use disposable syringes to deliver vaccines. During natural disasters, such as that caused by Hurricane Mitch, all health personnel (international volunteers and national personnel) must ensure that the PAHO / WHO guidelines are followed, to guarantee the sanitary use of disposable injection equipment and that the Appropriate equipment is available to collect and dispose of contaminated syringes and needles. This especially applies when normal methods of operation cannot be followed, either because the collection of medical waste has been interrupted, or because the facilities where it must be properly destroyed are not working.
PAHO / WHO recommends the following standards:
The "self-destructing" syringes [a] are the preferred type of disposable injections with which vaccines are given and the material of choice for carrying out immunization campaigns in large numbers of people.
Healthcare workers should not refuse needles.
Used disposable syringes should be collected in "Safety Boxes", which are puncture resistant containers designed to collect injection equipment.
The "Safety Boxes" or similar containers where contaminated inoculation equipment is collected, must be transported with great care to an incineration site.
If incineration facilities or sites do not exist or are not in service, "Safety Boxes" can be burned in a pit or something similar, for example a metal barrel. Burned needles can be safely buried or disposed of with other trash.
Failure to comply with these standards can put public health at risk as the inoculation material could be reused exposing people to disease and death.
Healthcare workers who refuse needles risk infectious diseases from accidental needle sticks. The public could be accidentally stuck if needles and syringes are not properly destroyed.
Sharps Container for Home Use and Professional 1 Quart (3-Pack) by Alcedo | Biohazard Needle and Syringe Disposal | Small Portable Container for Travel
DURABLE AND HIGH QUALITY – The durable and high-quality sharps container is constructed of puncture and impact resistant material.
PERFECT FOR PROFESSIONAL AND HOME USE – The sharps container is ideal for use in hospitals, labs, and clinics or at home by diabetics who need a small transportable container to dispose of biohazard needles and syringes waste.
LIGHT WEIGHT AND COMPACT – The sturdy light-weight container is perfect for phlebotomists (blood draw professionals) or others who need a small portable sharps container. Use it at home, at work, anywhere you go.
EASY TO USE – The handle on the container allows easy carrying. Clear lid allows a view of the fill level, temporary closure for safety, and snap locks for final disposal.
STRICT QUALITY STANDARD – Each container is labeled with usage instructions to dispose of medical waste safely and responsibly. Meets OSHA and EPA requirements for local biohazard waste collection.
NEEDLE DESTROYERS
Destroy all contamination hazards. Wherever there is a used needle, there is a risk of infection; By destroying it, all transmission risks are eliminated.
The EMISON portable needle destroyer is the ultimate means of eliminating the risks of contamination by hypodermic needles providing total safety. Its light weight and small dimensions facilitate its transport, and once the syringe is used, the needle can be destroyed directly in home treatments.
It totally destroys the needles by calcining them through the passage of a low voltage and high intensity electric current. A small receptacle and a high temperature of1400 ° C they make it possible to instantly incinerate the used needle and with it any chance of contamination.
It eliminates the risks of covering the needles and offers more guarantees to avoid contagion risks than the use of containers. Its operation, very simple, is limited to inserting the needle into the device, without even removing it from the syringe, leaving it completely disintegrated in less than a second.
Its small weight and size make it easily drinkable. Connected to the 230 Volt electrical network, it allows working without interruption.
Combustion residues are collected in the inner tank, easily accessible for cleaning. Its capacity is 4,000 needles destroyed
Completely sure its price is 375 Euros. The delivery time is immediate, except for sale.
The cabinet EMISON Needle Destroyer is the ultimate means of eliminating the risks of contagion from hypodermic needles, acupuncture needles, tattoos, scalpels or lancets, providing total safety.
It totally destroys the needles by calcining them through the passage of a low voltage and high intensity electric current, provided by a robust transformer. It offers more guarantees than the use of containers.
Connected to the 230 Volt 50 Hz electrical network, it allows to incinerate about 4 elements per minute without risk of overheating, and its price is 780 Euros.
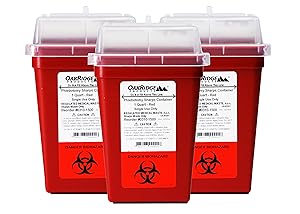
OakRidge Products 1 Quart Size (Pack of 3) Sharps Disposal Container - Approved for Home and Professional use
GREAT FOR HOME-. Ideal for diabetics. Fits perfectly on bathroom countertops. Keeps contaminated waste safe from pets and small children - Safe disposal of needles, needles with syringes, pen needles, lancets, blades (razors, scalpels, etc.
GREAT FOR BUSINESS - Designed for use by phlebotomists or others who need a small transportable container. The vertical drop maximizes useable container volume while providing a space saving option for totes, carts and work spaces.
LIGHTWEIGHT AND COMPACT - Perfect for traveling and on the go use. Fits easily into a medium sized purse backpack, gym bag, or luggage. Clear lid allows a view of the fill level, temporary closure for safety, and snap locks for final disposal.
GOLD STANDARD in Sharps Containers - this the SAME product we sell to Doctors and Hospitals all over the country. We are a US manufacturer. PRODUCT DIMENSIONS: 4"L X 4"W X 6.25" H
COMPARE FIRST - our competitor's "1 quart" products look very similar but they are actually about 20% smaller than ours. Oakridge would never mislead our customers. Our product is really a full 1 quart in size.
Sharps Disposal Containers
FDA Approved Sharps Containers The FDA recommends that used needles and other sharps be placed immediately in FDA-approved sharps disposal containers. FDA-approved sharps disposal containers are generally available at pharmacies, medical supply companies, healthcare providers, and online .
The FDA has evaluated the safety and effectiveness of these containers and has approved their use by healthcare professionals and the general public to help reduce the risk of injuries and infections from sharps.
FDA-approved sharps disposal containers are made of rigid plastic and have a line marking when they should be considered full, which means it is time to dispose of the container. Below are examples of FDA approved sharps containers:
There are FDA approved sharps containers available in a variety of sizes, including some small ones that can be taken on the road and used when you are away from home.
Safe alternative to FDA approved containers homemade containerIf an FDA-approved container is not available, guidelines from some organizations and communities recommend the use of a sturdy plastic homemade container as an alternative. The container should be leak-proof, stand upright during use, and have a tight, puncture-resistant lid, for example a plastic detergent container.
Homemade containers should have the same basic features as a good sharps disposal container:
Made of heavy duty plastic
Can be closed with a tight, puncture-resistant lid so sharps can't get out
Stays upright and stable during use
Leak proof
With appropriate labels to warn of hazardous waste inside
When your container is 3/4 full, follow your community guidelines for proper disposal.
What to do if you can't get a sharps disposal container The safest way to dispose of a used needle is to immediately place it in a sharps disposal container to reduce the risk of needle sticks, cuts, and puncture wounds caused by loose sharps. If you cannot immediately find a sharps disposal container, you may need to recap the needle or use a needle cutter until you can dispose of the sharps in an appropriate container. Never throw loose needles or other sharp objects into trash cans or recycling bins, and never flush them down the toilet.
Needle cutters
There are products that serve to safely store used needles, both at home and when traveling. These devices are generally available for sale in pharmacies and medical supply stores.
A needle cutter automatically stores cut needles when a disposal container is not available. The remainder of the syringe, after the needle is cut, can be placed in a homemade container or a sharps container. When the needle cutter is full, empty the needles into a household container or sharps container and dispose of it according to your state regulations.
needle destroying deviceA needle destroying device is a small, portable machine that incinerates needles, melting them into pellets the size of pellets. Once the needle is destroyed, the remainder of the syringe and molten metal can be safely disposed of with standard (not recycling) waste. These devices, previously only used in healthcare facilities, are now available for use at home.
Before using any of the above procedures, check your community guidelines for acceptable sharps disposal methods.
When recapping If you need to recap the needle, do not bend or break the needle and never remove a hypodermic needle from the syringe by hand. Doing so could lead to punctures, cuts, or puncture wounds. To replace the cap you must use a mechanical device or the one-handed technique (see step-by-step instructions below).
Needles that have been capped should be placed in a waste container at the earliest opportunity.
One-handed needle cover method :
Step 1: Place the lid on a flat surface, such as a table or counter, next to something firm against which you can "push" it.
Step 2: Holding the syringe with the needle in one hand, slide the needle into the cap without using the other hand
Step 3: Using only one hand, push the needle with the cap against a firm object to "seat" the cap firmly on the needle.
Dos and Don'ts for Proper Sharps Disposal :
DO put used needles and other sharps in a sharps disposal container right away to reduce the risk of needle sticks, cuts, and puncture wounds from loose sharps.
DO use an FDA approved sharps disposal container, if possible. If an FDA-approved container is not available, guidelines from some organizations and communities recommend the use of a sturdy plastic homemade container as an alternative.
DO make sure that using a homemade container has the basic characteristics of a good disposal container.
DO carry a portable sharps container with you when traveling.
DO follow your community guidelines for disposing of your sharps container.
DO call your local public health or garbage collection department (listed in the city or county government section of your phone book) to find out about sharps disposal programs in your region.
YES ask your healthcare provider, veterinarian, hospital or pharmacist
where and how you can get an FDA approved sharps disposal container,
whether they can receive your used needles and other sharps, or
if you know of other sharps disposal programs nearby.
DO keep all sharps disposal containers out of the reach of children and pets.
DO seal your sharps containers before disposing of them, label them appropriately and consult your community guidelines for proper disposal.
DO ask your health or drug insurance provider if they cover sharps disposal containers.
DO ask the manufacturer of your pharmaceutical products that require needles or other sharps if they offer their patients free sharps disposal containers.
DO report problems related to sharps disposal containers.
DO NOT throw loose needles or other sharp objects in the trash.
DO NOT flush needles or other sharp objects down the toilet.
DO NOT put needles or other sharps in the recycling bin - they are not recyclable.
DO NOT try to remove, bend, break, or recap needles that someone else has used. Doing so can lead to an accidental puncture, which can cause serious infections.
DO NOT try to remove the needle without a needle cutter, as the needle may fall, get thrown, or become misplaced and injure someone.
Care Touch Multi Colored Twist Top Lancets 30 Gauge, 300 Lancets
MULTI COLORED - Why not make blood testing more fun? Great for kids to help ease the discomfort by making it more exciting. Compares to Microlet Lancets
TRI-BEVELED TIP - The lancets triple sharpened needles, minimizes skin trauma and discomfort
GAMMA STERILIZED - The Care Touch Lancets are gamma sterilized for a long shelf life
PAIR WITH CARE TOUCH LANCING DEVICE - Our lancing device is a best seller. It has 10 depths to choose from and is good for finger and alternate site testing. These lancets are compatible with most lancing devices. It is generic for Microlet Lancets
CARE TOUCH DIABETIC SUPPLIES - Check out our alcohol pads, pen needles, testing kits and more for all your diabetic supplies.
Importance of capillary blood sampling
Capillary blood sampling and its relevance to obtain correct hemoglobin measurements
Capillary blood sampling (fingerstick) is being increasingly used around the world due to the increasing availability of portable hemoglobin analyzers at the point of patient care.
Considering that 25% of the world population is affected by anemia, with a much higher prevalence in developing countries, hemoglobin analysis is the most frequently performed test in hematology. This test is also used routinely by blood collection services (blood banks) to ensure safe donation. At the same time, hemoglobin (Hb) values are among the most likely to be affected by pre-analytical errors, so to avoid generating misleading hemoglobin results, health personnel who draw blood must adhere to blood collection techniques. Strict and standardized blood tests to ensure accurate and consistent results that are comparable to laboratory techniques.
Why is it important to have good capillary blood collection procedures for hemoglobin testing?
The use of capillary sampling is increasing worldwide as the use of diagnostic tests develops at the point of patient care
Hemoglobin is the most frequently performed test in point-of-care hematology
Hemoglobin results are prone to being affected by pre-test errors
Taking capillary blood sample performed incorrectly is the most common reason leading to inaccurate results hemoglobin at the point of patient care
Understand the common causes of pre-analytical errors
The variability in reported hemoglobin values can be caused by a series of physiological factors such as dehydration, smoking habits or altitude, and can be significantly affected by pre-analytical errors arising due to an incorrect capillary blood collection technique. Here are some of the most common sources of error that healthcare personnel should be aware of.
Correct lancet option : The lancet must be of minimum dimensions so that when performing a puncture it guarantees an adequate blood flow. For adults, a depth of 1.85 to 2.25 mm is recommended. The thickness of the lancets should be 21G , which guarantees a blood volume range of 75 - 125 microliters
Correct selection of the puncture site : The middle or ring finger should be used, ideally from the non-dominant hand, as they are generally less callused and less sensitive to pain compared to the index finger or thumb. The thumb should also be avoided due to its pulse (arterial presence). In the little finger, the distance between the surface of the skin and the bone is too small. The puncture should be done slightly off-center from the central fleshy part of the fingertip, near the side where the skin is thinner with fewer nerve endings and less pain sensation, but not on one side of the finger. Selecting the correct finger and puncture site will ensure consistent good blood flow and minimize pain for the patient.
Cleaning, disinfection and drying : Cleaning and disinfection of the puncture site is essential to remove any potential contamination that could affect the test or put patient safety at risk. The puncture site should also be thoroughly dried, after cleaning, to remove any residual alcohol solution that will dilute the blood sample and cause false low readings.
Applying too much pressure around the puncture site : The finger can be gently massaged before and after puncture to stimulate blood circulation, but not past the first knuckle. Maintaining light pressure when drilling ensures effective penetration. However, the finger should not be pressed too hard as this will push fluid from the tissue into the blood and cause false low readings.
The importance of time and blood flow Another key factor influencing hemoglobin measurement is capillary flow. Typically for hemoglobin, the first 1-3 drops after puncture show a greater degree of variability in hemoglobin concentration, regardless of the analytical device used for the test. It is for this reason that these first drops of blood must be discarded.
Generally, the highest precision is achieved from the fourth drop after puncture, when good capillary flow is achieved over a period of 30-45 seconds. Blood draws obtained after this time may result in inaccurate hemoglobin results.
The most important factor to reduce pre-analytical errors is the presence of a free spontaneous blood flow, especially since neither the size of the drop nor the moment of taking after the puncture are well defined and the manufacturer's recommendations on this subject vary. A step-by-step guide to capillary blood sampling best practice The following steps demonstrate how to collect an appropriate capillary blood sample to ensure accurate hemoglobin measurements at the point of patient care. :
Wash your hands well and put on tight-fitting gloves (they do not need to be sterile). Make sure that all items for capillary blood sampling and testing are available and within easy reach.
Select the middle or ring finger, ideally the non-dominant hand. The patient should not wear a finger ring as it can obstruct blood circulation.
Ensure that the patient's hand is warm and relaxed and that the patient is comfortably seated. Puncture should be done slightly off-center from the fleshy portion, near the side of the fingertip.
Disinfect and completely dry the puncture site. Alcohol can dilute the sample. Dry well before taking.
Gently massage finger towards tip to increase blood flow. Avoid passing the first knuckle.
Make the incision on the fingertip side, palm up, to facilitate filling of the hemoglobin cuvette. Apply only light pressure towards the fingertip until a drop of blood appears. It may take a few seconds after the puncture for blood flow to begin.
Wipe off the first 2-3 drops and make sure there is a free flow of blood before filling the cuvette. Stop holding your finger when wiping a drop.
Make sure you have a drop of blood large enough to fill the cuvette. Fill the bucket completely in one go. Avoid air bubbles. Always refer to the instructions for use provided by the manufacturer of the hemoglobin analyzer.
Venipuncture
It is the collection of blood from a vein. In most cases, it is done for laboratory tests.
How the test is performed Most of the time, the blood is drawn from a vein located on the inside of the elbow or the back of the hand.
The site is cleaned with a disinfectant (antiseptic).
An elastic band is placed around the upper arm to apply pressure to the area. This causes the vein to fill with blood.
A needle is inserted into the vein.
The blood is collected in an airtight vial or in a tube attached to the needle.
The elastic band is removed from the arm.
The needle is removed and the site is covered with a bandage to stop the bleeding.
In infants or young children, a pointed instrument called a lancet may be used to puncture the skin and cause it to bleed. Blood is collected on a slide or test strip. A bandage may be placed over the area if there is any bleeding.
Preparation for the exam The steps you need to take before the test depend on the type of blood test you are having. Many tests do not require special measures.
In some cases, your healthcare provider will tell you if you need to stop taking some medications before doing this test or if you need to go fasting. Don't stop or change your medications without talking to your provider first.
How the test will feel You may feel slight pain or sting when the needle is inserted. You may also experience some throbbing at the site after the blood is drawn.
Reasons the test is done Blood is made up of two parts:
Liquid (plasma or serum)
Cells
Plasma is the liquid part of the blood in the bloodstream that contains substances such as glucose, electrolytes, proteins, and water. Serum is the liquid part that remains after blood is allowed to clot in a test tube.
Blood cells include red blood cells, white blood cells, and platelets .
Blood helps move oxygen, nutrients, waste, and other materials through the body. It also helps control body temperature, fluid balance and acid-base balance of the body.
Tests done on your blood or parts of it can provide important clues about your health to your provider.
Normal results Normal results vary according to the specific type of exam.
Meaning of abnormal results Abnormal results also vary according to the specific test.
Basis Extraction methods allow us to collect blood samples for analysis in the laboratory. In other words, it allows us to obtain an adequate blood sample to carry out its hematological, biochemical or microbiological analysis.
Among the methods of blood extraction we find the capillary puncture. This consists of using a lancet and pricking a finger. Preferably the first phalanx of the ring finger, that is, its most distal phalanx, is pricked. The middle finger or index finger can also be used.
It is a technique that has the disadvantage of having to quickly spread the drop of blood obtained before it clots. It also presents difficulty and impossibility of obtaining a large quantity of blood and introducing it into a tube with anticoagulant.
There is some controversy with the use of the capillary puncture technique as to who should and who should not perform it. Today it is a mandatory technique to use, together with a glucometer, in patients with diabetes. Their relatives are forced to learn the technique to have a thorough control of blood glucose levels. The controversy arises from the peculiarity that relatives and patients are not health personnel.
Material
70º alcohol.
Guatis.
Ballpoint.
Lancets
Slide where the extension will be made.
Slides with ground edges.
Filter paper.
Yellow waste container.
Technique
Clean and disinfect the finger that we are going to prick.
Load the pen with the lancet.
Lightly massage the finger to ensure adequate and sufficient blood flow.
Prick the finger with the lancet.
Press a little to obtain drops of blood.
Discard the first drop.
Obtain a second drop and use it to make a blood smear.
Discard the lancet in the waste container.
Results Capillary puncture
In this image we can see part of the material. 70º alcohol, lancets, pen, blood smear slide, guatis and, of course, the filter paper.
Capillary puncture
Here we can appreciate the collection of capillary blood in a test tube. This photo really belongs to the reticulocyte staining practice, which we will see in the future.
Observations In the face of cold nerves and hands, a peripheral vasoconstriction occurs that makes the ideal result of the technique very difficult, since due to this it is practically impossible to obtain a drop of capillary blood.
You should also avoid pressing the finger too much to obtain a drop of blood, because we can hemolyze the red blood cells.
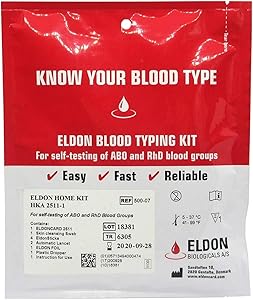
1 spring-loaded, sterile auto-lancet, 1 Blood typing test card, 1 Sterile cleaning swab, EldonSticks sample collection and transfer devices, 1 Transfer pipet, Laminating sheet, Color result chart and Instructions
An at home kit to quickly determine human blood type A, B, AB, O and rhesus factor Rh +/-.
You Are Receiving 5 Test Kits Good For One Use Each
Capillary sample
It is the collection of a blood sample that is obtained by pricking the skin. Capillaries are tiny blood vessels near the surface of the skin.
How the test is performed The exam is performed as follows:
The area is cleaned with an antiseptic.
The skin on the finger, heel, or other area is punctured with a sharp needle or lancet.
Blood can be collected in a pipette (small glass tube), on a slide, on a test strip, or in a small container.
Cotton or a bandage may be placed at the puncture site if there is any ongoing bleeding.
How the test will feel Some people feel moderate pain, while others feel only a prickling or prickling sensation. Afterwards, there may be some throbbing sensation.
Reasons the test is done Blood carries oxygen, nutrients, waste products, and other materials within the body. It also helps regulate body temperature. Blood is made up of cells and a fluid called plasma. Plasma contains various dissolved substances. The cells are mainly red blood cells, white blood cells, and platelets .
Because blood has multiple functions, tests on it or its components provide valuable clues in diagnosing conditions.
Capillary blood sampling has many advantages over blood drawn from a vein:
It's easy to get (it can be difficult to get blood from veins, especially in babies).
In the body, there are several collection sites and these sites can be rotated.
The test can be done at home and with little training. People with diabetes, for example, must check their blood sugar levels several times a day, using a capillary blood sample.
Disadvantages of capillary blood sampling include:
Only a limited amount of blood can be obtained by this method.
The procedure has some risks (see below).
Capillary blood sampling can cause inaccurate results, such as falsely elevated blood sugar, electrolytes, and blood counts.
Meaning of abnormal results
Results vary depending on the exam that is performed. Your healthcare provider can tell you more about this.
Risks The risks of this test may include any of the following:
Excessive bleeding
Fainting or feeling dizzy
Infection (a slight risk any time the skin is broken)
Scarring (occurs when there have been multiple punctures in the same area)
Calcified nodules (sometimes occur in babies, but usually disappear by 30 months of age)
Damage to blood cells from this collection method can sometimes lead to inaccurate test results and the need to repeat the test with blood drawn from a vein.
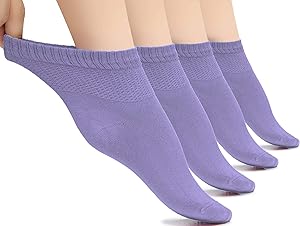
Hugh Ugoli Women's Loose Diabetic Ankle Socks, Bamboo, Wide, Thin, Seamless Toe and Non-Binding Top, 4 Pairs
80% Bamboo 17% Polyamide 3% Elastane.
Flat seam or hand linked seam are very faint and technically called seamless toe but not truly seamless.
QUALITY: Women purple ankle socks with micromesh, breathing hole let the air in and removes the sweat. Reinforced toe and heel make them extremely comfy and durable.
HEALTHY: Non-binding top and Seamless toe increase your comfort by reducing the pressure. Also reduces the risk of infection and eliminates the risk of blistering. Wide ankle socks are recommended for pregnant women, elderly people, people with circulatory problems, diabetes, edema, neuropathy, swollen ankle.
CARE INSTRUCTIONS: Please, wash on gentle cycle in warm water, max 30°C/86°F. Tumble dry on low setting (not exceeding 30°C/86°F), but it is better to line dry only. The socks may seem to have shrunk after washing but they'll regain their original form when you wear them.
How can we relieve pain in the feet
The discomfort that foot pain can cause are very diverse. The most common is usually the use of inappropriate footwear.
More and more people report foot pain or other discomforts that affect their quality of life. Since the feet support the body and allow movement, as well as the performance of various activities, it is important to ensure your health.
Foot pain can occur in isolation or repeatedly. Therefore, the ideal is to maintain consistency in their care. In many cases, foot complaints that are not treated properly or early end up affecting other areas of the body, such as the back for example, and this in turn can affect quality of life.
Among the main measures to take care of the health of the feet are the use of suitable footwear and the observance of good hygiene habits. However, it does not all come down to this.
Why do we feel pain in our feet?
Walking is such a common action that we perform it mechanically. We generally ignore that with each step we take, we put pressure on our feet. This generates an impact that can sometimes promote the appearance of certain discomforts . Among the most common are the following:
Specific problems such as: low metatarsal arch, spur, bunions , corns, fungus, osteoarthritis and plantar fasciitis .
Walking without proper support (which poorly distributes body weight).
Walking more than we are used to.
Spending too much time on your feet.
Use of inappropriate footwear.
Overweight.
Tips for relieving foot pain
In the event that foot pain occurs as a result of fatigue (from having walked a lot, for example), a very simple “remedy” can be used: immerse your feet in warm water with water and salt for a few minutes. This bath will help refresh your feet and give you some relief.
Other recommendations that are usually made in the popular sphere are:
Soak your feet in hot salt water and alternate with cold water for 20 minutes. After this time, dry well and apply a moisturizer.
Spray five aspirin and mix the powder with half a teaspoon of water. Get a massage with the mixture at night and when finished, rinse and dry well.
Get massages with peppermint oil, one of the most used in aromatherapy. Peppermint has a relaxing, anti-inflammatory and analgesic effect.
Shoes should always be comfortable. Not so loose that they produce friction, nor so tight that they result in pressure and suffering to the feet.
We recommend you read: how to reduce sweaty feet with 5 home remedies
Good habits
Rest your feet on a stool or any object that allows you to keep them elevated for 20 minutes , while you do so, move your toes gently.
Use special elastic stockings , as these promote return circulation .
For more severe pain, you can take anti-inflammatories to relieve foot pain, such as ibuprofen, if your doctor tells you to.
Crush two cucumbers and chill the cream in the fridge. Later, put the cream in a container with warm water and submerge the feet.
If you don't have diabetes , wrap a few ice cubes in a damp towel and apply it to your ankles and feet for a few minutes until you feel relief.
Walk barefoot and exercise the sole of your foot with a stress ball.
Recommendations to prevent foot pain To alleviate pain in the feet, or to prevent major discomfort, after the end of the day we suggest that you follow the following recommendations:
Put your feet in cold water with salt for 15 to 20 minutes when you feel discomfort.
Gently massage your feet with essential oil before sleeping.
Pay attention to nail maintenance, especially cutting.
Don't wear the same footwear every day.
Move your feet when you are sitting. Make circles, forward, backward.
Reduce the amount of salt in your daily diet.
If you run, find suitable footwear and try to warm up before starting your routine.
Visit a specialist (physical therapist or chiropodist ) at least once a month if you feel discomfort on a regular basis.
Soothe burning feet with 6 home remedies
Thanks to the properties of certain ingredients, we can promote circulation in the feet in order to alleviate the burning or tingling sensation that usually appears at the end of the day.
Burning feet is a condition that affects most people. Usually once in a lifetime this condition is suffered. In addition, it is an uncomfortable symptom that can indicate alterations of the nervous system, injuries or excessive physical activity.
It is usually accompanied by a slight reddening of the skin, tingling and increased sweating. In addition to another variety of annoyances that can affect mood.
Although it is usually not a serious problem, sometimes it is essential to pay attention to it. In this way, it can appear as a side effect of other diseases of greater care, according to this report from the Mayo Clinic.
Fortunately, in addition to being able to control it with some medications, there are several home remedies that can promote its relief without causing adverse effects.
This time we want to share 6 interesting alternatives so that you don't stop preparing them when you face this problem.
Take note. After all, it is up to you to take action!
1. Chamomile essential oil to treat burning feet
Renowned for its relaxing properties, chamomile essential oil is one of the therapeutic products that can soothe burning feet.
Its compounds help improve circulation in this area of the body. In addition, they favor the control of the inflammatory processes that this symptom produces, according to this study carried out by the Case Western Reserve University (United States).
Ingredients
2 tablespoons of chamomile essential oil (30 g)
1 teaspoon of olive oil (5 g)
Preparation
Combine chamomile essential oil with a teaspoon of olive oil.
How to use
Rub the treatment on the feet, massaging them for 5 to 10 minutes.
Repeat its use 2 times a day if you consider it necessary.
2. Bitter gourd Bitter gourd is an ingredient that has been valued in Ayurvedic medicine. In addition, it stands out for its anti-inflammatory power, according to this study by Jiwaji University (India). Consequently, it can promote the relief of various types of ailments.
Ingredients
6 bitter gourd leaves
Water (as necessary)
Preparation
Crush the bitter gourd leaves and moisten them with a little water until you get a smooth paste.
How to use
Rub the paste on the affected area and leave it to act for 10 minutes.
Finally, rinse with warm water and repeat its use 2 times a day.
3. Hawthorn
The infusion of hawthorn is a traditional remedy to reduce burning and redness of the feet . In addition, it improves blood circulation (according to this study carried out by the Madrid Pharmacy and Magisterial Formula Laboratory Office) and favors the control of discomforts such as tingling.
Ingredients
1 tablespoon of hawthorn leaves (15 g)
1 cup of water (250 ml)
Preparation
Pour a tablespoon of hawthorn leaves into a cup of boiling water and cover the drink.
Wait for it to rest for 10 minutes and strain it.
Consumption mode
Drink this infusion 2 or 3 times a day.
Take it daily until you stop feeling burning in your feet.
4. Ginger and coconut oil The medicinal preparation of ginger and coconut oil is an analgesic product that can soothe burning, pain and inflammation in the feet. This is stated in this study by The Himalaya Drug Company and this research by the University of Isfahan (Iran).
It contains hydrating and revitalizing compounds that also reduce the feeling of heaviness and changes in the skin's texture.
Ingredients
1 teaspoon of ground ginger (5 g)
2 tablespoons of coconut oil (30 g)
Preparation
Pour the ginger powder into a bowl and mix it with the coconut oil until you get a paste.
How to use
Apply the product on the feet and massage gently for 5 minutes.
Finally, rinse off the residue and, if necessary, repeat its use 2 times a day.
We recommend you read: Benefits of coconut oil in aesthetics
5. Witch hazel
The popular witch hazel is a natural tonic that can relax the feet and legs to lessen problems related to poor venous return. This is stated in this study carried out by the Ludwig-Maximilians-Universität München (Germany).
Its active ingredients activate blood flow and reduce discomfort such as swelling, burning and the feeling of heaviness.
Ingredients
3 tablespoons of witch hazel (45 g)
2 cups of water (500 ml)
Preparation
Add the witch hazel to the cups of water and bring to a boil over low heat for 5 minutes.
Finally, cover the drink and let it sit for 15 to 20 minutes.
How to use
Pour the water into a basin and soak your feet for 20 minutes.
Use it every day until the burning sensation subsides.
6. Apple cider vinegar According to this study by the Malaysian Agricultural Research and Development Institute, this natural toner has soothing and anti-inflammatory properties. So it reduces the discomfort that accompanies burning feet.
Its acidic pH slows the growth of fungi and prevents infections and skin problems.
Ingredients
3 cups of water (750 ml)
¼ cup of apple cider vinegar (62 ml)
Preparation
Heat the cups of water and, without letting them boil, pour them into a bowl.
Add the apple cider vinegar and stir it so that it integrates well.
How to use
Soak your feet for 20 minutes and pat them dry.
If symptoms persist, repeat its use 2 times a day.
Do you experience a burning sensation in your feet? Choose one of the mentioned remedies and say goodbye to these annoyances.
Reflexology is a body therapy based on the theory that certain areas in the feet and hands are linked to other areas and organs of the body, that is, there are "reflex" areas that correspond to specific organs, glands and other parts. of the body. Reflexologists argue that applying pressure to these reflex areas can improve health and relieve pain in the corresponding organs through energy pathways.
For example, the tips of the toes reflect the head; the heart and chest are reflected around the ball of the foot (widest part of the foot); the liver, pancreas and kidney are at the beginning of the arch of the foot; the lower back and intestines are reflected a little lower, reaching the heel area.
This idea was introduced by Dr. William H. Fitzgerald around 1915. Later, the physical therapist Eunice Ingram further developed this theory in the 1930s, giving rise to what is known today as reflexology.
Reflexology to relieve pain and reduce stress The pressure exerted on specific areas of the feet and hands can send signals that balance the nervous system or release chemicals, such as endorphins, that relieve pain and stress.
Most people find reflexology very relaxing. In fact, reflexology should not be painful, so if you feel discomfort you have to communicate it to the therapist.
Some areas may be tender or sore. This must also be communicated so that the reflexologist can spend more time on these points.
Also, do not forget that the pain should decrease with pressure. If this is not the case, it must be said.
Reflexology is not a foot massage A foot massage is similar to a Swedish massage , in which massage oil or lotion is often used to apply gentle gliding motions to the entire foot. Reflexology is quite different. Although many people find reflexology relaxing, this therapy is based on the theory that certain points on the feet correspond to certain organs and parts of the body and that applying pressure to the areas can promote health in the corresponding parts, thus that the movements are different.
What can be treated with reflexology Reflexology is a very popular alternative therapy that promotes relaxation, improves circulation, relieves pain, relieves tired feet, and promotes blood healing. In addition, with reflexology you can work on the following ailments:
Stress and other related disorders
Tension headaches
Digestive disorders
Arthritis
Insomnia
Hormonal imbalances
Sports injuries
Menstrual disorders
Digestive problems and constipation
Back pain
Reflexology is also used in post-operative or palliative care. In any case, reflexology is recommended as a complementary therapy and should never replace medical treatment.
Home remedies to relieve foot pain
Do you suffer from foot pain? Learn to fight it with these simple tricks
More or less frequently, we all suffer from foot pain at some point . Either by choosing an inappropriate shoe, by swelling or by some other problem, such as plantar fasciitis, this type of ailments can become a real nightmare for those who suffer from it. But how to fix it?
Depending on the type of problem, we will have to take into account a series of factors. Of course, it goes without saying that, in the most serious cases, and in those in which the pain is internal and does not subside, it is essential to put yourself in the hands of a specialist.
Plantar fasciitis It is one of the most common and perhaps most unknown problems. This ailment, which mainly affects the heel, but also other areas such as the metatarsal, can be really annoying. It is the inflammation of the so-called plantar fascia, a tissue that runs from the heel to the area under the toes. Although it is frequently suffered by people who practice a lot of sports, dance or other exercises, it can also appear with age or due to the use of inappropriate footwear.
To solve this type of discomfort, sometimes, applying a little ice to the affected area, the pain can subside. Another very effective solution is to massage the sole of the foot to improve circulation and relax the muscles; either by applying pressure with a roller, tennis balls or directly with your hands.
Swollen feet and ankles High temperatures can make your limbs swell and in pain. However, these circulation problems are not only frequent in summer; It is also common after having made a long walk or having spent many standing. In the most severe cases it could refer to vascular, kidney, infectious or heart problems; Therefore, if it remains in time, it is best to contact a doctor. However, in most cases, the cold is once again the best ally.
If you are a sports fan, try, if you can, to practice some swimming; Exercise and pool water will promote blood circulation and reduce your swelling problem. Cold showers before bed and when we wake up are also effective. Likewise, due to its diuretic and purifying nature, dandelion infusions, as well as scrubs and massages with aloe vera gel .
Wounds, blisters, burns, and abrasions Almost all of these ailments appear after the use of inappropriate footwear . Either because of its shape, because of the material with which it has been made (too rigid), because the size used is not the one that corresponds to us or because of the friction after having done a lot of sports, foot injuries can ruin your day .
If you have tried to soften the shoe, you have put talcum powder on them, you have resorted to pinkies , band-aids and endless formulas to avoid it and still you have not managed to get rid of the blisters and chafing, put these tricks into practice before it leads to a more serious wound and run the risk of infection. To cure them as soon as possible , disinfect the area to be treated with hydrogen peroxide and then apply a little baking soda. Aloe vera in these cases can also be very effective in achieving rapid healing.
How to relieve foot pain from walking a lot
Do you have foot pain when walking? How to relieve foot pain from walking a lot? Surely on more than one occasion you have had to do a long walk and when you get home you feel devastated.
In this post we will give you some tips that can help you take better care of your feet and keep us comfortable, whether you have simply walked a long distance, or if you have done some physical activity.
Keys to relieve foot pain when walking By putting pressure on our feet, we can feel a shooting pain in our feet. This pain can be more pronounced if we also use footwear that is too tight, or if we do not use an insole that helps cushion the footprint.
How to relieve foot pain after walking a lot? There are some tips that we can put into practice to rest our feet:
Take off your shoes and socks. The first step so that your feet can rest is to release the pressure exerted by the footwear on them. Take off your shoes and socks and stay that way until they are relieved.
Put your feet up. By coloring your feet up after traveling a long distance, you will be helping to reduce pressure and facilitate blood circulation.
Next time, use the appropriate templates. A poor adaptation of footwear to our feet can make our joints, ankle and heel ache. Thanks to the Biontech Pro insoles, you can enjoy a more stable footprint and reduce vibrations in your ankle.
In case of swelling, put ice on it. If you see that your foot is swollen, try placing an ice pack on the part that is most affected. This will create a feeling of relief and will help reduce pressure.
Give yourself a foot massage. To relieve pressure on the feet, it may also be convenient to give yourself a gentle massage, either using a foot cream or some type of oil that helps promote blood circulation.
On the other hand, keep in mind that it is very easy for your joints and ligaments to hurt if you are not used to physical activity. The next few days, once you have rested and recovered, will be more bearable.
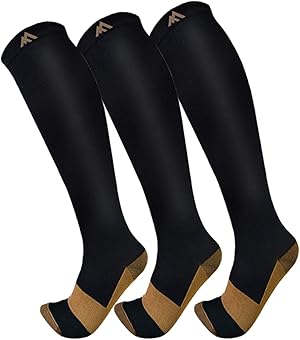
3 Pack Copper Compression Socks - Compression Socks Women & Men Circulation - Best for Medical,Running,Athletic
85% Nylon ; 10% Polyester;5% copper fiber
Imported
COPPER COMPRESSION SOCKS - Copper is a great conductor of electricity, we extended its natural property to rejuvenate blood circulation in your legs through copper fibers capable reviving blood circulation along with providing a 15-20 mmHg compression. They keep your feet and legs fresh throughout the day by providing a mild squeezing action to support enhanced blood flow. It offers the most perfect settlement scheme for those who sit for long period during travel or at work.
REDUCE INJURIES - Provide mild squeezing for warmness and enhance blood moving through your legs. Remove stress and stimulate every cell, relieves symptoms varicose veins and excess fluid retention. Help relieve pain & discomfort related to plantar fasciitis, Provides true graduated compression to support your legs, reduce fatigue, soreness, cramping and prevent injuries at the same time.
UNIQUE MATERIAL- Our products feature a unique copper-infused, breathable, moisture-wicking fabric that stays warm in cold temperatures and cooler when the temperature rises. Copper’s unique properties help eliminate odor allowing you to wear your sleeve longer without worry of offending those around you at the gym or at work. The remarkable fabric helps keep your skin dry and comfortable even in extremely hot temperatures.
3 PACK OF COMPRESSION SOCKS - You no longer have to settle. You decide on the assortment based on your taste, lifestyle, age or sex. Each bundle provide the high quality, performance and durability. Whether you work in an industry that requires long hours of standing-up or sitting down.You can all benefit from using the compression socks.
GIFT IDEA - If you are struggling with a gift idea to a loved one or a casual friend, this is will reduce your anxiety without even you wearing them J. Great gift choice for joggers, athletes, workout fanatics, office workers, ok..can we just say whoever use their leg extensively. Passion and customer obsession is our key principle. So shop with 100% confidence, if you are not happy with the purchase for any reasons, contact us for an exchange or 100% refund with no questions asked.
TIRED FEET TIPS TO PREVENT STRESS FROM AFFECTING YOUR FEET
Currently, society has become accustomed to living with stress, either due to changes at work, social or emotional level , and even more so in urban centers where rush reigns. This constant stress is capable of producing overwhelm, tension or anxiety , and creating harmful habits such as eating too much or increasing tobacco consumption.
Stress are responses derived from an accumulation of stimuli that cause various disorders . In most cases, whenever we talk about stress, the first thing we think about is its impact on a psychological level, but this problem goes further, also affecting a physical and motor level . Then...
How can stress affect the feet ?
Stress is an adverse emotional state that can cause muscular or postural alterations , among others. Faced with this problem, our body reacts by creating a series of changes that inevitably affect the foot and our way of walking , since they must be compensated by a greater musculoskeletal effort that translates into increased fatigue, pain, heaviness , etc.
In this article, we leave you several exercises and habits to do at home with which you will be able to relax your feet after a stressful day .
1- KEEP YOUR FEET UP
The first exercise that we suggest is that, while you are resting on the sofa, keep your feet up . This posture promotes blood circulation and, therefore, fatigue and heaviness is relieved . We can use a pillow and even the wall.
2- WATER BATHS WITH SALT
After a hard day, you may feel heat or swelling in your feet. To solve this, we recommend baths of 15 or 20 minutes in warm water with a little salt . These annoyances will diminish.
3- MASSAGE AND HYDRATE YOUR FEET
One of the exercises that we advise you to relieve tension in the soles of the feet is to massage this part of the foot. In this way, you will get the structures to relax. These massages are very simple: pass your thumbs from the heel to the fingers applying pressure . You can also help with the knuckles and mobilize the joints of the fingers.
You can take advantage of this moment to apply a specific cream and thus contribute to the hydration of your feet , keeping the skin in good condition. In this link we leave you an article about the importance of properly hydrating your feet .
IT IS IMPORTANT TO USE A PODIATRIC CREAM DAILY TO ENSURE PROPER HYDRATION.
4- STRETCHES TO END THE ANNOYANCE
The stretching relieves tension suffering feet. Some of the simplest and most effective to do at home are:
We grab the toes with our hand and slowly bend them towards the instep. Sitting on the floor with the help of a towel , we bring the foot towards the shin while flexing the ankle. We stand on the edge of a step supporting the balls of the feet and dropping the heels. We perform circular movements with the ankles. We roll a ball over the entire plant.
5. MORE TIPS
In addition to following these tips, it is essential that, when we get home, we wear comfortable shoes and it is even positive to walk barefoot on soft surfaces such as carpet, grass or sand. This stimulates our body, since we have many nerve endings in the foot.
In any case, to reduce the discomfort, the ideal is to influence the cause and find out why. We recommend you go to the podiatrist since, if necessary, a solution could be the use of personalized templates . This treatment will provide comfort and may prevent and correct future pathologies .
Finally, it should be noted that the use of inappropriate footwear can contribute to the appearance of these ailments. Therefore, it must be remembered that it is important to avoid narrow toes and heels above 4 centimeters . In short, it will be essential to use appropriate footwear for every occasion.
How to relieve foot pain
One of the most momentous sports injuries of all time was not a horrific knee strain or a shattered shoulder. It was Joe DiMaggio's heel spur, a painful bone bulge that supposedly ended the New York Yankees' career in 1951. But DiMaggio's foot problems didn't stop there. In 1990, almost 40 years after leaving sports, the athlete sought treatment again: He could not play golf or even walk.
"Foot and ankle problems are not life threatening, but they affect lifestyle," explains podiatrist Rock Positano, director of the non-surgical foot and ankle service at the Hospital for Special Surgery in New York City. The foot pain is often the triggering event that leads to musculoskeletal problems such as knee pain, hip and back, and ultimately to falls, loss of mobility or worse.
About 24% of people over the age of 45 suffer from foot pain. At age 70, the figure is 50%. But foot pain is not a normal part of aging, says Alan Bass, a New Jersey-based podiatrist. "I never tell my patients, 'You're getting old and things happen.'
DiMaggio's injury and failed surgery during his playing career greatly boosted non-surgical foot and ankle musculoskeletal interventions in the country, says Positano, who successfully treated the former player with a specialized ankle brace.
Today, thanks in part to "Joltin 'Joe," it is easier than ever to treat foot pain, often with orthopedics rather than surgery. Here are some common places where pain can start and how to deal with it.
Problems 1. Vascular Blood flow to the feet decreases with age, and that can make any foot problems worse. For example, decreased blood flow to a tendon could contribute to conditions like tendonitis, Positano explains.
2. Orthopedic Generally, bone or muscle problems, such as plantar fasciitis, heel spurs, bunions and arthritic changes in the joints of the foot begin to appear after the age of 40, especially in active people. If you are a runner, you may suddenly feel tension in your Achilles tendon.
3. From the skin Slower nail growth and a weakened immune system can lead to annoying nail fungus, athlete's foot, cracked skin, or nail trauma — the latter often occurs from roughly putting on and taking off shoes. As you reach your 70s and 80s, your skin thins and the fat pads on the soles of your feet and under the forefoot also wear away, says Emily Splichal, a New York-based podiatrist. Walking with little padding on the sole of the foot can be painful, she notes. If you have mobility problems, it can be difficult just to reach for your feet; poor foot hygiene can aggravate other disorders.
4. Of the nerves Foot sensitivity decreases as we age, making it harder for the body to determine how hard you are stepping or if you are walking on an uneven surface, increasing your risk of falls . According to the researchers, at age 70 your feet need twice the stimulus for the brain to receive the signal, says Splichal.
The solutions The weight gain in middle age can lead to disorders in the feet, and because bad knees, hips and shoulders can also cause foot pain (and vice versa) is not worth risking. Just like you would go to the dentist if you have a toothache, visit a podiatrist if you have foot pain. Look for a doctor who is affiliated with a podiatry or medical school and who specializes in nonsurgical procedures, Positano says.
In the meantime, these 5 steps can help you bring relief to your feet.
1. Be selective with your shoes Up to 72% of people wear shoes that don't fit. That's partially because the arches of your feet can flatten (and lengthen your feet) as you age. In older adults, wearing very tight shoes is associated with corns, bunions, and pain; Very short shoes are linked to other deformities, such as hammer toe and claw toe.
2. Stand up The longer you sit, the more you deactivate your glute muscles - and proper foot function requires strong glutes, hips and abs, Splichal says. Exercises like planks and hip bridges not only exercise your abs and hip extension (opposite poses of sitting), but also help you practice standing and sitting on the floor - something that research has found. linked to longevity.
3. Eat better Inflammation can cause foot pain. For an anti-inflammatory effect , ingest omega-3 and omega-6 fatty acids through nuts, seeds, legumes, vegetables, fruits, olive oil, and fish. One positive consequence: Mediterranean diets have been linked to weight loss, which can reduce pressure on the foot and relieve pain.
4. Go barefoot The nerves in the soles of the feet are even more receptive than those in the hands, but wearing shoes deprives them of the sensory input they need to help the body move. It can help to exercise barefoot, such as yoga and Pilates, and to walk barefoot at home.
5. Use a ball Moving your foot on a golf or tennis ball for 5 minutes each day provides the stimulus your foot needs, and improves stability and mobility by releasing tendons and facial connections, says New York-based trainer Michael Ryan.
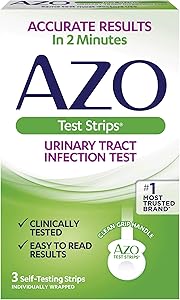
AZO Urinary Tract Infection (UTI) Test Strips, Accurate Results in 2 Minutes, Clinically Tested, Easy to Read Results, Clean Grip Handle, #1 Most Trusted Brand, 3 Count
TREAT YOUR URINARY TRACT INFECTION EARLY. Early treatment is the key to fast UTI relief and preventing more serious problems. With AZO Test Strips, you can take a UTI test at home and simply call your doctor with the results..
TRUST THE SAME TYPE OF UTI TESTS MANY DOCTORS USE. AZO Test Strips offer you the most reliable, over-the-counter UTI home test available. With AZO Test Strips, you can take a UTI test in the privacy of your own home and then call your doctor with the results
2 TESTS IN 1. The same urinary tract infection tests used in many doctor's offices to determine if the bacteria that cause a UTI are present. The Leukocyte and Nitrite tests are both commonly used to diagnose a UTI
ACCURATE Trust AZO to give you accurate results. Our Test Strips are Made in the USA
FAST. Test results are ready to read in just two minutes. The sooner you get UTI treatment, the better because an untreated UTI could lead to serious complications
CLEAN GRIP HANDLE is sanitary and easy to use. Hold test strip vertically to read results. Read Leukocytes test results on the top test pad and Nitrite test results on the bottom test pad
Know your blood sugar levels
If you have diabetes, keeping your blood sugar (glucose) level within your target range can help you feel good today and stay healthy for the future.
There are two ways to measure your blood sugar:
The A1C test is a laboratory test that measures the average level of sugar in your blood over the past 2 to 3 months. This test shows if your blood sugar level stayed near your target range most of the time, or if it was too high or too low.
Self-monitoring tests are self-tests of your blood sugar. These tests will show you what your blood glucose level is at the time you take the test.
The two tests help you and your health care team see if your diabetes care plan is working well.
The A1C test Why should I have an A1C test? The A1C test lets you and your health care team know if your diabetes care plan has been working well for the past 2 to 3 months. It will also help them decide what type and amount of medicine you need.
What should my A1C target range be? For many people with diabetes, the A1C goal is less than 7. You and your healthcare team will decide what your A1C target range should be.
If your A1C level stays too high, it can increase the chance that you will have eye, kidney, nerve, and heart problems.
How often should I get an A1C test? You should take the A1C test at least twice a year. You should have it more often if your results are too high, if you change your diabetes treatment, or if you want to get pregnant.
What if I want to get pregnant? Talk to your health care team before you get pregnant. Your doctor can help you reach a target A1C range that allows your baby to develop well. If you are already pregnant, visit your doctor immediately.
Self-monitoring blood sugar tests Why should I have self-monitoring tests? Self-monitoring tests will let you know if certain things (such as physical activity, stress, medicine, and food) raise or lower your blood sugar. These tests give you the information you need to make good decisions to help you better control your diabetes.
Keep a record of your results. Watch for when your blood sugar gets very high or low. At each visit, talk with your healthcare team about the results of your self-monitoring tests. Ask them what you can do when your blood sugar is not within your target range.
How do I check my blood sugar? Blood sugar meters use a small drop of blood to tell you how much sugar you have in your blood at the moment. Ask your healthcare team how you can get the supplies you need. They can also teach you how to use them.
What is a good target range for my self-tests? Many people with diabetes try to keep their blood sugar between 80 and 130 before meals. About two hours after you start eating, the range should be below 180. The target range for your blood sugar level may be different if you are older (if you are over 65 years of age). and you have had diabetes for a long time. It might be different if you have other health problems like heart disease or your blood sugar gets too low. Ask your healthcare team what range is best for you.
Can my blood sugar level get too low? Yes, it can. If you are shaky, sweaty, or hungry, check your blood sugar to see if it is below your target range. Always carry something sweet with you, such as 4 hard candies or sugar tablets. If your blood sugar is too low, take sugar tablets or candy. If this happens to you often, tell your health care team, and ask what you can do to prevent this from happening to you.
How often should I check my blood sugar? Self-monitoring tests are usually done before and after meals and at bedtime. People who need insulin need to check their blood sugar more often than people who do not take insulin. Check with your health care team about your schedule for self-testing.
What other tests are important for good diabetes control? You should check your blood pressure and cholesterol (a type of fat in the blood). Your health care team can also tell you what goals you should have for these two levels. Keeping these levels within your target range will help lower your chance of having a heart attack or stroke.
How do I pay for these exams? Medicare and most health insurances cover the cost of the A1C test and the cholesterol test, as well as some supplies for self-monitoring tests. Find out what your health insurance plan covers for you, or ask your healthcare team to help you see how you can cover these expenses. For more information about Medicare, visit www.medicare.gov External link
What's the use of making so much effort? It can be hard to find the time to do a blood sugar self-test. It can also be difficult to go to such lengths to control your diabetes and see your blood sugar not stay in the target range. Remember that your A1C and self-test results are to help you, not to judge you.
For many people, taking self-monitoring tests and using these results to manage their diabetes can work well. It is easier for these people to take control of their diabetes to feel good today and stay healthy in the future.
Juan visits his health care team Juan and his health care team review all of his test results to get a better idea of how his diabetes care plan is working.
At each visit, Juan and his team:
They review your A1C, cholesterol, and blood pressure test results, as well as your record of your blood sugar self-monitoring test results.
They check to see if you are achieving your goals. In Juan's visit to the doctor today, they notice that his A1C test is very high. He talks with his healthcare team to see what he can do to bring his levels closer to his target range.
Together they decide that Juan:
You will increase your daily walk after dinner to 30 minutes.
You will do the self-monitoring test at bedtime to see if exercising more is helping to lower your blood sugar.
You will call your doctor in a month. Your doctor may change or adjust your medications if your self-monitoring test results are still outside of your target range.
The National Diabetes Education Program (NDEP) of the United States Department of Health and Human Services is a joint program of the National Institutes of Health (NIH) and the Centers for Disease Control and Prevention (CDC). ), with the support of more than 200 partner organizations.
This information is not copyrighted. NIDDK encourages the public to share this information freely.
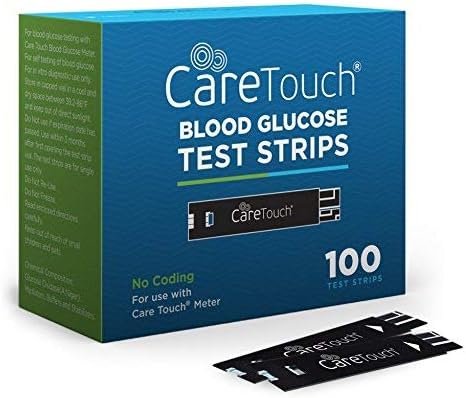
Care Touch Blood Glucose Test Strips (100 Count) for Use with Care Touch Monitor - 1 Box of 100
ACCURATE AND RELIABLE - Our strips, paired with the Care Touch Blood Glucose Monitor, provide state-of-the-art blood-level readings with complete ease and convenience to you.
FAST RESULTS – Get your test results in 5 Seconds.
SMALL SAMPLE - Only a small blood sample Is needed for testing (0. 5µL)
LONGER EXPIRATION DATE – Our strips have an expiration date of over a year.
Care Touch Blood Glucose Test Strips (100 Count) for Use with Care Touch Monitor (1 box of 100)
FIND OUT HOW TO MEASURE BLOOD GLUCOSE. CONTROL YOUR SUGAR EASILY!
Do you have to monitor your blood glucose level on a daily basis? If this is your case, know the normal levels and we also explain how to measure glucose properly to avoid hypo and hyperglycemia. We leave you the link to our glucometer . As always, if you have any questions, contact us here and we will solve them.
How to measure glucose If you have to measure glucose in your blood, it is likely that you have been diagnosed with diabetes, have been told your risk of suffering from it or have symptoms of hypo or hyperglycemia . Controlling blood sugar levels will then be essential to maintain good health and therefore your well-being.
Carrying out these measurements is simple and perhaps the tricky part is maintaining adequate blood glucose levels. If you have been diagnosed with diabetes, an action plan is usually arranged with the doctor to keep the values within normality . But we are going to guide you in this process so that you can control your levels without problems.
Why should you measure blood sugar? If your doctor has recommended you measure it regularly or if you have diabetes and you should do it daily, it is because the information from these measurements tells you if you are adequately controlling your glucose level. And controlling it is essential for your health. In addition, measuring blood glucose informs you of the following:
Whether medical treatment is effective and how it affects medication.
It helps you understand how diet affects your levels.
Other pathologies can affect your glucose level. For example stress.
It helps you differentiate and identify high (hyperglycemia) and low (hypoglycemia) levels.
Measuring blood glucose with glucometers Generally, the blood sugar level is measured with a comfortable and portable device, a glucose meter . This allows you to carry out the controls properly even outside the home. And how do you do it? We are going to see some guidelines necessary to do it correctly.
The glucometer (glucose measuring device) can be of different types and models . They can vary in their size, in the type of test strips (disposable element that reacts to the drop of blood), in the amount of blood they need, the place of the puncture, etc. There are many types, but specific guidelines for their use. To start with and once the glucometer has been chosen, before taking the measurement it is important to know that the right times to do the measurementsthey are on waking and fasting and 2 hours after eating. When making the measurement you must wash your hands for a correct result. Let's use the example of a glucometer with test strips. Place one in the mouthpiece of the device (where indicated by the manufacturer) and a sterile lancet in the lancing device (to remove the drop of blood). Once drawn, apply the drawn blood onto the test strip. The meter will run its test and you will get your blood glucose level. If this meter doesn't have memory, take notes and keep track.
Blood glucose: Normal blood glucose values after eating As I have mentioned, after meals it is essential to wait around 2 hours to make an adequate measurement. The normal values or normoglycemia depend on whether you have diabetes or not. According to the Foundation for Diabetes (Spain), normal blood glucose values are fasting:
Without diabetes between 70 and 100 mg / dl.
With diabetes between 80 and 130 mg / dl.
These are the normal values that we must all achieve and control. If in your case, you are above or below, I recommend you consult with your doctor to modify the action plan that you have developed.
Glucose measuring device As an example, we are going to see a blood glucose measuring device with which you can perform the controls comfortably and easily. You can also take it with you and take measurements wherever you are.
With this type of meter you can control glucose values and thus avoid any problems. It is very comfortable and accurate and allows you to keep track of measurements properly. Its use is very simple and offers you the exact results . In this case, the meter contains:
Glucometer (blood glucose measuring device)
Lancets (to get the blood sample)
Test strips (in contact with blood determines the amount of glucose)
Puncture device with transparent cap for LAP (to perform each puncture quickly and gently)
Instruction manuals
Carrier bag
HOW TO MEASURE BLOOD GLUCOSE LEVELS
This is a practical step-by-step guide on how to check your blood sugar. Share it with your family or friends who may need to check their child's blood for the first time, or use it as a guide for you, if this is something new to you.
HOW TO PRICK FINGER AND CHECK BLOOD:
Wash your hands.
Clean the fingertip with rubbing alcohol. Make sure it's very dry.
Set the needle to 2 or 3 to start. Twist the round tip at the top of the punch to match the white line.
Insert a strip into the glucose meter. Place the black and white end of the strip on the meter. Don't touch the white or yellow tip. (This action will cause the meter to “wake up” and in a moment you will see a warning on the screen with a drop of blood. This indicates that it is ready to start.)
Pull the needle out by pushing on the end of the awl (like a pen). A bubble on one side will turn yellow when the needle is removed.
For best results, squeeze your finger below the puncture site to draw blood to the tip.
Prick your finger by pushing the awl against the clean fingertip and then press the yellow button.
Squeeze it until a drop of blood comes out. It has to be a good drop, if the blood is watery or runs down the finger, the reading may be inaccurate (it will show a lower number than the true one).
Place the white or yellow tip of the strip on the drop of blood and wait until the meter beeps, indicating that the blood has already been read.
Lightly wipe the blood with a paper towel; the hole closes almost instantly.
IF YOU HAVE TROUBLE GETTING A DROP OF BLOOD:
Wash your hands with lukewarm water (and dry them well, of course).
Shake your hands a bit to increase circulation.
Don't hold your finger up in the air as blood will flow to the opposite side of the finger.
Increase the needle setting to 3, 5, or more if necessary.
Stay hydrated. It's harder to get a drop of blood if you're not.
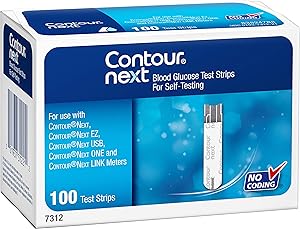
Highly accurate testing: test strips for use with the CONTOUR NEXT range of blood glucose meters(1,2)
No coding techology: fast, highly accurate(1,2) results in seconds with one less step in testing and eliminates errors due to user miscoding
Self testing: monitor blood glucose levels with an at-home test and tiny 0.6uL blood sample
Second-chance sampling: allows you to apply more blood to the test strip being used, which may help prevent wasting test strips and save money(4)
Compatability: can be used with any of the CONTOUR NEXT portfolio of blood glucose meters
Blood sugar test.
Blood glucose tests are an important part of diabetes care. Find out when to check your blood glucose level, how to use a blood sugar meter, and more.
If you have diabetes, self-testing your blood glucose can be an important tool in managing your diabetes and preventing complications. You can test your blood glucose at home with a portable electronic device called a blood glucose meter, which measures the level of glucose in a small drop of blood. You can also use a device called a continuous glucose monitor.
Why you should measure your blood sugar Blood glucose testing provides useful information for managing diabetes. It can help you with the following:
Control the effect of diabetes medications on blood glucose levels
Identify blood glucose levels that are high or low
Track your progress against your overall treatment goals
Know how diet and exercise affect blood glucose levels
Understand how other factors, such as illness or stress, affect blood glucose levels
When to check your blood sugar Your doctor will tell you how often to check your blood glucose levels. The frequency of testing usually depends on the type of diabetes you have and your treatment plan.
Diabetes type 1
Your doctor may recommend testing your blood glucose four to 10 times a day if you have type 1 diabetes. You may need to take measurements:
Before meals and snacks
Before and after exercise
Before going to bed
During the night (sometimes)
More often if you are sick
More often if you change your daily routine
More often if you start a new medicine
Type 2 diabetes
If you take insulin to control type 2 diabetes, your doctor may recommend that you test your blood glucose several times a day, depending on the type and amount of insulin you use. Testing before meals and at bedtime is usually recommended if you are taking multiple daily injections. You may only need to do a test before breakfast and dinner if you use only a long-acting or intermediate-acting insulin.
If you manage type 2 diabetes with medications without insulin or with diet and exercise alone, you may not need to test your blood glucose level daily.
What if you wear a continuous glucose monitor?
People with diabetes, especially those with type 1 diabetes, can also choose to use a continuous glucose monitor. These devices measure your blood glucose every few minutes using a sensor inserted under the skin. In general, these sensors are used for one to two weeks before they need to be changed.
The newer type of continuous glucose monitor has an implanted sensor that can detect blood glucose levels for up to three months. A body-worn transmitter sends blood glucose information wirelessly from the sensor to a smartphone app.
Some devices display the blood glucose level at all times on a receiver, smartphone, or smartwatch, and an alarm will sound if the blood glucose rises or falls too fast. Others require you to monitor your blood glucose by periodically moving the receiver across the sensor.
Most of these devices still require you to do the finger prick check to calibrate the machine. Read the user guide for your device to see if and how often you need to get checked.
Certain medications, such as acetaminophen (Tylenol, others), albuterol (Proair HFA, Ventolin HFA, others), and lisinopril (Prinivil, Zestril, Qbrelis), can interfere with the accuracy of some continuous glucose monitor readings, particularly on older models. Newer continuous glucose monitor readings do not appear to be affected by standard doses of acetaminophen (up to 1000 milligrams for an adult).
If you need to take medications that can affect the accuracy of the readings, your doctor may recommend that you check the results of the continuous glucose monitor with a standard blood glucose meter. Consult with your doctor about using a continuous glucose monitor if you are pregnant, on dialysis, or have a serious illness, as these conditions can affect the blood glucose readings on continuous glucose monitors.
Know your desired level Ask your doctor what a reasonable blood glucose range would be for you. Your doctor will establish desirable blood glucose test results based on several factors, including the following:
Type and severity of diabetes
Age
How long you have had diabetes
Pregnancy status
Presence of diabetes complications
General health and presence of other diseases
The American Diabetes Association generally recommends the following blood glucose levels:
Between 80 and 130 milligrams per deciliter (mg / dL) or 4.4 to 7.2 millimoles per liter (mmol / L) before meals
Less than 180 mg / dL (10.0 mmol / L) two hours after meals
But the ADA notes that these goals often vary by age and personal health and should be individualized. For example, Mayo Clinic generally recommends that healthy adults younger than 60 aim for slightly lower blood glucose goals.
Some people will have slightly higher blood glucose goals, including the following:
People who are 60 years or older
People with other medical conditions, such as heart, lung, or kidney disease
People who have a reduced ability to perceive low blood glucose levels (hypoglycemia ignorance)
How to measure your blood sugar The blood glucose test requires the use of a blood glucose meter. The meter reads the amount of glucose in a small sample of blood, usually drawn from your fingertip, and placed on a disposable test strip. Even if you use a continuous glucose monitor, you will need a blood glucose meter to calibrate your continuous glucose monitor on a daily basis.
Your doctor or diabetes educator can recommend an appropriate device for you. It will also help you learn to use your meter.
Follow the instructions that come with your blood glucose meter. In general, this is how the process works:
Wash and dry your hands well. (Food and other substances can lead to inaccurate readings.)
Insert a test strip into the meter.
Prick the tip of your finger, on the side, with the needle (lancet) that comes with your test kit.
Touch the edge of the test strip to the drop of blood and hold it.
In a few seconds, the meter will show your blood glucose level on a screen.
Some meters can test blood taken from an alternate site, such as the forearm or palm of the hand. However, these readings may not be as accurate as fingertip readings, especially after a meal or during exercise, when blood glucose levels change more frequently. The use of alternate sites to calibrate continuous glucose monitors is not recommended.
Record the results Ask your doctor how often to record your blood glucose results. Now you can download readings from many devices to a computer.
When you record your results manually, you write down the date, time, test results, medication and dosage, and information about diet and exercise. Bring your records with the results to all your appointments with your doctor.
Talk to your doctor about what to do if your results are not within the range of your desired goals.
How to avoid problems with your meter Blood glucose meters must be used and maintained correctly. Follow these tips to ensure proper use:
Consult your device's user guide for instructions; procedures may vary from device to device.
Use a blood sample of the size indicated in the user guide.
Use only the specific test strips for your meter.
Store the test strips according to the instructions.
Do not use expired test strips.
Clean the device and do quality checks according to the instructions.
Bring the meter to your doctor's appointments to discuss any questions and to show him how you use your meter.