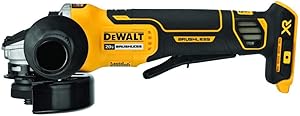
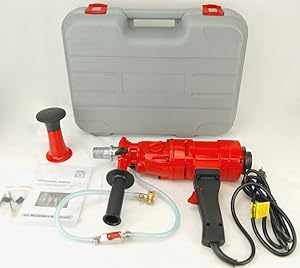
DEWALT 20V Max Impact Driver Kit, 1/4-Inch (DCF885C1)
- Compact (5.55-inch front to back), lightweight (2.8 lbs) design of DEWALT impact driver fits into tight areas
- 3 LEDs with 20-second delay after trigger release of the cordless impact driver provide visibility without shadows
- DEWALT 20V 1/4 impact driver features one-handed loading 1/4-inch hex chuck accepts 1-inch bit tips

When to use an impact drivers vs. a drill
A drill and impact wrench are useful rotary drive tools to have around the house, shop, or garage. Because they share some similarities, they are often confused with each other, but a drill and an impact driver are different enough that each tool is worth having on hand to cover a wide spectrum of construction and repair needs.what is an exercise
Available in corded or cordless options, a drill rotates a drill clockwise to drill holes in materials, cutting and removing debris. A drill applies constant torque. Equipped with a drill, a drill can turn screws, nuts and other fasteners into materials. The drill can invert to remove the fasteners.
Users supplement the rotational force by pushing the drill from the rear. Also, when the exercises stop, a common trick to persuade them is to apply short bursts by quickly pressing the trigger several times. It is these supplemental actions that link the drill to the impact driver and that sometimes lead rig owners to explore the purchase of an impact driver.
pros
- More useful than impact driver
- can drill and drive
- Low cost bits and drivers
cons
- Weak when driving long fasteners
- Difficult fasteners require pre-drilling
- Strong in hand, wrist and arm
What is an impact factor
An impact wrench is shaped like a drill but is usually shorter and smaller. It has many of the same features as a drill, such as a handle, trigger, and a type of chuck called a hexagonal collet.
The difference between an impact driver and a drill is that an impact driver provides the sequential bursts that advanced users often try to get with the exercises more effectively. It delivers these bursts automatically, without the user having to do anything.
An impact driver also pierces at a constant speed as needed and takes advantage of the breaking action when the driver detects resistance in the work material.
Impact drivers powered by air compressors have long been used in the car garage. Small, wireless and lightweight impact drivers are a newer tool for home improvement.
The strength of impact tools is driving fasteners with high torque, not drilling holes. While you can use an impact wrench on a tweezer to drill a hole, that's not what it's best for.
pros
- Easy on wrist and arm because torque is applied by the tool
- Reduces chance of stripped screws
- Smaller than most drills
- High power ratio when compared to its size
cons
- No variable speeds
- bad for drilling
- Not for hard and brittle materials like masonry.
- Requires expensive special bits
- More expensive than a drill
When to use an exercise
Use a drill bit to drill holes, to drive small fasteners into soft wood, and to drill into masonry.
Having an impact drill means you can switch to using it for all fasteners except the smallest ones. Because an impact drill is so powerful, it tends to tighten short screws faster than you might expect. This can result in pulling the screw deeper than you want.
One application where this is particularly important is when driving drywall screws into drywall. You need to have precise control to prevent the screw head from falling below the paper level and entering the plaster core. A drill will give you that level of control; an impact driver does not.
Use a drill to drill through any type of masonry, such as concrete, brick, or manufactured veneer stone.
When to use an impact driver
Use the impact wrench when you want to engage most fasteners except very short ones.
An impact wrench is especially good for uses such as driving 3-inch screws into wood, a task that is difficult for a drill even with pre-drilling the hole. Impact drivers are excellent for securing fasteners in dense or knotted wood.
You will also want to use an impact wrench for machine screws or lag screws.
Should you buy a hammer drill?
A hammer drill combines rotational bursts with front-to-back motion (the hammering action) to drill through difficult masonry that poses an obstacle for common drills.
If an impact wrench is less useful than a drill, then a percussion drill is less useful than either of those two tools - at least to most homeowners. Purchase a percussion drill only if you plan to drill a lot in masonry. Otherwise, consider renting or buying one.