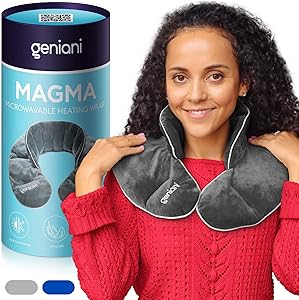
GENIANI Microwavable Heating Pad for Neck and Shoulders with Herbal Aromatherapy - Calming Weighted Cordless Neck Wrap - Heat Pad for Pain Relief and Spasm - Hot and Cold Compress (Cloud Gray)
- FAST NECK & SHOULDERS PAIN RELIEF! The dual hot/cold neck heating pad is a true miracle-worker for those with constant neck pain. Fitting perfectly on your shoulders, the heating wrap delivers up to 20 minutes of deep, soothing heat to relieve pressure and take away that annoying chronic neck pain.
- GET COZY AND COMFY WHEREVER YOU ARE! Made to be the optimal size, Magma is the ideal heating pad for neck and shoulders that stays in place on the go: in the car, on a plane, or while using public transport. Since Magma is a cordless heating pad, you can use it in any position: lying down, sitting, or even standing.
- HEATS UP IN SECONDS! Magma is a microwavable heating wrap that can be brought to optimum temperatures speedily, so you can use it right away when you need it. Though robust enough to be used in the microwave, Magma is soft to touch, so you can fully enjoy the experience. Pain alleviation in minutes!
- USE IT ALSO AGAINST SWELLING & INFLAMMATION! Besides relieving muscle tension, the heat wrap can also be used as a cold wrap left to cool in the freezer. The cold wrap will minimize swelling around injuries and decrease pain levels as soon as you apply it.
- ANXIETY, TENSION AND STRESS RELIEF! Filled with LAVENDER and millets, this heating pad for neck and shoulders is also a great aromatherapy product. The heat will release a calming scent of lavender that will put your mind into a state of complete relaxation. 1 YEAR WARRANTY. Risk-Free Purchase & Hassle-Free Replacement!

5 steps to make a thermal pad
A thermal pillow is a fabric pouch filled with different types of seeds and often aromatic elements. It is very useful during the coldest months of the year.
Obviously, this is an object used primarily to warm the body , but also to relax, soothe muscle or joint pain.
And while it's true that a thermal pad isn't exactly a decorative object, these days it's hard not to pay attention to its aesthetics; for this reason, many manufacturers strive to use striking fabrics and sew them with different shapes besides square and rectangular.
So, to make your own thermal pillow, you will have to take into account your preferences in terms of design so that you can have a completely personalized object at your disposal. Get to work!
Steps to Make a Thermal Pad
It is important to clarify that, although the use of rice and other elements for the manufacture of thermal pillows has been highly recommended, these are not the best options.
After being used several times, a pillow made from rice can smell unpleasant and harbor insects. Therefore, it is not recommended to use rice to make thermal pads.
The disadvantage of using other materials, such as cherry or olive pits, is that these elements are not entirely ergonomic and, instead of promoting well-being, can actually limit you.
1. Gather the materials
- Line.
- Ruler.
- Scissors.
- Chalk or marker.
- Needle or sewing machine.
- Filling: millet seeds.
- Fabric scraps (cotton, linen, etc.).
- Optional: 2 to 3 handfuls of herbs.
Prepare all the materials we mentioned to make your thermal pad. You can use a scrap of fabric you already have at home. It can be made of cotton, linen, a piece of fabric (plain or printed) or an old t-shirt, among others.
2. Prepare the fabric
First, you must be sure of the design you want to structure the cushion shape. Remember that you must take into account the amount of fabric you have. Also, you should measure the fabric before you start cutting.
Since the thermal pad is usually microwave-heated, it's best to make them small for convenience.
To make your first pillow , the best thing is to choose a rectangular shape and a medium size. And, once the measurements have been defined, with the help of the ruler and chalk, mark the lines on which you will make the cuts later.
When marking with chalk or marker, leave a seam allowance of at least 1 cm. Also, remember that you must make two rectangles of the same size to assemble both sides of the cushion.
3. Cut and sew
Once the fabric is cut, you will have to place one piece of fabric over the other and start sewing. This process can be done manually (with a needle and thread) or by machine.
You should leave the top edge of the cushion open and then place your padding. After sewing the sides and bottom edge of the cushion, you must turn it inside out so that the seams are hidden.
You must make a seam that is strong because, when placing the padding on the cushion, its contents will generate a certain amount of pressure on the sides; in this way, it will prevent it from falling apart easily.
4. Put the cushion filling
Once you've made sure you've made strong seams, you'll be able to fill the inside of the thermal pad. In order not to exceed its capacity, we recommend that you fill the cushion with 85-90% seeds.
Also, if you prefer, you can add a little lavender , orange blossom, rosemary or eucalyptus to perfume your thermal pillow. By heating the seeds, they will help reduce muscle pain.
Another option is to impregnate the fabric inside the cushion with a little essential oil with the scent of your choice.
5. Close and decorate according to your preference
Once you have placed all of your seeds inside the cushion, you can sew its top edge to close it. Then, you can start decorating the pillow to your liking; for this you can use sequins, buttons and even bows and so on.
Aspects to be considered
When placing your thermal pad in the microwave , also put a glass of warm water; this will prevent the cushion from burning. Also, remember not to heat it for more than 3 minutes.
So, as we mentioned earlier, you can use your thermal pillow both to warm your bed at night and to alleviate various body aches.