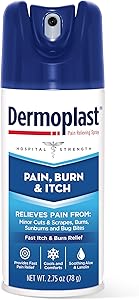
Dermoplast Pain, Burn & Itch Spray, Pain Relief Spray for Minor Cuts, Burns and Bug Bites, 2.75 oz (Packaging May Vary)
One 2.75 oz can of Dermoplast Pain, Burn & Itch Spray
Provides immediate pain and itch relief for minor skin irritations and postpartum care
Maximum OTC strength of benzocaine provides immediate pain relief, menthol soothes and refreshes, and aloe and lanolin moisturize
No-touch application lets you spray on relief without additional pain
Clean affected area and apply Dermoplast spray
What to do in case of a burn
With most burns, the most important step is to quickly cool the skin so that the deeper layers do not continue to burn and cause injury.
However, depending on the degree of the burn, care can be different, especially in the 3rd degree, which should be evaluated as soon as possible by a doctor, in the hospital, to avoid serious complications such as nerve or muscle destruction.
In the following video, we indicate the first steps to treat a burn at home, in a light and fun way:
What to do with 1st degree burns
First-degree burns only affect the surface layer of the skin, causing signs such as pain and redness in the area. In these cases it is recommended that:
Place the burned area under cold water for at least 15 minutes;
Keep a clean cloth dampened with cold water in the region for the first 24 hours, changing whenever the water heats up;
Do not apply any product such as oil or butter to the burn;
Apply a moisturizing or healing ointment for burns, such as Nebacetin or Ointment. See a more complete list of ointments ;
This type of burn is more common when you spend a lot of time in the sun or when you touch a very hot object. The pain usually disappears after 2 or 3 days, but the burn can take up to 2 weeks to heal, even with the use of ointments.
Generally, 1st degree burns do not leave any kind of scar on the skin and rarely present complications.
What to do with 2nd degree burns A 2nd degree burn affects the middle layers of the skin and, therefore, in addition to redness and pain, other symptoms such as blisters or swelling may appear. In this type of burn, it is advised that:
Place the affected area under cold running water for at least 15 minutes;
Carefully wash the burn with cold water and neutral pH soap, avoiding rubbing too hard;
Cover the area with a wet gauze or with a lot of Vaseline, and secure with a bandage, during the first 48 hours, changing as necessary;
Do not pierce the blisters and do not apply any product on the site, to avoid the risk of infection;
Get medical attention if the blister is too big.
This burn is more frequent when the heat is in contact with the skin longer, such as when hot water is poured over clothing or is held in something hot for a long time, for example.
In most cases, the pain improves after 3 days, but the burn may take up to 3 weeks to disappear. Although second-degree burns rarely leave scars, the skin can lighten at the site.
What to do with 3rd degree burns A third-degree burn is a serious, life-threatening condition as the deeper layers of the skin are being affected, including nerves, blood vessels and muscle. Therefore, in this case it is recommended that:
Immediately call an ambulance by calling 192 or take the person quickly to the hospital;
Cool the burned area with saline solution , or in its absence, tap water, for about 10 minutes;
Carefully place a sterile gauze moistened with saline solution or a clean cloth over the affected area until medical help arrives. If the burnt region is very large, a clean sheet moistened with saline solution can be rolled up, which does not shed hair;
Do not place any type of product on the affected region.
In some cases, the third-degree burn can be so severe that it causes multiple organ failure. In these cases, if the victim faints and stops breathing, cardiac massage should be started. See here the step-by-step of this massage .
Since all layers of skin are affected, nerves, glands, muscles and even internal organs can be severely damaged. In this type of burn you may not feel pain due to the destruction of the nerves, but immediate medical help is needed to avoid serious complications as well as infections. What not to do After burning the skin it is very important to know what to do to quickly relieve the symptoms, but you should also know what not to do, especially to avoid complications or sequelae. Thus, it is advised that:
Do not attempt to remove objects or clothing stuck to the burn;
Do not use butter, toothpaste, coffee, salt or other homemade product;
Do not pop bubbles that appear after the burn;
In addition, gel should not be applied to the skin, as the extreme cold, in addition to causing irritation, can worsen the burn and even cause a shock due to the large temperature difference.
When to go to the hospital Most burns can be treated at home, however, it is advisable to go to the hospital when the burn is larger than the palm of your hand, many blisters appear, or it is a third-degree burn that affects the deeper layers of the skin.
In addition, if the burn also occurs in sensitive areas such as hands, feet, genitals or face, you should also go to the hospital.
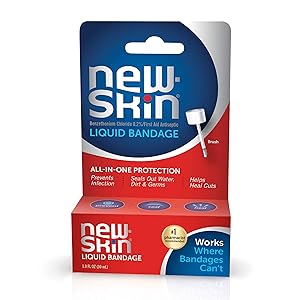
New-Skin Liquid Bandage, Waterproof Bandage for Scrapes and Minor Cuts, 1 fl oz
One 1 fl oz package of New-Skin Liquid Bandage
Waterproof bandage seals and protects minor wounds
Skin protectant contains benzethonium chloride to help prevent infection by killing 99.9% of germs
Fast-drying, flexible liquid skin bandage protects against water, dirt and germs and stays on your skin unlike traditional adhesive bandages
Clean the affected area, apply a small amount and let dry
Liquids used in dressings: to use or not?
Until recently, our mothers and grandmothers used several medications, which in their understanding had miraculous abilities to heal wounds, among them we can highlight mercurochrome, a reddish-looking liquid, merthiolate, a colorless liquid that burned a lot when placed on the the wound, and the hydrogen peroxide that burned as hot as merthiolate and caused a boil over the wound. All these medications are now in disuse, below we explain why.
The current procedure to treat any type of wound is basically washing it with soap and water, this procedure alone is enough to kill the bacteria present in the wound. Washing the wound prevents infections and even minimizes cases of allergic reactions, especially in burns where sensitivity is usually greater.
We emphasize that the cuts, whether superficial or deep, should only be cleaned with soap and water, in the case of deeper ones, it is necessary to go to the doctor, given that in some cases it is necessary to stitch the cut. Another case in which dressings are necessary are burns, which must be covered with gauze soaked in Vaseline so that they do not stick to the wound.
It was previously unknown that washing the wound well would aid in healing, as it eliminates bacteria and minimizes the risk of infection. Older people should remember medicines used at the wound site, which came with a kind of shovel, used to apply to the wound site. Its direct use on the wound helped in the proliferation of bacteria that developed in the flask, which were then passed on to another wound, contaminating another person. Therefore, nowadays it is a consensus among physicians that the best way to perform the asepsis of a wound is using water and mild soap.
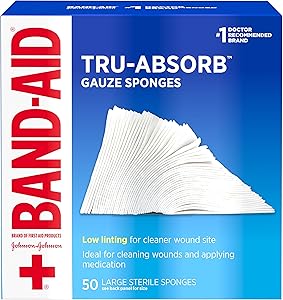
Band Aid Brand First Aid Products Tru-Absorb Gauze Sponges for Cleaning Wounds, 4 in x 4 in, 50 ct
50-count package of Band-Aid Brand of First Aid Products Tru-Absorb Sterile Gauze Sponges for cleaning and applying medication to wounds
These first aid supplies feature a special low-linting design which helps provide cleaner wounds and may help prevent irritation
Each large gauze sponge measures 4 inches by 4 inches in size, making them the ideal first aid coverings for minor cuts, scrapes, and burns
Sterile sponges feature soft cushioning offers extra comfort when cleaning dirt and contaminants from the injured area
Use these first aid gauze sponges for cleaning and prepping wounds, or for applying medication. They can also be used as absorbent wound dressing
Sterile Gauze – Injuries well treated!
We've already talked here on the blog about the importance of various products in wound care. Among those already discussed are Merthiolate and cotton wool . And today to further enhance this subject, let's talk about sterile gauze and its importance in the process of first aid and wound dressing. Check out this full article now and know where to find it for the best price!
What is sterile gauze? The sterile gauze pad is a hospital medical item used mostly to protect wounds (dressings), it acts as an antibacterial barrier protecting the wound from contaminating pathogens (bacteria, fungi, viruses etc...), which are present in the air, it is usually made with cotton thread and its main job is to absorb the liquid from the surface of the skin or wound.
There are currently many uses for sterile gauze , present in most first aid kits and are also widely used in pharmacies, clinics and hospitals.
Dentists can use rolls of gauze to absorb excess saliva and blood while extracting a tooth. Surgeons often use it to prevent the accumulation of blood when making an incision, thus promoting its stagnation and improving vision.
People in general use sterile gauze to bandage, because they were injured or because they had a surgical procedure and they constantly need to change the dressing.
What is sterile gauze made of and what is the packaging like? Normally, sterile gauze is manufactured in size 7.5 cm wide by 7.5 cm long when folded and 15 cm x 30 cm when open, the most common is it contains 9 threads per cm², 11 threads per cm² or 13 threads per cm².
It almost always has the appearance of a mesh, similar to fabric.
One of its main features is the expansion that occurs due to moisture (absorption of fluids such as blood or secretions), which helps people to heal faster and also helps to keep the surgical site clean, without traces of blood.
Packing The sterile gauze is usually packed in surgical grade paper on one side which contains information about the product as the record number in ANVISA, expiration date, product dimensions among others, and the other side has a transparent laminated film where you can have the compress view.
Everyone must be careful to avoid contamination during the opening, as this contamination can generate much bigger problems such as infections, inflammations, fungi, among others.
What is sterile gauze indicated for? Every day, injuries such as cuts, abrasions, burns, etc. are often seen. And as we saw earlier, wounds that are not properly treated can be affected by pathogens (bacteria, fungi, viruses etc…).
The swabs sterile gauze are used mostly in small single or sutured wounds wounds. And its main function is to prevent external pathogens from contaminating the wound, that is, basically speaking, sterile gauze is used to make dressings to protect the wound from bacteria contained in the air, clothing, bed, sofa, among others.
An example is if the patient is injured in the hand, and needs to drive, so he will need to change gears, take the wheel where it is full of contaminating pathogens, then the dressing made with sterile gauze that will protect the wound from these bacteria enters .
First aid Whether it's a cut or a bruise, if the wound is bleeding from the wound, try to stop the bleeding first. If the wound is not too deep (if it is deep, call the emergency room right away!), the blood will usually stop within five minutes.
After stopping the bleeding, check if the wound is dirty, if it is, wash the wound with water, bacteria and foreign materials in the wound must be reduced and then clean with saline, disinfect the wound (antiseptic of your choice ), and finally protect the wound with sterile gauze to prevent infections. However, if the wound is not too dirty, wash the wound with water or saline and avoid iodine disinfection.
If the bleeding exceeds five minutes, it is recommended to seek the emergency room to close the wound, suturing (making stitches) the wound.
After dressing with a sterile gauze pad , the wound must be kept clean and sterile, when the wound touches water or is contaminated, hands must be washed and the gauze must be changed.
If the gauze is sticking when removing it, use saline solution (saline solution) to wet the gauze, then carefully remove it.
When redressing the dressing, cover the wound with sterile gauze (hold the corners when removing it from the wrapper, do not touch the side that will touch the wound), and finally secure the gauze with breathable tape (eg, micropore tape).
The sterile gauze can also absorb any fluid or blood from the wound drain, helping to avoid damage to clothing or other objects from contamination.
Keeping in mind that during the care period you can bathe normally every day, as long as you can remove the sterile gauze before bathing, the wound can be watered and rinsed normally. After bathing, the dressing can be remade as before.
Also, note the daily changes in the wound, they usually take a couple of weeks to heal. If there is pain, swelling or a strong odor, see a doctor to examine the wound again.
What should I know when buying sterile gauze? These tips are specific for buyers (from hospitals, distributors, pharmacies, clinics, veterinarians, among others) of hospital medical products, in this case sterile gauze pads . Check it out now to stay alert:
Concern with origin First, you must check if the manufacturer of sterile gauze has a registration with Anvisa regarding the product. Anvisa (National Health Surveillance Agency) is responsible for promoting the sanitary control of the production and consumption of products and services subject to health surveillance, including processes, environments, inputs and technologies related to them, such as food, medicines, products hospital doctors, among others, ensuring greater safety for people who will use that product.
It is possible to consult all records of all hospital medical products that are manufactured in Brazil and find out if that manufacturer is authorized by Anvisa to manufacture a specific product, just enter the manufacturer's CNPJ or corporate name or search for the product name itself or your registration number on the agency's website.
Now we know that we should only buy products registered with Anvisa.
Sterility guarantee Second and not least is the product sterilization report, when you are going to buy a sterile gauze pad , or any sterile product, the least we expect is that this product comes sterilized correctly, after all if you need the product to be sterile it is precisely to avoid contamination, infection, among others. But how do you make sure the product is sterile?
Well, when the industry manufactures a certain product, it does not only manufacture one unit, but several and this set of units of manufactured products receive a numbering (LOT), the product batch is described on its packaging, after this batch of products is sterilized he receives a report, known as a sterilization report. Through the lot number, you, by law, have the right to request the sterilization report of the product from the manufacturer of the product, and he must provide it. That way you can be sure that the product has really been sterilized.
When it comes to avoiding hospital contamination and infections, this request for a sterilization report is the least we can do to ensure the safety of the user (patient) and the place. Having access to the sterilization report is your right, and it costs nothing to ask for it. After all, any medical product, so-called sterile, has its sterilization report.
Verification of conservation status Check the validity of the product, check the state of the packaging both at the time of receipt of the product and at the time of use, if it has wet spots, or the packaging is damaged with tears, cuts, etc., when receiving the product, no receive, inform the manufacturer or the company responsible for the sale so that the product can be exchanged or reimbursed.
If any problem is noticed during use, discard the product and check the reason for the occurrence.
After confirming the quality of the sterile gauze purchased In the case of sterile gauze pads, you must pay attention to the quantity offered in the pack, size, weight or packaging of the dressing , and the number of threads stated on the package, whether it is 9 threads, 11 threads or 13 threads per cm².
The weight of the product is directly linked to its quality, the greater the weight per unit, the greater the absorption, so the smaller the quantity to be used, this case is valid both for sterile gauze packs of 5 or 10 units and for gauze non sterile package with 500 units.
Through the weight of the package and the size of the product, it is possible to know the quantity that comes in the package, and if it is actually informed on the package, another way is to perform the count manually.
To check if the product really has 13 threads per cm², just take a magnifying glass, make a square measuring 1 cm wide by 1 cm long, after that place the magnifying glass over the fabric (gauze) and count the threads inside the space of 1 cm².
Always remember that a quality gauze represents an economy in the quantity of the product used, greater safety and comfort for the patient.
Use of sterile gauze pack Use the sterile gauze pad immediately after opening.
If the package is opened, it should no longer be used as a sterile product.
When picking up the gauze, do not take it in the middle, take it by the edge and cover the wound, being careful not to touch the part that will go to the skin (wound). The use of surgical gloves or sterile forceps is recommended to avoid contamination.
When purchasing a sterile gauze pad , take into account the size of the wound and the amount you will be using.
The gauze pads that are left in the package after opening must be discarded, as these can no longer be considered sterile to bacteria when in contact with the outside air, the longer it takes to place the gauze after opening the envelope, the more bacteria to the they will be attached, so be careful if the sterile gauze is exposed for too long outside the packaging it may be full of bacteria and could result in wound infection. If using gauze inside the package, it is recommended to discard the gauze that is left in the package in order to prevent further complications.
Remembering that in patients with immune deficiency, (such as diabetics, HIV carriers, among others), small wounds can become major infections.
Check the validity of the product. Always buy products registered with Anvisa. IMPORTANT: Remember that you can demand from your supplier the sterilization report of any sterile product. The report is made by batch of products produced. Precautions are never too much, especially when there is a risk of hospital infections, which can lead to death. Main presentations of sterile gauze sterile cotton gauze Made of white cotton wool, good absorbency, soft and odorless, wrapped with gauze in pure cotton fabric with 13 threads per square centimeter, folded in a way that facilitates the use of the material, wrapped in a plastic wrap. Packaged in surgical grade paper and plastic film in 3 layers of polyethylene and PVC, with uniform sealing that provides a microbial barrier, maintenance of sterility and the aseptic opening technique.
Available in sizes:
10x15 cm
10x1 m
10X2.5m
10X20 cm
10x2 m
10x30 cm
Sterile tonsil gauze
Made of white cotton wool, good absorbency, soft and odorless, wrapped with sterile gauze in pure cotton fabric with 13 threads per square centimeter, folded so as to facilitate the use of the material, wrapped in a plastic wrap. Packaged in surgical grade paper and plastic film in 3 layers of polyethylene and PVC, with uniform sealing that provides a microbial barrier, maintenance of sterility and the aseptic opening technique.
Available:
W/ RX W/2 UNITS
Without RX W / 4 UNITS
No RX W / 5 UNITS
Anchored sterile gauze Made of white cotton wool, good absorbency, soft and odorless, wrapped with gauze in pure cotton fabric with 13 threads per square centimeter, folded in a way that facilitates the use of the material, wrapped in a plastic wrap. Packaged in surgical grade paper and plastic film in 3 layers of polyethylene and PVC, with uniform sealing that provides a microbial barrier, maintenance of sterility and the aseptic opening technique.
Available:
W/ RX W/2 UNITS
Without RX W / 4 UNITS
No RX W / 5 UNITS
No RX W/6 UNITS
No RX W/2 UNITS
sterile ball gauze Made of gauze pad with or without visible radiopaque filament in each, minimum quantity of 5 units in each package. Packaged in surgical grade paper and plastic film in 3 layers of polyethylene and PVC, with uniform sealing that provides a microbial barrier, maintenance of sterility and the aseptic opening technique.
Available:
W/ RX N.0 W/ 10 UNITS
W/ RX N.0 W/ 5 UNITS
W/ RX N.0 W/ 5 UNITS
W/ RX N.1 W/ 5 UNITS
W/ RX N.2 W/ 5 UNITS
W/ RX N.3 W/ 5 UNITS
W/ RX N.4 W/ 5 UNITS
Roll sterile gauze Made of pure cotton fabric with 13 threads per square centimeter, rolled in a way that makes it easy to apply, wrapped in a plastic wrap. Packaged in surgical grade paper and plastic film in 3 layers of polyethylene and PVC, with uniform sealing that provides a microbial barrier, maintenance of sterility and the aseptic opening technique.
Available in sizes:
With 1 m
2 m
Sterile gauze for laparoscopy w/ 5 pcs.
With 13 threads per square centimeter, 14cm x 21cm, tightly wound, without optical bleach, starch-free, with radiopaque thread. Packaged in surgical grade paper and plastic film in 3 layers of polyethylene and PVC, with uniform sealing that provides a microbial barrier, maintenance of sterility and the aseptic opening technique.
Available:
W/ RX W/ 5 UNITS
Sterile gauze for ENT Made with 100% cotton bleached tape; no optical bleaching. The tape is wound and secured with black thread for easy handling. Packaged in surgical grade paper and plastic film in 3 layers of polyethylene and PVC, with uniform sealing that provides a microbial barrier, maintenance of sterility and the aseptic technique for opening.
Available in size:
With 1 m
Sterile popcorn gauze with 10 pcs. Made of Morim-type fabric, folded in a specific way, for use in surgical procedures, without bleaching, starch-free, with radiopaque thread, wrapped in a plastic wrap. Packaged in surgical grade paper and plastic film in three layers of polyethylene and PVC, with uniform sealing that provides a microbial barrier, maintenance of sterility and the aseptic opening technique.
Available:
ADULT WITH 10 UNITS
CHILDREN W/ 10 UNITS
Sterile buffer gauze Made of pure cotton fabric with 13 threads per cm², folded in a rectangular shape so that there are no exposed ends, with cotton thread for removal, wrapped in a plastic wrap. Packaged in surgical grade paper and plastic film in 3 layers of polyethylene and PVC, with uniform sealing that provides a microbial barrier, maintenance of sterility and the aseptic opening technique. Available:
FOR SEPTUM W/2 UNITS
1.5X100 CM NASAL CAP
PREVIOUS NASAL CAP
ADENOID CAP WITH 02 UNITS
2.5X100 CM VAGINAL CAP
4.5X100 CM VAGINAL CAP
HYDROPHY LARGE PACKING
HYDROPHY SMALL PACKING
Where to buy? Now that you know a little more about this very important product, how about searching for sterile gauze here at Cliquefarma ? Our price searcher and comparator will inform you of the best offers and terms of delivery of the product right now! Just click on the link on the side, compare and save.
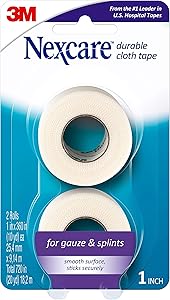
Nexcare Durable Cloth First Aid Tape, Tears Easily, For Securing Splints and Bulky Dressings, 2 Rolls
A strong cloth tape for general purpose bandaging and whenever extra strength is needed Nexcare Durable Cloth Tape comes to you from the #1 leader in U.S. hospital tapes
This tape sticks securely, making it the perfect choice for securing splint and bulky dressings
Living life adventurously means minor injuries are inevitable–especially in a non stop household–so always be prepared with Nexcare Durable Cloth Tape
From the #1 leader in U.S. hospital tapes
Comfortably secures gauze and dressings Strong adhesive stays on, even during exercise
Family first aid kit: know how to assemble
Taking care of the family's health is one of the responsibilities of everyone who is part of it. A good way to put this care into practice is to always have a complete first aid kit at hand. The word “accident” needs no explanation and it can happen at any time, especially if you have children or elderly people at home.
Of course, some more serious accidents require medical attention, but having certain tools on hand is essential, especially for minor problems, such as scratches, which, if not properly treated, can become infected.
Want to know how to assemble a very complete kit? So, see below the list we made with the items that can not be missing!
Cotton and gauze These are items that help when cleaning wounds, but should not be used dry. The cotton , for example, should be soaked in saline or any other antiseptic liquid. Thus, it does not stick to the injury site and facilitates cleaning.
Gauze has been widely used to clean scratches or wounds of the type, precisely because it does not loosen threads. Still, it is interesting that it is moistened before use.
It can also be used to cover the wound, preventing the deeper tissue from being exposed to various types of microorganisms, such as mites, fungi, bacteria and others. Remember that the dressing needs to be changed constantly.
tape and tape Materials important for making bandages of various sizes, the tape and tape should be in your family first aid kit. A recommended type of tape to always have at home is the micropore version, which has small pores, allowing the skin to breathe.
Regardless of the type of tape chosen, only use products created specifically for dressings. These versions are tested in a way that minimizes the chances of allergy and avoids bruises and discomfort, besides sticking better to the skin.
Band-aid dressing For minor wounds, such as superficial cuts, band-aid dressings are recommended. They are made with a tape that allows the skin to breathe, and prevent the wound from becoming infected, protecting against dirt and external contact.
The ideal is to have at home band-aids of different sizes, which can be used both on small wounds on fingers and on larger areas.
Thermometer To measure temperatures quickly and accurately, identifying cases of fever , it is recommended to have at least one thermometer at home. There are electronic options , infrared and ecological versions , which do not have plastic or substances that can harm the environment.
Previously, the most common version of thermometers was mercury , however, this option was banned in 2017 by Anvisa, as this substance is toxic. If you still have one of these at home, Anvisa's recommendation is to dispose of it in appropriate places , such as those created for collection of batteries.
Lubricating eye drops The lubricant eye drops can be used to reduce dryness and irritation of the eyes and is especially recommended for those who work in front of computers or use contact lenses .
Another common use is to get rid of discomfort caused by external agents, such as sand and dust.
Saline and antiseptic There are several functions of saline solution for your first aid kit, and one of them has already been mentioned above. Another function is to clean the wounds and, in this regard, do not skimp: you must use an abundant amount, so that the place is really clean.
The serum is also excellent for removing dressings, as it is quite normal for them to stick and, at the time of removal, cause great pain in the patient.
The antiseptic can kill microorganisms that may be at the site of the injury. If it is not applied, the chances of infection are great.
Gloves Gloves are very important when it comes to handling any type of wound. After all, at an unexpected moment, we don't have time to wash our hands and gloves help to avoid contamination of the place.
Prefer disposable gloves , as the reuse of these materials is not recommended, which can lead to infections.
Scissors Scissors are also a very useful item and you will need it to do just about anything: cut tape, bandages and even gauze. Ideally, before using it, you should be able to clean it with an antiseptic solution .
A very easy way to do this is to ask for help from a beauty salon, for example, since this type of establishment has an oven for sterilizing pliers and other materials.
Gels and Ointments Gels and ointments are important first aid items and a wide selection is recommended. Try to keep options for burns, ringworm, antibiotics and against muscle pain.
It is important to note that not all gels and ointments are sold without a prescription, so it is recommended to look for over-the-counter options that are safer to use in a family first aid kit.
Compress pouch The compress pouch is an indispensable item for your kit! It can be used in a wide variety of situations, such as blows, skin inflammation and sores that create pus .
The tip is to choose an option that can be used either as a cold or hot compress, increasing its practicality.
Basic medications Having basic and over-the-counter medications in the kit is important. Put some options against muscle aches and headaches , as well as others to treat cold and flu symptoms . However, remember that self-medication is dangerous and, whenever possible, see a doctor for a correct diagnosis.
Now that you know what's in the first aid kit, how about getting into practice and putting one together for your family? The Drugstore Liviero has great products to make up your kit, always at an incredible price. Click on the banner to know!
WIDE SIZE RANGE - Paw Legend Female dog diapers are available in 4 sizes - sizes XS all the way to L.Size Large best for dogs waist size 17.5" to 27". If your dog is in between sizes, factor in their weight, A heavier do,go up a size. A skinnier dog, go down a size. PLEASE SEE PHOTO to MEASURE YOUR DOG WITH MEASUREMENT TAPE FOR CORRECT SIZE BEFORE ORDERING. Adjustable hook&loop closures and a range of sizes ensures you will get a perfect fit that won’t slip.
SPECIAL PROTECTION & LEAK PROOF - Our Dog incontinence products are designed to make life with a leaky-dog easier for everyone. It doesn't matter whether your female dogs in heat, dogs with urinary incontinence and excitable urination, these diapers are ideal to absorb wetness and eliminate messes and keep your dog’s business private. We are making our lives easier with our house care, but we are also taking a lot of pressure off of our dogs as well.The inside pad color is white.
COMFORTABLE FIT & MULTIPLE PROTECTION - There have a fully waterproof outer layer to keep the diaper from leaking,the permanent odor control layer and wick away moisture helping to keep your dog's skin drier. The texture and extra quilted stitching for comfort make it unique among all. There have a hole for your furry friend’s tail, they are softer compared to disposable dog diapers, no crinkle sound when she moves.
EASY PUT ON & PORTABLE - The diaper is extremely easy to put on and take off with adjustable hook-and-loop tabs for a great customized fit. Flexible hook&loop closures don’t stick to fur, more importantly, they stay on, so you can let your pet roam freely in the house without accidents! They are today’s most sanitary way to help dogs and their owners. Our diapers also work well as puppy pads during training or for stop accidents while traveling with your pet.
WASHABLE - These washable diapers are a great option for dog owners who wanting to be more environmentally friendly. You will also likely spend less money in the end because you won’t be buying diapers every week. Instead, you can get a supply of these (which is more money upfront) and use them over and over. Reusable Diapers are support for 300 washes. Fasten Velcro before washing.
Homemade diapers for dogs
A dog diaper is used in the same way as a baby diaper, but on dogs that are in heat or have reached an age where they are incontinent. Due to the nature of dogs' bodies, it is often difficult to find a safe method of putting diapers on them at home without friction and being uncomfortable. There is an easy way to turn something that doesn't fit your pet into a very appropriate item of clothing that will leave you and your dog at ease.
Step 1 Place a children's swim diaper on a table with the front side facing up.
Step 2 Measure the widest point of your dog's tail with a tape measure. While measuring, if it doesn't cause the dog discomfort, you can compress the hair so that it is straight.
Step 3 Draw a circle the size of your dog's tail 5 or 7 cm above the diaper crotch with a pen. The circle should be centered along its width.
Step 4 Make a hole in the center of the circle with the scissors and cut on the line you drew. You should cut only the front side of the diaper and not the bottom.
Step 5 Place the back of the diaper against your puppy's belly, with the top edge toward your head.
Step 6 Pull the rest of the diaper up, over the dog's tail, so that the front side of the diaper is on its back.
Step 7 Pull the dog's tail through the hole in the top and close the diaper flaps around its body.
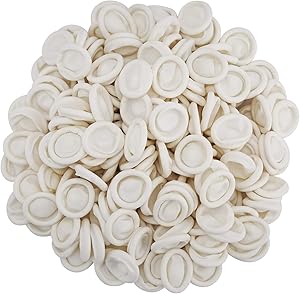
Large size : 2.67 inch long and 1.14 inch in diameter, flexible and suitable for fingers. These finger covers can help you get the job done without restricting flexibility or sacrificing comfort.
High-quality materials : The finger cots are made of latex, powder-free, keep clean and hygienic. Finger protectors are great for repairing electronics, assembling models or painting.
Sturdy and durable : thick enough to handle everything you need, protect your finger from harmful substance and scratches. If you usually work on craft projects, it’s better to use these finger cots to keep your fingers and your craft materials safe from damage.
Multiple uses : Clean room, electronics applications, semiconductor, crafting, painting, beauty and more.
Package included : Approx.210 PCS in a pack, especially packed in rolled form for easy donning.
Can a tongue cradle correct habits like sucking a finger?
It is generally used for children of primary or middle school age who have developed abnormalities in the teeth, jaw, muscles and / or skeletal due to the sucking of the thumb and finger or a condition called tongue puncture.
An orthodontist or dentist may recommend that your child use a tongue crib for several months to prevent these behaviors.
While this can be an effective treatment for your child, there are other options that can also be used to curb these behaviors.
You can decide to use a combination of interventions or just try a tongue cradle to help correct thumb and finger sucking and tongue pushing.
How it works The tongue cradle is an orthodontic appliance with a metal grille that blocks the roof of the mouth.
This grid makes it impossible for your child to suck on the thumb or fingers because they cannot get suction during suction.
It can also help to correct the position of your child's tongue by encouraging him to rest down and back, instead of forward and up, which can cause many mouth problems.
Your dentist or orthodontist will most likely recommend a tongue cradle or other orthodontic device if you notice signs of permanent damage due to your child's sucking behavior or tongue position.
One study found that a tongue cradle resulted in participants abandoning the sucking habit, as well as improving overbites and other orthodontic conditions.
The tongue cribs can be removable or permanent, depending on your child's needs.
Your child may have a removable crib if you feel that he will remember to use it regularly and will not lose it.
You are more likely to choose a permanent tongue crib if you feel that your child may be tempted to take it off frequently or simply not use it.
Your orthodontist or dentist can advise your child to use the tongue cradle for several months or even a year to help break their sucking or pushing habits.
What it treats The tongue cradle can discourage thumb and finger sucking and regulate tongue movements.
Sucking on your thumb and finger can cause tongue thrust, but you don't need to suck your thumb or fingers to develop this condition.
Finger and thumb sucking behaviors and tongue thrusting can create problems in the mouth, including:
damage to a child's upper front teeth
change in a child's bite, such as developing an overbite or open bite
an abnormal technique of swallowing
problems with jaw alignment
altered speech patterns
Infants, toddlers and young children often suck on their thumb or fingers to feel comfortable, which is considered normal low-risk behavior.
But when a child gets older, this behavior, as well as the passing of the tongue, can be worrisome. It may affect:
adult teeth
skeletal development
jaw alignment
speech
How to say Your child may have tongue jerk if:
Your tongue advances against your front teeth when pronouncing certain letters.
They breathe through their mouths.
They have chapped or chapped lips regularly.
Your lips remain open when your mouth is in a resting position.
Other devices A tongue cradle is just one type of orthodontic appliance that you can use to suck your thumb and finger or push your tongue. Other similar devices include:
a language trainer
a tongue rake
Hawley device
a language screen
a device to suck the tongue
Some of these devices have rakes or tips that redirect the child's tongue or discourage sucking.
Some feature plastic rolling devices that the tongue can move in place of the thumb or sucking finger.
Others are like cribs and block the child's ability to suck on fingers and thumbs or to push the tongue without additional sensory resources.
Your dentist or orthodontist may also recommend other treatments or devices, depending on your child's needs. This can include an expander or keys. When is it appropriate? You can consider a tongue crib or other orthodontic appliance for your child when he approaches primary school or begins to lose his baby teeth.
The length of time that a child mixes baby teeth and adult teeth is called mixed dentition years.
This is the period when orthodontic interventions can be very successful as the child's skeletal system matures, but it is still growing and developing and is not yet fixed.
You can look for a tongue crib for your child, even if there are no signs of permanent damage to teeth or jaw.
You may simply want your child to stop the finger-sucking habit as he grows up.
It's painful? Your dentist or orthodontist should be able to talk to you about the pain or discomfort that a tongue crib can cause in your child.
The insertion of the tongue cradle can cause some discomfort. Your child may be uncomfortable with the device for the first few days or weeks as it adapts to the change in the mouth.
What does that look like The tongue cradles feature some metal bars that are near the top of the mouth, close to the front teeth. The bars look like a crib or crate.
Permanent tongue cribs are attached to the upper molars with a thread that wraps around them and then passes along the inside of the teeth to the cradle.
Other methods You may need to help your child break the habit of sucking the tongue or finger before seeking any orthodontic, oral or other interventions.
One study cautions against using just a tongue cradle or other orthodontic appliance to reform a child's sucking behavior. He found that a child may return to sucking behavior after removing the device.
The study recommended the use of interventions other than the device to stop this behavior. This includes working with the child to change behavior.
It is important that your child is self-motivated to abandon the behavior in order to successfully break it in the long run.
Experts recommend finding a behavior-based program that includes positive reinforcement for long-term change.
You may consider seeking help from a speech therapist to correct the effects of thumb and finger sucking and tongue puncture.
Speech therapists can work with your child to help correct speech development problems, as well as your swallowing technique. These interventions include mouth exercises, as well as speech exercises.
Sessions with speech therapists can last a few months or more, depending on the severity of your child's condition.
If necessary, you can seek training from a speech therapist or other specialist to advise you on how to encourage your child to stop the behavior.
These techniques can help you correct the position of your child's mouth when at rest and other harmful habits developed by sucking your finger or pushing your tongue.
These techniques can help your child correct their behaviors more effectively.
When to see an orthodontist If your child is still sucking his thumb or fingers at primary school or later, or if you notice a speech problem, you can make an appointment with an orthodontist.
A consultation with an orthodontist may also be recommended if you notice they rest their mouths in an open position or appear to have abnormal swallowing behavior.
It is important to correct these behaviors in mid-childhood to prevent the development of more serious oral, facial and jaw problems in the future.
The final result You can consider a tongue crib if your older child still sucks on his thumb or fingers. This behavior can cause problems in the teeth, jaw, skeleton and muscles.
A tongue crib can help them stop the habit, as well as correct the damage that the behavior has caused in their mouth.
Talk to your orthodontist or dentist about using a tongue cradle and see a speech development specialist if your child has unusual speech patterns or swallowing techniques.
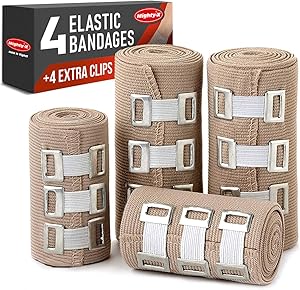
Premium Elastic Bandage Wrap - 4 Pack + 4 Extra Clips - Durable Compression Bandage (2X - 3 inch, 2X - 4 inch Rolls) Stretches up to 15ft in Length
VALUE PACK - Your package includes 4 rolls of compression wrap, two 3-inch rolls, and two 4-inch rolls. The smaller bandage is perfect for covering smaller areas while the larger bandage is ideal for larger areas.
DURABLE MATERIAL - Our elastic bandage wrap is made from premium polyester. It provides the best results by keeping your muscles tight. Each compression bandage extends up to 15ft when fully stretched. This is long enough to wrap most wrists, ankles, or knees.
INDIVIDUALLY PACKAGED - Our elastic bandages come encased in a protective wrapper until you’re ready to use them. This keeps your crepe bandage hygienic and debris-free to help prevent any kind of adverse reaction should an injury occur.
COMFORTABLE and SAFE CLOSURE - Each compression bandage wrap comes with two elastic bandage clips. This is one of the most effective ways to keep a wrap securely in place. Mighty-X will Hold it Tight!
4 EXTRA CLIPS are included with your elastic wrap bandages. It’s always a good idea to have some backups. If you’re dealing with a chronic injury or in case you lose one, you’ll have another to secure your wrap.
PHYSIOTHERAPEUTIC TREATMENT WITH ELASTIC BANDAGE
Functional bandages are widely used in physiotherapeutic treatment in conjunction with other specific techniques of these professionals. The elastic bandage has as a principle the adequacy of muscle tone and joint stabilization, with the correction of its positioning. As main results, we can highlight analgesia and selective limitation of range of motion.
There are two types of functional bandages: elastic and non-elastic bandages. Non-elastic bandages are indicated in cases of pain, joint instability, muscle imbalances and subluxations. They should not be used in cases of unconsolidated fractures, skin wounds, dislocations and tumors. Among the best known, McConneel, Mulligan, Spiral Taping and Sports Taping stand out.
This text has the function of addressing the important aspects of its technique and application.
What is elastic bandage? The elastic bandage is the functional bandage with elastic properties. The best known elastic bandage is kinesio taping, created in 1973 by Dr. Kenzo Kase.
It is built 100% by cotton fibers that have up to 140% elasticity. To stick to the skin, the bandage has a special glue without latex, which allows skin breathing without obstructions and does not create friction with the skin.
The elastic bandage does not limit body movement, which is considered its greatest benefit in relation to rigid bandages. Added to this factor, it is waterproof, so it is not necessary to remove it to take a shower and it can be used in sports or leisure activities involving the aquatic environment. All of this contributes to the durability of the bandage is greater, and can last from three to five days.
They are sold in rolls, with dimensions of 5mx5cm and available in different colors. Unlike elastic resistance bands, where each color represents a different resistance, the colors of elastic bandages do not influence their tension, being all the same.
Purpose of elastic bandage The elastic bandage aims to offer external support to soft tissues, not limiting its action. It promotes constant mechanical stimuli in the skin, which activate skin receptors that are sensitive to changes in the articular system. These communicate with deep tissues, causing an increase in interstitial space, which results in a decrease in pressure on the nocioceptors, decreasing pain and allowing circulation and lymph to flow more freely.
Importance of elastic bandage in physical therapy treatment During physical therapy treatment, elastic bandage is another resource that should be used in conjunction with other techniques, especially kinesiotherapy. It can be used both in the prevention and rehabilitation of injuries. With it, the patient reports a feeling of security, as the execution of movements is allowed without harming the injury.
It will improve pain, blood and lymph circulation, stimulate proprioception and body awareness, correct joint misalignments, improve range of motion and decrease muscle spasm, thus acting in synergy of muscle contraction.
Due to all these resources, it is widely used in all areas of physiotherapy, having applicability in sports, musculoskeletal, neurological, pediatric, geriatric, rheumatological, women's health, among others.
How to apply elastic bandage to your student As with any other physiotherapeutic procedure, before application, an evaluation is necessary to verify the possibilities and indications of the method. Through static postural assessment, the physiotherapist observes misalignments and postural deviations that can be corrected by bandaging.
Dynamic assessment is also of fundamental importance and, in addition to gait, postures and gestures used for work or sports gestures in cases of athlete patients must be observed. In addition, other functional assessments should also be used, such as the joint mobility test and the flexibility and muscle strength tests.
With the observation of these movements, it will be possible to complete the positioning and tensioning of the bandage, in order to facilitate and not harm the patient's routine. The reassessments must be frequent and standardized, to observe the progress of the treatment and for the professional to rethink his objectives and conduct, reevaluating the need, the positioning and the tension of the bandages.
Before applying the bandage it is very important to prepare the skin. The area must be cleaned with alcohol and in some cases a fixative may be used. Magnesium milk is indicated as a pre-applicator. If the bandage is applied in regions where hair is present, trichotomy is necessary to guarantee the adherence and durability of the method.
After preparing the area, the physiotherapist cuts a piece of the bandage according to the region and with the purpose of the application. It is not possible to make the cut by hand, and scissors are needed for the procedure. It is important to take into account the tension that will be applied, as this will increase the final size of the bandage.
With the cut made and without removing the protective adhesive from the glue, the edges must be cut in a rounded shape, as shown in the figure below. In applications where one side needs to be divided into smaller parts, all of these parts also need this rounded cut. This procedure facilitates the adhesion of the bandage on the skin, promoting its durability.
With the cut performed properly, the ends of the bandage should be separated from the center, by means of a small cut in the protective adhesive. These lateral parts are called anchors and serve to fix the bandage, with no traction being applied in this region. The center, called the tail, will receive tensioning, according to the specific purpose of the treatment.
The following steps are then taken at the time of application:
The first anchor's protective adhesive is removed and it is placed in the desired region of the body, without tension;
The protective adhesive of the tail is removed, the appropriate tensioning is applied and then it is glued to the body;
The protective adhesive of the third anchor is removed and it is also finally glued to the body, without tensioning.
After application, it is necessary to rub the bandage in order to activate the glue and thus promote greater durability. After application, the therapist should ask the patient to perform some functional movements, to see if the bandage is not interfering with the individual's comfort or functionality.
The most common applications are related to joint repositioning, changes in muscle activation and lymphatic drainage.
Joint repositioning In bandages for joint repositioning, it is necessary to keep the joint in neutral and not perform movements during application. In cases where the patient is unable to reach the neutral range (or that is the treatment goal) the joint must be positioned as close to the neutral as possible.
Alteration of muscle activation Regarding the alteration of muscle activation, there are two methods for applying elastic bandages: one to inhibit and the other to activate muscle activity: Distal to proximal application In this method, the elastic bandage is applied at the insertion of the muscle and the tensioning is performed towards the origin. This application is used to inhibit muscle contraction and is generally indicated for inflammation or acute pain. A voltage of 0 to 15% is used on average.
Proximal to distal application In this method, the elastic bandage is applied at the origin of the muscle and the tensioning is performed towards the insertion. This method is used in chronic conditions to stimulate muscle contraction. Stresses from 15 to 100% can be used.
Lymphatic drainage The application of elastic bandages with the objective of lymphatic drainage is being increasingly recognized for the treatment of patients with disorders of the circulatory and lymphatic system. It can be used in cases of lymphedema, edema in premenstrual and postoperative periods of cosmetic surgery.
The technique must always be associated with known manual lymphatic drainage. As is known, in cases of lymphedema there is an increase in the size of the affected limbs, due to the decrease in lymphatic pumping. For this reason, the elastic bandage is preferable to the non-elastic bandage, which does not allow accommodation according to the change in the size of the lymphedema.
The tape is applied with the first anchor close to the lymph node to be drained, being applied with a 0-15% tension pattern. Its tail is divided into several parts, which open the initial lymphatic vessels, allowing the movement and drainage of substances throughout the lymphatic system, favoring its absorption.
Applications of elastic bandage for injury prevention The elastic bandage is widely used in chronic injuries, to prevent the injury from worsening. Often, the patient no longer has symptoms or movement restrictions, being already rehabilitated, however he will be exposed to some situation that will cause instability and may be a risk factor for the return of the injury.
The elastic bandage will stabilize the joint, allowing the functionality of the area, but preventing movements or positions that are harmful to patients. This technique is widely used by sports physiotherapists in athletes, in which the application is performed before athletes practice their sports.
The athletes are the public more discloses the use of elastic bandages for use in sports championships broadcast on national and international network. It is very common to observe pictures of famous sportsmen using the technique.
As said, bandages should be used by professionals who know the technique, in cases of prevention of chronic injuries or for analgesia. Each sport has injuries that are more common. In football players, for example, injuries occur mainly on the thigh and ankle.
In Muay Thai, lower limb injuries also appear predominantly. In sports such as boxing, most injuries affect ligaments of the hands and wrists. In these fighting sports, injuries can often also occur on the face, which implies the application of bandages on the face.
It is essential for the physiotherapist to know his athletes and their most common injuries in order to know which application to use in each case. Next, we will exemplify the application of elastic bandages in the most common pathologies.
Types of pathologies that can be treated with bandages As previously stated, elastic bandages are widely used for postural corrections, using the technique of joint repositioning. They can also be applied to patients with osteoarthritis, patellar chondromalacia and ankle sprains.
In addition, using the technique of altering muscle activation, bandages are also indicated for patients with low back pain, muscle contractures and strains, facial paralysis, plantar fasciitis, herniated disc and various pain conditions.
Elastic bandage for patellar tendonitis For this bandage, a tension of 60% is applied. The application is performed from distal to proximal and stabilization takes place around the patella. An additional bandage is used in the infrapatellar region , with the same pressure of 60%, which can be applied before or after the previous one.
Elastic bandage for patellar chondromalacia For this bandage, the patient must be seated, with the knees flexed at 90°. A tension of 60% is applied. The bandage should be cut in the central region, keeping the anchors intact. The space in the middle is used to stabilize the patella. The application is performed from proximal to distal.
Elastic shoulder bandage - instability For this bandage, a tension of 40% is applied. The joint must be positioned in lateral rotation for the application to occur properly. Two bandages are used, one horizontally and one vertically. The first band applied is the horizontal, which must be positioned in the middle of the joint, with the first anchor positioned on the axillary line and the tension applied from anterior to posterior. The vertical band is applied with the tension from top to bottom, with the first anchor positioned on the upper side of the joint.
Elastic ankle bandage - calcaneus tendonitis For this bandage, a tension of 15% is applied. The first anchor remains whole, while the second is cut in two, reaching the division almost to the first anchor. The first anchor is inserted in the posterior part of the calcaneus and the two tails are tensioned in the posterolateral regions of the leg, meeting in the popliteal fossa. Elastic bandage for plantar fasciitis For this bandage, a tensioning of 15% is applied to Plantar Fascitis . The first anchor remains whole, while the second is cut into four parts. The first anchor is inserted at the bottom of the heel and the four tails are tensioned one by one, towards the toes.
In some cases, another 50% tension bandage is used to stimulate supination of the ankle. This second bandage remains with the two anchors intact, the first being glued to the lower part of the medial malleolus and the tension applied in the lower lateral direction, with insertion in the upper part of the lateral malleolus.
Elastic bandage for tension headache For this pathology, three bandages are used. The first two, positioned vertically, have 15% tension. Anchors should be applied to the base of the occipital bone and tension is applied from top to bottom. The interval between these two bandages is intended for the spinous processes of the vertebrae. A third bandage is applied over the previous ones, with 40% tension, being applied the tail and then the two anchors.
Elastic bandage for generalized low back pain In cases of generalized pain, the star application is used. For this bandage, a tension of 15% is applied. For the application of the bandage, the patient is positioned upright, with an anterior trunk flexion. First, the “x” bandages are applied, and on top of the cross-shaped application.
When the patient has some tension point in the lumbar region, it is important that the point in question is located right in the center, in the meeting of all the bandages. Unlike all other applications, in this case the tail tensioning is still carried out with the bandage outside the body and then the anchors are applied, without any traction.
Elastic bandage for temporomandibular disorder For this change, two bandages are used. The first is cut in "V", as the first anchor remains whole, while the second is cut in two. A tension of 15% is applied. The first anchor is applied in front of the ear, on the zygomatic bone, with one tail directed to the side of the nose and another to the side of the mouth. A second horizontal strip is glued over the first, with a 40% tension.
Only one temporomandibular joint receives the application at a time. If both have dysfunction, the physiotherapist must observe when opening the mouth which moves first and apply it to that specific joint.
Contraindications for the use of elastic bandages on your student There are no contraindications for the use of elastic bandages in relation to the age or sex of the patient. Being properly applied by trained professionals, there are no restrictions to the beneficiaries of the technique.
As it is a treatment technique in which the resource is glued directly to the skin, in some people who have fragile dermal tissues, in the healing phase or with skin allergy the application is not recommended. Following this line of thought, elastic bandages cannot be applied to cellulite or areas that have serious active infections, either deep or superficial.
Some other cases in which elastic bandages may be contraindicated are: thrombosis, skin wounds, abdominal region of pregnant women, tendon, ligament and muscle ruptures, fractures, edema of unknown causes and patients with changes in venous return.
Special care that must be taken when using the elastic bandage technique The explanation about the objectives and the functioning of the treatment with elastic bandages must be very clear to the patients. They must understand its function, its effects on the skin and what they must do to contribute to its durability.
The patient is advised not to rub the area where the bandage was applied during the bath and, if possible, use a hair dryer to dry the area. In addition, it is also important to guide the patient so that in the presence of any discomfort (itchiness or burning, for example) he removes the bandage immediately.
This process must be performed slowly, using the aid of alcohol or some type of body oil.
Another precaution to be taken is during the application of bandages for cases of joint correction. For these patients, the ideal is to carry out the corrections gradually and not wait for results in the first application. Certainly, the change is the result of a long period of bodily modifications and readaptations. Therefore, it is most appropriate to progress with small amplitudes and angulations. At each session, the tension is slightly increased and progress is made in the correction, until the expected pattern is restored.
Excessive use of the technique can lead to increased stimulation, in which various areas of the body are receiving information and the response does not take place properly. Ideally, elastic bandages should be applied to one region of the body at a time, focusing on the specific treatment of the chosen region.
Conclusion As previously stated, unlike elastic resistance bands, bandages do not show a difference in tension when comparing colors. However, some theories believe that different colors can directly influence the benefits of bandaging by associating the color therapy technique.
This technique believes that each color emits its own vibration, thus having particular therapeutic properties. These vibrations can influence the individual physically or emotionally. As a result, certain colors of bandages can be chosen in some cases, favoring the achievement of results due to chromotherapy.
Red is a color related to motivation and persistence of physical strength. Green can improve thinking and promote physical relaxation. Blue also promotes relaxation and inspires confidence. Violet helps in hormonal balance. The yellow color, known for its joy, assists in the choices and activates the lymphatic system. Orange is a source of courage and favors the circulatory system.