Saturday, March 6, 2021

BAGSTER 3CUYD Dumpster in a Bag Holds up to 3,300 lb, Green 2 Count

 BAGSTER 3CUYD Dumpster in a Bag Holds up to 3,300 lb, Green 2 Count

  •  EASY PICKUP: The Bagster Dumpster in a Bag Service is an on-demand waste removal solution that works on your schedule
  • CONVENIENT: Great for projects too small for a full-size dumpster, and too big for contractor bags
  • VERSATILE: Perfect for kitchen renovation, bathroom remodel, outdoor project, moving, and cleanup
  • BIG AND DURABLE: The tear-resistant Bagster bag holds up to 3, 300 lbs. and is big enough for cabinets or even a bathtub (8’L x 4’W x 2. 5’H)
  • RELIABLE COLLECTION SERVICE: Waste Management’s trusted team will collect your dumpster bag within 3 business days


8 things to do with cut grass you probably never thought of


Those with large and small lawns will know how much of a task mowing can be. But even worse - what do you do with all the grass clippings, once you've finished mowing the grass?

The  Environmental Protection Agency  (EPA) estimates that yard waste accounts for 18% of the trash that is dumped in landfills - increasing to 50% during the growing season! Approximately 75% of this waste comprises grass clippings (circa  1,500 pounds  per year), the remainder being tree leaves and limbs.

Considering that landfills are starting to  run out of space  - and many have banned grass clippings anyway - isn't it about time we put our grass clippings to better use?

Here are eight ways to use grass clippings you probably never thought of ...

1. leave them on the lawn
If you are striving for  a perfect lawn  , you will likely remove your glass clippings every time you mow. But you're actually robbing the grass of certain nutrients it needs to grow.

In the future, let your short clippings lie as they break down quickly, nourishing the grass and turning it a perfect shade of green. In fact, grass clippings  can add back  up to 25% of the nutrients.  that growth removes from the soil! These clippings also encourage beneficial microorganisms and earthworms that digest this herb and maintain soil health.

However, clippings that are  too long  do not break off and leave the lawn looking unsightly. To avoid this, you may need to mow more often - removing no more than a third of the blade of grass at a time. Despite more frequent cutting, you will still save time by skipping to pick up the clippings! Studies show  that it takes  less time overall to mow more often  and leave clippings on the lawn, compared to weekly mowing and bagging clippings.

Keep in mind that if the lawn is showing disease or is  full of weeds  , address these issues before leaving the found clipped grass, as this will only exacerbate the problem.

2. Animal feed
Grass clippings can be used to make silage for livestock feed. Some tests  have found that silage made from the latter's clippings has a protein content of 18.2%, and a digestible content of 68% - much higher than hay, which typically averages a digestible content of about 59 %.

In addition to feeding livestock, grass clippings can be a viable supplemental feed source for sheep. The results of  several studies  indicate that cut grass can be effective and safe, used as inexpensive renewable food sources for these woolly creatures.

Even if you don't have animals on your own, check to see if your neighbors or local farm owners would be interested in using your grass clippings for cattle and sheep.

Remember:  Never  use grass clippings that have been chemically treated to feed animals.
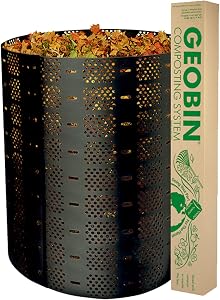
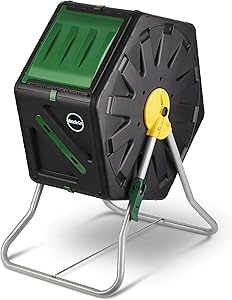
3. Compost
If you don't want to leave them on your lawn, one of the easiest ways to put cut grass to good use in your garden is by  composting them  . Once the clippings are prepared and treated the right way, you will be able to recycle the nutrients from the grass in other areas of your garden.

A proper compost pile requires a mix of green and brown materials. Freshly cut grass is considered 'green', and so will need to be compensated for by adding some brown material, such as dry leaves, twigs, twigs or paper. When adding fresh grass clippings, be sure to quench the grass in the heap to improve aeration and prevent compaction.

Alternatively, you can let your grass clippings dry out completely and turn brown when, unsurprisingly, they are considered brown material!

4. Trimming grass tea
Making a  compost tea  and compostable items is a great way to eradicate the disease, increase the amount of nutrients available to plants, accelerate the decomposition of toxins and improve the nutritional quality and taste of vegetables.

To make a  clipping grass tea  , place the freshly cut grass in a bucket of water and let it steep. Beneficial nutrients like potassium, nitrogen, phosphorus, chlorophyll and amino acids leech from the grass into the water. After three days or so, strain the liquid and use it to feed your plants by washing it on the roots or spraying it on the leaves.

Here are some tips and recipes for  making homemade fertilizer teas  .

5. The padding
Mulch is the term used to describe any type of material that is spread over the surface of the floor as a covering. Organic compost helps retain moisture, eliminate weeds, keep the soil fresh, and improve its fertility.

Grass clippings, whether fresh or dried, make an excellent compost  that contains  high amounts of nitrogen, something all plants need to grow and flourish.

Place a quarter-inch thick layer of fresh clippings around flower beds and plant beds for a free, organic mulch. If it is thicker, the grass will not be able to break down quickly enough and may start to smell as it decomposes. The dried clippings - which make a great compost for vegetable crops - can be spread in thicker.

6. High Beds
Raised bed gardening is one of the best ways to garden -  find out why here  ! If you maintain a container garden or raised beds, then you will be happy to know that they are a great way to use up your excess grass clippings.

To improve soil quality and increase its yield, consider using  the soil mix lasagna method . It involves creating multiple layers of material to fill the bed and nourish your plants.

In the lower regions of the beds, a layer of pieces of grass clippings with two pieces of shredded leaves - these slowly compost over time into rich soil. Clippings should be layered thinly to prevent matting. Once the beds are almost full (less than six to twelve inches from the top), add a compostable barrier like cardboard and fill the rest with your chosen soil mix.

7. natural coloring
Grass clippings make a great natural green dye color for Easter eggs, but could also be treated as an organic fabric dye! Find out  how to mix up here  .
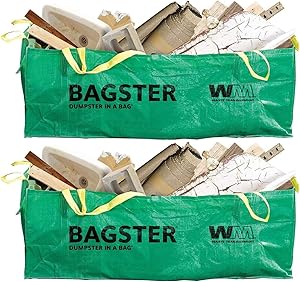
8. Recycling center
If you are producing more grass clippings than you can use, then the best option is to take your unwanted clippings to your local recycling center to dispose of them in a clean and green way.

What not to do - burn them!
Along with the fact that burning grass or leaf clippings outdoors is prohibited by law in many states and countries, incineration of wet grass clippings or other green materials creates thick smoke that can be  harmful to health.  and the environment.

That said,  researchers  at the Agricultural Research Service in Albany, California, have figured out how to turn ordinary grass clippings into environmentally friendly fireplace logs that could be for sale in the future - keep your eyes peeled!

Hefty Strong Lawn AND Leaf Trash Bags, 39 Gallon, 38 Count

 Hefty Strong Lawn AND Leaf Trash Bags, 39 Gallon, 38 Count

  • Family Pack


4 Eco-friendly ways to get rid of fall leaves


Fall is here, and soon those beautiful leaves will be falling off the trees and starting to cover your lawn. Many people fear the inevitable lawn rake, but you don't have to if you look at your leaves as a free gift from nature. The leaves do not have to end up in garbage bags or burn batteries. Instead, you can use them to help your garden grow or beautify your home in an eco-friendly way. So if you're ready to change the way you think about fall leaves, read on!

1. Composting autumn leaves

Composting is a great and easy way to use fallen leaves as an organic fertilizer. Composting helps you create mineral-rich soil so you can look forward to a healthy spring landscape. So where do you start? It should have nitrogen-containing ingredients, such as grass clippings, as well as high-carbon materials, such as dried leaves.

Shredded leaves break down faster than whole leaves and are easier to mix in a compost pile. You don't have to shred the leaves, but an easy way to do that is to simply run them over with your lawn mower. Then toss all the leaves into your compost pile with grass clippings and mix them well with a shovel or rake so that the newer leaves are buried under the older composted material. Continue mixing and turning the pile every four to five days to ensure even decomposition of the material in mineral-enriched soil. Cover the compost pile with a tarp in late fall and winter to seal in the heat and keep moisture out. Your compost should be ready to use in about two months. You will know when it changes to a dark brown color and the original ingredients are unrecognizable. It must smell like dirt. At that point, you can dig finished compost into your soil to help your garden grow.

2. Mulching autumn leaves

Compost is an organic soil enhancer that gets into the soil where you garden. Mulch, on the other hand, acts as a protective covering that is spread over the ground and between plants. It works to reduce weeds and maintain moisture. Many people buy mulch, but you can easily make it on your own. All you have to do is collect the blades from your lawn and cut them with your lawn mower. Add in some wood shavings and grass clippings for good measure and voila, you're done! Now, you can plant your flowers and garden plants and place the leaf mulch on the ground to provide easy organic protection. However, unlike compost, you don't want your mulch to break down to the point that its original components are unrecognizable.

3. Leaves as fireplace fuel

Burning entire piles of leaves to get rid of them is wasteful. However, there is nothing wrong with burning leaves if they serve a purpose. If you have a wood burning fireplace, you can give your leaves a worthy purpose. As any Boy Scout veteran will tell you, leaves and twigs are perfect for starting a controlled fire. So, fill a bag with dried leaves from your backyard and store it in a cool, dry place and use a handful each time you light your cozy wood-burning fireplace. The leaves will work as firewood to start the fire faster, and they will give a delicious aroma to your home. It is a win-win situation for everyone involved.

4. Leaves as natural decorations.

Don't forget about the natural beauty of your fall leaves! You can save some of your sheets to use in art projects. Use them on a cold day to make fun indoor crafts with your kids. Pick some of the most colorful and shapely leaves and frame them for a simple and beautiful wall decor. Gather up a bunch of leaves and some old clothes and make a scarecrow for your garden. You can even turn your leaves into potpourri if you like the smell of fresh leaves in the fall. Simply crumble your leaves into mesh bags, add a cinnamon stick as a measure, and enjoy the delicious smell of fall.

If you can't get rid of most of your leaves through composting or mulching, check to see if your city or county provides special assistance for leaf removal. You can also call your garbage collection service to see if they have special yard waste collection days. Many municipalities require property owners to dispose of the leaves in paper bags as an environmental solution. Finally, remember to have fun with your leaves before using them in your home or garden. Find a spot on your hard drive that's free of rocks and make a big pile of leaves for your kids to jump on. They will have a lot of fun and you will have fun watching them create lasting memories. Good luck!


GREEN WASTE RECYCLING


Trees, Leaves And Branches

Green waste recycling is a novel, biodegradable waste material, including grass, leaves, plants, and tree clippings that can be diverted from landfills for recycling. Food waste represents another category that can be included in this group.

The best use of green waste recycling is to compost for gardens, patios, erosion control projects, and agricultural crops. Compost serves as a fertilizer and improves the structure of the soil.

Shredding Reduces Greenhouse Gas Emissions
Every year millions of tons of green waste are dumped in landfills instead of being recycled and used as mulch or compost. Dumping green waste in landfills shortens its useful life and also contributes to greenhouse gas (GHG) emissions. GHG emissions arising from the decomposition of organic waste lodged in landfills have been identified as a major source of emissions that greatly impact global climate change. To help alleviate this situation, many states and provinces in North America have developed mandates on recycling green waste to prevent organic materials from reaching landfills and thus reduce GHG emissions.

The horizontal shredders Peterson are an ideal tool to quickly and effectively reduce green waste and turn them into mulch or compost .

Recommended Tools

CRUSHING PITCHES
Peterson's standard 6-pass carbide picks can be used to crush green debris that is generally a lightweight material, with wood or green components such as plants, shrubs, grass and leaves. If more carbide protection is required due to small contaminants in the raw material, such as rocks or sand, a Peterson 8-pass heavy duty pick is recommended.

GRATES
The selection of grates may vary depending on the size of the final product desired. As a general rule, smaller openings (2 "or 4" hex) are used in the first two positions, as these bars are largely responsible for the size of the product. Grates with larger openings (4 '' or 6 '' hexagonal) are progressively installed in the following positions, which are used as "discharge" grates so that the product leaves the sawmill.

Amazon Brand - Solimo Lawn & Leaf Drawstring Trash Bags, 39 Gallon, 40 Count

 Amazon Brand - Solimo Lawn & Leaf Drawstring Trash Bags, 39 Gallon, 40 Count

  •     Includes 40 lawn & leaf garbage bags
  •     Each bag holds 39 gallons
  •     Black trash bag with red drawstring for easy tying and carrying
  •     If you like Glad Large Drawstring Trash Bags, we invite you to try Solimo Lawn & Leaf Drawstring Trash Bags
  •     An Amazon brand


Remove leaves, grass and branches for collection


Learn how and when to dispose of your yard clippings, such as leaves, grass clippings, and small branches, using curbside collection service. Find out the dos and don'ts of yard trimmings.

  • Place grass clippings, dead leaves, small branches, and other yard debris in leaf and garden bags. If you have a green pot, put them there.
  • If the branches won't fit in your boat or bags, tie them up and place them next to the boat. Branches should be no more than 5 feet long and 3 inches in diameter.
  • Find your collection day with the My Collection Schedule tool below.
  • Remove clippings from the yard by 6:30 am on collection day. Be sure to leave a 5-foot space between boats, cars, and mailboxes.

Dos and don'ts of yard trimmings

  • Remove all rocks and dirt from your garden clippings.
  • Wrap thorns in newspaper or cardboard and tag “thorns” to protect City of Austin personnel.
  • Do not put large weeds, such as tree trunks and large branches, along with yard clippings. These are considered large items.
  • Do not include sawdust, wood, or animal waste.

Don't put plastic bags or extra trash with your yard trimmings. These will not be collected.


How to recycle yard waste


It's the time of year to garden, and you may have yard waste filling bags in your garage. Or maybe you're ready to take on a project and wonder where to recycle your yard waste. We can help. While recycling rules vary by city, recycling is incredibly good for the environment and worth considering!

Learn how to manage your garden or wood waste
Although recycling rules vary by city, we have many great tips for recycling wood and yard waste so it doesn't end up in a landfill. When this happens, it contributes to global climate change, but it also takes up space and produces methane gas. When yard debris such as leaves or clippings are burned, it is not only a fire hazard but it also creates air pollution. To avoid them, check your city or town website for the proper disposal site.

Reduce waste through reuse
A preliminary step to recycling is reuse, and what better way to avoid the need to recycle than by reusing your yard waste? You can avoid a trip to the local composter (if one exists) and you don't have to worry about filling your car with bags and bags of leaves, weeds, or tree trimming. Plus, reuse is much easier and takes less time!

Instead of packing your grass clippings after you cut them, leave them on the lawn where they will break down and return nutrients to the soil. Just make sure to avoid cutting the grass less than 3 cm.

Another great way to reuse is with dry leaves or shredded wood waste. You can use them to make mulch. Spread the mulch in thin layers around the base of the plants. This prevents weed growth, retains water, adds nutrients to the soil, and regulates soil temperature. You can do the same with grass clippings.

Learn to compost at home
Since food and yard waste makes up 20 to 30 percent of what we throw away, we should compost these items instead, keeping these materials out of landfills. Compost is an organic material that can be added to the soil to aid plant growth, such as dead leaves, twigs, branches (brown), grass clippings, plant debris, fruit debris, and coffee beans (green). Since many of us use these items on a regular basis, it is easy to start with a compost container, you can buy it in stores like Ecologicoysostenible.com

Compost piles should contain equal amounts of browns to greens, and the layers should alternate between the two groups. Brown items provide carbon and green items provide nitrogen. To create garden compost, you need a dry, shady area near a water source. Add brown or green materials and moisten as they are added.

After creating a compost pile, mix green waste and grass clippings in the pile and bury fruit and vegetable waste under 12 inches. of compost material. You can also choose to cover the top with a tarp to keep it moist. Your compost is ready to use when the material at the bottom is dark in color!

If you don't have room in your yard for an outdoor compost pile, just buy a compost bin and store it in your home! You can compost even in an apartment . For more information on how to create a compost pile, check out some tips .

Compost Bin by GEOBIN - 246 Gallon, Expandable, Easy Assembly

 Compost Bin by GEOBIN - 246 Gallon, Expandable, Easy Assembly

  • Large capacity—expandable to 4 feet (246 gallon)


How to compost at home? 5 steps to transform your organic waste into compost


Not everything is really rubbish! Learn to compost and reduce waste in your home.

In these days when we spend so much time at home, you may have noticed the amount of garbage that humans produce. Well, the good news we have for you is that not everything is really rubbish! What happens is that many times we do not know how to separate it or how to take advantage of it so as not to send so much waste to landfills.

One of those strategies, which at the same time is quite magical, is to make homemade compost so that the peels of fruits and vegetables , garden waste and paper do not go to the garbage but return to the earth to become compost for the plants. Interesting, right?

The fact: Composting you can reduce 60% of your waste (if you recycle you will reduce it by 90%). Together they are garbage but separately they can be used.

What is composting about?
Composting is the decomposition of organic matter that occurs thanks to the presence of oxygen and the work of bacteria, fungi, other microorganisms and small insects. There are many ways to do it, –even with the presence of worms and large insects–, but the advantage is that to carry it out at home we only need a few extra minutes of time and a space with good ventilation and shade to locate the container. the rest is made by nature!

The data: With 100 kg of organic waste, between 30-40 kg of compost is obtained, a little less than half of the starting material. The rest evaporates as water vapor and CO2.

What can be composted?
The materials that can be composted at home are divided into two groups:

a) Fresh waste:

  • Fruit and vegetable waste
  • Garden debris (leaves, flowers, etc.)
  • Coffee grounds and tea bags *
  • Eggshells

* If you put them to dry you can use them as dry waste.

→ Compost moderately : Remnants of cooked food such as rice, pasta, bread, vegetables.
→ Do not compost! : Meat, dairy, fats and oils, plastics, metals, feces.


b) Dry waste:

  • Dry leaves, branches, sawdust and grass
  • land
  • Paper, newspaper and cardboard without glossy, adhesive or plastic coatings
  • Grease-free napkins
  • Egg boxes


Step-by-step home composting:

1. Choose a container to be your compost bin

 It can be a bucket, fruit box, flowerpot, or plastic organizer box. The important thing is that you choose a material that will not be damaged by the humidity that will be generated inside the compost bin, that has a lid to prevent mosquitoes and that allows oxygenation of the content .

One idea that has worked for us is to put a cloth on the container as a lid and secure it with a rubber.

2. Collect your fresh and dry waste and chop it very small

Reducing the size of the two types of waste helps microorganisms break them down faster.

Here are some tips for this stage:

  • Locate a jar with a lid in the kitchen so that, every time they peel or chop something at home, they deposit the shells there and, as soon as it is full, they process them to include them in the compost bin. It's a good idea to keep it in the fridge so it doesn't attract mosquitoes.
  • The avocado seeds and mango take longer to break due to its size and hardness. What you can do is scratch the avocado seed and let the mango seed dry to scratch it as well.
  • If your home blender allows it, you can blend some items with a little water.
  • Use scissors to chop up the dried residue. It usually happens that these wastes are the most difficult to generate at home at the same volume as organic ones, so you can get sawdust for this purpose.

3. Put your waste in the compost bin taking care that the proportion of wet and dry material is the same.

The first time you do the process you must build a good layer of dry material, then add the wet material and finish with another layer of dry material, as if it were a lasagna.

* A tip: When the material that is inside a compost bin is well balanced and has adequate humidity, it does not present a bad smell. The coffee grounds is an element that also allows the material not to smell bad.

4. Cover your compost bin and place it in a shady place where it receives a good draft.

The microorganisms that will be working in the compost bin need oxygen and a humid environment to stay alive, so it is very important not to get the sun.

5. Add your waste again according to the rhythms of your house (it can be daily or once a week).

From the second time you add residuals, keep in mind that:

  • The ratio of dry and wet material must be the same.
  • Once you add your organic waste, you must stir all the material (use a glove or a shovel for this) so that it becomes oxygenated. Always finish with a layer of dry material.
  • When you are stirring, take the opportunity to check the humidity of the material: take a handful and squeeze it to check that just a couple of drops are generated. If it is very wet, stir dry material before the last coat.
  • If you feel that it is hot when stirring the material , it is a good sign! As part of the process carried out by the microorganisms, the temperature of the compost bin tends to rise.
  • Even if it doesn't smell bad, the compost bin will be generating gases so you can wear a mask to avoid breathing them.
  • When you fill a container you can pass this material to the maturation stage before using it as compost, it is necessary to stir it at least once a week and add a little water if it looks dry.

Miracle-Gro Small Composter - Compact Single Chamber Outdoor Garden Compost Bin (18.5 Gallon)

 Miracle-Gro Small Composter - Compact Single Chamber Outdoor Garden Compost Bin (18.5 Gallon)

  •  NO SPACE? NO PROBLEM! – Don’t let tight spaces keep you from composting! Miracle-Gro’s outdoor compost bin tumbler is small enough for even the tiniest spaces! The 18.5gal (70L) volume perfectly fits your balcony, porch, patio, or rooftop garden. Finally you can compost from anywhere!
  • TURN YOUR FOOD WASTE INTO GARDEN GOLD – Transform kitchen and garden waste into rich, fertile compost – the gardener’s treasured “black gold!” Ready-to-use compost will be yours in just 4-6 weeks, thanks to Miracle-Gro’s unique aeration system. Internal mixing bars speed up decomposition to make growing a happy garden easier than ever!
  • REDUCE YOUR CARBON FOOTPRINT – Studies show that approximately one third of the world’s food supply goes to waste. But with Miracle-Gro’s rolling compost box you can do your part to change that. Save your compostable food scraps, help the environment, and cook up some compost that your plants will love
  • YEAR-ROUND, HASSLE-FREE – Why should composting be a seasonal activity? Miracle-Gro’s heavy-duty design lets you keep your compost going all year round! The sturdy side-locking mechanism ensures easy loading and unloading, while the durable construction maintains a tight seal. And BPA-free, food grade, UV-protected plastic, means you won’t need to worry about harmful toxins.
  • Achieve your garden goals with a pair of multi-purpose gardening gloves! Each pair is latex-free, water-resistant, and features a no-slip grip, perfect for both indoor and outdoor projects. Grow your green thumb with Scotts and Miracle-Gro!


How to turn your organic waste into natural compost


Last January the European Environment Commission voted to increase the recycling targets for municipal waste . According to this proposal, 50% of municipal waste must be recycled by 2020, 70% by 2030. To achieve these ambitious goals it is necessary to take a look at the garbage bag. Let's see it: according to the most recent data published by the National Institute of Statistics (INE) , during 2014 more than 21 million tons of waste were produced, that is, 459 kilograms of waste per person per year. Of these, the most important part, 42% of the bag according to the Ministry, corresponds to organic waste or bio-waste: grass, leaves, pruning remains or discarded food , the most common.

Taking these numbers into account, the conclusion is clear: increasing the recycling rate of organic waste is a necessary strategy to achieve the European 2020-2030 goals. And without a doubt, its correct implementation will result in a better separation of the rest of the waste.

More and more towns are beginning to become aware of the importance of correctly managing their organic waste, designing separate collection and composting plans. But are we clear about what we are talking about? Don't miss this post!

What is compost?
Natural compost is an organic fertilizer that is obtained from the natural decomposition in the presence of oxygen from organic waste, either by means of microorganisms such as bacteria and fungi (composting) or by means of worms ( vermicomposting ). Depending on the type of waste used, from 100 kilograms we can obtain around 20 kg of organic compost.

What does it take to compost?
Composting household waste does not require complicated mechanisms or large investments. Simply a space inside the house or in shared areas of the community in which to locate the composter , a container where we will mix organic waste and in which the transformation process of said waste to obtain compost will take place.

How can I compost at home?
If you have a garden or a shared green area, you can install a composter that is in contact with the earth, preferably in the shade. If you live in an apartment you can also compost using a vermicomposter.

Do you have to spend a lot of time on it?
The truth is that no: make sure to remove the contents of the composter from time to time to aerate it, to keep the material to be composted moist and let it degrade little by little. Without bad smells or pesky bugs, in 5-6 months it is possible to obtain good quality organic compost.

What can be composted?
Only organic remains. In general, any discarded food such as leftover bread, coffee grounds, fruit, vegetables, rice, pasta, egg shells, expired yogurt, etc. as well as garden debris such as leaves, sawdust, branches and others. Meat, fish, cheese or bones can present some inconvenience in their transformation. Butts, cooking oil, ash or sweeping debris should not be thrown into the composter.

What are the advantages of compost?

First of all, we easily obtain a good quality organic fertilizer that we can apply to indoor plants or gardens, without the need to buy chemical fertilizers. In addition, compost has another added value compared to them, since it improves the structure of the earth by providing organic matter.

Based on environmental criteria, organic waste collected by conventional circuits is significantly reduced, which reduces management costs and avoids the generation of greenhouse gases. A clear example of the application of the principles of the circular economy , compost closes the cycle of organic matter returning to the earth and enriching it.

VIVOSUN Tumbling Composter Dual Rotating Batch Compost Bin 43 Gallon Black

 VIVOSUN Tumbling Composter Dual Rotating Batch Compost Bin 43 Gallon Black

  •  TWIN CHAMBER-Designed with 2 chamber benefits Batch composting, which is the most efficient way to produce high-quality compost; Let one side "cook" while you add fresh materials to the other, continuously swapping sides creates an uninterrupted flow of rich, healthy compost
  • CREATIVE TUMBLING DESIGN-The rotating design lets your hands-free, avoiding digging and mixing your compost pile by hands, making the mixing more easy and efficient; Just fill it up with garden refuse and kitchen scraps, slide the door closed and give it a turn every couple days
  • OUTSTANDING AERATION-Adjustable air vents and deep fins strengthen the air circulation, help decompose the clumps in the chamber and combine lots of oxygen into the compost, easily produce finished compost in weeks
  • STURDY & DURABLE CONSTRUCTION-Made of galvanized steel and high-quality PP plastic, this VIVOSUN Tumbling Composter is corrosion-resistant, degrade resistant, sturdy and durable for long-lasting service life
  • GARDEN GLOVES INCLUDED-Comes with 4 durable ABS plastic claws, no other tools required, convenient to excavate and plant in horticultural work; Latex rubber material not only protects your hands from cuts and broken nails but also makes it easy to clean as its waterproof function


How to transform organic waste that you throw into the garbage into natural compost?


With a little patience and letting nature act at its own pace, it is easy to always have a natural fertilizer on hand from which the plants you have in your home or garden will obtain all the nutrients they need.

The Spanish Association of Agronutrient Manufacturers (AEFA ) defines compost as a product obtained by aerobic fermentation of organic waste. According to current legislation, the compost that we can purchase must contain at least 25% organic matter, but if you want you can do it at home 100% natural.


How do you make homemade compost?
If you dare to try, your plants and the environment will thank you and, in addition, you will save money on chemical fertilizers. As experts point out, compost is a basic element that helps to achieve a more fertile soil .

To start composting you need very little. Ideally, you should have an appropriate container, a composter or compost bin , although a plastic bucket can also be useful.

To compost, you simply have to get into the habit of separating organic waste and taking what is useful for composting to the container.

It is advisable to start by placing a first layer of soil, dry branches or waste from cleaning the garden . Once the bottom is prepared, you can start to put the remains of usable food in the composter, for example fruits and vegetables, including seeds and shells, eggs, also with the shell, any food "half eaten" but that is in good condition (not rotten ). What you should not use for compost are the remains of meat or fish , nor their bones or thorns. Of course, we are talking about organic remains, so plastics, bricks or any type of metal or paper container are not valid . You should not pour oils either, neither raw nor used, nor some elements that could be toxic, such as the burnt ashes of a barbecue coal.

It is not about throwing it all in at once, but about going every day to dump the waste generated so that, little by little, it begins to ferment.

How long it takes?
The decomposition of food scraps occurs slowly. It can take between a month and a half and three months to see the first results , depending on the amount you want to achieve.

At this time it is essential to stir the compost every so often to aerate it and promote fermentation . Also, it needs some humidity, so if you have the compost bin outside, take advantage of a day of fine rain to uncover it and make it wet (you can also water it lightly).

If you see any worms, do not worry, it is normal and when the compost is ready for use, you will no longer see them. It is a clue to know when it is time to give it to your plants. Others are: the color, which must be very dark brown , almost black and the texture, which must be spongy, without the organic remains that you have been adding are visible.

Friday, March 5, 2021

Garden Genie Gloves, Waterproof Garden Gloves with Claw For Digging Planting, Best Gardening Gifts for Women and Men. (Green-2A)

 Garden Genie Gloves, Waterproof Garden Gloves with Claw For Digging Planting, Best Gardening Gifts for Women and Men. (Green-2A)

  •  ★ Quick and Easy to Plant - Garden genie gloves with 4 Built-in durable ABS Plastic Claws on each hand, Easy to dig and plant without hand tools in gardening work!
  • ★Waterproof and Puncture Resistant: - Using natural latex rubber coating material. Waterproof, puncture resistant and easy to clean, protects your hands from cuts and Broken nails!
  • ★Breathable Design - Nylon knitting on the back of the hand, comfortable and breathable to keep the hands cool and dry even in summer.
  • ★Universal Size Fits Most - High quality latex coating has good ductility, so garden genie gloves are universal size to suitable for women, men and even older kids.
  • ★A Great Gardening Gift - It is a great gift for a birthday, Holidays, Mother's Day, Father's Day, Thanksgiving and Christmas.


How to take care of your hands: tips for gardeners


As I dispatched enough this week, I realized that the problems in the skin of the hands were my biggest nightmare related to the profession in recent years, so I come to evangelize about it.

Post, don't google this term
The gringos refer to this as "hand rot" or "bar hands." My nightmare and that of many. As I am not one of those Instagram accounts that teach you to have a clean kitchen and show you worms and moths in your food, there will be no photos of hands in this email. What I must tell you is that it looks ugly and I recommend that, even if you are a very curious person, you want to googling. It looks ugly and it feels a thousand times worse. The thing starts when the skin of your hands begins to dehydrate, because poor girls you send them to the front of an intense battle: squeezing lemons, washing mint, cleaning bottles and a thousand other tasks take you away from that career as a model of hands with which some you ever dreamed.

One day the palm of your hand begins to itch, or perhaps the tips of your fingers. The skin begins to sag and there, dear viewer, you are closer to the cross than to the axis . It's hard for me to explain to you how difficult it is to keep your broken hands from getting infected while you work. Imagine that you have a wound, would you clean it with the rack that you use in a bar? There it goes, we begin to understand each other.

At this point, going back is very difficult. You are going to have to go to a dermatologist who is going to tell you that the way to solve it is to stop working at the bar for a while, or to use a double layer of gloves to work: cotton ones glued to the skin and latex on top. Dinnerware breakage imminent.

To prevent is to cure
Sorry for the cliche , but it's so so true in this case. The way I healed my hands was to stop dispatching. Industrial detergent, lemon, rubbing alcohol, alcoholic beverages, mint, all of these remove the magical protective layer from your skin. Avoiding coming into contact with these substances was impossible for me. So the point is not to let your hands slip. 

Here I go with my tips:

  • Wear gloves for production, not service. Latex gloves have powder and that dries out your skin, nitrile gloves do not have powder but they will make you perspire and that is not good either.
  • Keep your hands dry as much as possible. This involves taking your clean, dry cloths or towels to work.
  • There are things you need to wash with hot water, okay. Be careful with the temperature of the water, do not prime yourself.
  • Put on a lot of good cream every night before going to sleep and during the day, whenever it is within your means.
  • Be consistent with all of this.

The creams that worked best for me:
  • Really, I more than anyone would like this to be a trade, but it is not. I have researched the market for hand creams a lot in recent years, which in Argentina is large but does not even match the range of creams available in the United States. There are creams for people who perform very specific tasks, type, creams for gardeners , for climbers , for people who live in Vermont , etc.

Considering the price and the results, this is what I recommend:

  • Milking cream. No, it doesn't smell good. The whole of humanity has known for a couple of generations. In its defense I will say that it absorbs fast.
  • Neutrogena Hand Cream. Yes or yes before bed, unless you can do without using your hands for a good 30 minutes. It's like passing pig fat, but it goes prissy.
  • Atrix, the one your grandmother used. The one with the water green reusable can . Also to wear before bed.
  • As an over-the-counter antiseptic I always vote for tea tree oil . As it is very intense, you can add a drop to the cream you use.

According to the website, the wave is to spread a good amount of cream on clean hands before sleeping and put on cotton gloves. Unless you are a magician or a butler, I doubt you have cotton gloves, so I would tell you to put cotton stockings over your little hands. It remains between us.


So you can avoid getting dirt on your nails while taking care of your plants


Having your nails full of dirt from caring for plants is something that ALWAYS happens, unless you wear gloves, but if you don't get comfortable with them and you prefer your hands free, you know what I'm talking about.

Caring for and keeping nails clean is much easier with this trick, my grandmother taught me when I was little and now I always apply it when I do gardening practices.

Okay, there are only two ways to keep dirt from getting into your nails:

  • Using special gloves for gardening
  • My grandmother's trick
 

If you want to know, you need to keep reading, because I'm sure it will save your manicure.

When you go to change your pot plants or want to plant new ones, put compost, prune your trees and more, you must protect your nails.

In addition to keeping the dirt away from the bottom of your nails, you will also prevent them from breaking (in case of long nails).

The only thing you have to do to protect your nails and prevent them from being filled with dirt is to run it through a bar of soap.

Yes, with your nails rub a bar of soap several times, until it is all over the nail and prevents dirt from accumulating there.

After all, soap is easier to remove than dirt.

When you have passed your nails through the soap you can do any activity in the garden without fear of being mistreated. Trust me!

After this, your nails will never be filled with soil again from caring for plants. Do you want to try?