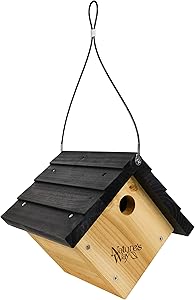
Nature's Way Bird Products CWH1 Cedar Wren House, 8" x 8.875" x 8.125"
Made with insect and rot-resistant premium cedar and rust-free stainless steel hardware
Air vents allow for maximum air ventilation through wall and floor openings for bird health
Clean-out door provides easy access for cleaning
1 1/8" hole keeps out sparrows and larger birds
Attracts wrens and chickadees
Vinyl coated steel hanging cable included
How to protect your bird from the cold?
Birds are sensitive to cold, especially those that belong to tropical species or come from warm regions. If low temperatures are beginning to be felt and you want to know how to protect your bird from the cold, pay attention to the following tips.
Relocate the cage to protect your bird from the cold
One of the most important things you have to do to protect your bird from the cold is to relocate the cage . If it is outside, it may be a good idea to move it inside the house. If this is not possible, it can be kept outside, but in an area protected from frost and wind .
If you see that your bird is in a ball, it is because it is cold. If possible, put the cage indoors, but taking care not to place it near a heat source or behind a window exposed to direct sunlight. When you turn on the heating, use a humidifier , so that your respiratory system does not suffer.
Change the diet to protect your bird from the cold
With the arrival of the cold the birds must increase their fat reserves. For example, if they can be included in your diet, put more sunflower seeds or peanuts in your feeder. They contain a higher oleic index and serve for the bird to generate a layer of fat to keep them warm.
If the cage stays outside, check that there is never a lack of liquid water. Being in the open can freeze . It may be convenient to locate it in the area least exposed to cold to minimize this risk.
Prepare the cage to protect your bird from the cold
When there is no choice but to keep the cage out of the house, it must be placed in the most sheltered place from wind and ice . It can be had on a terrace, under the overhang of a roof or window.
One more thing to do is provide a warm place for it. As in nature it would be sheltered in a nest, it is convenient to leave a generous amount of cotton so that it has a warmer area in which to be. On frosty nights, it may be necessary to cover the cage with a cloth , always leaving enough gaps for air to enter.
The type of cage is also important. For winter you can use a partially closed cage , so the bird will have more shelter. Others have a visor that can also help minimize the effects of a frost.
Where to get everything you need for your bird
In Madagascar Pets we have everything you need for your bird. You can go to any of our stores and request advice from our specialists. They will help you protect your bird from the cold.
5 tips to keep exotic birds warm in winter
Most pet bird species come from areas with hot, tropical climates. Because their bodies are designed to withstand heat, cold weather can spell big trouble for an unprotected exotic bird. To ensure winter weather doesn't put your pet's health at risk, keep the following tips in mind when preparing for the changing seasons:
Move the cage away from doors and windows
Birds that are placed near doors and windows are at risk of exposure to freezing drafts. Move your pet indoors to avoid chills.
Consider covering the cage at night
Using a cage cover after the sun sets can do wonders to help maintain a comfortable temperature within your bird's environment.
Test temporary isolation Seal unused windows and doors with a shrink wrap insulation kit. Not only will it help keep cool air outside, but it will keep warm air inside.
Be careful when heating Wood burning fireplaces, as well as electric kerosene and electric heaters, can pose a threat to your pet's health. Wood and gas smoke and fumes can wreak havoc on a bird's respiratory system, and many electric heaters contain a non-stick coating, which is notorious for causing acute illness and death in birds.
Monitor closely for signs of exposure A chilled bird is a bird with a lowered immune system. Keeping an eye out for common symptoms of the disease can help prevent any weather-related health problems due to the snowball.
Taking steps to adequately heat your bird's environment is necessary for its health and comfort. With these tips, it should be easy to keep your feathered friend nice and tan until spring arrives. Stay warm
How to take care of your domestic bird in the winter?
Contrary to what many people believe, domestic birds can also suffer the ravages of winter and become ill or have various health complications, since the temperature of the environment does not adapt to the body temperature of the birds.
In the same way that dogs or cats suffer some discomfort due to low temperatures, domestic birds can go through difficult times when they must face the cold without any support.
Because of this we want to present you some tips so that you know in what way or what is the best way to take care of your domestic birds , or pets during the winter and thus you can maintain a balance and a healthy life in your home with your pets. .
Avoid drafts Any type of air current could negatively affect your pet, since your domestic bird, despite having a plumage that protects its skin, is susceptible to changes in environmental temperature. That is why it is best to avoid placing your pet's cage in places where there are drafts.
You can also take care of your domestic bird from drafts, placing a thin cloth on top of the cage that covers the cold wind, this can help a lot. At night or when it is too cold, it is recommended to place the cage in slightly more closed spaces where your bird can stay warm.
In case your bird is loose and you do not have a cage , try as much as possible to keep it indoors, that is, you can better control the movements it makes, so that you know specifically what the problems or temperatures that could affect it.
Keep them active Like human beings, a good way to combat the cold in animals is by keeping them constantly active, that is, they can play with objects that allow them to move and stay active at all times. This will help to a great extent to reduce the risk that your pet will go through some kind of problem in the future related to low temperatures.
Finally, do not try to bathe them, spray them with water or make them come into contact with any type of liquid under any circumstances, unless it is to drink, during the winter, as this could seriously affect the mobility of your pet.
Remember that birds have wings that are usually muscles and part of their skeleton that is quite sensitive and prone to breaking easily, so if we add hypothermia the mixture is fatal.
Remember that domestic birds are much more delicate animals than cats or dogs, so we must take even greater care in the care we have with these types of pets. Especially in winter, when the birds usually have endless complications due to the variation in temperature.
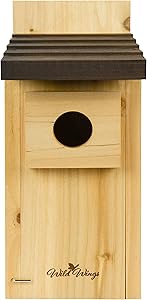
Crafted from insect and rot resistant Premium cedar
Air vents allow for proper air ventilation through wall and floor openings
Clean-out door allows easy access to clean between broods
Predator guard extends the entrance hole to protect young birds against predators
How to protect your bird from the cold: tips and tricks
Having a bird as a pet is one of the trends of our days, from a parrot to a parakeet. These are animals that they like a lot because they enliven the home with their songs and that are ideal for those who do not have as much time as to take care of other pets that do require it. However, like all living beings, birds need basic care, and we must not forget that they are animals that are very sensitive to cold ; so it is essential to give them the protection they need with the arrival of winter.
HOW TO KNOW IF YOUR BIRD IS COLD
The constitution of birds is prepared to resist the cold thanks to its feathers , which act as if it were a garment, and the scales on their legs, which simulate to be shoes. Birds are designed to live in freedom, and for this reason their body is prepared for low temperatures, even if they seek shelter during rains or frosts. However, in the case of domestic birds they have to face the temperatures to which they are exposed , and in many cases they are not used to the cold.
To find out if your pet needs more heat, watch his behavior. If you detect that they have cupped their wings, it is an infallible sign that will tell you that they are cold, as it is the mechanism they use to get bigger, better cover themselves and save their body heat . In addition, you should be alert if you see that the animal remains immobile or seems lethargic , as a result of a reduction in its metabolic activity. Birds develop this strategy to conserve calories and reduce their cardiorespiratory rate.
HOW TO CONDITION YOUR BIRD'S CAGE SO THAT IT DOES NOT GET COLD
With the arrival of winter you should introduce the following changes in your bird's cage to prevent the cold from causing problems:
Choosing a good feeder can be key in autumn and winter, especially if the place where you have your pet's cage is outside, as there are some models designed to protect food from moisture . In this way you will prevent bacteria from proliferating in the grains and the food that you provide. Although the birds live on their feet, you can buy your pet a nest to snuggle up and rest, to which you can put a little cotton to make it warmer. To protect the cage from the cold, protect it with a blanket , although you should always leave some space for oxygen to enter . It is also recommended that there be a separation distance between the fabric and the bars to prevent the bird from grabbing the blanket. There is the option of buying partially covered or roofed cages , an idea especially recommended for species less resistant to cold or for cages located on terraces or gardens. However, it is very important that there is always light and oxygen in.
TIPS TO PREVENT YOUR BIRD FROM GETTING COLD
When the low temperatures arrive, you have to take precautions so that your pet does not catch cold and alter its health. Among the considerations to take into account is the location of the cage, since you must keep it away from drafts and prevent them from being in contact with the cold outside. Also, do not place it too close to a heat source as this could have the opposite effect. It is also highly recommended that you shelter it at night since it is the part of the day when temperatures drop the most and the animal is inactive, that is, a perfect situation for the cold to affect your bird's defenses .
On the other hand, you have to be careful with heating, because although it helps the space to be warmer, it can dry out your pet's eyes and respiratory tract . It is evident that the heat helps to protect the birds from the cold, but it prevents them from being very close to it and above all, use a humidifier that maintains the humidity in the environment, although always checking that it is not excessive. In addition, you must be very careful in case you release the bird through the house if you want it to activate to warm it up, as there may be elements that damage your bird , such as radiators, fireplaces or heaters.
Foods that provide calories Another recommendation to follow is to provide your pet with caloric foods that provide fat , with seeds being the most suitable food. With the seeds, the birds ingest nutrients whose energy is stored in the body and is precisely more difficult to eliminate than that provided by other foods such as carbohydrates. In this way, you will strengthen your immune system against the cold, although you must always be careful not to exceed the amounts so as not to harm your health, either causing cardiovascular or digestive problems. You can also feed them foods rich in vitamin C, a nutrient designed to strengthen the immune system of birds.and therefore to make them less vulnerable to colds and other illnesses. You should know that many birds need to ingest this vitamin because they do not produce it, so it is always good that we provide it.
Finally, to be even more alert, pay special attention to whether your bird belongs to one of the cooler species . The birds that are least resistant to cold are usually those originating from tropical environments , such as parrots, cockatoos or parakeets, so you should protect them even more from low temperatures. Also, make sure that your pet has a good amount of water and that it is clean , because during the winter birds need to drink more liquids since the cold makes them use up their liquid reserves more easily. Also, you should not give it very cold to avoid catching a cold. And remember that birds need to bathe in water to clean its plumage and avoid parasites, so put it warm or even something warm to prevent your pet from getting hypothermic, especially while drying.
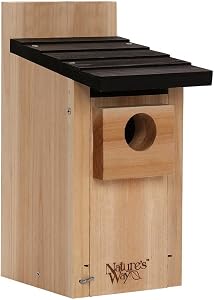
Nature's Way Bird Products CWH3 Cedar Bluebird Box House
Crafted from insect and rot resistant premium cedar with a water-based protective stain; The hardware used in construction of the house is rust-free
Air vents allow for maximum air ventilation through wall and floor openings
Clean-out doors provide easy access for cleaning
Predator guard extends the entrance hole to protect young birds against predators
Pole mount or flush mount installation options
Cooler birds, how to protect them from the cold?
Cooler birds, how to protect them from the cold? If you have some of the coolest birds, you will wonder how to protect them from the cold? Especially in the fall and winter, when the weather gets colder. You can protect
If you have some of the coolest birds, you will wonder how to protect them from the cold? Especially in the fall and winter, when the weather gets colder. You can protect your birds from the cold by following some of the simple measures that we present below.
Ways to protect chill birds from the cold
Birds come naturally equipped to withstand the cold. The feathers and scales on its feet are, in fact, a natural barrier. The problem comes when the cold becomes intense and is also accompanied by rain, hail or snow.
Cooler birds
The coldest birds can be very affected if they have to spend the coldest months of the year without protection. But a good control over the internal temperature of the cage and over the feeding can help a lot.
You have probably already implemented many of these measures. Others, perhaps, remain for the next season. Read on and find out the best way to deal with the cold and its consequences.
Watch your bird
Maybe this is the first time you have a pet bird. But there are still signs that will tell you if your bird is cold or has another need. Your bird may be weathering the winter well, but by reading its body language, you'll know if it needs any help.
Cooler birds
When a bird is cold, its metabolic activity decreases, it becomes lethargic and fluff its feathers . These behaviors and physiological reactions help you conserve energy and heat. Even in nature it is possible to observe these behaviors.
Reduced metabolic activity and lethargy usually occur in birds without migratory behaviors. In order to maintain temperature, birds suspend other processes such as their heartbeat or their respiratory rate . They also reduce their movements.
In many cities in Europe it is common to see lethargic birds in autumn and summer. This behavior makes them easy prey for natural predators. It also makes you more prone to accidents with air and ground traffic vehicles.
Without the reduction in metabolic activity and lethargy, the birds could hardly make it to spring again. Despite the risks, these behaviors and reactions are very successful.
Feather cupping is an evolutionary mechanism of which even humans retain traces. Birds use it to look bigger and to intimidate potential threats. But they also use it to keep their bodies warm and better cover themselves.
If you see your bird immobile, lethargic and with its feathers hollowed out and it is also cold, you should take action. Remember that your bird has nowhere to go and probably cannot get out of its cage.
Choose your feeders properly
Cooler birds Believe it or not, feeders can be of great importance during the colder seasons. When choosing a feeder for your birds or to put it in your garden you must be careful.
Feeders that isolate moisture from food are ideal. Due to the susceptibility of the bird's immune system during winter, safe food is best. Especially in places where it snows.
Melting snow can moisten food. Humidity encourages the growth of bacteria and the presence of spores. For wild birds, it may be more acceptable because spores disperse better in open environments.
Domestic birds can suffer much more from the presence of spores. Especially if your food is not changed regularly. Along with unsuitable cage conditions, the spores end up causing serious stomach and skin problems for the birds.
The best feeder has a cover that protects the food from the rain . Moisture can damage seeds or dry food, but the most important thing is to avoid direct contact. Anyway, if your bird's food gets wet or frozen, it is best to change it.
Silicone or antifreeze material bowls are a very good idea. Your bird may not like it if it can't stand on it. But this is compensated by the antibacterial properties and because the silicone does not retain odors.
Choose caloric foods
Cooler birds One of the best ways to protect your chill birds is by providing them with caloric foods . With diets high in fat and calories, birds can more easily get through the fall and winter.
Birds in the wild spend a lot of time storing fat and energy for the most difficult months. And they try even harder if they must travel long distances on migratory routes across the sea and the desert.
This is why many birds consume all the berries and seeds they can. Even if they are not in your diet on a regular basis, seeds like sunflower can help you a lot. Especially on cold or rainy days.
If we have a caged bird, the seeds can give it the necessary energy to get through the cold. Many birds fall ill in the fall and summer due to immune system failures due to low temperatures.
The consumption of calories and nutrients is even more recommended than supplements. Any supplement not only has a faster elimination, but it sets and absorbs more slowly. Instead, through the seeds the birds can stay healthy without side effects.
Many adult birds can develop kidney problems due to excess vitamins or fatty or sweet foods. And it is that many caregivers think that caloric foods are synonymous with food for humans, including sweets.
You provide the coolest birds like parrots and macaws some seeds along with their usual diet. Remember that even if they leave them, it is necessary that they have them at their disposal for when they need them.
Provide more food
Cooler birds Providing more food is a great way to protect your birds from the cold . They probably prefer to put it aside on some occasions, but it is important that it is available.
Birds are usually quite selective about what they eat in their natural environment. We may not be able to offer you so much variety, especially for tropical birds. But at least we can compensate with a greater amount.
A varied and abundant diet is essential in the autumn and winter months. In addition to promoting the synthesis of nutrients, it allows our birds to store more energy. This is necessary for birds that are outdoors.
You just have to be careful not to confuse it with variety. Many birds must consume large amounts of vitamin C because they do not synthesize it. If we provide a lot of food, but few of them have vitamin C, our birds can develop immune problems.
Cooler birds You should also take into account that even though your bird does not eat the food, you should change it regularly. Failure to do so can lead to digestive or skin diseases. Your bird probably does not want to eat everything, but since it cannot get out, it must have it available.
In any case, try to give your bird food that attracts its attention and that you know will not harm it. You can also try giving him food for stimulation or play. So she will be happy to eat well.
Avoid contact with snow
Cooler birds E vitar contact with the snow is very important to stay healthy birds . In fact, not only with snow, also with rain, hail or any atmospheric contingency. And as we saw before, you must protect the bird, but also its food.
Birds are rarely kept in the rain in the wild. In fact, they tend to take shelter in their lairs when it rains or snows. This behavior is due to the fact that the rain can make flight difficult and excessively lower their temperature.
Captive birds also need shelter. Especially if they are birds that are used to migrating or tropical birds. Although they have more food available to avoid the cold, getting wet can affect them a lot.
The coolest birds , naturally, are tropical birds. Parrots, parakeets and cockatoos can be very affected by the cold. That is why it is essential to keep them sheltered at all costs.
In fact, if your food becomes full of snow, it is best to remove it and put a new one. Tropical birds usually feed on fruits, insects, and seeds. All at temperatures above 15 ° C.
Food at low temperatures can not only not only give them colds, they can also cause stomach problems. And in cold months, any simple problems can be exacerbated if your bird's digestive system is weak.
In any case, you must provide your bird with the necessary shelter against the elements. You should also give him the opportunity to consume food at a suitable temperature. Otherwise it could make you sick.
Change the water
Cooler birds Water is very important for your bird to stay well hydrated and healthy. Due to the same reasons that your bird cannot consume frozen food, it cannot drink ice water either.
Often times, the water can freeze in its container during the winter months. If this happens, your bird may not even be able to hydrate properly. This can be problematic for a number of reasons.
The first is that birds in winter need extra hydration. The cold can cause them to use up more fluid reserves than normal. A dehydrated bird can suffer from disorientation, decay, lethargy and cramps.
Another reason it is important to change the water regularly is for bird baths. Even if they do not have dirty plumage, the birds take baths to remove parasites and dirt from their feathers. This is a social behavior that birds can use to socialize.
Cooler birds
If birds are bathed in very cold or frozen water, they can become hypothermic. This is why it is important to keep water away from cold temperatures and snow. Even if your bird bathes frequently, it could be very helpful to slightly warm the bath water.
Both drinking water and bath water are of great importance to your bird's routine . If it is normally important to change it frequently, imagine in the fall and winter when it can freeze easily.
Protect the cage Bird cages need extra protection in winter, especially if they are among the coolest birds . You have many options to protect the cages, especially since it is much easier to act on them than on the birds.
Cooler birds
There are birds that need extra protection throughout the year, such as pigeons. If you are a caregiver, you probably know that it is better to cover at least two faces of the cage so that they feel more secure.
Other birds even need shelter from the night breeze during any season. That is the case with parrots and parakeets. Without adequate protection, their immune system will be compromised. Although a blanket is usually enough, it is better to be vigilant.
In winter it is important to roof the cages or to cover them totally or partially . A coating can ensure that your birds are resting and performing properly. The only important thing is to be careful not to interfere with breathing and the entry of light.
The problems associated with lack of oxygen and lack of light can also be complex. Especially if there are chicks in between. In addition, any condition can be aggravated during the winter months. Birds of the tropics can be particularly affected by the lack of light.
If the cages are not very big and you can move them, another option would be to bring them home or leave them indoors. A wall that cuts off the direct breeze might also help. You can also cover the cage a little to increase its interior temperature.
Control humidity This method of protecting your birds from the cold is especially important if you put your bird's cage at home. The coolest birds may be delighted to come indoors, especially if you have heating.
Cooler birds The problem is that bringing your birds home if you have the heating on can lead to serious health problems. If after turning on the heating your eyesight dries up, you will understand what we are saying. The same thing happens to birds.
Heating causes dry mucous membranes in birds . Especially in your eyes and airways. This can make them feel uncomfortable and lead to serious breathing problems like colds.
The lack of humidity generated by the heating is considerable. And in small birds the effect is more noticeable than in large birds. In canaries, for example, the risk of dehydration is very high.
But there is a quite satisfactory solution: turn on the humidifier. Once you get it up and running, your bird will be safe at home. And your eye health is even likely to improve.
Sure, you shouldn't overdo the humidity level. Too high a humidity level can spoil your bird's food. It can also lead to feather problems if kept under high humidity levels.
It could even be worse if the high humidity is maintained for a long time. Perhaps for tropical animals it is fine, but other times they may receive it badly. And another point against is that surely your library and furniture will suffer.
Be cautious above all Bringing our bird home may seem like the ideal solution to temperature problems. But you must be careful. Especially if you can't fit your bird's cage or if you like to let it loose.
Devices and mechanisms to heat your home in winter can be very dangerous for your bird. Burning stoves, fireplaces, or radiators are a constant source of danger for such curious animals.
If you want to avoid risks and keep your birds safe, it is important that you reform your house. You can secure the fireplace and avoid keeping heat-emitting devices exposed.
This can be a bit difficult, because even lighting can pose a risk. And if you have several loose birds the risks increase. With their games, they can end up causing life-threatening disasters.
In addition to a home renovation, you should consider keeping a cage, even if it has the minimum acceptable dimensions at home. A small cage will help you protect your bird at night or if they are not at home.
If you have more pets such as dogs or cats, you must be very vigilant. Very intelligent birds may want to interact to find some warmth. If you don't stay tuned, this can end in disaster. Visit to the vet Before the cold months begin, it is appropriate to consult the vet. He will tell you what your bird needs, how you can keep it warm, and what foods you can provide. This information can help you keep your bird healthy and happy.
when to visit the vet for my bird If you happen to observe any abnormal symptoms in your bird, going to the vet could make it improve in time. The first signs that something is wrong are a lack of appetite and unkempt or defective plumage.
When your bird does not eat and does not keep its plumage in good condition, it is signaling that it is not well. These symptoms may be accompanied by spots on the beak or the presence of feces on the tail plumage.
Cold and humidity can affect birds a lot. And if they had a pre-existing condition or disease, they could be severely affected by a low temperature. Especially if they don't have the right diet.
Deworming and virus treatment can ensure your bird survives the winter. Especially if you are very young, very old or not in your place of origin. The latter could bring extra complications, which you should consult an exotic animal veterinarian.
Cooler birds, how to protect them from the cold? Protecting your birds from the cold is easy. You just have to take the necessary preventive measures and get down to work. Insulation from snow, rain and cold are the best alternatives. But it is best to have a detailed picture and have a professional appraise your bird.
If you know more ways to keep the coolest birds safe, share them in the comments. You can also follow us on our social networks ( Facebook , Twitter and Instagram ) and be aware of our publications. Remember that at sexadodeaves.com we are specialists and we genetically sex up to 400 species!
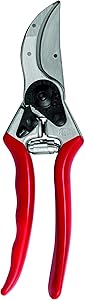
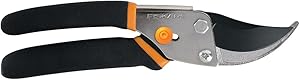
A hardened bolt and nut to assure exact adjustment of both the cutting and anvil blades
Rubber cushion and shock absorber
Ideal pruner for light applications and easily adjustable
Features strong blades with a wire cutting notch
Lightweight metal handles
Blades are made of high-quality hardened steel
Limited lifetime warranty
How to remove dead carnation flowers from the cape
Cape carnation enjoys full sun and well-draining soil, as well as giving the gardener a display of brilliant flowers all summer long and beyond. Regular pruning of faded flowers results in the redirection of the plant's energy to produce new flowers instead of seeds. In addition, pruning will keep the beds fresh and neat and give them good air circulation, which reduces the risk of disease. Rock gardens and flowerbeds often have some of the 300 varieties of carnations.
Step 1 Examine each flower and stem systematically and cut out any flowers that have died, lost their color, or started to lose their bloom and are turning brown. Cut them 1/4 inch (0.6 cm) from the closest group of leaves. Removing these flowers encourages the plant to focus on producing new buds rather than new leaves. Removing dead flowers makes the remaining ones, in good condition, last longer.
Step 2 Remove dead flowers before they form seeds on the inside. Pruning them at the right time prevents the seeds from spreading spontaneously and vigorous root development, which will be beneficial when you want to divide the plant.
Step 3 Prune the carnation once it has nearly completed flowering, usually 6 weeks after it produces its first flower. Using garden pruning shears, cut the foliage about 5 inches (12.5 cm) to retain its shrub shape, however, to have green foliage all winter only cut 3 inches (7.5 cm) . This plant will tolerate cutting it flush with the ground if necessary.
Step 4 When the dying flower turns brown, harvest the seeds that are inside. Cut them with the pruner or scissors once they are completely dry, at which point the seeds will fall easily if you shake them. Even if the plant may appear sloppy and unkempt for a few weeks, the seeds will give you a solid base for propagation in future seasons.
When and how to prune rose bushes: keys to taking care of your flowers
The rose, considered "the queen of the garden", gives life and color to the place to patios and gardens. When to prune it and how to take care of it so that it looks beautiful.
Growing our own roses is a luxury that we can give ourselves if we learn some secrets of this beautiful flower, associated with love, passion and purity, among many other symbols derived from its color and its particular perfume. We tell you how to prune rose bushes without hurting yourself with thorns and how to take care of the plant so that it gives you more and more buds.
The first thing to know is that pruning rose bushes is a task that we cannot skip if we want to have these beautiful flowers at home. And we must do it correctly so that the plant does not weaken.
Keys to prune rose bushes To achieve a good result and have roses worthy of a flower shop in the garden, the ideal is to start by learning how to plant rose bushes, how to care for them and how roses are pruned , when and with what tools.
Rose plants are believed by many to be difficult to care for, but they are undemanding and fast-growing shrubs . They adapt very well in all temperate areas of the world and withstand quite extreme temperatures, which can range from 40ºc heat to a few degrees below zero.
They can be planted in large pots, but they thrive and look best in the soil in a garden. They need plenty of sun, plenty of water and it is very important that they have good and loose soil so that the irrigation drains well.
It is also necessary to put compost in spring and summer. But one of the keys for the plant to grow healthily and give us good flowers is pruning.
When to prune rose bushes
When winter is ending and the temperatures begin to be warmer . The key is to do it when the risk of frost has passed because pruning "favors" the plants to accelerate their vegetative activity. Therefore, if we can do them in autumn and encourage them to sprout, when the frosts arrive they can damage those tender twigs that have just sprung up. For this reason, in areas with very cold climates and intense frosts, wait for spring to appear.
During the flowering season: at that time the other type of pruning is done that we should not skip. It is smaller but just as important, since the withered flowers have to be removed from the plant. This will cause the plant to have more flowers each year, of good size and color. And it is the way to take care of the health of the plant, because withered flowers can be a source of bacteria and other microorganisms that damage the rose bush.
What tools do we need to prune rose bushes It is important to have the right tools, which are generally used for pruning bush and climbing roses. Ideally, you should have:
Scissors with anvil cut .
Normal garden scissors .
Gloves (optional, but remember that the plant has thorns).
Healing paste (optional, but highly recommended).
How rose bushes are pruned Pruning is cutting off dry, dead, damaged or diseased branches, flowers or leaves. In the case of the branch, if it is sick you will see a brown color when you cut it; if it is healthy its color is white. The cuts must be made oblique, clean and without tearing.
As we saw, there are two times to do this task and a recommended tool for each.
Training pruning and rejuvenation
Anvil-cut scissors should be used, as the branches do not exceed 2.5 cm in thickness.
Disinfect the scissors with pharmacy alcohol and check that they are sharp so that the cut is clean.
Remove the branches that look weak, diseased, and also those that do not produce flowers.
Prune healthy branches above the fourth or fifth bud. The youngest must be left with at least 2 or 3 buds. The cut must be oblique.
Put healing paste on the wounds in each cut to prevent the proliferation of fungi and bacteria.
Finally, clean the scissors well with alcohol and dry them with a clean cloth. Store them in a cloth bag or toolbox to prevent rust if they come in contact with water and sun.
Flowering pruning
To cut the flowers we can use common garden scissors. If, in addition to the wilted flower, you want to trim the branch a bit, use the anvil cutting scissors.
To remove the flowers, the step is simple: you just have to cut the stem that connects the flower with the rest of the plant.
In this case also do not forget about the hygiene of the scissors before and after pruning.
An important fact: you can reuse the cut stems of the branches that are not stinked. It is enough to apply powdered rooting hormones to the base of the cut and plant them in a small pot with good soil and universal growing medium. Keep watering and in no time the roots will start to grow. It is recommended that you keep those stems in the rooting process in the same pot for at least 6 months.
Climbing rose: how to prune it Rose bushes are not climbing plants in the strict sense: by themselves they cannot climb like ivy, Wall Lover, vines, etc. They can if we guide and tie them. That is why climbing roses must be well attached to a support (column, lattice, wall, etc.).
The roses of the climbing rose bushes are not born directly from the main branches but are born from the secondary or lateral branches, which are the carriers of roses.
Pruning should be done every year but it is not complicated; You only have to cut from 3 to 5 buds and cut at the base all the branches that we see weak or very old, since they will not give flowers. You also need to trim the shoots that are stinky.
Ideal for cutting stems and light branches. Easy-open lock protects the blade during transport and storage
Fully hardened, precision-ground steel blade stays sharp, even through heavy use
Low-friction coating helps blade glide through wood, prevents the blades from gumming up with sap and debris and helps the blades resist rust
Maximum cutting capacity: 5/8 inch diameter
Lifetime warranty
How to prune withered rose flowers
Roses that have died, or those that have fully blossomed and are beginning to wither, should be removed. This process is known as "pruning the wilted flowers" and is done to keep the roses looking attractive. In addition, it encourages more flowering. This is a trick that focuses on the stems and flowering of the plant rather than wasting energy on dead roses or producing seeds. During the blooming season or summer, you should prune the withered rosebush flowers regularly until the bush begins to winter hard.
Part 1 Prepare to prune
1 Gather the tools you will need to prune. You will need sharp, clean pruning shears, gardening gloves, and a large bucket to carry the cuts you make.
Your scissors should allow you to make very clean cuts, and they should be small enough that you can hold them in one hand and make precise cuts.
Buy gloves that cover not only your hands, but also your forearms. Some rose bushes are very thick and tall, and you will need to reach the bush to prune certain roses. Therefore, by covering your arms, you will protect yourself from thorns.
2 Learn to identify dead roses and other problem areas that you need to prune. One prunes the faded flowers not only to encourage more blooms, but also to keep the rose bush healthy and free from fungal and insect diseases. Examine your rose bush and look for the following:
Dead roses . When the roses have finished blooming, they will begin to wilt or bend down. Its petals will become extremely loose and will even fall off in the mildest winds. Therefore, you will need to prune those stems.
Conflict roses. Some roses may become entangled with each other. These roses basically compete with others to grow in the same small place, stunting the growth and appearance of the others. By pruning these roses correctly, you can change the direction they will grow the next time they bloom. [1]
Roses that grow inward. You want the bottom junction or base of your rose bush to get plenty of water and sun. Therefore, if the stem of a rose grows inwards, it will not allow sunlight and water to reach that junction, possibly causing it to become infected with bacterial fungi. You basically want the stems of your rose bush to grow outward and the path leading to the junction to be clear. [two]
Part 2 Cut the stems
1 Identify the sets of 5 sheets that are facing the correct direction. Looking at the stems you will probably find some with 3 or 5 leaves. The correct way to prune a rose is by cutting over sets of 5 or more leaves. [3] The set of 5 leaves (sometimes called a true leaf) should be oriented in the direction you want the stem to grow. For example, if you want the stem to grow outward, cut a set of 5 leaves that is also pointing outward.
Cutting a set of 3 leaves can cause the stem to lack flowers.[4]This means that it will not bloom or will not produce more roses. However, it can flourish in the following season.
You don't have to cut the stem on the first set of 5 leaves you see. Sometimes a set of blades may be facing the wrong direction, so you will need to cut lower.
2 Recognize knots. You will see a dark spot just above the point where the stem and the set of leaves meet. This union will be the point where a new stem will appear on which a rose will grow. You should make the cut just above the seam.
If you must prune multiple rose bushes, you may not have time to find all the knots there are. Fortunately, this junction is very close to your blade set. Only make a 6 mm (¼ inch) cut over the 5-blade set.
3 Make the cut at a 45 degree angle. You should never cut straight. A 45 degree cut will allow water from your sprinklers or rain to run off and not pool on the stem, preventing bacteria and fungus from growing.
There are conflicting opinions on whether to use garden shears at a 45-degree angle when pruning roses. In many sources it is stated that the angle at which the cuts are made does not affect how well the plant heals or how many flowers it produces.
Consider putting some white glue on the edges of the fresh cut. This reduces the risk of disease attacking the base of the plant.
Tips
If you want to reduce the size of the rose bush in general, cut the stem so that it is smaller. This is especially necessary for fast and abundant growing roses like David Austin roses. However, the more you prune it, the longer it will take for the flowers to form.
If you don't prune off faded flowers from a rose bush, dead roses will turn into seeds or rose hips. By pruning them, you will be able to enjoy more blooms in the growing season.
If desired, place the fresh rose cuttings in the compost bin. However, avoid placing abundant woody or mature rose cuttings in the container as they will take longer to disintegrate than young stems.
Cut dry stems, flowers and leaves to plants
A couple of days ago Hilda, one of our Cuidatujardin.com readers, asked us about the care we should take when we want to cut the leaves of our plants that are dry. Therefore, today we want to take care of analyzing all the details that we have to take into account when we think about cleaning the stems, leaves and flowers that are dry in our garden.
The first thing we must bear in mind is that beyond the fact that autumn is usually the most recommended time to cut the stems, flowers and leaves of our garden that are requesting an urgent cleaning , each species of plant has its own peculiarities, and that is where the secret is that we must know.
Remove dry leaves or wilted flowers Of course, one of the main doubts that arise in this regard has to do with being able to remove the dry leaves or withered flowers from the plants. Ideally, you should check them every week and remove them as soon as you discover them, because otherwise you could put the rest of the plant at risk. In addition, we make it much easier for you to develop new leaves and flowers in this way.
The plant species Anyway, and as we said before, if we have doubts about the species of plant that we have before us, it is convenient that we carry out a survey about it. The rule indicates that those that bloom in the first and summer, that is to say at this time of the year in the northern hemisphere, are pruned in autumn. On the contrary, those that bloom in autumn and winter are pruned in spring. Finally, almost no plants are pruned in summer.
And how do I clean it? Considering that the pruning of the plant is one of the main cares that we must have in this regard, the ideal is to cut the branches or stems in a skewed way, as close as possible to their growth nodes. In the case of wilted flowers and leaves that are already weak, it is best to remove them first by hand, and then proceed to remove the trunk if you no longer have any of them.
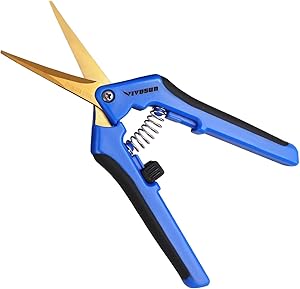
VIVOSUN 1-Pack Gardening Hand Pruner Pruning Shear with Titanium Coated Curved Precision Blades
REDUCE HAND STRAIN: These micro tip snips are built spring-loaded so that they automatically push themselves open without you having to do the work which greatly reduces hand fatigue making these snips great for those with arthritis, carpal tunnel, hand or wrist issues. Comfort Grip handles will make it easy to work for long periods of time without discomfort
ULTRA SHARP BLADES: These quality snips come with stainless steel precision-sharpened blades which is titanium coated and are ready to tackle all of your deadheading, trimming, and shaping needs for your roses, annuals, vegetable and small flower gardens
SECURE, EASY TO OPERATE LOCK: These micro tip snips feature a safe and secure sideways locking mechanism that keeps your blades protected and closed when not in use. The design of these pruning snips are perfect to use whether you are right or left handed with ease
MAKE PRECISE CUTS: With these micro tip snips, you can easily get between plants to "clip and snip" only the area or part that you want to cut with one-hand and without damaging the other vital stems and branches of your other plants.Care: Clean blades after each use
What You Get: VIVOSUN Precision Pruner and our friendly customer service
Cut off withered flowers throughout the summer
To keep the garden clean we have to cut the withered flowers during the summer:
We also facilitate the cutting of the withered flowers the new flowering of the plant. So unless for decorative reasons we leave some wilted flowers in most cases it is best to cut them.
When the flowers wither, the seed formation process begins, this process is very costly in energy for the plant and prevents a new flowering. So unless we want to harvest seeds from a plant, it is best to cut off the withered flowers. In the case of wanting to obtain seeds from a plant, we will leave some withered flowers preferably at the back of the bush.
To keep the summer pots and planters clean, we will cut the flowers as they wither. This task in this type of plantation should be part of the daily cleaning of our pots and planters. Large flowers, petunias and geraniums for example, we can cut them directly by hand with the help of nails. The finest flowers must be cut with scissors. Sometimes we will have to cut a good portion of the stem next to the flower to balance the whole.
In the case of rose bushes, the treatment of withered flowers is different depending on the types of rose bushes. If we have a rose bush that forms beautiful fruits after flowering, we will not cut the withered flowers to leave the plant to form those fruits. If it is a question of rose bushes that bloom forming clusters of flowers, we will cut with the scissors only the withered flowers that are in an inflorescence, when all that set of flowers is in poor condition we will cut the stem one centimeter above the branch from which it starts. We will do the same with roses that bloom alone.
Annual plants will last longer, until the arrival of the first frosts, if we are careful to cut the wilted flowers frequently. We will carry out this operation with pruning shears or with simple kitchen scissors.
Remove dead flowers to promote blooming
To ensure flowering abundant and continuous in our annual and perennial plants must remove withered flowers. Today we give you some tips so that you can do it successfully.
Removal of faded flowers is preferable for most annuals and some perennials. If we do not take this into account, we can end up delaying or preventing the formation of new flower stalks.
In the first place, the fact of cutting these dead flowers is done for aesthetic purposes, but we also know that in this way we will avoid the appearance of low-quality seeds for their next flowering season. In short, it is a good method to promote the appearance of new, good-looking flowers.
To remove dead flowers from a perennial plant, we will use the pruning shears, making diagonal cuts, at an angle of 40-45º and a few millimeters above the third or fourth leaf. You want to make sure that you don't cut in the wrong place, because that way you could be removing the stem that will produce new flowers.
In some varieties of plants, the stems must be cut in half (for example, those seen in the images), so it will be necessary to inform you specifically for each plant before doing anything. If you achieve this, you will be assured of a good production, enough to make a fantastic bouquet of flowers!
How to cut dry leaves from a plant?
Cutting dry leaves from plants is always tricky, especially when you don't know much about gardening. I understand the feeling of wanting to do it, but being afraid to kill your plant.
To that special that, for some reason, has not died and you want to keep it.
If you have any comments or want to know more about me, follow me
Delirium and go ahead and prepare chicken in an easy and delicious way with these recipes, you will love them!
The truth is that cutting dry leaves from plants or pruning them, is necessary and the day must come when you must do it.
So the longer you put off the topic, the more dried leaves you will have to cut and the harder it will be to do.
It is also true that you must take into account some points so that when cutting dry leaves of the plants you do not ruin everything and kill your little plant.
The first thing is the scissors, these must be special for gardening, if you do not have one, you can use one that is very sharp, so you will not damage the branches.
The season is also important, you should prune the plants at the beginning of their growing season.
If your houseplant isn't blooming, you should prune it in late winter, but if it does bloom, it's best to wait for it to bloom before pruning it.
To cut dry leaves of plants and branches you must do it at an angle of 45 °, in this way you do not hurt your plant.
Do not cut those that are green, leave the main stems intact, only cut what is NO longer alive.
You should also cut the withered flowers, remember that those that are alive and beautiful take life away.
I consider that these tips are enough to cut the dry leaves of the plants that you have at home, little by little you will do better.
Bangerz Sunz Fire Starter Squares 144, Larger and Safer Fire Starters for Fireplace, Wood Stove & Grill, Camp Fire Pit Charcoal Starters 50B, USA Made
ALL-PURPOSE & VERSITILE – Get a fire going anywhere fast. Easily combustible fire starters are designed to start fires fast. Great for camping, pit fires, or charcoal lighters for barbequing (Doesn’t flavor food)
NATURAL FIRE STARTER – Ecofriendly product made with non-toxic recycled wood chips and wax, emits up to 80% less carbon monoxide. “Go Green” (No lighter fluid necessary)
WEATHER RESISTANT LIGHTER NUGGETS – Designed for all weather conditions, these robust squares ignite even when wet
SAFETY FIRST – Our safe lite produces no flare ups, perfect for safely lighting indoor fires. Safely light up a cozy fireplace or wood stove, and its a must have accessory for your emergency survival kit
EASY TO USE & HASSLE FREE – Quick, and ready to use with no kindling or paper required to ignite. Place squares into desired application and ignite. Squares break apart very easily to meet your requirements
How to light a fire in a wood burning fireplace fast. Tricks
Do you want to know how to make the wood in your fireplace burn?
When you have a fireplace to heat your house, in addition to saving money, you offer a relaxing and romantic atmosphere to your home. Knowing how to make a good fire in a fireplace is not very difficult, you just have to safely follow a few key points. Therefore, we want to offer you some essential tips and recommendations for lighting a wood burning fireplace.
The fireplace: much adored in winter by many people. It warms us, it hypnotizes us with its flames and it relaxes us… It creates a romantic atmosphere or it encourages endless conversations by the fire with family and friends.
Sometimes lighting a fire can be difficult, but do not be discouraged, follow these tips and essential recommendations to be able to light the wood fireplace without stress! and you will see how you get it more easily. There are many ways to light the fire, but this is one of those ways that makes the process easier.
What is the best firewood for the fireplace?
The hardest wood firewoods are those with the highest calorific value. What is considered the best firewood is oak . It is a hard wood and very resistant to humidity, that burns slowly generating a lot of heat and is affordable. It is preferable to use dry firewood.
To choose the type of firewood, we have to take into account the heat capacity. Ordered from highest to lowest, this is the heat capacity of each type of firewood:
Over: 4900
Chestnut: 4800
Elm: 4790
Oak: 4690
Olive: 4678
Beech: 4630
Pine: 4557
There is a firewood called "green firewood", it is much cheaper, but it has much less calorific value and gives off a very unpleasant white smoke. Although it is cheaper, it is not the best option when it comes to cooking.
The firewood is preferable that it does not have branches or green twigs. If not, it will cause thick smoke, plus it will cost much more to light the fireplace.
You will need to light and use the fireplace: Here are some products that can be very useful:
A couple of large logs.
5-10 small pieces of wood chips or firewood or pinecones.
Several sheets of paper. Even better if you use some small pre-treated eco-friendly material to light. It must be taken into account that lighting with newspaper is especially polluting and contributes to the formation of soot in the chimney, even so, better from newspaper than magazines or colored paper, it is more ecological.
Ignition pills.
Matches or lighter.
Product to clean the windows of the fireplace
Step 1. Most importantly, your safety. The first thing you have to take into account before lighting a good fire in the wood fireplace is to make sure that there are no objects that can burn nearby , you will have to remove any object that can catch on.
Step 2. Start a base with easy ignition fuel. You have to prepare a base with fuel of easy ignition . You can put some newspaper, thin branches, dry leaves, a couple of ignition pills ... place them in such a way that there are holes for the flame to breathe and oxygenate.
Step 3. Light the fire and don't neglect it. Remember, it is better to use firewood from a hard tree, and it is recommended, to make it easier to light, that it is always as dry as possible. It is often said that the best firewood has had to be 6 months in the open, in the sun. This helps it lose much or all of the moisture it contains.
Now you have the base ready to light the fireplace, take a match or a lighter, light the fire and close the door. This step is the most delicate , it is very important to be careful and not neglect the fire so that it does not go out. To make it easier for the fire to really ignite, you can put the flame in different places. If you see that it is fading, add some more twig.
My personal trick to ignite faster is: Take 1 or 2 pineapples, and in their holes put pieces of ignition tablets . Then put newspaper on top, small branches and a thicker trunk on top, I usually do it in the shape of a pyramid leaving holes so that the fire does not drown and oxygenates.
Light a match or lighter and from time to time hit with the bellows to fan the flames until the fire gains strength.
Some fireplaces take longer than others to create a good draft, especially brick ones. If the draft isn't enough, it may be a good idea to open the stove door slightly until the stove is hot.
If, after all, we have miscalculated the size of the log, or we have erred in its placement, and the fire is extinguished, we can still take advantage of the embers and start again. It is not uncommon for multiple attempts to be made.
Step 4. Watch the air flow. Remember that the air flow is the most important thing, we recommend a distance of 1 cm between piece and piece of firewood, it is the ideal measurement. The small wood should not be thick, small logs or chips between two and four centimeters thick are ideal.
Step 5. Add thicker logs. Once you see that it is already lit, it is time to add thicker logs so that they start to ignite before the twigs are consumed and the fireplace goes out. To light the log, you have to bring a flame to it continuously for a while until the log burns by itself. In this step we will still have to be attentive, and not neglect the fire by putting in some twigs from time to time. It will be necessary that there is space between the logs, so that the fire breathes and has the necessary oxygen to burn, you can place the logs in a "pyramidal" shape so that air enters and ignites more easily.
If after a while, the fat log has not yet lit, we can forget about it for the moment, to prevent it from going out we have to take advantage of this fire to burn a medium-sized log. Once this log has ignited, the thick log will surely burn. While being inside the fireplace it takes temperature to ignite more easily. From this moment on, the log will give us its warmth, just by paying attention to a few details. The placement of the log is very important, since its flame has to give us heat, on the one hand, and it has to be the source, also, of the combustion itself; for this reason, it is important to give it a little twist when part of the trunk has been consumed.
Step 6. Use the bellows. We can help ourselves with a bellows, it is very useful to stoke the fire. A bellows is an instrument that is used to give air to the fire and thus fan the flames, thus achieving that the largest logs ignite and the flame does not go out. If you have a fireplace with a door, you have to check that the vents are open.
Step 7. Take care that it does not go out by adding more logs from time to time. Once the flame is well lit, you will have to add larger logs and recharge it as we observe that it is necessary. If you follow these directions and light the fire with a couple of thick logs, the first load of firewood will last an hour. When it has turned to embers, you can open the door and add more firewood. We recommend leaving the door ajar for a few seconds before fully opening it.
Step 8. How to prevent the stove glass from turning black? The best way to light the wood stove is, once the tablet is in place, leave the door half ajar while the iron and pipes are heating up and creating the appropriate depression so that the stove works well, and does not accumulate excess smoke in the combustion chamber, which will make the glass stain more.
Step 9. C OW clean the glass of the fireplace or stove? It is one of the questions we ask ourselves when we have a wood or pellet fireplace. There are different cleaners on the market for stove and fireplace glass that effectively remove all traces of tar and soot .
You just have to spray the product and let it act for a few seconds (or minutes, in the case of particularly resistant deposits) and wipe with a dry cloth paying attention to the most difficult areas.
Step 10 Use a chimney sweep log at the beginning and end of the season to prevent potential fires It is a log shaped like a log or a briquette. It is used to remove soot and clean the chimney flue pipes. This helps the proper functioning of the fireplace or wood stove and avoids possible incidents, since sometimes the creosote that forms in the pipes can ignite and cause a fire .
The frequency with which this type of chimney sweep log should be used varies depending on the use that you have given to the fireplace or stove. It is advisable to use the log at the beginning and end of the cold season. To use it, the fireplace is started with a load of wood and then the unopened chimney sweep log is inserted from the bag in which it comes. The process ends when the fire goes out by itself.
Important notes:
If you want to light the fireplace and have a comfortable and lasting fire, it is better to put, once the fireplace is lit, a thick log. The thinner branches will provide us with the flame much sooner, but it will also be extinguished quickly, so it will be necessary to continually replenish the fuel.
It is important that the logs are dry; if they are green they will give off a lot of smoke, it will be constantly sizzling, and it will only be the source of unnecessary annoyance.
With the help of the appropriate fireplace utensils, you can turn over and reposition the wood as necessary.
Be careful with the children, that they do not approach the fire if you are not present.
Another very important point to achieve a joyful flame is that air can enter: the fire must be oxygenated. If we bring many logs to it, we will only be able to drown the fire, and it will be extinguished without being able to avoid it.
If you go to sleep and the fire is still burning, do not forget to put a protector or make sure that there are no carpets, chairs or any flammable objects near the fire.
It is common that when you light a fireplace, you are surrounded by people giving their own advice. Although these are always welcome, a good fire is usually a single thing.
Now we can enjoy the pleasure that the heat of the fireplace gives us at home.
How to put out a fire in a wood burning fireplace
With salt
Another very effective way is to add salt on the embers scattered and covered with ash. More or less, a large bowl will suffice, although this varies depending on the size of the fire. This method can be used when the fire is not very intense.
With sand
With a metal shovel, spread the ash over the embers. Although it will not put out the fire completely, it will extinguish it. When the flames disappear, finish extinguishing the embers by pouring sand over them. Before lighting the fire again you will have to remove the sand well and put new wood so that there is no sand in the fireplace.
With bicarbonate
Baking soda can help you put out a fire effectively. You have to spread the logs, cover them with ash and put a thin layer of bicarbonate on top, enough to cover all the embers.
With water
Do not even think about adding a bucket of water to put out the fire in the fireplace, it would be a very sharp contrast to your temperature and it could damage your fireplace, what you have to do is moisten the logs with a spray bottle. Spread the firewood with the poker so that it goes out more quickly. Spray until you see the fire go out.
Our rural accommodation in Asturias has heating in all rooms and two comfortable wood fireplaces, designed for the comfort of our customers. Enjoy a warm and homely atmosphere in our house in a natural environment surrounded by mountains.
And what better than to make a winter getaway and sleep warm in a rural mountain house with a fireplace in Asturias?