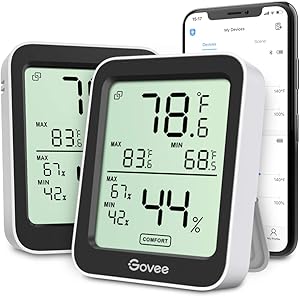
Govee Indoor Hygrometer Thermometer 2 Pack, Smart Humidity Temperature Gauge with Large LCD Display, Notification Alert with Max Min Records, 2 Years Data Storage Export for Room Greenhouse, Black
Easy to Connect: Simply download the Govee Home app, search for and select H5075, and pair it successfully within minutes. With a 260ft/80m Bluetooth range, you'll be notified of any air changes immediately.
Accuracy: Built in Swiss made smart hygrometer sensor, the temperature is accurate to ±0.54°F while humidity is ±3%RH. It provides high precise monitoring. Up to 2S refresh speed always gives you the lastest changes of environment.
Large LCD Display: It offers realtime temp/humidity readings with large numbers and max/min records on 3 inch LCD screen, comes with 3 level comfort indicators dry/comfort/wet keeping you aware of house situation with just a glance.
Smart App Alert: You'll receive a notification alert once temperature or humidity is out of preset range. It can help you effectively adjust situation of your wine cellar, greenhouse, basement or other places in time.
Free Data Storage: It features 20 days online data storage. You are able to view recent temperature and humidity records. Curve graph diasplying brings you a clear data-changing track. You can export latest 2 years data to CSV format at any time.
Measure the temperature in the nursery
Controlling the child's body and environmental temperature is basic to understand what is happening to him and how things affect him. Precisely for this reason, today on the blog for babies , we offer some advice about how we should measure and why the temperature of the child.
In order for the baby to be properly covered at night and dressed as appropriate during the day, the temperature of the room must be known, for which a thermometer must be placed on an interior wall at bed height , that is, approximately at 90 cm from the ground.
Do not stand near the heating source if there is one. The baby's clothes and garments should be used according to the temperature of the crib or the place where he sleeps , which should be kept uniform in cold weather.
A young baby , less than 3 months, needs a warmer room than a larger or more robust one, therefore, the parents must be in charge of favoring all the conditions for the baby.
Especially in the first weeks of life the room temperature should be 21 to 24 ° C day and night, while for older and stronger children during the day it can be 20 to 21 °, and at night 12.8 to 15.5 ° C.
Protect the creature by means of screens or screens against cold drafts. The temperature and humidity of the room should be kept as uniform as possible. Oil or electric heaters are convenient for quickly providing temporary heat.
Do not use a gas heater in a child's room unless there is no other way to heat it quickly, as there is a danger that it will leak and emit poisonous fumes that are very dangerous; a slight leak day after day can make anyone seriously ill and exposed to breathing the fumes.
In the summer, when it is very hot, the baby should be kept in the coolest part of the house or on the veranda by wearing only very light clothing, such as a sleeveless shirt and a diaper, or even a diaper alone.
How to measure the ambient temperature
Ambient temperature is the range of air temperatures that people prefer when they are indoors. Measuring it is really very simple. To do this, you can use a thermometer placed in the center of the room to see a reading, or even download an application on your Smartphone.
Method 1 Read a thermometer
1 Choose a digital thermometer to see an accurate reading. Electronic or digital thermometers may be more expensive than others, but they provide a faster reading and a more accurate temperature. They also react faster to changes in temperature than other types of thermometers, thus allowing for greater accuracy in readings. [1]
Some digital thermometers can store temperature readings so that you can compare the ambient temperature over time to see how it changes.
2 Use a glass thermometer to see an approximate reading. These thermometers use a glass tube filled with a liquid to measure temperature. As the air around the thermometer heats up, the liquid rises up the tube and can be used to read a fairly accurate measurement of the ambient temperature.
Use a glass thermometer that does not contain mercury. Mercury is highly toxic and can be dangerous if the thermometer breaks.[two]
Glass thermometers are also known as a bulb thermometer or liquid-in-glass thermometer.
3 Use a bimetallic thermometer for an easy reading. Bimetallic or dial thermometers have a metal pointer that goes up or down on a circular scale to indicate temperature. These thermometers use a strip of metal that expands and bends as the temperature increases. As this strip expands or contracts, it moves the pointer on the scale. The large pointer arrow makes it easy to check the room temperature. [3]
Keep in mind that bimetallic thermometers are not as accurate as digital ones.
4 Place the thermometer in the center of the room. Regardless of the type of thermometer you use, you should place it in the center of the room within 2 feet (60 cm) of the floor to read an accurate measurement of the room temperature. If you put it on a wall, you could read inaccurate measurements because the heat from them can distort the reading. [4]
Place the thermometer on a table or stool so that the temperature of the floor does not affect the reading.
Tip: Make sure there is no heat source near the thermometer.
5 Wait about 5 minutes for the thermometer to adjust to the room. Before checking the temperature, allow the thermometer to adjust to the room. Thermometers, particularly bimetallic and glass thermometers, need a few minutes to indicate an accurate reading of room temperature.
Don't hold the thermometer or stand directly next to it, as your body heat could affect the temperature reading. [5]
6 Check the temperature on the thermometer. After placing the thermometer in the center of the room and waiting a few minutes for it to adjust, you can check the temperature reading to measure the room temperature. A typical room temperature is between 21 and 24 ° C (70 and 75 ° F). [6]
A digital thermometer will show the temperature on the screen and it will be the most accurate.
If you are using a glass thermometer, read the numbers next to the top of the liquid to measure the temperature.
If you are using a bimetallic thermometer, look at the number the arrow points to to measure the temperature.
Method 2 Use a smartphone
1 Download a thermometer app on your smartphone. Many smartphones have sensors capable of monitoring the temperature of the device. You can download an app that uses sensors to read a room temperature. Open your phone's App Store and find a thermometer app to download. [7]
Head over to the App Store to download a thermometer app on your iPhone .
Use the Google Play Store to download an application on your Android .
Among the most popular applications are My Thermometer, Smart Thermometer and iThermonitor.
2 Open the app. After downloading the app, locate it on your phone screen and tap it to open it. After opening it, you will probably have to wait a few minutes for the app to update.
Before opening the application, you must first wait until it has completely downloaded.
3 Select the type of reading to measure the ambient temperature. Depending on the application you use, you will have different temperature readings to choose from. Some apps allow you to check the temperature of the phone's battery or the outside temperature based on weather data. Choose the room temperature reading to measure the temperature around you. [8]
Tip: ' Most applications allow you to choose between Celsius and Fahrenheit readings, but you can also convert measurements from Fahrenheit to Celsius or vice versa.
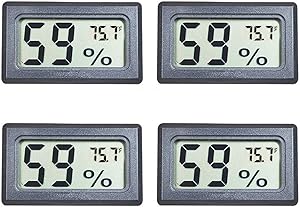
Veanic 4-Pack Mini Digital Electronic Temperature Humidity Meters Gauge Indoor Thermometer Hygrometer LCD Display Fahrenheit (℉) for Humidors, Greenhouse, Garden, Cellar, Fridge, Closet
Mini Digital Humidity Thermometer allows you to easily know the temperature and humidity around you
2in1 meter with built-in probe; digital electronic thermometer and hygrometer for measuring temperature and humidity for indoor use
Fahrenheit (°F) display, this thermometer displays temperature in Fahrenheit
Temperature measuring range: -58℉-158℉ ; Humidity measuring range: 10%-99%RH (Measures conditions every 10 seconds)
Temperature measurement accuracy: ±2℉; Humidity measurement accuracy: ±5%RH
How to measure the temperature of a room?
Whether in winter or summer, the temperature of the room where you sleep is essential to have a good night's sleep. And is that, if it is too high or too low, not sleeping well will affect the day to day physically and mentally.
That is why it is essential to find a way to measure the temperature of the rooms, even the whole house. And it is that depending on how your home is, you will have felt that in some rooms it is better than in others. So, with the right tool, you may even consider sleeping in another room.
Having controlled not only the temperature, but also the humidity of your home, facilitates the prevention of diseases and the appearance of mold. The combination of both can make your furniture age faster, even if you have respiratory problems.
So what is the best method to measure the temperature of a room? And of the whole house? Already on, why not from the garden?
Weather stations: the best solution
Weather stations are the ideal solution to have an easy and simple control of the temperature and humidity of your home. With them you can have a comfortable and precise tool without the need to invest too much or put mercury thermometers in all your rooms
But not only that, but thanks to technological advances you can find weather stations that can measure the barometric pressure, the direction and strength of the wind and even UV rays. These digital tools also offer you forecasts with more or less success, depending on the data collected.
And for that you don't need to have a hulk with a lot of measuring gadgets. With just a small station that fits in both hands you have more than enough.
In general, weather stations are made up of a central station and one or more remote sensors, allowing you to know all the information about the house with a simple glance at your screen. Or even from your mobile, if you have one of the fantastic featured models of Wi-Fi weather stations.
By installing a compatible app, you will be able to know what the weather is like at home from the comfort of your work; know how the room where your children sleep is located and know the most comfortable place when temperatures rise or fall too low.
How to choose the right model?
You will find a great variety of models of weather stations. From very simple stations that collect basic information to some much more complex that will need an installation in conditions outside. If you are interested in acquiring a weather station, we recommend that you take a look at this website , as they offer different buying guides that will be very useful.
In short, the fundamental thing is that the station you choose is capable of transmitting the ambient data comfortably, that is, via mobile. And for this the best are the wi-fi weather stations. If you are looking to buy a bluetooth or wi-fi weather station, one of the most interesting and complete is the one offered by Netatmo. Its design is elegant, with an interior sensor and an exterior sensor, it has great connectivity and you can check everything through your mobile. It will undoubtedly be a tool that will change your life.
The mobile battery allows you to know the indoor temperature in real time
Modern smartphones have a sensor that measures the temperature of the phone's lithium battery to prevent it from overheating, which can be dangerous.
The increase in battery temperature can be due to environmental conditions, intensive use of the phone, or it can increase in areas with less coverage, where the processor constantly works to search for the signal and maintain the connection with the mobile network.
In fact, it is not strange that a phone goes into low power mode - for example, lowering the brightness of the screen or reducing its performance - when they detect an increase in its temperature.
Correlation between ambient and mobile temperature
Taking advantage of this data, Dutch researchers are determining how to measure the ambient temperature from the temperature of the mobile . Both data are not similar, since the temperature of the battery of a phone even at rest is somewhat higher than the ambient temperature.
However, the researchers have managed to determine a strong correlation between the ambient temperature and the temperature of the mobile battery when a sufficient amount of this data is processed, when it is obtained from a large enough user base.
To develop the calculation algorithm, the researchers obtained the battery temperature data from the information sent by thousands of phones that make use of the OpenSignal application , a collaborative service that determines the presence and intensity of battery signals. wifi and mobile phone worldwide and shows data on local coverage maps.
It is estimated that the applicationOpenSignal captures up to a million of these readings every day from about 150,000 Android phones, although at the moment the researchers are working with measurements from only a dozen cities.
Know the temperature accurately
Measuring the temperature in a distributed way in the interior of cities offers more reliable data that is also constantly updated , almost in real time and unlike what happens if only the data obtained by fixed weather stations are considered.
These have a much smaller number and in most cases outside the city centers whose data is also updated much less frequently.
"Knowing precisely the temperature of the city is especially important due to the 'island effect' produced by urban heat. Basically the center of a city tends to be warmer than its surroundings due to the presence of materials that absorb heat such as asphalt, cement and buildings, among other things this represents an increased risk - even death - for a part of the population, especially among the very young and the elderly, "they explain in Inside Science .
To determine the correct relationship,the algorithm must consider the heat transfer from the user's body to the phone and the ambient temperature , especially in summer.
It even varies from one phone to another depending on its construction -material and insulating capacity- and efficiency -the heat dissipated during its operation. The system must also consider the seasons of the year, and in theory it must also distinguish when a telephone is outside or inside and if it is day or night.
However, according to the researchers, when buying the data obtained with their algorithm and the real measurements abroad - obtained from the information provided by the airports in these cities - they observed that, in the worst case, the variation was barely 1.5 degree, which has merit considering that differences between battery temperature and 'real' ambient temperature can multiply that difference tenfold .
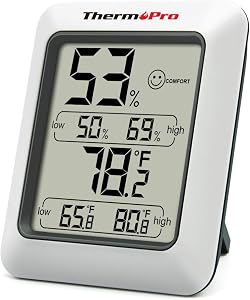
ThermoPro TP50 Digital Hygrometer Indoor Thermometer Room Thermometer and Humidity Gauge with Temperature Humidity Monitor
【Air Comfort Indicator】Humidity meter with humidity level icon indicates air condition -- DRY/COMFORT/WET, allowing this humidity sensor to ensure you’re always aware of changes to your home/household with just a quick glance
【High Accuracy and Quickly Refresh】Inside thermometer has high accuracy of ±2~3%RH and ±1°F, making it ideal for measuring fluctuating readings like in a greenhouse; Data measurements are updated every 10 seconds to give you lastest changes of the environment
【High & Low Records】Accurate hygrometer digital thermometer displays high and low temperature & humidity, always get ready to the changes of the environment
【Healthier Home & Environment】Thermometer hygrometer with temperature and humidity monitor ensures proper indoor humidity control has important skin, allergen and other health benefits; Can also be as refrigerator thermometer, freezer thermometer, reptile thermometer, soil thermometer, humidor hygrometer, cigar hygrometer and more
【Smart Design】Indoor room thermometer features a tabletop stand to place the temperature monitor on your counter or use the magnetic back to attach to a fridge; °F/°C Selector; Powered by 1 x AAA battery (included)
Is it possible to measure indoor temperature with a telephone?
The mobile phones we buy today have temperature and humidity control sensors . Normally, the device, through software, makes use of them to control the overheating of the same.
What you don't know is that we can give it a totally different use. In a simple way such as installing an application, you can measure the ambient temperature with your mobile.
At the end of the post, I leave you a series of free applications, which will use the internal thermometer of your smartphone , to show you the interior temperature of your house . In addition, they will use the Internet to detect the outer degrees and that you can make a comparison.
As you have probably wondered how it is possible that your phone is able to detect the temperature that is right now in your room, I am going to explain the three ways that are currently used:
Internal humidity and temperature sensors: Since almost the manufacture of the first smartphones, companies have introduced these sensors to monitor the proper functioning of the device. They are generally used to detect the entry of water and / or the heating of some of the components, such as the processor.
Battery temperature control: It is the least reliable of them, since it is a battery's own sensor . When there is an increase in the degrees in the battery, it can be due to: an increase in the ambient temperature, an increase in the active processes in the phone or even the load itself.
Internet: It is the fastest method , and therefore not very precise. It is based on an estimate of the outside temperature and using algorithmic calculations to remove the inside.
As I think it is logical, and I hope you have reached the same conclusion, we are going to download applications that make use of the internal sensors dedicated to them. Let's go to point 1.
Apps to measure indoor humidity and temperature
Here are two of the most downloaded applications from the Google Play Store. However, here is a link with more thermometer applications .
Thermometer - Intelillgent System : Uses the built-in sensors to detect the ambient temperature and the Internet to detect the outside. In a very simple interface, you will be able to see the real difference between your room and the outside.
Thermometer - Mobital : I like this one more, since it is more complete than the previous one. It allows you to carry out calibrations, and also play with changes in ºC and ºF and give you information about the weather.
As you can see, it is possible to measure the ambient temperature with your mobile. With a few simple applications, get very precise data thanks to the sensors incorporated in your smartphone.
What is the best room temperature?
To live in a comfortable home it is necessary to maintain an optimal room temperature. We explain how to get it. There is a lot of talk about what is the best room temperature to live. And we think that it is necessary to know it so as not to abuse energy and not to put, for example, the heating higher than we really need. At Healthy Housing we want to clarify this issue in the simplest way.
Best room temperature
The most comfortable temperature for humans in a resting state is between 18º and 20ºC. If you are working, the figure drops to the interval between 15º and 18ºC, depending on the type of movement and the intensity with which it is performed.
To get an idea, we can compare man to a stove whose fuel is food. Specifically, a 70kg man is equivalent to a stove that generates 105 Kilocalories every hour, an amount that is enough to boil 25 liters of water. This is the reason why when we are many in a room the temperature rises. Each person who enters is like putting one more stove.
The best way to heat a room is to install moderate heat sources in the coldest areas. Be careful with the temperature of the heat source, if it is higher than 70ºC, dry mouth and mucous membranes occur. Also raising the temperature too much is not energy efficient. For this reason steam heaters and iron stoves are not particularly suitable inside homes.
Ways to improve the room temperature
A concept associated with the best ambient temperature is that of air humidity. A pleasant environment should have a relative humidity of 50-60% and between 40% and 70% is considered acceptable. An environment that is too humid favors the development of harmful germs and fungi.
Of course each person contributes with their breathing to increase humidity. Let us bear in mind that man inspires oxygen with the air and releases carbon dioxide and water vapor in an amount that varies according to weight, age, diet or activity. Since carbon dioxide is toxic, proper ventilation is necessary .
Plants can be a way of balancing the humidity of the environment in humid environments, and they also help us improve the quality of the air in our home, since they absorb the CO2 that we expel and release oxygen. In this way we achieve cleaner and purer air inside the house.
On the other hand, today there are systems capable of controlling the temperature, and sometimes even the humidity of the environment, while optimizing the energy consumed. Some of the most popular examples are underfloor heating or blue heat.
Avoid heat losses
Finally, to maintain a stable and correct temperature, we must not only choose the heat sources correctly but also make sure that this heat is kept inside the house. The changes in temperature from one room to another that usually occur in poorly insulated environments are one of the main causes of cooling and expose the body to alterations that prevent us from maintaining a comfortable temperature.
To avoid these heat losses, it is essential that both walls and exterior enclosures such as doors and windows are adequately insulated . In this sense, windows are usually the weakest point in the house, poorly installed or poor quality windows can cause large heat losses, which means a significant increase in the expense necessary to heat the house. We leave you with a recommendation: when in doubt, if we are looking for good insulation, it is always better to choose windows that are not sliding, if possible made of PVC and with double glazing, in this way you ensure a correct insulation that you will notice on the bill of heating at the end of the month.
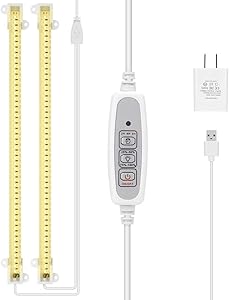
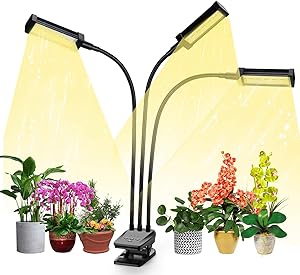
Mosthink LED Plant Grow Light Strips Full Spectrum for Indoor Plants with Auto ON / Off Timer, 48 LEDs / 4 Dimmable Levels, Sunlike Grow Lamp for Hydroponics Succulent, Two Pack
Full spectrum grow light - It emits all the wavelengths from 380nm to 800nm – just like natural sunlight. It has proven effective at promoting indoor growth as it accelerates photosynthesis. SAVE YOUR DARK INDOOR PLANTS with IT ! (50,000 hours lifetime.)
Auto Turn On / Off Timer Everyday - This led grow light strips can be set up to turn off after 2H/ 4H/ 8H. After you set up the hours, do not manually turn off the light or cut off the power supply, the light will automatically turn on at the same time the next day- TAKE CARE OF YOUR PLANTS EVERY DAY
Bright Grow Light with 4 Adjustable Brightness Levels - 25%, 50%, 75%, 100% - to meet each plant's lighting requirements at different stages .2x 7.5W & 48 LED chips, just put out enough luminosity for all stage of plant growth without worrying about burning your plant
Easy & Flexible Installation -The grow light bar pack comes with screws and a double-sided tape (pls cut into 2 pieces when applied). Compact design fits for various fixtures and surfaces. The power cord is 78 inches long for easy using in office,indoor,plant shelf,greenhouse etc
Safe for Indoor Plants & Wide Application - Sunlike growing lamp safe and healthy for your plants growing with FCC, CE, ROHS PSE Certified! The grow lamp is convenient for a number of potted landscape and indoor garden plants, such as Succulents, Flower, Seeds, Basil, Rosemary, Daffodils, Plumeria, Aloe, Orchids, Thyme, Cucumbers, Tomatoes, Peppers etc
Visually and biologically effective lighting for indoor plants
The integration of plants in workspaces and rooms requires a special lighting approach What are the challenges involved in making appropriate lighting for ornamental plants indoors? Dr. Karolina Zielinska, with the collaboration of Julia Hartmann and Carla Sigillo, raises in her work LED Light Sources and Their Complex Set-Up for Visually and Biologically Effective Illumination for Ornamental Indoor , the essential points around the subject through a practical case based on the analysis of the existing bibliography, and of photographic evaluations of plants under different sources of LED light, in which properties such as correlated color temperature (TCC), color rendering index (CRI) are measured , color spectral distribution (DEC), maximum wavelength of light (λP), among others.
Karolina M. Zielinska Dabkowska is a RIBA accredited architect and award-winning lighting designer. She is an assistant professor at the Faculty of Architecture, Gdansk Technical University in Poland; and co-founder of GUT LightLab, where she leads a research team focused on various aspects of light and lighting in the construction of environments. Karolina actively participates in the work of international organizations, such as the International Association of Lighting Designers (IALD), Illuminating Engineering Society (IES), and the International Dark-Sky Association(IDA), where it offers a guide towards a better practice of night lighting in public spaces and natural environments. Likewise, he has participated in numerous international conferences and has collaborated in national and international publications.
As a background to this analysis, Karolina Zielinska explains the integration of plants in work spaces and bedrooms, a practice that has been increasing in recent decades -called biophilia-, and has led to a growing interest on the part of researchers and professionals in different areas of architecture, with which multiple interpretations arise today about its meaning, as well as its applications in the generation of green and healthier environments for the user.
In accordance with this trend, argues the Polish academic, a philosophy of green architecture must involve an approach that can minimize negative environmental impacts - this through the correct application of sustainable energy sources, materials, and materials. construction processes of these spaces.
In this sense, there are numerous certification programs and standards that have been established to measure and verify that certain criteria for responsible construction and design are met; but there is still a lag in terms of the regulation of requirements for natural or artificial lighting for indoor plants -the latter are even non-existent-, a situation that contrasts with the interest that has been given to the practice of lighting in cases of commercial cultivation of plants for consumption (fruits and vegetables).
Resolving this deficiency and providing lighting that is appropriate for indoor plants requires taking into account factors such as the impact of wavelengths in the light spectrum on processes such as photosynthesis, photomorphogenesis and photoperiod, the study states. As is known, both natural light and artificial light affect the life cycle of plants; but, while the need for UV light from plants is an accepted fact, its use indoors is not frequent due to the negative effects it can cause in man, such as premature aging, burns, among others.
Despite the widespread use of specific lighting in horticulture - with the purpose of stimulating plant growth times - recent studies have confirmed that wavelengths in the green light range (497-570 nm) can penetrate more deeply in the leaves, and consequently favor the photosynthesis process.
Therefore, an optimal visual perception of decorative indoor plants should simulate natural lighting conditions; But, also considering that the effect of the lighting quality seems to be different for each species (especially during the growth phases), in the case of decorative indoor plants, if they grew only under artificial lighting conditions, they would be compromised. their appearance and biological functions, so it would be necessary to consider the evolutionary arrangement of certain plants and replicate as far as possible the appropriate characteristics within the spectrum of solar radiation through LED technology.
So artificial light or natural light for indoor ornamental plants?
As Dr. Zielinska maintains in her work, natural lighting is the most favorable for plant growth, as it is a source that provides both energy and the ideal spectral range; Unfortunately, illuminating an interior space with this type of light turns out to be a challenge due to several factors, since to the extent that plants complement an interior space, it is also necessary to balance lighting and the use of space to optimize the positive impact of light on plants and users.
The light distribution, direction, and vertical and horizontal lighting levels have a significant influence on the way architecture is perceived by humans, so the introduction of sustainable green architecture designs can become especially beneficial in design solutions.
In addition to this, most LED devices illuminate without generating heat and this results in a benefit for both plants and humans, but both respond differently to intensity, or light energy.
Based on these notions, the researcher seeks to emphasize the imperative of finding a formula that establishes the appropriate levels for both species, but also to understand that units such as lux or lumens cannot be used in the first place to measure intensity. of lighting systems for plants, because the values vary and depend on the spectrum of the luminaire, because in interior spaces, to stimulate the natural processes of a plant, the flux density of photosynthetic photons must be measured, which it is normally between 30 and 100 times higher than that required by humans, and it is also necessary to implement light sources that emit the correct wavelength.
On the other hand, for humans, factors such as visibility, visual performance and comfort must be considered, which are categorized based on visual function and use of space. These levels are determined from the perception of the brightness of visible white light, to increase the growth of plants in indoor environments it is necessary to first evaluate the intensity of light using appropriate metrics and meters, and only then to alternate it according to specific needs.
Despite the technical challenges, LED lighting is established as the preferred solution for lighting interiors, since when combined with an appropriate control system it offers enough flexibility to regulate the spectral composition, as well as to select an emission in the peaks of wave range more suitable for the correct development of ornamental plants.
As the academic concludes in her article LED Light Sources and Their Complex Set-Up for Visually and Biologically Effective Illumination for Ornamental Indoor, published on the academic portal Sustainability. It is then that, from this type of research work, the need for professional practice and a guide in the implementation and development of lighting sources for indoor plants can be based, and in this way contribute to the search for improvements. in the area of green architecture and biophilic design.
Plant Grow Light, VOGEK LED Growing Light Full Spectrum for Indoor Plants, Plant Growing Lamps for Seedlings, 3 Switch Modes 10 Brightness Settings (Black)
Grow light can be timed to 3, 6, 12 hours as the plant needs, bringing enough but suitable brightness to your plant. With auto on/off function. Plant light will be restarted automatically the next day without manual operation.
LED growing lamp can provide 10 brightness level. You also can choose one, two or three lamps on.
Grow light has a strong desk clip, and 3 bendable gooseneck between the clip and the lights which you can move the light to the position you need.
Vogek Grow light can offer full spectrum. The plant bulbs are replaceable, so you can replace new bulb instead of buying a new light when the life time of bulb is end.
Our plant growing light is made of 144LED beads, which can provide strongand uniform intensity of light to plants. This Grow lamp has more larger lighting area.
What is the best artificial light for plants?
We know that for good plant health and growth, light is necessary, especially sunlight. But we can have a series of alternatives to sunlight for indoor cultivation that allows us considerable energy savings, such as LED lighting for plant growth.
Depending on three fundamental factors, we will see what type of artificial light is good for plant growth. These factors are as follows:
Light color
Hours of light
Amount of light we supply to plants
Light color
Here we will see the sum of colors that make up the light that reaches the plant. Within electromagnetic radiation, visible light is the part of electromagnetic radiation that we can see. The color of light depends on its wavelength (or frequency) , normally measured in nanometers ( nm , one millionth of a meter). Specifically, visible light or the visible spectrum (what the human eye can perceive) is composed of radiation ranging from 380 nm (blue) to about 740 nm (red). They are very approximate data since it depends on the perception of each person. Beyond the blue we have the ultraviolet (with a shorter wavelength) and on the other side we have the infrared (with longer wavelength).
If we divide this spectrum of colors into fragments of interest to plants, we have a blue one , a green one (a color that plants do not absorb and for that reason we see them as green), a red one, which includes the called far red.
Light emissions (for example from the sun) are composed of photons (which have some of the properties of a wave and some of a particle) of different wavelengths (colors). For example, sunlight is a combination of certain wavelengths, giving white light . In addition, the sun gives other wavelengths that we do not see, such as infrared (heat) or ultraviolet, which are outside the visible spectrum.
Color Blue (between 400 and 500 nm):
the blue color is responsible for vegetative growth (which occurs after germinating and until flowering). When we give a plant only blue light, it grows shorter and has a darker color.
Red / Far Red (600-700 nm):
Plants interpret these colors as the ratio of one to another. This relationship influences the elongation of the stem , especially in direct light crops. Plants reflect far red much more than red. A consequence of this is that when there are many plants together, the amount of far red increases (the red / far red ratio decreases) and this causes the plants to lengthen their stems (for example, to capture the light better since there is competition) .
Blue and red:
This combination favors flowering.
Choosing good lighting (artificial or solar) is important to have the best results.
Number of hours of light or Photoperiod
The photoperiod is the number of hours of continuous light that a plant receives in a 24-hour period. In the case of being in the field, the photoperiod will last the same as the hours of sunlight , as is logical. In addition, it must be taken into account that the photoperiod varies depending on the season and as we have seen before it can affect the flowering of some plants.
Short-day plants are those that bloom especially when the day is shorter than a certain amount. And on the contrary, those with long days are those that flower only or more easily when the day is longer than certain hours. We could say that this number of hours is around 12 , although it varies by species. Finally we have neutral plants in terms of day, whose flowering does not depend on the photoperiod. Apart from flowering, it can affect branching, growth, and other aspects of the plant.
Amount of light
By quantity we mean the number of photons that a surface receives and photosynthesis can take place. We can refer to the amount at a certain moment (light intensity) or all the light it receives during a day.
What kind of light do I need?
The first thing to consider would be the type of plant you have, if you have some sunlight or no sunlight. They are the different situations that we can find. In each of them the differences will be the power of light that we need.
We have seen that plants need blue light and red light, depending on how much blue and red light we will favor the growth of the plant as well as its flowering. The redder the more flowering.
With LED lighting we can get "pure" colors from a light source since we can give blue light and red light that the plant needs without providing anything more than what is necessary for growth and flowering. This will save on energy costs, for example, to illuminate with green if the plant does not absorb it.
In this diagram we can see the light distribution of a led luminaire for plant growth, ideal for indoor cultivation
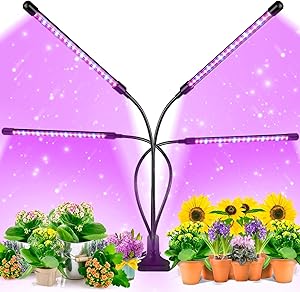
EZORKAS 9 Dimmable Levels Grow Light with 3 Modes Timing Function for Indoor Plants
Auto turn on and off timming function
Red and blue led combination
9 dimmable modes
3 cycle timing modes
Suitable for indoor potted plants or indoor gardens
What type of lighting to use in indoor growing
We review the different lighting systems for indoor crops, their advantages and disadvantages, so that each grower chooses what best suits their needs.
Cannabis needs sunlight and the passing of the seasons. This way you know when to stop growing and start flowering, as the days get longer and the daylight hours increase. However, for so many plants around the world, the sun may well not exist. It is as unknown to them as the sea could be to a monk high in the Himalayas (we assume that this monk never went on vacation). It is about the millions of indoor crops that supplant the sun by lamps of different types that give plants the energy they need, and determine their cycles. There are several types of lighting systems, each with its own characteristics and suitable for different types of crops.
In order to make a good choice, you first need to know what is the appropriate light spectrum for cannabis. To reflect what happens in nature, marijuana plants basically need blue light during growth and red light during flowering. The green spectrum does not affect them, so if it is necessary to use a light in the crop without altering the cycle, a lamp of this color is suitable.
Another very important factor is heat. The different types of lamps emit more or less temperature, which must be taken into account. Although the more watts, the more production, this has a limit. More is not always better, especially in tight spaces or naturally hot climates. The most commonly used powers are 400W and 600W with their ballasts.
Lighting systems for indoor growing
Each lighting system has its pros and cons, and even its functions. Different types can be combined, or choose an integrated system. Let's see the different options:
Fluorescent tubes and CFL
In the early stages of the plant, it needs less light output. For this reason, fluorescent tubes or CFL (Compact fluorescent light) energy-saving lamps are ideal for germinating seeds or rooting cuttings thanks to their blue light spectrum and low consumption. They are inexpensive and easy to use. CFLs also come with a built-in ballast. In terms of power, fluorescents range from 18 to 55W per tube, and CFLs are 100, 125, 200 and 250W. Due to this low wattage, a good number of bulbs are required for efficient lighting. There are CFL bulbs in the red spectrum, which can be used for flowering, but may not be the best option.
HID bulbs: sodium (HPS) and metal halide (HM) lamps.
Both sodium (HPS) and metal halide (HM) lamps are types of HID (High Intensity Discharge) bulb. In general, these are two types of complementary lighting, since HM are more appropriate for growth (due to their blue spectrum), and HPS for flowering (because they are rich in red). Both usually use the same ballast, but for this it must be taken into account that both are of the same watts. The most common is that 250W, 400W and 600W are achieved.
HPSs are known for their great performance, but they generate a lot of heat, so it may be necessary to install a ventilation system. In addition, they can result in high energy costs (with its consequent electricity bill). All HIDs degrade over time. HMs do it faster than HPS, but both require replacement after a few crops. There are also mixed versions, which are HPS lamps with dual spectrum, that is, for growth and flowering, such as the Dual Spectrum from Lumatek or the Son-T Pia Green Power from Phillips.
Led lamps
LED bulbs are rapidly gaining ground, partly thanks to their low power consumption and the fact that they produce little heat. Although the initial investment is much higher, they allow great energy savings over time, in addition to having a longer duration. You can get panels of different power and different spectrum, to configure them according to the phases of the plant. There are even LEDs that include infrared and UVB spectra, which helps in the generation of trichomes. However, it is recommended to use these spectra with caution due to potential health risks. Another thing to keep in mind is that the fact that they don't generate as much heat can be good for summer crops, but it can be a problem during winter,
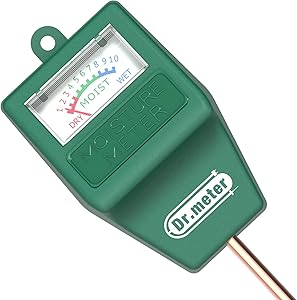
Dr.meter S10 Soil Moisture Sensor Meter Hygrometer-Garden,Farm,Lawn,Plants,Indoor&Outdoor(No Battery Needed), 1 Pack, Green
▶ 【Compact & Portable】 Have you been sticking your finger in the soil hoping to feel when it's time to water? Why not eliminate the guesswork and keep your hands clean when you use the Dr.meter Soil Moisture Sensor Meter! Know the right time to water your garden, farm, lawn and plants, anytime.
▶ 【Easy to Read】No experience required--while this machine is sophisticated, it's not complicated! With an interface using ten scales and a color-coded reading system from red, green to blue, it's never been more straightforward reading your soil moisture.
▶ 【No Batteries Required】Who needs batteries or electricity? Just plug stick it into the ground and get a reading in no time!
▶ 【Gentle to Plant Roots】Keep roots intact when you do readings thanks to the single probe design. You won't have to dig up too much soil or disturb sensitive roots when you take readings so your plants can stay perfectly healthy.
▶ 【Helpful Tips】The Dr.meter Soil Moisture Sensor Meter is designed only for soil testing and should not be used in liquids. Keep it away from rocks and extremely hard soil to avoid damaging it. Make sure to clean the probe after each use.
Soil Analysis: Diagnosis, Quality and Assertiveness
The Beginnings of Soil Analysis
Since 50 BC in Ancient Rome the first attempts were made to analyze the soil; this diagnosis consisted of taste, acidity and salinity tests. It came to be thought that the total content of nutrients in the soils was what we wanted to know, so that later it was learned that this content did not correlate with its availability.
The Evolution of soil analysis
There are three periods that define the development of soil analysis in modern times. 1) 1845 to 1906. The foundations of modern soil analysis were laid, procedures to evaluate soil fertility were evaluated and developed, there was already a first distinction between less soluble and more soluble nutrients and extractants such as carbonated water began to be evaluated, Hydrochloric acid, acetic acid and nitric acid (HNO 3) . 2) 1907 to 1924.This period was very centered between the chemical composition of the soil and the production of the crop, an abundant data base was generated that served as a foundation to improve the analytical methods and to interpret the results of the soil analyzes. It was during this period that soil fertility monitoring was promoted to avoid soil depletion . 3) 1925 to 1950. During this period two currents developed: One, in which researchers promoted the use of multi-elemental extracting solutionsand another, in which the use of extracting solutions for specific nutrients was promoted. Chapman and Kelly (1930) developed the 1M ammonium acetate extractor solution for exchange bases (Ca, Mg, Na and K), an extractor solution that is still used with excellent results today. Morgan (1941) developed the universal extraction solution that bears his name, using acetic acid and sodium acetate at pH 4.8. At the same time, Bray and Kurtz (1945) developed various procedures to evaluate available phosphorus using Ammonium fluoride + hydrochloric acid, which are still used today for the determination known as Bray P1 and P2, in the second case, with a higher HCl concentration.
Mehlich (1953) developed the multi-elemental extractant using sulfuric acid and hydrochloric acid, known as the double acid method or North Carolina method. For their part, Olsen et al . (1954) developed the extractant based on sodium bicarbonate at pH 8.5, which gained popularity for alkaline soils and is a very popular method today in America and part of Europe, for neutral and alkaline soils. Other methods were showing its ineffectiveness, such as carbonated water, which even today there are laboratories that use it, and the Mehlich method 2 which also did not show sufficient effectiveness and has been discarded in practically all laboratories.
Trends in soil analysis
The search for universal extraction solutions continues to be an issue that worries many laboratories, since together with the appearance of plasma emission spectrophotometers (ICP) it is possible to analyze hundreds of samples in a single day (Mallarino and Sawyer, 1999). This makes the analysis very economical, however recent history has told us that the quality of the diagnosis is sacrificed too much, since precision is lost when trying with a single extractant to evaluate the availability of the 12 elements: nitrates (NO 3), phosphorus (P), potassium (K), calcium (Ca), magnesium (Mg), sodium (Na), sulfur (S), iron (Fe), zinc (Zn), manganese (Mn), copper (Cu ), boron (B) and in the case of acid soils: aluminum (Al) and hydrogen (H). Some references that support the low efficiency of multielemental methods such as Mehlich 3, are cited below: To interpret the phosphorus analysis it is necessary to know the soil analysis method before any fertilization recommendation is derived. This consideration is imperative as many methods have been developed to test the availability of phosphorus to crops. Thus, some laboratories are interested in using tests that do not use traditionally recommended extractions for P. This is where the question of whether the Mehlich 3 method is efficient or not lies. To discuss it, it is first necessary to remember that the result of a laboratory analysis is the culmination of the entire method of soil analysis, including extraction and the analytical measurement method. Mehlich 3 is a multi-element extractant and nutrients are measured in ICP. The United States Central Regional Committee for Soil Testing and Plant Analysis (NCR 13) and Iowa State University (ISU) do not recommend the determination of phosphorus with the ICP method, extracted with Mehlich 3, as variations in P concentrations measured with ICP compared to the standard colorimetric method measure up to 40% more P, and making corrections in this regard is not an effective strategy. Furthermore, they do not recommend the use of Mehlich 3 to determine Calcium (Ca), Magnesium (Mg) and Cation Exchange Capacity (CEC) in calcareous soils and micronutrients in any type of soil, due to the lack of correlation. Micronutrient interpretations, particularly zinc, are based on DTPA tests and for lime requirements in the method known as SMP, developed by Shoemaker, McLean and Pratt in 1961. For each geographic region the ISU recommends only using authorized and calibrated methods in those soils, this means the recognition of both the laboratory extraction and chemical analysis method (Mallarino and Sawyer, 1999) . For his part, Pittmanet al , 2004, testing 6400 soil samples at Oklahoma State University, found clear differences between analyzing Mehlich 3 with ICP and Mehlich 3 with the colorimetric method. Despite this, many laboratories use the Mehlich 3-ICP for phosphorus analysis, without considering that this practice could lead to the misapplication of nutrients and contribute to crop losses or negative environmental effects. Kleinman et al ., 2015, suggest that obtaining correction factors or equations is not a trivial matter, since the relationships are potentially influenced by the type of soil, and factors such as soil pH and organic matter. In Ohio soils the recommendations for phosphoric fertilization in crops are based on the Bray-Kurtz P1-colorimetric method. Comese et al ., 2007 working on rotations of corn, wheat and soybeans with increasing doses of phosphate fertilizers found that the Bray & Kurtz I method is the one that best adapts to the diagnostic practices and regional recommendations for the use of phosphate fertilizers. They concluded that Mehlich 3 overestimates the value from 15 ppm of P in the soil. Bray & Kurtz I is the method that best detected the variation of the added phosphorus doses. Performing potassium calibrations with Mehlich 3 in corn and soybeans for Iowa soils, Barbagelata et al ., 2002 detected the need to adjust K levels to interpret and make fertilization recommendations, concluding that the research should be focused on providing information to establishing different interpretations of K for different soils.
Soil analysis in Mexico
Due to the low cost of the Mehlich 3 method, foreign laboratories operating in Mexico have been encouraged to promote its use in the country. However, the country's soil specialists have not approved this procedure because it is not correlated or calibrated in Mexico and because they do not have evidence that it works correctly for the majority of Mexican soils. Its use allows to lower the cost of the analyzes but reduces the efficiency in the diagnosis with respect to the methods approved by the Official Mexican Standard (NOM-021-RECNAT-2000). Even in the United States, many more laboratories use up to 6 extractions to diagnose soil fertility than those that use the Mehlich 3 method (Sikora and Moore, 2014), for the same reasons we discuss here. On the other hand, the scientific community of Mexican soil scientists is inclined not to recommend it as a method for diagnosing soil fertility, since the lack of correlation and calibration at the regional level of a given method reduces its value for its use as a diagnostic tool. of soil fertility. This is vital to maintain credibility in soil testing with users. It is vital that Mexican laboratories adhere to the analysis methodologies established by the Official Mexican Standard.
Correlation and calibration concepts
In order for a soil analysis procedure to be authorized for its use, it must comply with the following development: 1) The evaluation of various extraction solutions and analysis methods; 2) Correlating the crop yield or the amount of the nutrient extracted by it, with the amount of nutrient extracted by each of the extractor solutions; and 3) Calibration of the analytical procedure, which consists of estimating the concentration of the extracted element at which a performance response is no longer observed, that is, estimating the critical level, above which the response to the nutrient in question is unlikely. With adequate precision, the correlation defines the analytical method that best reflects the content of the nutrient available in the soil in relation to the growth of the crop and predicts with greater precision the response of the crop to said nutrient. The degree of correlation can vary with the soil class. On the other hand, calibration is the process by which the levels considered critical are established. The most commonly used procedure to define critical levels is the one proposed by Cate and Nelson (1971), whose diagram is presented in Figure 2. Later, with other more detailed statistical regression studies, a series of interpretive values is proposed, ranging from very low or
poor, even very high or excessive. Without these values, the soil analyzes cannot be interpreted. The characteristics of these levels are presented in Figure 3, which Fertilab supports with its own research. A method that is not calibrated or correlated in the field, gives unreliable results and there are reports that even in the United States, there are many regions where the Mehlich 3 method has not been correlated or calibrated and in the best of cases only correlations with conventional methods, to estimate a conversion factor and to establish sufficiency levels for interpretation purposes.
Diagnostic methods authorized in Mexico
In October 2000, the Official Gazette of the Federation published the Official Mexican Standard 021-RECNAT-2000, which establishes the specifications for fertility, salinity and soil classification, studies, sampling and analysis with application throughout the territory. national. The purpose of this standard is that analysis service providers are duly regulated, in order to provide users with a quality service and high reliability in analytical information, preventing each laboratory from using the method that best suits them for reasons Low cost. Below is a summary of the methodologies authorized by NOM 021 for use in Mexico.
N-Nitric (N-NO 3 ). It is the N of the soil that is available for immediate use by the crop. It is extracted by means of a KCl extractor solution, followed by steam distillation. It can also be estimated using the cadmium reduction column method.
Phosphorus (P). It is determined using the Olsen Methods (neutral or calcareous soils) and Bray 1 (acidic or neutral soils). Critical levels range from 10-15 ppm for the Olsen method and 25-30 ppm for the Bray 1 method.
Potassium (K), Calcium (Ca), Magnesium (Mg) and Sodium (Na). These cations are extracted with 1N ammonium acetate at pH 7 and quantified by Atomic Absorption or by ICP. In calcareous soils it is recommended to extract with 1 N ammonium acetate at a pH of 8.5, to avoid overestimations of Calcium and Magnesium.
Iron (Fe), Manganese (Mn), Zinc (Zn) Copper (Cu). They are extracted with DTPA and quantified by Atomic Absorption or by ICP. The critical level considered for Fe and Mn is of the order of 5 ppm, for Zinc 1 ppm and for copper it ranges from 0.5 to 1 ppm.
Boron (B). It is extracted by means of a hot and diluted CaCl 2 solutionand it is quantified by ICP or Azomethine H. Its critical level is of the order of 0.8 to 1 ppm and the excessive level is greater than 4 ppm.
Sulfur (S). The method is semi-quantitative. The S is extracted with KCl and the determination is carried out in a turbidimetric way. The critical level is 5-10 ppm.
As mentioned at the beginning, the use of specific extracting solutions is the most accurate and precise way for the determination of nutrients in the soil. A laboratory adhering to the NOM and with rigorous quality control allows users to give assertive diagnoses.
Quality control in laboratories
Quality control and the use of appropriate methodologies allow laboratories to maintain certainty in the analyzes they offer. The soil analysis provided by a reliable laboratory is a robust guide to recommend fertilization rates, as it is the basis for ensuring a successful fertilization program. From this idea derives the importance of an assertive and quality diagnosis, since it will depend on it that correct decisions are made regarding plant nutrition. The establishment and monitoring of a rigorous quality control is the only way that defines "reliability" in laboratories. The purpose of the regulation is to supervise the performance of the laboratories, where Internal and External Quality Control are a very important part of the process. The intercomparison allows to measure and standardize processes with international laboratories as part of external quality control. Additionally, an internal quality control is carried out, through the use of certified standards, which allow to ensure the certainty in the analysis. These known concentration standards for each of the elements analyzed and the use of blanks are run in each batch of 10 samples and allow us to ensure the certainty of the analysis in the samples we receive from our clients. The data are statistically analyzed and allow the generation of ranges and work intervals, as well as the validation criteria of the determination. This process is called Statistical Process Control (CEP), which has also been used in the automotive industry for many years.
How to choose the services of a Laboratory?
Below are 11 criteria that serve as a guide for the correct choice of a laboratory. 1) Check how many and which determinations the laboratory makes, 2) What delivery times it offers the user, 3) Check if it is certified in ISO-9001-2008, 4) If it has international accreditations, 5) If it has intercalibrations with different laboratories in the world, 6) If it uses its own analysis methodologies for Mexico and that marks the NOM, 7) If it conducts research on its methods, 8) If it uses certified standards, 9) If it uses standard samples for every 10 analyzes, 10 ) If you have a friendly report and 11) If you give an interpretation and a recommendation of fertilization at no cost to the client. High crop yields are the result of multiple factors that begin with a good diagnosis of soil fertility. It is important to use an adequate sampling system, a good analysis procedure, authorized by the official Mexican standard, and a good analytical quality control in the laboratory. The next step is to carry out a good interpretation of the results of the analyzes and later generate an adequate recommendation for fertilization, based on a specific yield goal.