Tuesday, October 5, 2021

DEWALT DWE6411K 1/4 Sheet Palm Grip Sander Kit with DEWALT DWAM4321 80 Grit Mesh Sheet (5 Sheets), 1/4"

 DEWALT DWE6411K 1/4 Sheet Palm Grip Sander Kit with DEWALT DWAM4321 80 Grit Mesh Sheet (5 Sheets), 1/4"

  •  2.3 AMP motor sands at 14,000 OPM
  • Locking dust-port system that allows the user to lock vacuum hose up with the sander
  • Longer Life vs. standard Dewalt sandpaper
  • Mesh sandpaper is washable and minimizes clogging


How to Use a Sheet Sander


A sander is generally better known as a palm sander. They are smaller and more compact than regular orbital or belt sanders, and fit snugly in the palm of your hand for easy control. The sheet metal sander works by using a motor to vibrate in a back and forth motion. The pad is a small square or rectangle shape depending on the make and model. They are also useful for getting into smaller spaces than regular size sanders can.

Step 1 - Setting up
Before you start, you need to put the pieces together and make sure everything you need is there. If you have just purchased your new sheet sander and are about to use it for the first time, remove it from the box and packaging. You must have a long cable with it attached to the motor and it cannot be removed. There are no other special components that come with your sander, but you can (in rare cases) get some free sanding sheets, as an accompaniment, in the box.

Step 2 - Place the sand paper
The advantages of a blade sander are that the sheets can be cut from partial pieces of regular sandpaper, unlike belt sanders, which require an exact fit sheet. On each side of the sander, somewhere just above the pad, you should notice two spring clips that pull away from the body and up to release them. The best way to fit the sandpaper is to have the handle and hook it between your knees, with the pad facing up. Open the spring clips and use scissors to cut a piece of sandpaper large enough to bend and reach under the spring clips so you can secure them.

Step 3 - Using the sheet sander
Since the operation of a sheet sander is a back-and-forth motion, you must accommodate it before you begin. Get your wood surface ready for sanding. This surface can be anything, such as a door, baseboard, table top, or any other flat wooden surface. Turn on the sander before touching the surface. Start moving it back and forth immediately. As soon as you touch the surface, you should start moving it forward, keeping it flat on the surface. Don't apply too much pressure to it, but hold it tight in your hand.

Step 4 - Runaway Engine

If you let go of the engine, it will run away, so hold it tight to avoid this. Keep a firm grip at all times while the sheet sander is on and guide it up and down on the wooden surface in a back-and-forth motion. Stay with the wood grain initially, but you can cross the grain for a finer finish during the sanding process. Just remember to keep the grain to finish.


Know the types of sanders and their functions


Among the versatile tools , the sander is sure to be quite successful, and there are countless models on the market — each with a specific function. Therefore, it is essential to know very well the types of sanders and their indications so as not to get scratched when shopping.

Not sure how to choose your type of sander or how important this tool is? Read on!

What is the sander for?
You probably already know that the sander is a suitable tool for those who want to homogenize and finish surfaces. A curiosity is that, on average, the sander has 5,500 revolutions per minute, being excellent for sanding materials and surfaces such as wood, plastic, metal or fibers.

Some services that sanders can help are:

  • · prepare walls for painting ;
  • · strip floors and doors;
  • · remove materials;
  • · refurbish worn surfaces;
  • · remove surface mold.

Regarding its benefits, we can mention: more practicality during the work, reduction of the team's physical effort, more safety, possibility of diversifying services, reduction of construction time and better finishing for the material.


Difference between sander and grinder
Another similar tool is the grinder, and its similarity to the sander may end up confusing some when buying. The difference between them is the number of revolutions per minute.

The grinder has a greater amount of revolutions per minute, reaching up to 11,500 rpm. Therefore, it is best suited for grinding metal surfaces .

What types of sanders and their functions?
Thinking about the type of work you will perform with the tool is essential for a successful purchase, as well as understanding the different types of sanders and the functions and indications of each one. Check out:

belt sander
The belt sander is best suited for heavy duty . This model is ideal for removing wood debris from large surfaces as well as metal finishes, old paint, plastic or varnished materials.

Another important feature is that the belt sander works only to be used on horizontal and flat surfaces , because it is heavier than the others, making it difficult to keep it upright.

Those who prefer can opt for smaller and more compact models, which are simpler to transport and use.

In general, the belt sander is the most used model by professional carpenters , thanks to the facility it offers when sanding more robust woods such as Cumaru, Ipê and others.

It is worth noting that many models of this type of sander have a dust collector , which helps to reduce dirt during work. Another important detail that you should be aware of is that the sander belt tends to wear out and has an expiration date, so it needs to be changed after a period of use.

Some of the functions of the belt sander are:

  • · sanding;
  • · remove burrs;
  • · round off sharp edges on surfaces;
  • · round the edges of materials;
  • · perform finishes on thick, flat, robust and large surfaces;
  • · remove varnishes and paints quickly;
  • · sanding panels, wooden tops and other large surfaces.

Orbital sander
The orbital sander (or treme-treme) is indicated for light finishes and for actions that require smooth sanding . These types of sanders are small, portable and light in weight.

Its base is square (which makes it different from the roto-orbital sander, which we'll talk about later) and it has a slightly lower dust production rate.


The great advantage of this sander is its ease of control and its operation that occurs through oscillations, which makes the machine vibrate quickly, removing the volume of material.

In general, this sander is best suited for working with MDF wood, drywall and plywood , as these materials require the use of finer sandpaper. Consequently, it is not very suitable for the removal of heavier materials, and it can even scratch the part if it is too forced.

This is also the model that offers one of the best cost-benefit ratios compared to other types of sanders, with lower and attractive prices. In addition, another advantage is that the orbital sander uses common and fine sandpaper, being able to use cut sandpaper sheets, for example.

A difficulty cited by some people is the moment to put the sandpaper in the machine — since it is necessary to activate some levers — but, with time and practice, the task becomes less and less complicated.

Roto-orbital sander
This type of sander is widely used in the joinery, carpentry and bodywork industries because it offers good sanding and is able to do excellent material removal .

The roto-orbital sander is also a favorite of those professionals who need to perform impeccable jobs, and it is possible to do good polishing with it.

The difference between the roto-orbital sander and the orbital sander is in its base. While the previous one has a square base, this one has a round base and performs the oscillation movement, offering more work possibilities through the rotation of the disc.

In addition, the roto-orbital is able to eliminate the swirls that the orbital sanders usually leave and guarantees more performance. In addition, it has a more practical and efficient model, which brings more agility and productivity to the work.

Another difference is that, thanks to its higher rotation index , the roto-orbital also achieves larger diameters, around 2.5mm, which helps in the rotation of the disc and in the moment of thinning.

The roto-orbital has a greater aggressiveness, which means high production capacity, precision and firmness, and that generates more exquisite finishes, something especially important in parts where there is a need to remove unevenness and marks.

Some models also feature dust sharing to prevent dust accumulation, which creates a cleaner working environment.

However, an important disadvantage is that their sanding discs are connected to the machine through a velcro base, which demands the use of specific sandpaper – which can be more difficult to find.

Angle Sander
This type of sander is indicated for those who need to carry out large roughing of wood or metal . When compared to the roto-orbital sander, the angular one has an even greater rotation, so its use is indicated for harder materials, such as hardware .

Due to high rotation, it does not provide a smooth finish . Thus, the indication is to use it on surfaces that do not need a perfect finish. It is also worth remembering that, as it is very powerful, it is not recommended for those who do not have much experience or care in handling the tool.

Its indication for use is for the roughing of different types of surfaces curved in a circular shape. Some examples of use are: exposed roof sanding, rustic furniture (before painting or varnishing), handrail and deck sanding, and other items that do not need a fine finish.


Thus, the angle sander should be used in jobs that require high productivity in sanding, greater grinding power or for sanding solid wood that will be exposed to weather.

Angle sanders can vary according to disc diameters, the most common being: 100, 115, 125, 150, 180 and 230 mm.

eccentric sander
This type of sander is the most suitable for those who need finishing with a circular sanding base, so it is recommended for both fine finishes and for removing material from large surfaces.

The eccentric sander is extremely versatile capable of polishing different materials such as plastic, filler, varnish, metal and wood, for both flat and curved surfaces. It provides a fine, streak-free sanding.

Another interesting advantage is that this sander has a compact format, designed for the user to carry out their work in any position, with more efficiency and comfort.


In addition, most models have features to vacuum the dust generated during work, making the environment cleaner.

As this sander has a faster sanding attachment, it is indicated for carpentry, joinery, works in the civil construction sector and for any type of material. Offers the possibility of electronic speed control, with numerous rotations.
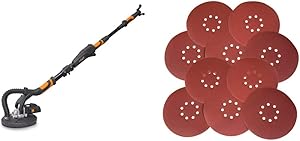
Wall Sander
Wall sanders are the most suitable for roughing out ceilings or walls that will receive paint. In general, these types of sanders have a telescopic handle to facilitate reaching hard-to-reach places.

In addition, many models also have a dust collector, which makes work safer and more practical, reducing the amount of dirt.

The main advantage of using these types of sanders is the speed and productivity they offer, allowing the job to be done up to 7 times faster , with an average yield of 600 meters per day, in addition to a finish far superior to the traditional method.

The equipment works with circular movements, which eliminates excessive effort and can be used in masonry, plaster, drywall and spackle. Ceiling and wall models can be used with 6 thicknesses of sandpaper, which offer more finishing possibilities.

Combined sander
This is a type of table sander, used to sand wood in horizontal and vertical positions with a very good finish, being indicated for craft and joinery jobs that need to sand only a piece of wood or perform a different angle in the material. It is generally used for light work .

The combination sander can be used for various materials such as wood, resin and glass. On some models, your table can be tilted, which makes your work easier.

manual sander
This sander is suitable for carrying out smaller jobs at home, with an excellent cost-benefit ratio. It can be used to sand a wall before painting, a wooden furniture, or do some minor renovation.

How to choose the best sander for me?
As we have seen, the different types of sanders have specific indications. That's why it's important to understand what kind of material you will be sanding and what you need in terms of finishes.

Furthermore:

  • · research about the main brands in the market;
  • · analyze the power of the sander;
  • · prefer models that have a dust collector, to avoid dust accumulation;
  • · always check the tool oscillation diameter;
  • · prioritize sanders that have an authorized network, so you will have easy access to technical assistance;
  • · analyze how easy it is to add and remove sandpaper and also find the right sandpaper on the market.


Conclusion
As you have seen, there are different types of sanders. This tool is essential when carrying out a series of jobs, bringing more agility and a better finish. However, it is essential to analyze, first, what kind of material and service you will be doing in order to find the most suitable sander.

Monday, October 4, 2021

AUSTOR 132 Pieces Sanding Drum Set with Free Box Including 120 Pieces Drum Sander Sanding Sleeves and 12 Pieces Drum Mandrels for Dremel Rotary Tool

 AUSTOR 132 Pieces Sanding Drum Set with Free Box Including 120 Pieces Drum Sander Sanding Sleeves and 12 Pieces Drum Mandrels for Dremel Rotary Tool

  •  Package include - 120 pieces sanding bands in 3 diameters: 1/2", 3/8" and 1/4", 40 pieces per size; and 12 pieces shank sanding drum in 3 diameters: 1/2", 3/8" and 1/4", 4 pieces per size; total 132 pieces set
  • Essential accessory - 120 grit commonest and standard size sanding bands use for smoothing surface and curved edges, polishing both soft and hard materials, like home improvement, artwork and woodworks
  • Easy installation - drum mandrels with self-expanding rubber cushion, making the sanding bands close to the manderl firmly and acheiving better finishing; in case the sanding band fall apart from the mandrel while using, please make sure the drum have been screwed tightly and wear closely to the sleeve
  • Note: please wear professional safety glasses to protect your eyes, because maybe there are flying grits when the sanding drum turning at high speed; the sanding drum will be attritted more quick on metal surface, please replace sleeves timely in order to achieving the better sanding effect
  • Bonus - come with a free plastic box, convenient for store and fetch


How the Drum Sander Works


The drum sander is a great machine used for wood and plastics. This equipment is used in large carpentry projects, and when plastics are formed. Drum sanders can be purchased pre-assembled, or they can be created at home using items purchased at your local hardware store. The drum sander typically measures 29 1/2 inches (0.74 meters) wide, 24 1/2 inches (0.62 meters) long, and weighs at least 190 lbs (86 kg). The equipment requires at least 0.6 meters of free space on all sides to ensure sufficient working space.

The purpose of a drum sander is to efficiently polish a large number of wooden parts quickly and neatly. The apparatus is provided with a suction mechanism to remove sanding debris from the work area. This unit is used for abrasive materials at a higher speed than other types of sanders, giving the operator the freedom to use both hands to manipulate the work item as needed.

The unit is configured so that the sandpaper can be easily changed to provide different finishes. The sander itself is mounted on its own cart and is equipped with a mounted light for better visibility of the work area. These models of sanders are often found at machine or lumber stores, hardware stores and hobby clubs.

When purchasing a drum sander, there are three factors you need to consider: the frequency of use, the types of materials you plan to use, and the area where the sander will be located. All of these items have an impact on which model best suits your needs.

The sander usage fee has a direct relationship to the amount of money that must be invested in the purchase of equipment. If you are buying a unit for your home, make a list of projects you plan to complete in the coming year and determine how long you will need to use the drum sander. If the use is less than 20% of the total project time, you can purchase a less expensive model. However, if you estimate that between 25% and 50% of the total project time will be spent on the sander, then you should invest in a professional grade unit.

Check your project list and think about the materials you will be using and the amount of abrasive material you will need. Determine whether wood is hard or soft and whether plastics will be needed. These decisions determine how much sandpaper you need to buy and the notes you need.


Drum Sander Explained


A drum sander is a powerful machine that can be used to sand wood and plastics. It can be a portable machine or a large equipment used in variety or wood projects or for forming plastics. Drum sander accessories can be placed on an electric drill that is used to sand an object. A large drum sander can be operated like a bench machine, employing a variety of drums and sanders.

Purpose
In woodworking, the purpose of a drum sander is to carry out a large number of sanding tasks that can be done quickly and neatly. The drum is an abrasive material or has abrasive material attached to it. Attachable paper drum sanders often have a clamping feature that allows you to quickly change paper to meet your need based on the texture of the paper. Using very high speeds allows an operator to perform a sanding stage faster than using other types of sanders. Using a drum sander allows the operator to use both hands to apply the piece of stock to the drum, unlike manual units where the drum is applied to the wood.

Sanding changes
The versatility of the drum sander is evident in the ease of changing paper. This allows the operator to quickly change the paper grade to get different results on the same piece of wood, or change the paper to suit a need for sanding another piece of wood.

Bench Sander
Most bench-type drum sanders are mounted on their own stand for stable operation. Many are equipped with a dust containment accessory or some sort of dust vacuum feature. This feature not only protects the operator from dust and other wood debris, it also helps to reduce dust that needs to be cleaned from the machine. There are three distinct factors to consider when purchasing a store-style drum sander: how often you will use the tool; the types of material you will be sanding and where you plan to locate the machine. Typically, you will need a minimum of two feet around the machine for safe operation.

how much to spend
How much you use the drum sander will have a direct impact on which quality machine you should buy. If you, as an avid woodworker, believe that a shop-style drum sander is an invaluable tool, determine what percentage of your woodworking projects will employ the drum sander. If it is less than 20%, purchase one of the many high quality home workshop models. But, if you plan on using the machine by more than 25% or more than 50%, consider a professional grade machine, even if it's for your garage shop. The constant use, versatility and durability of a professional sander will not disappoint the woodworker who uses it constantly.

WEN 6502T 4.3-Amp 4 x 36 in. Belt and 6 in. Disc Sander with Cast Iron Base

 WEN 6502T 4.3-Amp 4 x 36 in. Belt and 6 in. Disc Sander with Cast Iron Base

  •  Two-in-one sanding machine includes both a 4-by-36 inch belt and a 6-by-6 inch disc
  • Belt tilts anywhere from 0 to 90 degrees
  • Sturdy cast iron base prevents any heavy vibrations
  • 4.3 Amp motor provides up to 3600 RPM
  • Tension release lever provides for simple changes between sandpaper grits


How to use a belt sander?


A belt sander is a woodworking tool designed to sand or smooth wood and prepare it for finishing. Can also be used to smooth or round edges. A belt sander is quite large and, if not used correctly, can damage the wood or cause serious injury. However, using a belt sander is a very simple operation. Here are the necessary steps to follow to correctly use a belt sander

steps
1
Prepare your wood for sanding, ensuring it is properly secured to the table or countertop.
2
Wear necessary safety equipment such as safety glasses or gloves. If your belt sander contains a collection bag to collect the sawdust, goggles are usually not needed.
Belt sanders can lift a lot of sawdust, which can easily get into your eyes. This can cause the sander to fall instinctively, which can cause injury.
3
Start the belt sander motor keeping it away from the wood you want to sand. Make sure it's at full speed before putting it in contact with the wood.
Start with a coarse belt and finish sanding with a finer grain.
4
Lower the back of the sander onto the wood, ensuring a firm grip on the rear handle, which is used to control the sander.
5
After lowering the back of the sander, start moving it forward.
6
Bring the rest of the sander to the wood as smooth as possible.
7
Move the sander back and forth in smooth, even motions, using the front handle to guide it across the wood.


Tips
  • Always move the belt sander parallel to the wood grain. This will ensure an even and smooth surface.
  • Keep the sander moving at all times, as leaving it running in one place on the wood can avoid an uneven surface.
  • If your belt sander comes with staples, you can clamp it in a vise and move the wood along the sander instead of moving the sander along the wood.


Notices
  • Don't put any unnecessary extra pressure on the wood. The belt sander is a heavy instrument and usually uses its own weight to apply even pressure.
  • Do not tilt the sander on its side as the edge of the sander can cut into the wood.


things you will need

  • bench or table
  • Glasses
  • Gloves
  • belt sander


Questions and answers

  • Should I move the belt sander up and down or side to side?
  • Side by side because you'll have more control over it than moving it up and down.
  • unanswered questions
  • How do I adjust the strap so it doesn't slip to the side?

Sunday, October 3, 2021

Makita BO5030K 5" Random Orbit Sander, with Tool Case, Teal

Makita BO5030K 5" Random Orbit Sander, with Tool Case, Teal
 

  •  Smooth and fast sanding with 3.0 AMP motor (12,000 OPM)
  • Rubberized grip for improved operator comfort and control
  • Large 1/8" random orbit action for fast and super smooth sanding
  • Pad control system for controlled pad speed upon start-up
  • Efficient through-the-pad dust collection system for a cleaner work environment


Orbital Sander – 10 Tips for Efficient Tool Use


The orbital sander is an electrical tool, widely used in mechanic workshops and civil construction professionals to unify surfaces. There are actually three types of sanders that are best known, namely the orbital sander, the roto-orbital sander and the belt sander.

The orbital sander is one that, as the name implies, performs only  circular movements, in orbit,  also called “shakes and shakes”. It is the best choice to improve the appearance of burrs and bring light and smooth finishes.

Best Orbital Sander Brands
There are many brands in the construction market that seek to attract customers, but not all of them can be as efficient. The most suitable brands for purchase are renowned ones such as Bosch, Makita, Dewalt, Stanley and Raimann.

Try to choose the model that best meets your needs and your budget.

Orbital sander for differentiated projects
If you are aiming to achieve an excellent  finish on a flat surface , especially when developing woodworking projects that require a fine finish, you should opt for an orbital sander.

For steel and metal products you should also consider using this tool. These details make all the difference when highlighting your product to consumers who value the quality and beauty of the materials.


Tips for Efficient Use of the Orbital Sander

If you want to have 100% use of the orbital sander, know that there are some tips to make a more efficient use of the tool. Check out 10 essential tips to optimize your usage!

  • Never touch the sandpaper while the sander is on to  avoid accidents.
  • Choose an orbital sander that has the switch sealed, as  excessive dust can damage  and make your machine difficult to turn on or off.
  • Have good  control of the speed  of the orbital sander, especially if you are dealing with delicate materials to avoid damage to parts.
  • Having a balanced orbital sander balance ensures  more control and comfort  when handling the tool and prevents fatigue during its use.
  • Remember that the orbital roto sander plate must always be well-  fitted to the workpiece.
  • Lubricate the orbital sander regularly to prevent the  blades from drying out.
  • To reduce  operator fatigue,  prefer ergonomically designed sanders from the brands mentioned above.
  • Never remove the dust collector from the orbital sander, as it prevents particles resulting from cutting or sanding from being  thrown against the  equipment operator .
  • Do not apply excessive force  to sanding as the orbital sander disc will not support the operator's weight.
  • Never press the cutting disc  also in lateral position.


Extra Safety Tips

  • Always wear safety equipment such as hearing protection, safety glasses or a visor, apron and mask.
  • Use dust collection bags, which can be attached to some sander models to avoid excess dirt.
  • Always use both hands to operate the equipment.
  • Do not use the equipment with bare wires.
  • At the end of the work, wait for the disc to stop completely before putting it away to avoid accidents.
  • Store the equipment in an appropriate place and with the disc pointing upwards and out of the reach of children.
  • Keep the power cord away from the equipment.
  • Do not use the equipment near toxic or flammable products.


professional care
Keeping an organized workplace and worrying about  safety measures , carrying the necessary PPE are essential when handling the orbital sander and other civil construction equipment.

The orbital sander must only  be used by a trained professional,  who has full command of the use of the tool so that it does not cause accidents to himself or others.

It is always important to read the manufacturer's manual to obtain the necessary information about each use and to  understand how to extend the tool's life.

WEN 6369 Variable Speed 5 Amp Drywall Sander with 15' Hose & 6369SP80 Drywall Sander 80-Grit Hook and Loop 9" Sandpaper (10 Pack)

 WEN 6369 Variable Speed 5 Amp Drywall Sander with 15' Hose & 6369SP80 Drywall Sander 80-Grit Hook and Loop 9" Sandpaper (10 Pack)

  •  Product 1: Variable speed adjustment operates anywhere from 600 to 1500 RPM
  • Product 1: Hook-and-loop base pad makes changing sandpaper easier than ever
  • Product 1: 5-Amp head-mounted motor provides maximum torque to the sanding disk
  • Product 1: Automatic dust removal system combined with the 15-foot dust hose minimizes Clean-up
  • Product 2: Hook-and-loop backing makes for easy installation and removal
  • Product 2: Includes ten pieces of 80-grit sandpaper
  • Product 2: Hole configuration designed to fit the WEN 6369 Drywall Sander
  • Product 2: Perfect for material removal and resurfacing


How to Use a Disc Sander


A disc sander has circular sandpaper, which you can replace as needed. Step 1 - Store your safety gear Before using the disc sander, you should put on your gloves and goggles. Use them whenever operating the disc sander. Goggles protect your eyes from dust particles that might break off, and gloves protect your hand.

A disc sander features circular sandpaper, which you can replace as needed.

Step 1 - Make your safety gear
Before using the disc sander, you must put on your gloves and protective eyewear. Use them whenever operating the disc sander. Goggles protect your eyes from dust particles that might break off, and gloves protect your hand.

Don't wear loose clothing, or at least wear an apron to hold any loose clothing on you. If you have long hair, be sure to tie it back.

Step 2 - Configure the Disc Sander
Place the disc sander in an area where there is less traffic. This position reduces the risk of people bumping into you while you are using the machine.

Before turning on the disc sander's power switch, make sure that the guard, the guard covering the circular sander, is always mounted.

Also check that the dust extraction unit is connected. If not, connect it to the disc sander as this extraction unit extracts or captures any dust particles while you are sanding.

Step 3 - Prepare the material
For an accurate result, always mark the areas on the material that you want to sand. These marks will help you determine if you've reached the desired area or shape.

Step 4 - Turn on the disc sander
When you have finished setting up the disc sander, you can turn it on. Wait for the disc to reach full speed before using the disc sander. When turning on the disc sander, you will notice that the sander rotates counterclockwise, so you only need to use the left part of the disc sander.

Step 5 - Use the Disc Sander
Keep your fingers at least 4 inches away from the sander and always be aware of where you place your fingers while using the disc sander.

Carefully place the material you want to sand in the workspace or table of the disc sander. Lightly push the material against the rotating disc; Move the piece from left to right at the same time. Do not push the material too hard onto the disc. You can only use the part of the disc sander that is not protected by the guard. However, only use the part of the sander that is moving down.

Keep materials moving at all times; Otherwise, friction between the wood and the sander will cause the wood to blacken.

Step 6 - Adjust as needed
Most disc sanders have tables that you can adjust to different angles. To use this feature, first turn off the disc sander and unplug it. This is to ensure that no accidents happen.

To sand a material or wood at a different angle, unlock the lock nut located on the side of the worktable. Adjust the locknut to your liking.

When you use the tuning table, be extra careful because space is created from the worktable for the rotating disk. You then have more room for accidents to happen.

Saturday, October 2, 2021

BLACK+DECKER Mouse Detail Sander, Compact Detail (BDEMS600)

 BLACK+DECKER Mouse Detail Sander, Compact Detail (BDEMS600)

  •  The electric sander has 3-position grip for control and ease of use in many applications
  • Compact size gets into tight spaces and maximizes user control
  • An included detail finger attachment can be interchanged to help sand hard to reach spaces
  • Hook and loop system helps make paper changes easy. Dust Collection: Yes, Canister
  • Features high-performance dust collection with micro-filtration for a clean workspace
  • 3-position grip for control and ease of use in many applications
  • 1.2 amp motor for material removal with 14,000 orbits per minute


TYPES OF SANDERS AND THEIR USES


If you go to the nearest hardware store you can find different types of electric sanders and sanding products on the market. Each of these types of sanders has its own specific purpose!

If it's your first time buying an electric sander and you're not sure which type to choose, here's a list of several sanders and their uses that can help you.

In this article, I've included 10 different types of sanders and their uses. This is to provide useful information on which to choose for a specific task. The list includes electric sanders such as belt sanders, disc sanders, combined disc and belt sanders, oscillating shaft sanders, orbital sanders, random orbital sander, drum sander, palm sander, detail sander and drywall sander. See what kind of sanding tool is applicable to the task you have!

10 different types of sanders and when to use them
There are several different types of electric sanders and their variations. Also, I found that some of these sanding tools might have different regional aliases that make it even harder to determine which type to work with. For that reason, I'm going to talk about the 10 most commonly used types of sanders that cover all your sanding and polishing needs.

1. Belt Sander

In any modern shop, the most common type of sander you can find is the belt sander. This sanding tool is called a belt sander as it incorporates a sanding belt wrapped around two drums. The rear drum is powered by an electric motor while the front drum rotates freely.

It also has a tension release lever which I find useful because it allows the belts to be easily changed. In addition, most models have a tracking adjustment knob that always keeps the belt in the center.

Uses

A portable sander is the best electric sander for flattening and smoothing wooden surfaces. Joiners and carpenters use this type of sander extensively to level table tops, rough wood planks, dressers, etc. The belt sander is also excellent for scraping, while the stationary or bench version is useful for sanding smaller work pieces.

cons

The sander's brutal power is both its strength and its disadvantage. Power is a serious issue with the belt sander! If not used correctly, this powerful tool can leave grooves, especially at the end of the planks.

2. Disc sander
A disc sander, as the name implies, has a round disc-shaped sander on which the abrasive is fixed. Depending on the design, there are 2 types of disc sanders.

  • Portable or handheld disc sander.
  • Bench Disc Sander.

Portable Disc Sander


It's one of the rarest types. It is best known as an inclusion in electric drills, but it also has a table-mounted version. Also known as an offset disc sander, the portable disc sander works similarly to an angle grinder, except that the disc is rotating perpendicular to the power tool body. You must clamp the workpiece securely using a vise or other clamping devices and place the rotating wheel on the work for sanding.

Uses

They have more or less similar uses to a portable sander. However, a disc can cover larger areas and it is possible to sand edges and curves that a sander cannot reach.

Bench Disc Sander


The benchtop stationary disc sander has a round back plate to which the abrasive disc is attached. The circular backplate is usually made of steel or aluminum and is fixed to the drive motor with a screw in the center. The diameter of the disc can be between 4 and 12 inches. A height-adjustable worktable that will act as the workpiece support is attached to the front of the wheel. You will move the workpiece or wood against the sanding wheel that rotates at high speed. Be sure to set the space between the worktable and the abrasive wheel as close as possible to prevent the part from getting stuck in the middle.

You can also tilt the worktable at different angles to match the miter cuts you've made to sand a smooth, straight edge.

Also, you can use different size paper for this type of sander depending on the task. And due to the speed of rotation of the disc, this provides a smooth finish, perfect for large areas.

Uses

A benchtop disc sander is an excellent machine tool when the workpiece is small and you need to sand it quickly.

3. Combined disc and belt sanders

You probably can't even imagine at first what it would be like to combine these two professional-grade machines. But the combination disc belt sanders are, in fact, a very useful tool if you have a lot of work that requires you to hold it by hand and with the shape.

Although you can purchase it as two separate sanding products, the combination disc and belt sanders are ideal for smooth belt sanding along with great support. Furthermore, this combo saves space and they are also highly versatile.

Uses

Combined disc and belt sanders are perfect for two types of jobs. And that's precisely grinding edges and flattening edges and faces.

4. Oscillating Spindle Sander

An oscillating shaft sander is included in the drum family, which features a sanding drum that protrudes from a freestanding table or bench. This bench sander is an excellent tool for finishing curved and straight edges. It works in such a way that when the engine runs, the drum also goes up and down on its axis. This allows the surface of the wood to touch the entire drum, which not only helps to remove the grooves, but also reduces wear on the drum surface by using its even distribution.

An oscillating shaft sander also comes in different sizes. This includes bench models that have a length of 4 inches and drum diameters of ½ to 2 inches. On the other hand, freestanding tables feature drums 4 inches long and 4 inches in diameter.

Uses

Mainly it is specially used to smooth the board edges. Additionally, several large models include the ability to tilt the front of the table approximately 45 degrees to create beveled edges. And due to the drum's vertical design, this sanding tool works excellently on curved surfaces.

But it's also effective at sanding straight surfaces, which makes it highly flexible compared to other types of sanders.

5. Orbital sander

An orbital sander has a rectangular or square sanding plate that moves in small circular paths and hence the name orbital sander. You can cut a rectangular piece of standard size sandpaper and attach it to the sandpaper. Therefore, this tool is also known as a sheet sander.

Uses

Electric orbital sanders are primarily used for finishing large surfaces pre-sanded with sanders.

A belt sander is relatively inexpensive and is ideal for heavy jobs that require a lot of material to be removed. However, if you are not careful, it can damage soft woods. On the other hand, an orbital sander is specialized in all types of finishes. The only downside to using orbital sanders is that they are not as useful for large-scale material removal.

6. Eccentric Orbital Sander

This type of sander has a round sandpaper and works similarly to an orbital sander. Its round pad moves in small circular orbits and also rotates. This means that the movement of the sanding board on the pieces is random. This results in smooth, clean surfaces, unlike orbital sanders, which leave a visible swirl pattern.

An eccentric orbital sander also has different pad sizes, offered in 6 inches diameter or 5 inches. In addition, it is also available with pressure sensitive adhesive discs. Otherwise, with velcro-type surface discs depending on the sanding tool model.

Uses

An electric eccentric orbital sander is used to finish the sanding without swirl marks. It can quickly finish large areas and is more powerful than an orbital sander or palm sander.

The most notable thing about this type of sander is that it is applicable to almost every sanding task. In fact, it can do the job of an orbital sander and sander in one; particularly gentle sanding and material removal. However, don't be surprised if this sander shows less efficiency than belt sanders designed for heavy material removal.

This tool is ideal for anyone opting for a versatile all-purpose sander.

Orbital sander VS Eccentric orbital sander

The main differences between the two sanders are in the shape of the sanding plate, head movement patterns and material removal rate. An eccentric orbital sander has a round pad, while an orbital sander has a square-shaped pad.

The sanding pad of an orbital sander moves in a specific pattern that can leave swirl marks on the job. On the other hand, the Eccentric Orbital Sander moves in random patterns that produce almost no swirl patterns. The eccentric orbital sander is the more powerful of the two and can remove material at a faster rate.

Finally, the eccentric orbital sander costs more when compared to an orbital sander and a palm sander. You will also need to purchase special sandpaper made specifically for the round fitting.

7.Palm Sander
They are also called a finish sander. They incorporate a square block that oscillates in small circular orbits that provide ultra smooth finishes. It's also great for sanding corners because of its square sandpaper.


A palm sander is also called a ¼” sander because the size of the sandpaper is one-quarter of a standard 9 x 11” sander. It uses spring clips that hold the sandpaper perfectly in place. And if I compared it to other basic sander types, I can say that it's quiet and light enough, which makes it easier and more convenient to control. For polishing jobs, this type of sander is one of the most popular options.

In addition, this sanding tool is also perfect for smoothing paint, varnish or plaster. It's also great to use for thin veneers and plywood, but you wouldn't want to use it to remove rough material.

Palm Sander VS Orbital Sander

If you want to know the difference between palm sander and orbital sander. Here are the things that vary between the two:

The main differences between the two are in size. A palm sander is a smaller version of an orbital sander. Other differences include ease of use, price and type of application.

While an orbital sander is moderate to control a sander, it is very easy to maneuver. The smaller size palm sander is significantly cheaper. When it comes to specialty, an orbital sander is ideal for large scale removal and polishing. Plus, it's perfect for finishing and priming, but it's easy to sand too much, so be careful when using it.

On the other hand, a palm sander is specialized in sanding corners and finishes. You can normally use it for smooth surfaces and finishing tasks, but chances are it will leave marks if you have trouble using it.

Also, these two different types of sanders look a lot alike. However, their differences lie in the tasks they are good at.

8. Drum Sander
There are two types of drum sanders.

  • The bench top drum sander for wood.
  • Drum floor sander.

Bench Drum Sander

This type of drum sander has a large rotating drum on which the sandpaper is attached. A drum sander is highly effective in reducing the thickness and finishing of wooden boards. Place your plate on the conveyor belt and adjust the space between the abrasive drum and the conveyor belt. As the wooden board passes, the sanding drum starts to remove the high spots. When the board is flat, you can sand it further to reduce the thickness. However, remember that a drum sander cannot replace an electric planer. A planer can remove material at a much faster rate, but a sander provides a better finish.


Drum Sander

Similar to all members of the drum family, a sander is particularly bulky and incredibly powerful. As proof, it actually requires two people to be transported from one place to another. Thus, a drum sander is most commonly rented because of its massive construction that parallels its hostile price. And because of its power, I find it difficult to control which is quite worrying if users aren't being careful. If something worse happens, it can leave marks on the floor.

A drum sander bears a resemblance to a lawn mower in terms of use because it is also pushed. I used it once to remove the ink and it's showing great efficiency so I recommend it.

Furthermore, this sanding tool is also perfect for removing adhesives as well as other irritating and unwanted substances. It is also important to note that a full size version of the eccentric orbital sander is also used for wide floor areas such as a drum sander. The only difference is that drum sanders are more difficult to control.

Uses

One of the best things about drum sanders is that these tools are consistent in terms of thickness. Thus, they are fast and highly efficient. Plus, they can handle both large and small boards, which makes them great in terms of versatility.

There are two things that to me are a drawback to this sanding tool. The first is the relatively expensive price and high weight. This makes execution difficult, requiring you to ask other people for help.

9. Detail Sander

This type of sander looks more like an iron than a real sander. A detail sander is actually a member of the orbital sander family that includes a triangular-shaped pad that uses a special self-adhesive sandpaper.

Sometimes this type of sanding tool comes with different accessories for a better and more precise or specialized task. The unique shape of this tool is actually designed to hit crevices that a basic sander usually can't. It is used for mounting in tight spaces and corners such as the axes of a classic chair leg.

Furthermore, the detail sander is also efficient and effective in terms of sanding unusual shapes. They are also useful for crafts and more.

Uses

This type of sander is great for smoothing out tight and narrow spots. Because it's compact and easy to control, beginners can also use it with ease. It's also relatively affordable, but produces an audible noise while running. Also, it is not applicable to heavy material removal.

10. Drywall Sander

Are you curious about this metal detector-like tool? At first, I thought the same too, but Drywall sanders only show up as a metal detector because it's a disc sander attached to a long pole. It is used to smooth drywall surfaces as well as remove remaining adhesives stuck to the drywall. Also, people often clip the handle close to the hub to get a closer job.

Most drywall sander models include a vacuum to collect dust particles that fall while you work. The reason another variation of this sanding tool has longer handles is to allow the device to sand higher places like ceilings and high walls that normally require a ladder.

Do I really need to buy a drywall sander?

It really depends on the work you intend to do. You can use an ordinary belt sander to remove paint. But for finishing, you may need a finishing sander.

LE LEMATEC Portable Sand Blaster Gun Kit, Multipurpose Sandblasting Tool Complete with Connector, Extra Steel Tip and Media Mesh Filter, for Cleaning Rust, Dirt and Paint, and Corrosion Prevention

 LE LEMATEC Portable Sand Blaster Gun Kit, Multipurpose Sandblasting Tool Complete with Connector, Extra Steel Tip and Media Mesh Filter, for Cleaning Rust, Dirt and Paint, and Corrosion Prevention

  •  High quality kit tackles any job around the shop or home; complete with ¼ inch NPT quick connector, extra steel tip, media filter, user manual & media guide
  • High performance tool designed to outperform with gravity fed reservoir to ensure more consistent work; fully adjustable control valve that automates sand flow precisely
  • Versatile to use; supports media such as steel grit, glass beads, silicon carbide and more; cleans, restores, and prevents corrosion on multiple surfaces; also for etching glass and carving stone
  • Portable, lightweight, and compact; goes anywhere you want to achieve a fine surface finish; handheld and easy to carry; blasts in tight spaces and hard to reach areas
  • Easy to use; simply follow the setup instructions, connect to your air compressor, and load the preferred abrasive or sandblasting media based on the work and results you want to achieve


GENERAL INFORMATION ABOUT THE SANDBLASTING PROCESS AND SURFACE PREPARATION:


For many decades, abrasive sandblasting has been important for cleaning and preparing surfaces to be coated. Compressed air is used to propel abrasive particles at high speeds over a coated or uncoated surface. While abrasive blasting is technologically straightforward, safely converting a mixture of abrasive particles and compressed air into an effective treatment requires planning and preparation as well as tools and equipment designed according to sound engineering principles, as well as the combination of those elements with proper operator dexterity and the use of good judgment.

 
PLANNING AND PREPARING FOR SANDBLAST JOBS:

Sandblasting different abrasivesAn important first step requires a thorough evaluation of the surface to be treated, the environment surrounding the object or structure and knowledge of the requirements of the work to be carried out, such as the degree of cleaning required and specified for the application of the product. coating. An analysis of the implicit risks of the work to be carried out should also be carried out, which will help in the planning of the project by identifying in advance the critical issues and elements (such as removing paint containing lead or which abrasive to use for the task ) and that must be taken into consideration regarding equipment and personnel.

PROPERLY DESIGNED TOOLS AND EQUIPMENT:

For high production blasting, selecting the right size equipment, as well as the selection of compatible components and accessories, will ensure efficient operation and a successful result. Some important tips for making the best selection are listed below.
Air compressor properly selected in capacity to produce a sufficient flow and / or volume of air at the pressure required for all the components that it will have to supply. The compressor represents both the source of energy and the power of the sandblasting system. Compressed air is required to pressurize the blast machine, to transport abrasive material to the nozzle, to operate valves and accessories, and to provide air for breathing. The sandblasting process requires a stable supply of high pressure air (psi = pounds per square inch) and a high volume (cfm = cubic feet per minute) and a high level of purity when used as breathing air.
To determine the required compressor size, add up all the individual requirements for all equipment and add a 50% reserve margin to keep productivity high as the nozzle wears out. The smallest internal diameter of the compressor air outlet should be at least four times the diameter of the nozzle orifice.

 Clemco columbec M aluminum lined boron carbide sandblast nozzles Clemco columbec M tungsten carbide rubber sandblast nozzles Clemco columbec M polyurethane coated silicon carbide sandblast nozzles Clemco columbec M angle outlet tungsten sandblasting nozzles Clemco columbec M static dissipative flexible sandblasting hose Sandblasting hose 4 layers resistant passage zones Clemco columbec M
Sandblasting nozzles  should be selected according to the compressor output capacity and the required reserve.

The nozzles accelerate the abrasive to a highly effective cutting force for the most demanding applications. Replace the nozzle when its orifice is worn 1/16 inch (1.5 mm) above its original size. A worn nozzle not only wastes air, it will also reduce productivity or cause injury in cases where the inner cover fails. Carbide nozzles (tungsten, silica and boron) are the most popular for most sandblasting applications due to their long life.

The air line should be as large as possible, with connections that do not restrict air flow.

Using a properly sized air line is critical to getting the most out of your compressor and blasting system. Like the compressor air outlet, the internal diameter of the sandblast hose  should be at least four times the diameter of the nozzle orifice. This principle applies to air lines up to 100 feet. When the air hoses exceed 200 feet (60 meters), check the air pressure at the inlet of the blast machine during the blasting process itself to determine if the internal diameter is sufficient.

Air flows best through non-restrictive connections and straight lines, therefore air lines should be placed in as short a length as possible and with as few bends as possible to avoid pressure losses. Use an air hose designed for a minimum pressure equal to or greater than the working pressure of the sandblasting machine.

 
The filter, moisture separator and air dryer serve to remove annoying abrasive plugs caused by water in the air line.
Water and oil are enemies of sandblasting equipment. All compressors release moisture as a by-product from the air compression process, but some also pollute the air with oil. Tools for removing moisture and oil vary according to the relative humidity of the environment. An air filter, installed at the air inlet to the sandblasting machine, removes oil and water that has already condensed in the air lines. Coalescing filters collect some water vapors to form small water droplets. Aftercoolers cool the air to condense moisture, and then trap it before being taken to the sandblasting machine. Air dryers are the most effective at removing moisture and oil.

  •  Based on your compressor and nozzle, select a sandblasting machine with an abrasive capacity of 20 to 30 minutes of sustained blasting. Consult an abrasive / air consumption table  to determine the amount of abrasive to consume based on the size of the nozzle orifice at a given pressure. For example, a Number 6 nozzle (3/8 ”orifice) at 100 pounds per square inch (psi) will consume 1,152 pounds of abrasive per hour. Selecting a 6 cubic foot sandblasting machine (6 foot hopper WEB link) will provide approximately 30 minutes of sandblasting (1152 divided by 2 equals 576).6ft sandblasting hopper Clemco columbec M
  • Air and abrasive media flow through pipes, valves, hoses, nozzles, and fittings that are all cylindrical. Any reduction in the diameter of these cylinders will dramatically decrease the flow rate. A 1-inch internal diameter cylinder has an area of ​​0.80 square inches. A ½ ”bore cylinder has an area of ​​0.20 square inches. Cutting the diameter of a cylinder in half reduces its area by three-quarters. Pay particular attention to the outside pipes and fittings of the sandblasting machine, because it is usually here that restrictions usually occur.
  • A well designed sandblasting machine allows a uniform flow of air and abrasive through the system. A quality industrial sandblasting machine has concave heads for easy filling and is automatically sealed with a conical shut-off valve, a cone-shaped piece of metal with its respective coating for greater resistance to wear. Most machines have a conical bottom with a 35º angle to allow the abrasive to flow freely to the metering valve. Make sure that the tank has the respective approvals, which indicates that it meets the specifications and necessary regulations.
  • Install a screen to prevent entry of impurities that would otherwise enter the system and sandblasting process. Cover the machine when not in use and keep it protected from rain and inclement weather.
  • Install a pressure regulator with a gauge on the blast machine to adjust and monitor the air pressure. Maintaining a good operating pressure guarantees optimal equipment performance. Use a hypodermic needle pressure gauge to check the pressure at the nozzle.
  • The abrasive metering valve is designed for a uniform and constant flow. The abrasive flows by gravity through the metering valve in a fast-flowing stream of compressed air. Metering valves that deliver 90 degree abrasives cause turbulence, leading to erratic flow of abrasive, abnormal pipe wear, and an inaccurate mix of air and abrasive.
  • Metering abrasive to the 45 degree air stream allows air and abrasive to mix properly. A good metering valve allows fine adjustments to be made. Air valves, as well as other valves that are not specifically designed for abrasives, will wear out quickly and adversely affect flow.

  •  Application recovery recycling abrasive sandblast Clemco Columbec MRemote controls are necessary for safe and efficient operation. A sandblasting machine should have remote controls (as required by OSHA) that allow the blasting process to be stopped quickly when the control handle is released. This system is critical to avoid injury should the operator lose control of the nozzle. Pneumatic controls work well over distances up to 100 feet. Electric remote controls are recommended for distances greater than 100 feet and are required for distances of 200 feet or more.Integrated Wetblast Dryblast System Sandblasting Clemco columbec 02 M
  • Blast hoses and couplings are designed to reduce friction losses.
  • Always use suitably sized blast hoses (link to WEB hoses), of good quality, static dissipative and designed for the proper working pressure.
  • The internal diameter of the blast hose should be at least three times (and preferably four times) the size of the nozzle orifice.
  • Select couplings and brackets based on suitability for job site conditions, not based on your purchase price. Sandblast hose couplings fit together. Under pressure, the blast hose expands against the fittings to create a tight seal. The gaskets in each coupling are aligned and compressed as one coupling snaps into the other in its ready-to-work locked position.
  • Make sure the coupling bolts are long enough to provide sufficient gripping force without penetrating the inner tube. Some couplings have integral steel mechanisms to secure the couplings to each other for added security. If your couplings do not have them, be sure to install them to ensure a good connection. Sandblast hose safety cables provide an additional measure of safety for your guards and should be used at every coupling connection to avoid injury from accidental coupling loosening.

Sandblasting equipment installation example
 
The operator's safety equipment mainly consists of protective clothing and an approved, airtight breathing system for the sandblasting operation. All personnel working in the vicinity of the sandblasting area should wear the aforementioned protections. No dust is safe to breathe.
To prevent injury and illness, the use of personal protective equipment is absolutely necessary for both operators and those working in the area. Respirators must be tested for the blasting process and approved by the appropriate body.

  •  Sandblasting Clemco columbec M safety helmetSandblasting Clemco columbec M safety suitcarbon monoxide detector Clemco Columbec Mcommunication unit sandblasting Clemco columbec M
  • Make sure that an air jet helmet  not only supplies air for breathing but also protects the head and face from rebounding particles and debris, as well as the abrasive itself, attenuates noise and allows a wide field of vision. clogged. OSHA regulations mandate that noise levels generated by the respirator at maximum airflow and measured inside the helmet, cannot exceed 80 decibels. Be sure to use appropriately approved and readily available components and replacement parts.
  • The alarms carbon monoxide They serve to protect workers from exposure to carbon monoxide (CO), a colorless, odorless, and deadly gas. Made easy when using a CO monitor and alarm (WEB link). This accessory prevents operator exposure to carbon monoxide by providing both a visual and aural signal to the operator when unsafe levels of CO are detected.
  • Carbon monoxide can be produced by oil-lubricated compressors or by engine exhaust entering the compressor inlet or air pump. The air compressor should always be serviced according to established and recommended intervals, and high temperature shutdown mechanisms or carbon monoxide alarms installed, or both.


What is Sandblasting


Have you ever heard of what Sandblasting is ? or also known as sandblasting. In this blog we describe what it refers to and what it is used for.

The word "sandblast" comes from the English words " sand " which means sand and " blast " which means pressure, so the term refers to the technique called "pressure sand" or commonly known as "sandblasting". or "sandblasted".


However, this technique does not necessarily use sand for its operation since there are different abrasives as a substitute, such as:


  • Silica sand
  • Aluminum oxide
  • Silicium carbide
  • Sodium bicarbonate
  • Garnet
  • Copper slag
  • Glass pearl
  • Plastic abrasive
  • Steel shot, among others.

To carry out this process, compressed air is used to propel abrasive particles at high speeds through a nozzle, this technique is generally carried out in steel , cast iron and metal alloys in general, and also in other materials such as example: wood, glass, ceramics, stones, slabs, tiles, acrylics and marbles, both for use in the mechanical industry and in construction, in order to clean metal structures and protect them from oxidation, prepare materials for the application of coatings, remove oxidation and impurities, remove paints and other finishes, remove welding impurities, renew parts of machinery, equipment and gears, remove concrete plates and give finishes in wood, steel, resin and plastic.

The main components that are used for this process are: the type of abrasive, the sandblasting gun, the compressor, the hose and the nozzle, each and every one of these components are selected according to the element that will be subjected to the process.

The benefits obtained by using this technique are: labor costs, minimizes work times, reduces maintenance times, achieves greater purity of the material with a minimum of effort and obtains a greater anchoring and adherence of coatings.

It is important to mention that for these equipments that normally throw abrasives at high speed, they require safety standards and protective equipment specially formulated and designed to carry out these tasks.


Sandblasting How to use it?


For many decades, abrasive sandblasting has been instrumental in cleaning and preparing surfaces to be coated. Compressed air is used to propel abrasive particles at high speeds over a coated or uncoated surface.

On the other hand, abrasive sandblasting is technologically simple, to safely convert a mixture of abrasive particles and compressed air into an effective treatment, requires planning and preparation, as well as tools with equipment designed according to engineering principles, as well as the combination of those elements with appropriate operator dexterity.

Planning and preparing for sandblast jobs:

To carry out Sandblasting on a surface, a complete evaluation of the area to be treated must first be carried out, such as: the environment surrounding the structure, the degree of cleaning required and specified for the application of the coating.

Likewise, an analysis of the implicit risks of the work to be carried out must be carried out, which will help in the planning of the project through the early identification of critical elements such as: removing paint with lead content or which abrasive to use. Elements that must be taken into consideration in relation to construction equipment and personnel.

Properly designed tools and equipment:

For high-production sandblasting, choosing the appropriate size equipment, as well as the selection of compatible components and accessories, will ensure efficient operation and completely successful results.

Here are some important tips before performing Sandblasting

Air compressor , duly selected in capacity to produce a sufficient flow and / or volume of air at the pressure required for the components to which it must supply. The compressor represents both the energy source and the power of the sandblasting system.

Compressed air is used to pressurize the sandblasting machine, to transport the abrasive material to the nozzle, to operate the valves and accessories. In addition, the sandblasting process requires a stable supply of high-pressure, high-volume air, and a high level of purity when used as breathing air.

Sandblasting nozzles should be chosen according to the compressor output capacity and the required reserve.

The nozzles accelerate the abrasive to a highly effective cutting force for the most demanding applications.

If your nozzle is wearing 1/16 inch (1.5 mm) above its original size, it must be replaced, so a worn nozzle not only wastes air but will also reduce productivity or cause injury in cases where the inner cover fails.

Air Line

Using a properly sized air line is a critical factor in getting the most out of your compressor and blasting system. Like the compressor air outlet, the internal diameter of the sandblast hose should be at least four times the diameter of the nozzle orifice.

This principle applies to air lines up to 100 feet. When the air hoses exceed 200 feet (60 meters), check the air pressure at the inlet of the blast machine during the blasting process itself to determine if the internal diameter is sufficient.

In addition, remote controls are necessary for safe and efficient operation. A sandblasting machine should contain remote controls that allow the sandblasting process to be stopped quickly. This system also serves to prevent injury should the operator lose control of the nozzle.

Pneumatic controls work well over distances up to 100 feet. Electric remote controls are used for distances greater than 100 feet and are required for distances of 200 feet or more.