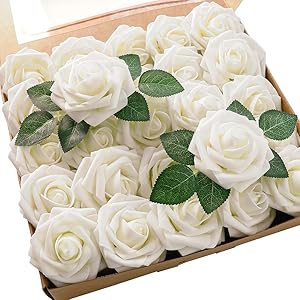
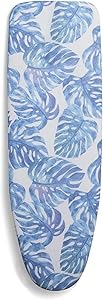
Bartnelli Rorets Original Replacement Ironing Board Cover and Pad, for 9738 & 2615 (44L x 13W) Resists Scorching and Staining Iron Board Cover with Market Leading 4 Layer Padding (Blue, 44L x 13W)
- Original Bratnelli 4 Layer Cover- This iron board cover is fitted with 4 layers, A 100% cotton surface, thick felt padding, and a 100% breathable cotton layer for high durability. It easily handles multiple ironing sessions and outlasts other ironing boards laced with the scorch-resistant layer.
- WRINKLE-FREE CLOTHES SOONER- The 4 Layer cover & pad reflects heat while distributing steam and heat evenly. This shortens your ironing time, helping you get wrinkle-free clothes in a fraction of the time! It helps eliminate pesky
- ELASTICIZED EDGES FOR NON-SLIP FIT- The elasticized edges of this iron board pad help to bind it securely to your ironing board and helps secure the cover in place. You do not have to worry about the cover slipping or leaving the edges of your board exposed to heat or stain damage
- PERFECT SIZE & EASY TO USE- This 13-inch x 44-inch iron pad is made to fit The BArtnelli 9738 Models And the 2615 Smart Hanger 43x13 ironing boards. The elasticized edges mentioned earlier along with the hook-and-loop straps give a snug, custom fit to your ironing board. This also helps stretch out the ironing mat which in turn makes your surface smoother.
- WARRANTY- Our ironing board cover is built to last and we are very confident that you will love this cover. However, if you don't and face any problems or issues, you are covered for 1 entire year, and will, therefore, get your full money back
The Importance of Covers and Liners for Ironing Boards
When we buy an ironing board, we must be careful that it makes our ironing task easier at all times, this is where the covers and linings assume great importance.Because there are accessories that you should consider if you want an ironing. The covers and linings are elements that provide a smooth surface for a better plate movement.
Importance of covers and linings
They are a textile accessory usually made of cotton, highly resistant to heat and also contribute to the care of your most delicate items.
It serves to protect the table structure and give you a better work surface.
Depending on your use and the amount of clothing you are constantly ironing, you must choose between one model and another.
We know that a good ironing board should last for decades or even a lifetime. However, you will need to replace the cover and lining that came with the board with a better one to improve the quality and efficiency of the ironing.
And did you know that using just the ironing board without any protector or cover can be very harmful to clothes or reduce their comfort, as they often do not offer the necessary facilities to iron your clothes safely?
Choosing the best ironing cover is essential, as long as you want to get good results and considerably streamline this household task that almost no one likes, as this element provides a softer and smoother base through which the iron can slide smoothly.
Furthermore, these practical accessories protect the table structure, as we already know that steam tends to deteriorate it due to its condensation, whether on a metal or wooden surface.
Whether it's a floral design, a pretty butterfly, dots or stripes, the variety of different designs today makes it difficult to select. But in addition to appearance, functional aspects are also at the forefront. Glemy products are an example.
What to look out for when buying your board cover?
When buying covers, you should first check that the cover in question is very soft and that it is made of cotton and other natural fibers, in addition to being highly resistant to high temperatures and, of course, washable.
In addition, it is advisable that the cover has clasps that make it impossible to move it during use, which will facilitate the sliding of the clothes across the surface, in addition to reflecting the heat and steam from the iron.
This will ensure that the clothes are ironed on both the top and bottom sides, an effect called "double ironing" which helps to save a lot of time when ironing.
Brand
As with any other object or item you can find on the market, it is important to always consider the manufacturer's brands, and the same goes for covers and linings.
Although there may be high quality brands that you don't know, betting on highly prestigious brands in the sector is usually a guarantee of quality in this type of product.
As far as the laundry products market is concerned, some of the main brands you can find and which are all contracted are from Glemy.
Tips for choosing a good ironing board cover and lining
To find out which ironing board cover you should buy, you should consider some recommendations, such as the different models and features of each one:
- Material: The first thing you should pay attention to is the material it is made of, ideally it has good heat resistance and behaves well in contact with delicate parts. In addition to contributing to plate slippage.
- Breathable: It must be ensured that the fabric has breathable capacity to prevent the accumulation of moisture and damage to clothes when ironed, it is essential for irons that work with steam.
- Size: Another important feature is the size, you should make sure it easily adapts to the table you already own. Some can be adapted to different sizes, so take a good look at the specs in terms of measurements.
- Layers: the more layers the product has, the better the heat and steam distribution.