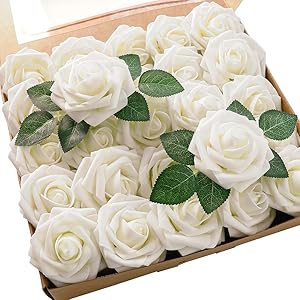
Der Rose 3 Pack Mini Potted Fake Plants Artificial Plastic Eucalyptus Plants for Home Office Desk Room Decoration
- 【Package】:You will get 3 packs faux plants.The small fake plant measures appr. 9.5" tall. The paper pulp pot appr. 3.65" tall wide
- 【Durable Material】:Our mini potted artificial plants have eucalyptus leaves that are made of plastic.The pot is made of good paper pulp,please do not put it in the water
- 【Easy to Care】:No need for much maintenance or care the plastic plants, they will neither wither nor fade. Just occasionally wipe it gently with a damp cloth
- 【Delicate Design】:The lifelike desk plants can bring green life and freshness to your living space.We adopt a unique design to imitate the frosty gray-green leaves of eucalyptus, and flock the surface of each potted plant. The gray-green leaves make them look more realistic, which is not dust,please don't worry about it!
- 【Perfect Decoration】:Our eucalyptus plant is perfect for your office, home, desk,bedroom, living room, bathroom, kitchen, farmhouse,balcony,floor,indoor outdoor decoration

How to make Topiary step by step
Topiaries are those famous round-shaped flowers or shrubs, very charming and beautiful to decorate gardens, inside the house, or even as a centerpiece or in other places at parties and celebrations.
They can be made of natural flowers (which can be bought at garden stores), or they can be made with artificial flowers, or even pearls and ribbons, making them really beautiful and amazing!
How to make your topiary yourself
- Artificial flowers of your choice
- Clay
- green foam ball
- Hot glue pistol
- Plastic handle imitating wood
- Flower vase
Step number one: Interlace the plastic cables
With hot glue, interlace the cables and plastic that imitate wood that can be found in artificial flower shops. So they look nice and intertwined with the hot pants, let it sit and you've got the handle of your topiary.
It is important that these cables are strong and hold the top of the topiary, or else it will fall down and not have the effect you want.
Step number two: Place the artificial flowers on the green foam sphere
Put the artificial flowers one by one, skewering the foam sphere with the stem of each one. If you feel it is necessary, drop a drop of hot glue into each hole so that the flowers are very firm. Cover the entire length of the foam sphere so that it is very alive and full, making a really stunning topiary top.
Step number three: Attach the plastic handles to the clay
Now, take your flower pot and place the clay in it. Right in the middle you will insert the plastic handles that will make the stem of your topiary, so that they are very firm. For a better finish, you can cover the clay with plastic leaves or petals, for example, or even use grass for mockups so that the effect looks better and your topiary is more well-finished, with all the details.
Step number four: Attach the top of the topiary to the plastic handle
Take your flower-covered foam sphere (the top of our topiary) and make a hole in the middle of it that's big enough to fit the plastic handles, but at the same time makes them snug and secure in the topiary.
With the foam ball attached to the handle your topiary is ready and will look like the picture above. Again, if you want to add extra effect with a better finish, invest in petals, leaves, or artificial grass to put on the underside of your topiary's stem, giving a really dazzling effect.
Now that you know how easy it is to make a topiary, we've put together some other examples and ideas that can inspire you to do much more, decorating your home, party, or any other event you want. Topiaries are really very delicate items that bring a much greater freshness and elegance to any environment. Invest in this project and completely change the face of your home or event.
Topiary with sunflowers
This topiary with sunflowers is extremely beautiful, and brings a more rustic touch to the environment. You can choose this model if you want to decorate your home, a wedding or any other party with a more rustic style. To make it follow the steps shown above, but just make the foam ball of this topiary, tying and hot glueing a string or other wire of your choice to hang it anywhere.
Paper flower topiary
This topiary can use a material as simple as paper, but each flower was cut out and a pearl-head pin was used to secure each flower to the foam sphere. This done, a sumptuous flower vase was used with clay in it, and the top of the topiary was inserted into it, without the need for a larger stem. This model looks great on candy tables, for example, or it can even look great on a shelf or on side tables in your home.
Rose Topiary
This topiary is made in exactly the same way as the first, however artificial roses and a single thicker plastic stalk were used to support it. This beautiful inspiration is also finished with a bow with a rose that makes the project even sweeter and more beautiful.
Topiary with roses and tin vase
This topiary made with artificial roses and thick plastic stem is very similar to our last inspiration, however, it brings more color to any environment, as the chosen roses can be of different colors, and you can match the color of the roses with the color of the metal cans that will be used as a vase. This inspiration is beautiful at children's parties, for example, or at more rustic and colorful events, such as a party on the farm. Paint the cans the same color as the roses that will be used and finish with a green bow and a large button in the middle.
pearl topiary
A design that appeals to many people, this pearl topiary is even easier to make, as each pin with the full size pearl head can be easily attached to the foam sphere. Bet on a sumptuous vase of flowers for a more elegant effect and choose a large, beautiful bow to put on the stem, which can even be made of wood.
Topiary with ribbons
This topiary with ribbons is a little more laborious to make, but its effect is really beautiful. You can choose this topiary to decorate a teenager's party, for example, choosing the ribbons in the party colors. Fold the ribbons into a drop shape and allow them to be well rounded, then nail each one with the help of pins and hot glue. Leave the sphere well filled, leaving no foam in sight.
For the stem, choose colored skewers, and choose a vase that matches the colors of the ribbons. Make a bow on each vase and you're done!