Thursday, June 17, 2021

Bug Bite Thing Suction Tool, Poison Remover - Bug Bites and Bee/Wasp Stings, Natural Insect Bite Relief- Black/Single

 Bug Bite Thing Suction Tool, Poison Remover - Bug Bites and Bee/Wasp Stings, Natural Insect Bite Relief- Black/Single

  •     Removes insect venom, saliva, and other irritants left under the skin using suction
  •     By removing the irritant, the body stops producing the reaction that is causing you to itch & swell
  •     Works on: mosquitoes, bees, wasps, biting flies, no-see-ums, chiggers, sea lice & more
  •     Compact, lightweight, reusable and easy to carry
  •     Clinically Proven, kid friendly, 100% guarantee

Wasp sting: what to do, how long it lasts and what are the symptoms


The wasp sting is usually very uncomfortable as it causes severe pain, swelling and intense redness at the site of the sting. However, these symptoms are especially related to the size of the stinger rather than the intensity of the venom.

Although these insects may seem more poisonous than a wasp, they are not and therefore cause milder symptoms as the stinger does not stay at the sting site releasing more venom, as is the case with wasps. Thus, there is no need to remove the stinger before starting treatment.

Wasp sting: what to do, how long it lasts and what are the symptoms
To alleviate symptoms, what you should do is:

  • Wash the area with soap and water to prevent the entry of microorganisms through the bite, which can worsen the skin reaction;
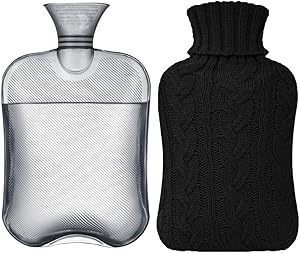
  • Apply a cold compress over the bite site for 5 to 10 minutes . To do this, dip a compress or a clean cloth in cold water, remove excess water and place it on the spot;
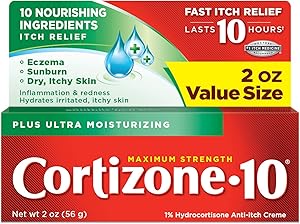
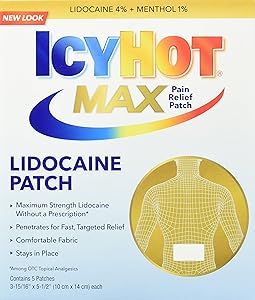
  • Apply an antihistamine ointment for stings such as Polaramine or Polaryn.
  • The application of the cold compress can be repeated several times during the day, whenever you feel the need to relieve swelling or pain. The ointment should only be applied 3 to 4 times a day, or according to the manufacturer's instructions.

In most cases, these steps are enough to improve symptoms and relieve the discomfort caused by the bite in a few minutes, however, if the pain does not improve or the symptoms become more intense, preventing hand movement, for example, it is very important go to the hospital as you may be developing a severe allergic reaction, which needs to be treated with more specific medications.

The wasp usually only bites when it feels threatened, so hornet nests that are out of reach usually don't cause any problems.

How long does it take to deflate
In many cases, the swelling from the wasp sting lasts only 1 day, and it improves significantly after the application of the cold compress. However, people who are more sensitive to insect venom may have a more exaggerated reaction, which makes the swelling last longer, up to 2 or 3 days.

Although it is rarer, there are also people in whom the swelling can get better and get worse again after 2 days of the bite, lasting for up to 7 days. In these situations, in addition to the application of a cold compress, you can also keep the bite site higher, especially while sleeping, to speed up recovery.

What are the symptoms of wasp bite
The symptoms presented after a wasp sting can vary according to the sensitivity of each person, but the most common are usually:

  • Severe pain at the sting site;
  • Swelling and redness;
  • Burning sensation on the sting;
  • Difficulty to move the spot on the sting.

Although wasp stings cause symptoms that are not dangerous to health, there are people who are more sensitive to its venom. In these cases, a more severe allergic reaction, known as an anaphylactic reaction, can occur, which can be identified through symptoms such as very intense itching in the area, swelling of the lips and face, feeling of a ball in the throat or difficulty breathing. In these situations, one should immediately go to the hospital or call for medical help, to start treatment with steroids and anti-allergic drugs.

Learn more about how to identify an anaphylactic reaction and how it is treated .

when to go to the hospital
In most cases, wasp stings can be treated at home without major complications. However, it is important to go to the hospital when:

  • The swelling takes more than 1 week to go away;
  • Symptoms worsen over time;
  • There is a lot of difficulty in moving the sting site;
  • Swelling of the face or difficulty breathing occurs.

Usually, in these cases it is necessary to start the treatment with drugs directly in the vein, such as antihistamines, corticoids or antibiotics, for example.

Wednesday, June 16, 2021

OFF! Family Care Insect & Mosquito Repellent I, Smooth & Dry Bug Spray for the Beach, Backyard, Picnics and More, 4 oz. (Pack of 2)

 OFF! Family Care Insect & Mosquito Repellent I, Smooth & Dry Bug Spray for the Beach, Backyard, Picnics and More, 4 oz. (Pack of 2)

  •     Tick repellent with powder-dry formula; not oily or greasy
  •     Repels mosquitoes, biting flies, gnats, ticks, chiggers and fleas
  •     Aerosol mosquito spray allows for easy application in a continuous sweeping motion


Pests in your vegetable garden and garden: make your own homemade repellent!


Plant pests: how to fight

Plant pests  are one of the  main concerns  for those who like to have beautiful and healthy plants, thus ensuring their full growth and development.

The first step is taken at the time of purchase when deciding to buy strong, pest free plants while  taking into account the location  and  care requirements of your plants .

It is not always animal parasites or diseases that make life difficult for plants, as adverse growing conditions do too.


The fact that a plant has very little space to grow or is in a  place that is too dark , as well as  incorrect watering or fertilization , can encourage the appearance of parasites and diseases .

It is best to check the plants regularly, including the inside of the leaves.

Aphids, thrips, spider mites  and similar parasites are easily recognizable with the naked eye or with a magnifying glass, but the same cannot be said for fungi, bacteriosis and diseases caused by viruses.

In these cases, it is the  aspect of damage to the plant that reveals the cause, so be aware .

The resistance capacity of your plants  can be increased with the so-called fortifiers, as they contain numerous and important compounds that strengthen the plant's tissue and make it more resistant to infectious agents.

Do you want to learn how to make repellents to ward off insect pests from your plants? So continue reading this article.


Homemade repellents to fight pests: know some recipes

1. Garlic repellant
To make this recipe start by boiling 5 to 6 cloves of garlic and add half an onion in 1 liter of water. Let it boil for about 15 minutes and when this solution has cooled, spray it on the attacked plants.
Controls : aphids.


2. Absinthe infusion-based repellent
Wormwood also known as Artemisia ( Artemisia absinthium ), is a plant that belongs to the Asteraceae family  .

It is a plant originally from Europe and Asia, characterized by having scalloped gray leaves and a bitter taste, which is used as a medicinal plant and in the manufacture of alcoholic beverages.

This infusion can be used to ward off leprosy, especially in peach trees.

To make this infusion, add a liter of boiling water to 30 g of dry leaves and let the infusion work for 10 minutes. Afterwards, dilute in 10 liters of water and spray on the affected plants.

This infusion is used to control caterpillars and slugs.


3. Recipe for controlling ants
To fight ants, you can make a mixture of red pepper and water (after crushing), soaking a cloth in this mixture and placing it around the trunk or stem of the affected plant. You can also choose to brush the affected plants with the solution indicated above.

Monday, June 14, 2021

Cortizone 10 Plus Ultra Moisturizing Anti-Itch Cream with Aloe Vera and Vitamin A, Helps Relieve Itchy, Dry Skin associated with Rashes, Eczema and Psoriasis, 2 Oz

 Cortizone 10 Plus Ultra Moisturizing Anti-Itch Cream with Aloe Vera and Vitamin A, Helps Relieve Itchy, Dry Skin associated with Rashes, Eczema and Psoriasis, 2 Oz

  •     Contains one (1) 2-oz. tube of Cortizone 10 Maximum Strength Plus Ultra Moisturizing Anti-Itch Creme
  •     Cortizone 10 Ultra Moisturizing Anti-Itch Creme relieves itching fast and lasts for hours
  •     This maximum strength anti-itch creme contains maximum strength hydrocortisone, the #1 itch medicine recommended by doctors
  •     Cortizone 10 Plus Ultra Moisturizing contains 10 moisturizers, including aloe, and vitamins A and E to help make skin feel softer
  •     Maximum Strength Cortizone 10 helps relieve itch associated with minor skin irritations and rashes due to insect bites, psoriasis, poison ivy and more


Expert word : The fear of cortisone in 5 points


Point 1: natural cortisone
Cortisone is produced by our body, under the name of cortisol, functioning as a fuel to “start” at 8 am, and continuing to be produced throughout the day, with a short rest at around 3 am. This hormone intervenes in the metabolism of sugar, fat, sleep, immunity. It is a response to chronic stress (day-to-day), while adrenaline is a response to acute stress (when we see a truck coming towards us).

It has important anti-inflammatory benefits, and that is why it is used in the form of medication. It is available in tablets, injection or cream and ointment.

The dangerous side effects of cortisone only occur when it is taken orally or by injection: weight gain, high blood pressure, diabetes, osteoporosis, bone fracture...

None of this happens when it is applied locally, because...

Point 2: is destroyed by inflammation
cortisone cream reduces inflammation atopic eczema

If cortisone is applied to normal skin, it passes through the skin and can be found in the blood. However, if it is applied to inflamed skin, it is immediately destroyed by the inflammation and almost nothing gets into the blood - too little, anyway, to cause toxic effects.

So, why is it advisable to continue the applications twice a week in areas where plaques usually appear (elbow bends, knee bends)? For two reasons:

If we could analyze the skin under a microscope, we would always see an inflammation ready to reactivate.
Applying cortisone twice a week in areas where plaques have disappeared helps prevent relapses, the total amount of cortisone applied over a year being, in the end, much lower than if we didn't.

Point 3: Why does it have such a bad reputation?

No cure:
To control eczema, moisturizing and treating with cortisone is not enough.
It is also necessary to identify the factors that caused it and try to prevent them.
Likewise, it is necessary to treat the digestive flora with probiotics and through an antacid and anti-inflammatory diet.
Prevents deletion:
  • A phrase we hear a lot: “you have to let it out, otherwise the toxins stay inside and it's dangerous”. It was Hippocrates who discovered the emunctory function of the skin, 2500 years ago...
  • Toxins are effectively eliminated by the skin, through sweat and sebum. But cortisone cream does not alter the functioning of the sweat and sebaceous glands. That is, with or without cortisone, toxins are eliminated normally.

Point 4: But surely there is another solution?
The atopic dermatitis is a chronic disease, which is difficult to understand, both for parents and for the patient. With each new crisis, it is necessary to go back to the checklist: what is the triggering factor, can we prevent it, is it necessary to re-treat the digestive flora?

Some will get good results with other medications, but regardless of your choice, the basis of the approach is unavoidable:

  • the skin is dry: not to aggravate the dryness, moisturize every day;
  • it is necessary to know how to listen to the body, understand how the skin reacts;
  • it's no use suffering, take care of yourself;
  • if stress is a determining factor, choose a method that reduces your sensitivity (sophrology, hypnosis...);
  • respect your digestive flora.

Point 5: But the real reason for the fear of cortisone comes...
From the doctors themselves. Studies show it: divergent positions among health professionals fuel parents' confusion. The reference centers for the treatment of atopic dermatitis are the therapeutic education centers.

Saturday, June 12, 2021

GENIANI Microwavable Heating Pad for Neck and Shoulders with Herbal Aromatherapy - Calming Weighted Cordless Neck Wrap - Heat Pad for Pain Relief and Spasm - Hot and Cold Compress (Cloud Gray)

 GENIANI Microwavable Heating Pad for Neck and Shoulders with Herbal Aromatherapy - Calming Weighted Cordless Neck Wrap - Heat Pad for Pain Relief and Spasm - Hot and Cold Compress (Cloud Gray)

  •     FAST NECK & SHOULDERS PAIN RELIEF! The dual hot/cold neck heating pad is a true miracle-worker for those with constant neck pain. Fitting perfectly on your shoulders, the heating wrap delivers up to 20 minutes of deep, soothing heat to relieve pressure and take away that annoying chronic neck pain.
  •     GET COZY AND COMFY WHEREVER YOU ARE! Made to be the optimal size, Magma is the ideal heating pad for neck and shoulders that stays in place on the go: in the car, on a plane, or while using public transport. Since Magma is a cordless heating pad, you can use it in any position: lying down, sitting, or even standing.
  •     HEATS UP IN SECONDS! Magma is a microwavable heating wrap that can be brought to optimum temperatures speedily, so you can use it right away when you need it. Though robust enough to be used in the microwave, Magma is soft to touch, so you can fully enjoy the experience. Pain alleviation in minutes!
  •     USE IT ALSO AGAINST SWELLING & INFLAMMATION! Besides relieving muscle tension, the heat wrap can also be used as a cold wrap left to cool in the freezer. The cold wrap will minimize swelling around injuries and decrease pain levels as soon as you apply it.
  •     ANXIETY, TENSION AND STRESS RELIEF! Filled with LAVENDER and millets, this heating pad for neck and shoulders is also a great aromatherapy product. The heat will release a calming scent of lavender that will put your mind into a state of complete relaxation. 1 YEAR WARRANTY. Risk-Free Purchase & Hassle-Free Replacement!


5 steps to make a thermal pad


A thermal pillow is a fabric pouch filled with different types of seeds  and often aromatic elements. It is very useful during the coldest months of the year.

Obviously, this is an object used primarily to warm the body , but also to relax, soothe muscle or joint pain.

And while it's true that a thermal pad isn't exactly a decorative object, these days it's hard not to pay attention to its aesthetics; for this reason, many manufacturers strive to use striking fabrics and sew them with different shapes besides square and rectangular.

So, to make your own thermal pillow, you will have to take into account your preferences in terms of design so that you can have a completely personalized object at your disposal. Get to work!

Steps to Make a Thermal Pad

It is important to clarify that, although the use of rice and other elements for the manufacture of thermal pillows has been highly recommended, these are not the best options.

After being used several times, a pillow made from rice can smell unpleasant and harbor insects. Therefore, it is not recommended to use rice to make thermal pads.

The disadvantage of using other materials, such as cherry or olive pits, is that these elements are not entirely ergonomic and, instead of promoting well-being, can actually limit you.

1. Gather the materials
  • Line.
  • Ruler.
  • Scissors.
  • Chalk or marker.
  • Needle or sewing machine.
  • Filling: millet seeds.
  • Fabric scraps (cotton, linen, etc.).
  • Optional: 2 to 3 handfuls of herbs.

Prepare all the materials we mentioned to make your thermal pad. You can use a scrap of fabric you already have at home. It can be made of cotton, linen, a piece of fabric (plain or printed) or an old t-shirt, among others.


2. Prepare the fabric
First, you must be sure of the design you want to structure the cushion shape. Remember that you must take into account the amount of fabric you have. Also, you should measure the fabric before you start cutting.

Since the thermal pad is usually microwave-heated, it's best to make them small for convenience.

To make your first pillow , the best thing is to choose a rectangular shape and a medium size. And, once the measurements have been defined, with the help of the ruler and chalk, mark the lines on which you will make the cuts later.

When marking with chalk or marker, leave a seam allowance of at least 1 cm. Also, remember that you must make two rectangles of the same size to assemble both sides of the cushion.


3. Cut and sew
Once the fabric is cut, you will have to place one piece of fabric over the other and start sewing. This process can be done manually (with a needle and thread) or by machine.

You should leave the top edge of the cushion open and then place your padding. After sewing the sides and bottom edge of the cushion, you must turn it inside out so that the seams are hidden.

You must make a seam that is strong because, when placing the padding on the cushion, its contents will generate a certain amount of pressure on the sides; in this way, it will prevent it from falling apart easily.


4. Put the cushion filling

Once you've made sure you've made strong seams, you'll be able to fill the inside of the thermal pad. In order not to exceed its capacity, we recommend that you fill the cushion with 85-90% seeds.

Also, if you prefer, you can add a little lavender , orange blossom, rosemary or eucalyptus to perfume your thermal pillow. By heating the seeds, they will help reduce muscle pain.

Another option is to impregnate the fabric inside the cushion with a little essential oil with the scent of your choice.


5. Close and decorate according to your preference
Once you have placed all of your seeds inside the cushion, you can sew its top edge to close it. Then, you can start decorating the pillow to your liking; for this you can use sequins, buttons and even bows and so on.


Aspects to be considered
When placing your thermal pad in the microwave , also put a glass of warm water; this will prevent the cushion from burning. Also, remember not to heat it for more than 3 minutes.

So, as we mentioned earlier, you can use your thermal pillow both to warm your bed at night and to alleviate various body aches.

Friday, June 11, 2021

Samply Transparent Hot Water Bottle- 2 Liter Water Bag with Knitted Cover, Black

 Samply Transparent Hot Water Bottle- 2 Liter Water Bag with Knitted Cover, Black

  •     Wide mouth design, fill the water bottle more easily
  •     Transparent bottle to accurately know how much water is inside
  •     Not suitable for Microwave oven heating and fill only to two-thirds capacity maximum
  •     What you get: 1* hot water bottle, 1* knitted cover
  •     9 colors available: blue, navy, pink, red, purple and green, more on the way


How to make a hot water bottle for colic?

To do this technique, just place a bag of warm water or warm compresses on the abdomen, at the site of the cramps and leave for 10 to 15 minutes. If the bag is too hot , let it cool a little and protect the skin from direct contact, placing a garment or cloth between the bag and the skin.

How to make a hot water bottle with a pet bottle?

It's very simple to make at home: just heat two liters of water (on the stove or in the microwave), place it in a PET bottle and close. Children, ask an adult for help to avoid burns when putting the hot water in the bottle ! The compress that also works as a foot massager is ready!

How to make a bag to make a compress?
Making the thermal bag with a sock. Fill an old sock with raw rice. It is the simplest method of making a reusable thermal bag . You will need an old sock, raw rice, a microwave oven, and material to sew or tie the sock.

How to make a thermal grain bag?

The tip is to put half a kilo of grain in each sock, mix it with a fragrant essential oil, put it in the microwave (hi?!?) and that's it! The " bag " stays warm for a long time and will relax your little shoulders for sure.

How to make herbal thermal bag?

Step 1: Marking the seam. Place the fabric inside out and pin where you will sew. ...
Step 2: Sewing. ...
Step 3: Placing the beans. ...
Step 4: Putting the herbs . ...
Step 5: Finishing. ...
Step 6: Ready!

How to make hot compress with gel bag?
To use the thermal bag for hot compresses , it is recommended to boil 3 liters of water in the fire or microwave and, after turning off the heat, immerse the bag in hot water for 3 to 5 minutes, until the desired temperature is reached.

How to heat the gel bag?
Heat 3 liters of water to a boil, turn off the heat or turn off the microwave and immerse the bag in hot water for 3 to 5 minutes until reaching the desired temperature. Cold compress: Place the pouch in the refrigerator 2 to 4 hours before use, or in the freezer about 30 minutes before use.

How do you use a hot water bottle?

- When using the Bag , fully wrap it in a towel or cover, keeping the heat applied for 20 minutes, or at the discretion of a healthcare professional. - Never apply the bag directly to the skin. - By carefully following these guidelines, you will be protecting your skin and conserving your bag .

How to relieve pain from contraceptive injection?
How to alleviate the pain “Another technique that can be used is to make a compress of hot water, which also helps to spread the vaccine and alleviate the pain ”, he teaches.

Can you get pregnant with a quarterly injection?
What is the probability of getting pregnant with an injection ? It is a very effective contraceptive method. According to data published in an article on the Bayer website, the percentage of failures is only 0.1% to 0.6% for monthly injection and 0.3% for quarterly injection , which is equivalent to the effectiveness of the ligation of fallopian tubes1.

Does an injection have a fertile period?
There is no fertile period in women who use contraceptives. The risk of injectable contraceptive failure is 3 pregnancies per 1000 women per year (0.3% risk) if used correctly.

How does the 3-month contraceptive injection work?

The quarterly contraceptive injection has a progestin in its composition, which acts by inhibiting ovulation and increasing the viscosity of the cervical mucus, hindering the passage of sperm, preventing pregnancy.

Thursday, June 10, 2021

MIGHTY BLISS Large Electric Heating Pad for Back Pain and Cramps Relief -Extra Large [12"x24"] - Auto Shut Off - Heat Pad with Moist & Dry Heat Therapy Options - Hot Heated Pad

 MIGHTY BLISS Large Electric Heating Pad for Back Pain and Cramps Relief -Extra Large [12"x24"] - Auto Shut Off - Heat Pad with Moist & Dry Heat Therapy Options - Hot Heated Pad

  •     PAIN & SORE MUSCLE RELIEF! YOU WILL LOVE THIS HEATING PAD! Want to get rid of your back pain or unbearable cramps? No need to suffer with a cheap flimsy cold broken small heating pads! This quality large heating pad for cramps is perfect. Super sturdy long lasting and heats to penetrate effectively. Relieves pain in seconds.
  •     SUPER FAST HEATING PENETRATES HURTING MUSCLES AND CRAMPS IN SECONDS! No worrying about your hot pad breaking down after a week No pain due to faulty heat pads or not getting hot enough. This pad will give you the heat you need. You’ll wish you found this years ago!
  •     SOFT MICROPLUSH FIBERS - EXTRA LARGE [12"x24"] FEATURES A LIFETIME WARRANTY! Made with soft microplush fibers used in the most luxurious and comfy winter pajamas for awesome cozy feeling, XL size makes this the perfect heat pad for back pain on your neck and shoulders, legs or stomach, extremely comfortable.
  •     MULTIPLE PERSONALIZED HEAT SETTINGS - MOIST AND DRY OPTIONS MACHINE WASHABLE! Low, medium or high temperature heat settings + Can be used moist or dry, Imagine the pain free life you'll make with this.


Quick pain relief with thermal pads


Heat has a relaxing and pain-relieving effect. It is also a basic human requirement. That's why heat has been used as an effective therapy since prehistoric times. If heat is generally associated with a feeling of comfort and relaxation, heat therapy goes one step further: it provides both pain relief and cure for many types of pain. Thermal pads provide quick and cost-effective thermal therapy. They are simply placed over the affected area.

Fast, comfortable and effective pain relief
Microlife thermal pads have stable and individually controllable heating levels. Technical functions such as preheat times and wires with a special diameter offer unique therapeutic options. The thermal pads are also comfortable and easy to use.

Flexible heating with Microlife

Thermal
Pads Microlife thermal pads were specially developed for parts of the body where thermal therapy is the most effective.

Warming
blanket Warming blanket with the latest and safest functional technology at its best. For the highest level of comfort and optimum warmth.

Icy Hot Max Strength Lidocaine Plus Menthol Pain Relief Patches for Back or Large Area (5 Count)

 Icy Hot Max Strength Lidocaine Plus Menthol Pain Relief Patches for Back or Large Area (5 Count)

  •     LIDOCAINE PAIN RELIEVING PATCHES: Strong relief for tough pain, our patches target pain points. Icy Hot Lidocaine Patches help desensitize aggravated nerves, targeting pain receptors for fast-acting, maximum strength pain relief (among OTC topical analgesics).
  •     TOPICAL PAIN RELIEF: Our creams & patches deliver icy coolness to dull the pain & relaxing heat to help relieve achy muscles. With Icy Hot, you'll get fast, long lasting relief that helps reduce pain from muscle aches, arthritis, joint pain, & cramps.
  •     ICY HOT PAIN RELIEF: Icy Hot carries a variety of pain relieving solutions, from creams, lotions, balms, and gels to sprays, patches, & SmartRelief TENS Therapy products. From back pain to knee injuries to arthritis, our products can help ease your pain.
  •     A WELL ROUNDED MEDICINE CABINET: When you or a family member is in pain, sick, hurt, or just generally feeling under the weather, you don’t want to run to the pharmacy. A well stocked home medicine cabinet helps ensure relief is at hand when you need it.
  •     PAIN RELIEF: Icy Hot offers chronic pain relief for back, joints, shoulders, knees & sore muscles. Try our prescription strength medicated creams, lotions, sprays, gels & balms for pain management.


Cold or heat? Which should I turn to for pain relief?


A very frequent question is when we should apply cold or heat. Let's clear up all the differences between the two concepts!

when to choose cold
The application of ice reduces blood flow to the injured area, helping to decrease inflammation and edema . In addition, it acts as an analgesic and should be applied after exercise or after pain-producing activity .

Ice can be applied to impact injuries , such as trauma , or to acute (recent) inflammation , such as sprains, strains, bruises or even chronic traumatic pathologies .

Method for applying ice:
  • Ice packs (can be gel or crushed ice);
  • Cold compresses (dipped in ice water);
  • Ice bath ;
  • Ice cube massage ;
  • Coolant spray .
  • The most frequently used method is ice packs . But, it is also possible to also put ice cubes in a bag and place a thin cloth to cover the affected area. With this you can make an “ice massage” by moving the bag in the area of ​​discomfort to prevent it from coming into contact in a specific location for a long time.

To reduce edema, it is beneficial to associate the application of ice with lifting the injured body part above the level of the heart.

How much time?
The compresses or ice packs should be applied for 10 to 15 min . It is very important not to exceed this time (maximum 20min), as it could have the opposite effect.

Ice is a vasoconstrictor and, when applied for too long, it can greatly reduce the blood flow to the injured area, thus slowing down the healing process. Putting on for a long time can also lead to frostbite.

How many times?
It is important to allow the tissues to “warm up” until ice is again applied to the injured area (at least 30 minutes between applications).

when to turn to heat
The application of heat promotes increased blood flow and inflammation . It is often used in muscle alterations such as contractures and muscle tension , with the purpose of muscle relaxation and analgesia. Heat is used, for example, to relieve pain in the neck and lumbar spine . Note that it should not be applied to inflamed or edema areas.

  • Methods for applying heat:
  • Moist heat in the hydrocollector ;
  • Hot compresses ;
  • Hot baths ;
  • Paraffin and mud .

How much time?
It should normally be applied for 15-20 minutes at a comfortable temperature .

Please note that using heat for a long time at very high temperatures can cause burns !

Cold or heat?
The cold or heat should not be used on skin lesions as open wounds, burns or if the area is numb. It may not be suitable for people with conditions that reduce the feeling of cold or heat, such as diabetic neuropathy.

In some cases, alternating heat and cold (contrast therapy) can be beneficial as it will increase blood flow to the injured area . This technique is widely used in order to reduce muscle pain after intense physical exercise.

The use of ice or heat is only part of the treatment program . Even with the relief of symptoms, it is necessary and essential to perform exercises to restore flexibility, strength and skills needed for sport or everyday life . That is why monitoring by your doctor or physiotherapist is essential !