Thursday, June 10, 2021

Icy Hot Max Strength Lidocaine Plus Menthol Pain Relief Patches for Back or Large Area (5 Count)

 Icy Hot Max Strength Lidocaine Plus Menthol Pain Relief Patches for Back or Large Area (5 Count)

  •     LIDOCAINE PAIN RELIEVING PATCHES: Strong relief for tough pain, our patches target pain points. Icy Hot Lidocaine Patches help desensitize aggravated nerves, targeting pain receptors for fast-acting, maximum strength pain relief (among OTC topical analgesics).
  •     TOPICAL PAIN RELIEF: Our creams & patches deliver icy coolness to dull the pain & relaxing heat to help relieve achy muscles. With Icy Hot, you'll get fast, long lasting relief that helps reduce pain from muscle aches, arthritis, joint pain, & cramps.
  •     ICY HOT PAIN RELIEF: Icy Hot carries a variety of pain relieving solutions, from creams, lotions, balms, and gels to sprays, patches, & SmartRelief TENS Therapy products. From back pain to knee injuries to arthritis, our products can help ease your pain.
  •     A WELL ROUNDED MEDICINE CABINET: When you or a family member is in pain, sick, hurt, or just generally feeling under the weather, you don’t want to run to the pharmacy. A well stocked home medicine cabinet helps ensure relief is at hand when you need it.
  •     PAIN RELIEF: Icy Hot offers chronic pain relief for back, joints, shoulders, knees & sore muscles. Try our prescription strength medicated creams, lotions, sprays, gels & balms for pain management.


Cold or heat? Which should I turn to for pain relief?


A very frequent question is when we should apply cold or heat. Let's clear up all the differences between the two concepts!

when to choose cold
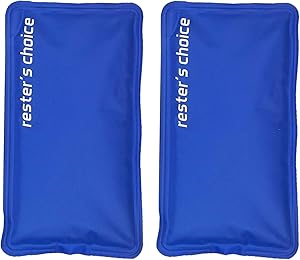
The application of ice reduces blood flow to the injured area, helping to decrease inflammation and edema . In addition, it acts as an analgesic and should be applied after exercise or after pain-producing activity .

Ice can be applied to impact injuries , such as trauma , or to acute (recent) inflammation , such as sprains, strains, bruises or even chronic traumatic pathologies .

Method for applying ice:
  • Ice packs (can be gel or crushed ice);
  • Cold compresses (dipped in ice water);
  • Ice bath ;
  • Ice cube massage ;
  • Coolant spray .
  • The most frequently used method is ice packs . But, it is also possible to also put ice cubes in a bag and place a thin cloth to cover the affected area. With this you can make an “ice massage” by moving the bag in the area of ​​discomfort to prevent it from coming into contact in a specific location for a long time.

To reduce edema, it is beneficial to associate the application of ice with lifting the injured body part above the level of the heart.

How much time?
The compresses or ice packs should be applied for 10 to 15 min . It is very important not to exceed this time (maximum 20min), as it could have the opposite effect.

Ice is a vasoconstrictor and, when applied for too long, it can greatly reduce the blood flow to the injured area, thus slowing down the healing process. Putting on for a long time can also lead to frostbite.

How many times?
It is important to allow the tissues to “warm up” until ice is again applied to the injured area (at least 30 minutes between applications).

when to turn to heat
The application of heat promotes increased blood flow and inflammation . It is often used in muscle alterations such as contractures and muscle tension , with the purpose of muscle relaxation and analgesia. Heat is used, for example, to relieve pain in the neck and lumbar spine . Note that it should not be applied to inflamed or edema areas.

  • Methods for applying heat:
  • Moist heat in the hydrocollector ;
  • Hot compresses ;
  • Hot baths ;
  • Paraffin and mud .

How much time?
It should normally be applied for 15-20 minutes at a comfortable temperature .

Please note that using heat for a long time at very high temperatures can cause burns !

Cold or heat?
The cold or heat should not be used on skin lesions as open wounds, burns or if the area is numb. It may not be suitable for people with conditions that reduce the feeling of cold or heat, such as diabetic neuropathy.

In some cases, alternating heat and cold (contrast therapy) can be beneficial as it will increase blood flow to the injured area . This technique is widely used in order to reduce muscle pain after intense physical exercise.

The use of ice or heat is only part of the treatment program . Even with the relief of symptoms, it is necessary and essential to perform exercises to restore flexibility, strength and skills needed for sport or everyday life . That is why monitoring by your doctor or physiotherapist is essential !

Tuesday, June 8, 2021

Rester's Choice Gel Cold & Hot Packs (2-Piece Set) Medium 5x10 in. Reusable Warm or Ice Packs for Injuries, Hip, Shoulder, Knee, Back Pain – Hot & Cold Compress for Swelling, Bruises, Surgery

Rester's Choice Gel Cold & Hot Packs (2-Piece Set) Medium 5x10 in. Reusable Warm or Ice Packs for Injuries, Hip, Shoulder, Knee, Back Pain – Hot & Cold Compress for Swelling, Bruises, Surgery
 

  •     RELIEVE PAIN EASILY – Lessen your pain without mess and hassle! This cold pack reduces your aches and swelling without any ointments or pills. Whether you have back pain from biking, or you’re sore swelling from surgery, the Rester’s Choice gel ice bag is here to help.
  •     COMFORTABLY COLD – After a couple hours in the freezer, the ice pack for injuries gets super cold! In fact, it gets so frosty, we recommend placing a cloth between your skin and the back and knee ice pack for the most relief and comfortable use.
  •     PERFECT COMPRESSION, ANYWHERE YOU NEED IT – Whether you need a shoulder ice pack or warming knee pain relief, the ice gel pack delivers warm and cool compression exactly where it hurts.
  •     FLEXIBLE WHEN FROZEN - Morph the cold packs into the shape you need even after they've been frozen! Our cold packs for injuries stay pliable so you can place them around your knee and shoulder
  •     THE RESTER'S CHOICE PROMISE - Guaranteed to last a lifetime, the ice bags for injuries lessen your limps, better your back, and alleviate your aches forever! Conveniently store in fridge, freezer, or backpack for on the go pain relief for years to come.


When to make hot or cold compress


Cold compresses reduce the blood flow where they are applied, help to deswell, and have an analgesic effect that starts after 5 minutes of use, and can be used up to 48 hours after injection, in case of toothache, blow, sprain , knee pain and falls. On the other hand, warm compresses dilate blood vessels and reduce muscle tension, promoting relaxation, and can be used when there is back pain, bruises on the skin, pimples, boils and stiff necks, for example.

A compress is an absorbent material that can be used to apply cold or heat to a region of the body, and can also be used to apply some medication, poultice or cover a wound, which can be cotton, mesh or gel.

when to make hot compress
A warm or hot compress promotes increased local blood flow, increases mobility and promotes relaxation, which can be done in some situations, such as:

  • Muscle pain;
  • Bruises;
  • Boil and stye;
  • Torticollis;
  • Before physical activity.

A warm or warm compress can be placed on the back, chest or anywhere on the body where increased blood flow is required, however it is not recommended when you have a fever, for example, as there may be an increase in temperature body.

The warm compress can be used 3 to 4 times a day, for 15 to 20 minutes, but it should always be wrapped in a cloth diaper or other thin cloth, so that the skin is not burned.

How to make a warm compress at home
To make a warm compress at home, just use a pillowcase and 1 kg of dry beans, such as rice or beans, for example. Place the beans inside the pillowcase, tie them well to form a bundle, heat in the microwave for about 3 to 5 minutes, let it warm and apply to the painful region for 15 to 20 minutes.

If, even when using ice or hot water, the pain does not diminish or the symptoms worsen, one should go to the doctor so that tests can be carried out that can identify the cause of the pain and, thus, specific treatment can be indicated.

When to make hot or cold compress
Cold compresses with ice promote a decrease in blood flow in the region, reducing inflammation and pain, in addition to preventing the appearance of bruises. Thus, this type of compress is indicated for:

  • After hits, falls or sprains;
  • After taking an injection or vaccine;
  • In toothache;
  • In tendonitis;
  • After physical activity.

To make a cold compress at home, simply wrap a bag of frozen vegetables, for example, in a towel or cloth and apply to the painful area for 15 to 20 minutes.

Another possibility is to mix 1 part alcohol with 2 parts water and place in a ziploc- type bag and leave in the freezer. The contents must not be completely frozen, and can be molded as needed. The usage mode is the same.

Monday, June 7, 2021

Disposable Gloves, Squish Clear Vinyl Gloves Latex Free Powder-Free Glove Health Gloves for Kitchen Cooking Food Handling, 100PCS/Box, Medium

 Disposable Gloves, Squish Clear Vinyl Gloves Latex Free Powder-Free Glove Health Gloves for Kitchen Cooking Food Handling, 100PCS/Box, Medium

  •     Thick, Heavy-Duty Resilience – Crafted with Compound of vinyl-based Hybrid, these versatile gloves are stronger than latex while still giving you the dexterity and control you need for needles or equipment. They are powder-free, ambidextrous and offer a stretchy & comfy fit for both men and women.
  •     Bulk Box Order – You’ll receive a total of 100 total gloves to suit any office or service need. And because they come in compact, stackable boxes, they’re easy to store, and they’re also disposable for quick,and simple clean up.
  •     No Latex, No Powder: Without the use of latex or powder, your body will be kept in optimal
  •     Highly Versatile: Our gloves are designed to be highly versatile and can be used in a variety of professions: law enforcement professionals, physicians, food vendors, hair coloring specialists, painters, cleaners, pet care as well as in home improvement.
  •     Available in Medium sizes & counts: These power free exam gloves are 9.5” long, can be worn on either the right or left hand, and fit men and women equally. These powder-free exam gloves come in size M


Safety, hygienic and cleaning gloves, understand the difference


There are several professions for which the use of gloves is mandatory for safety and hygiene measures. Made from different materials, each type of glove meets a specific need. Let's talk a little more about the different types of safety and hygiene gloves and their uses.


CLEANING GLOVES
Usually made of latex , they protect your hands from chemicals that can cause allergies and other substances that can pose a risk of contamination, in addition to keeping your hands dry. As they can be reusable, they are widely used not only by cleaning professionals but also in homes, for cleaning purposes.

The most popular cleaning gloves are the yellow latex ones, which are easily found in supermarkets. Manufactured in several colors, they can come with or without a powder that is added to make it easier to wear, and some models contain small cotton flakes inside that absorb moisture and sweat, providing more comfort.


HYGIENIC GLOVES
Manufactured in vinyl , latex or nitrile , hygienic gloves are widely used in manicures, doctors' offices and tattoo studios to avoid contamination by chemicals or bodily fluids, in addition to being used in the kitchen, mainly professionally.

In addition to the differences in materials, they come in powdered and non-powdered options (talc or starch). Easier to put on, comfortable and resistant, hygienic powdered gloves cannot be used in any situation. In environments such as kitchens, laboratories and medical clinics, for example, dust-free ones are often preferred to avoid allergies and contamination. Now let's know what is the best type of hygienic glove for each situation and its specifications according to the material:


latex gloves
Despite offering good tactile ability and mechanical protection, they are less resistant to tears and latex can cause allergies in some people. They can come uncoated (good option for those who will reuse gloves, as they dry quickly), with cotton to absorb sweat, or with silver varnish, which protects hands from allergies. They can also be disposable or reusable, the first type being indicated for health, aesthetic and any other professions that have contact with bodily fluids and the second type, more resistant, indicated for cleaning and gardening.


nitrile gloves
Among the existing models of hygienic gloves, nitriles are the thickest and resistant to tears and abrasion, even though they are less elastic than latex ones. Despite its high resistance, it is necessary to pay attention to verifications and specifications, since there are different types of nitrile gloves and each one of them offers better protection against chemical, abrasive, biological and excoriating risks.

Made from a synthetic material, nitrile gloves are an excellent choice for those who are allergic to latex. Manufactured in different colors, they cater to professionals from different areas and each color is more common in a niche. Blue ones, for example, are generally used by healthcare professionals, while black ones are preferred by tattoo artists. Nitrile gloves are also widely used in agribusiness as they protect hands from pesticides, oils, grease and other materials.


vinyl gloves
Also more resistant to tears than latex, they are also non-allergenic and have excellent touch and sensitivity, often giving the impression of being gloves. For this reason, vinyl gloves are widely used in restaurants. They are less resistant to punctures and sticking than nitriles and are also generally cheaper. 


SAFETY GLOVES

  • Made of leather or fabric: offer thermal protection and against mechanical risks, being used in places where there is contact with abrasives and excoriators. They are widely used for the operation of machines, transport and handling of objects, sanding etc.
  • Made of steel: highly resistant, they are used to protect against cuts in places such as slaughterhouses, slaughterhouses and fishmongers.
  • Polyethylene: also with good mechanical strength, they are used to protect against cuts.
  • Made of treated leather, fabrics, ceramics or aramid fibers: used by professionals who are exposed to extreme heat.
  • Chemically treated cotton or nylon: resistant to tearing, abrasion and puncture without limiting movement.
  • PVC, neoprene, nitrile and latex: used for protection against chemical and biological agents by professionals in the pharmaceutical, aesthetic and healthcare industries, among others.
  • Rubber: protect against electric shock.

Saturday, June 5, 2021

First Aid Only 299 Pieces All-Purpose First Aid Emergency Kit (FAO-442)

 First Aid Only 299 Pieces All-Purpose First Aid Emergency Kit (FAO-442)

  •     Emergency Care: A total of 299 essential first aid supplies for treating minor aches and injuries
  •     Set Include: Adhesive fabric and plastic bandages, antibiotic ointments, BZK antiseptic towelettes, burn cream packets, aspirin, ibrufen, gauze roll and pads, wound closures, cold pack, and other multi-use items for any potential emergency
  •     Convenient Packaging: Fabric case with clear plastic pockets for organization and easy access to first aid supplies in an emergency
  •     Compact and Spacious: Two separate layers with individual compartments make retrieval easy and quick
  •     First Aid Care Ideal For: First aid care for home, travel, and on the go use


What You Should Know About Business First Aid Kit


Ensuring the safety and well-being of employees is a key factor in any sector. Despite this, there are many organizations that end up leaving this concern aside and forgetting, mainly, to have essential items, such as the first aid kit for the company, which is essential and mandatory by law.

Therefore, if you want to avoid risks, ensure the care of your employees in different situations and still avoid possible fines, be sure to check out our tips and information about the company's first aid kit. Let's start?

After all, why is it so important to have a first aid kit in the company?

The first aid kit is an essential item in corporations, as it allows the first care to the employee in case of an incident that may cause damage to their health. In other words, the moment between what happened and the arrival of professional assistance is crucial to ensure stability and control of the situation, thanks to the use of medicines and basic accessories, which can even be handled by another co-worker .

This simple action makes all the difference and can even save lives.

Is the company first aid kit mandatory?
Yea! According to NR 7.5.1, of the Ministry of Labor and Employment , every company has the obligation to keep at least one first aid kit on its premises, which contains the items and materials necessary to ensure the first attempts to maintain the employee alive or stable, until medical care arrives.

It is also noteworthy that this standard encompasses all types of companies, regardless of size, sector of activity and number of employees, varying only the types of items, according to the characteristics of the business.

What items need to be in the business first aid kit?
As mentioned above, everything that will appear in the kit is linked to the characteristics of the activity carried out in the environment and is described in the PCMSO.

However, among all the mandatory items, we highlight the following:

  • face mask;
  • surgical procedure glove (disposable);
  • protective goggles;
  • gauze;
  • bandages;
  • cotton;
  • clamp;
  • adhesive dressing;
  • cotton swab;
  • thermal, hot and cold bags;
  • bactericidal liquid soap;
  • adhesive plasters;
  • splints;
  • round tip scissors;
  • alcohol;
  • hydrogen peroxide;
  • saline.
In the same way that it is necessary to include all these items, there are others that are prohibited, such as anti-inflammatories, analgesics and other types of medication.

How to maintain the first aid kit for business?
It is not necessary that all company employees know how to use or keep the first aid kit up to date. Therefore, the importance of CIPA and events, such as SIPAT, to elect at least one person responsible for security in each sector.

This person must be trained on the use and function of each item, know where they are stored and, especially, pay attention to the constant maintenance of the kit, taking into account the necessary replacements by use, expiration date and conditions of the materials.

Anyway, having a first aid kit for the company should be seen much more as a legal obligation. After all, it is really a fundamental and extremely necessary accessory for the safety and well-being of your team.

Philips HeartStart Home and OnSite AED Defibrillator Replacement Battery

 Philips HeartStart Home and OnSite AED Defibrillator Replacement Battery

  •  Spare or Replacement Battery - This battery can be used as a spare or replacement battery for Philips OnSite AED (M5066A)
  • Shelf life - this battery has a five-year shelf life plus a (typical) four-year installed life
  • Carry a spare - it is recommended that you carry a spare battery with your defibrillator
  • Training - additional batteries should be purchased for defibrillators used frequently for training or demonstrations


How to use an automated external defibrillator (AED)


If an adult or adult is in cardiac arrest (unresponsive, not breathing, and not having a pulse), you can start CPR with chest compressions and yell for someone to call 911 for help and get an AED.

Cardiac arrest can be fatal if the victim is not treated within a few minutes. Surviving an out-of-hospital strike will depend on emergency help from the person closest to you.

What is an automated external defibrillator (AED).
An automated external defibrillator, AED (AED) is an electronic device that can examine the heart rhythm to determine if it is necessary to deliver a shock to a person in cardiac arrest. Although most cardiac arrests occur in adults, they can occur in a child or adolescent.

How to use an AED during an emergency:
When an AED is available, continue chest compressions and resuscitation while someone else turns on (activates the cigarette lighter) the defibrillator and attaches the sticky paddles or pads.

If the AED says "Shock / Shock Recommended", press the charge button and stay away from the patient, press the shock button when the light comes on. The AED reviews the heart rhythm to decide whether or not it is necessary to deliver a shock / shock. Make sure that no one touches the child if a shock is given.

Then summarize CPR. It is very important to minimize interruptions to resuscitation with breathing and chest compressions. Also, when applying chest compressions, withdraw completely from the chest between compressions to allow the chest to release the pressure between compressions.

AED Pads for Adults and Pediatric Use

Although all AEDs are made for adults, there are pediatric paddles that modify (set) the level of energy used. These paddles are designed for young children (under 8 years old).

You can use adult paddles on children over 8 years old.

You can use adult paddles for children under 8 years of age, but you should use them differently than indicated on paddles: put one in front of the chest, and the other on the back so that they do not come into contact. Once the paddles are attached, follow the instructions on the AED.

Take a CPR class to learn how to use an automated external defibrillator
For more information on how to use an AED, the American Academy of Pediatrics (AAP) recommends taking a class for parents and caregivers offered in your community or at a hospital. These classes will give you the opportunity to practice CPR and teach you how to use an AED.

The AAP also recommends age-appropriate survival classes, including CPR classes for older children and for all school personnel, beginning with those who work in elementary schools. The AAP also encourages having an AED in the vicinity of athletic facilities , as well as training for its use by staff and older children.

Thursday, June 3, 2021

Dermoplast Pain, Burn & Itch Spray, Pain Relief Spray for Minor Cuts, Burns and Bug Bites, 2.75 oz (Packaging May Vary)

 Dermoplast Pain, Burn & Itch Spray, Pain Relief Spray for Minor Cuts, Burns and Bug Bites, 2.75 oz (Packaging May Vary)

  •     One 2.75 oz can of Dermoplast Pain, Burn & Itch Spray
  •     Provides immediate pain and itch relief for minor skin irritations and postpartum care
  •     Maximum OTC strength of benzocaine provides immediate pain relief, menthol soothes and refreshes, and aloe and lanolin moisturize
  •     No-touch application lets you spray on relief without additional pain
  •     Clean affected area and apply Dermoplast spray


What to do in case of a burn


With most burns, the most important step is to quickly cool the skin so that the deeper layers do not continue to burn and cause injury.

However, depending on the degree of the burn, care can be different, especially in the 3rd degree, which should be evaluated as soon as possible by a doctor, in the hospital, to avoid serious complications such as nerve or muscle destruction.

In the following video, we indicate the first steps to treat a burn at home, in a light and fun way:

What to do with 1st degree burns

First-degree burns only affect the surface layer of the skin, causing signs such as pain and redness in the area. In these cases it is recommended that:

  • Place the burned area under cold water for at least 15 minutes;
  • Keep a clean cloth dampened with cold water in the region for the first 24 hours, changing whenever the water heats up;
  • Do not apply any product such as oil or butter to the burn;
  • Apply a moisturizing or healing ointment for burns, such as Nebacetin or Ointment. See a more complete list of ointments ;
  • This type of burn is more common when you spend a lot of time in the sun or when you touch a very hot object. The pain usually disappears after 2 or 3 days, but the burn can take up to 2 weeks to heal, even with the use of ointments.

Generally, 1st degree burns do not leave any kind of scar on the skin and rarely present complications.

What to do with 2nd degree burns
A 2nd degree burn affects the middle layers of the skin and, therefore, in addition to redness and pain, other symptoms such as blisters or swelling may appear. In this type of burn, it is advised that:

  • Place the affected area under cold running water for at least 15 minutes;
  • Carefully wash the burn with cold water and neutral pH soap, avoiding rubbing too hard;
  • Cover the area with a wet gauze  or with a lot of Vaseline, and secure with a bandage, during the first 48 hours, changing as necessary;
  • Do not pierce the blisters and do not apply any product on the site, to avoid the risk of infection;
  • Get medical attention if the blister is too big.
  • This burn is more frequent when the heat is in contact with the skin longer, such as when hot water is poured over clothing or is held in something hot for a long time, for example.

In most cases, the pain improves after 3 days, but the burn may take up to 3 weeks to disappear. Although second-degree burns rarely leave scars, the skin can lighten at the site.

What to do with 3rd degree burns
A third-degree burn is a serious, life-threatening condition as the deeper layers of the skin are being affected, including nerves, blood vessels and muscle. Therefore, in this case it is recommended that:

  • Immediately call an ambulance by calling 192 or take the person quickly to the hospital;
  • Cool the burned area with saline solution , or in its absence, tap water, for about 10 minutes;
  • Carefully place a sterile gauze moistened with saline solution or a clean cloth over the affected area until medical help arrives. If the burnt region is very large, a clean sheet moistened with saline solution can be rolled up, which does not shed hair;
  • Do not place any type of product on the affected region.
  • In some cases, the third-degree burn can be so severe that it causes multiple organ failure. In these cases, if the victim faints and stops breathing, cardiac massage should be started. See here the step-by-step of this massage .

Since all layers of skin are affected, nerves, glands, muscles and even internal organs can be severely damaged. In this type of burn you may not feel pain due to the destruction of the nerves, but immediate medical help is needed to avoid serious complications as well as infections.

What not to do

After burning the skin it is very important to know what to do to quickly relieve the symptoms, but you should also know what not to do, especially to avoid complications or sequelae. Thus, it is advised that:

  • Do not attempt to remove objects or clothing stuck to the burn;
  • Do not use butter, toothpaste, coffee, salt or other homemade product;
  • Do not pop bubbles that appear after the burn;
  • In addition, gel should not be applied to the skin, as the extreme cold, in addition to causing irritation, can worsen the burn and even cause a shock due to the large temperature difference.

When to go to the hospital
Most burns can be treated at home, however, it is advisable to go to the hospital when the burn is larger than the palm of your hand, many blisters appear, or it is a third-degree burn that affects the deeper layers of the skin.

In addition, if the burn also occurs in sensitive areas such as hands, feet, genitals or face, you should also go to the hospital.

Wednesday, June 2, 2021

New-Skin Liquid Bandage, Waterproof Bandage for Scrapes and Minor Cuts, 1 fl oz

 New-Skin Liquid Bandage, Waterproof Bandage for Scrapes and Minor Cuts, 1 fl oz

  •     One 1 fl oz package of New-Skin Liquid Bandage
  •     Waterproof bandage seals and protects minor wounds
  •     Skin protectant contains benzethonium chloride to help prevent infection by killing 99.9% of germs
  •     Fast-drying, flexible liquid skin bandage protects against water, dirt and germs and stays on your skin unlike traditional adhesive bandages
  •     Clean the affected area, apply a small amount and let dry


Liquids used in dressings: to use or not?


Until recently, our mothers and grandmothers used several medications, which in their understanding had miraculous abilities to heal wounds, among them we can highlight mercurochrome, a reddish-looking liquid, merthiolate, a colorless liquid that burned a lot when placed on the the wound, and the hydrogen peroxide that burned as hot as merthiolate and caused a boil over the wound. All these medications are now in disuse, below we explain why.

The current procedure to treat any type of wound is basically washing it with soap and water, this procedure alone is enough to kill the bacteria present in the wound. Washing the wound prevents infections and even minimizes cases of allergic reactions, especially in burns where sensitivity is usually greater.

We emphasize that the cuts, whether superficial or deep, should only be cleaned with soap and water, in the case of deeper ones, it is necessary to go to the doctor, given that in some cases it is necessary to stitch the cut. Another case in which dressings are necessary are burns, which must be covered with gauze soaked in Vaseline so that they do not stick to the wound.

It was previously unknown that washing the wound well would aid in healing, as it eliminates bacteria and minimizes the risk of infection. Older people should remember medicines used at the wound site, which came with a kind of shovel, used to apply to the wound site. Its direct use on the wound helped in the proliferation of bacteria that developed in the flask, which were then passed on to another wound, contaminating another person. Therefore, nowadays it is a consensus among physicians that the best way to perform the asepsis of a wound is using water and mild soap.