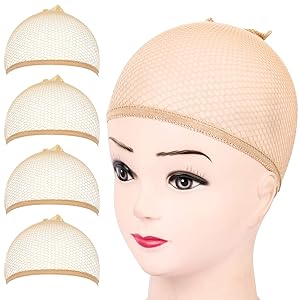
FANDAMEI Wig Cap, 4PCS Light Brown Mesh Wig Cap Net, Closed End Hair Mesh Net Wig Caps, Liner Weaving Caps for Women, Men, Kids
- Package Included: Total 4 pieces light brown mesh net wig caps. Color: Light brown.
- Closed End Design: The mesh wig cap have a closed design that can wrap you hair easily and help you hold your hair in place quickly.
- Breathable and stretchable- The hair wig cap is made of soft, durable and stretchy nylon material. Mesh net design is breathable and sweat-absorption which makes you feel more comfortable even in summer. Not easy to break, prolong the using time. One size fits most people due to the great elasticity.
- Natural looking- Lightweight and ultra-thin which can put your hair in order naturally and trimly; Natural color will not be easily noticed and provide a natural looking. Help you create a variety of styles. Not only fit women, but also men, kids.
- Convenient to use- Easy to wear and take off. Washable and reusable that can keep the wig and your hair clean. Help you hold your hair in place easily and comfortable. It is an essential tool for Halloween, makeup party, cosplay, etc.

How to make a wig cap
Making a wig takes a long time, but the results are worth it. Although you can always buy a pre-made hat to sew or air the fibers over it, nothing guarantees that it will fit. If you make your own wig cap, you will be sure to make a good base that will fit perfectly. However, for that purpose, you will need a custom-sized wig mannequin head or you can modify one you already have to fit your measurements. If you are working with a mannequin head that does not have standard measurements, the wig cap (and the resulting wig) could be too small!
Part 1 Make a mold of your head
1
Pull your hair back in the same way that you would wear it under the wig. Some people like to do a French braid or two , while others go for African braids . The way you braid your hair is not very relevant because it will affect the size and shape of the wig cap. [two]
- You need to make a mold of your head to modify the mannequin head for wigs. Otherwise, the wig cap will not fit. [3]
- If you already have a canvas head to make wigs the same size as your head, you can skip this part and click here to continue.
2
Cover your hair with plastic wrap. Make sure to extend it beyond the hairline. That includes the ears, forehead, and nape. Extending the plastic wrap beyond the hairline will reduce the chances of the duct tape sticking to your hair in later steps. [4]
- Use clear plastic wrap if possible. That way, subsequent steps will be easier.
- If you have a nylon cap that you can wear under your wig, it is recommended that you put it on first.
- If the plastic wrap is slipping around too much, secure it to your forehead with a piece of tape.
3
Cover the plastic wrap with two layers of clear packing tape. Wrap the tape around the hairline first, being careful to avoid the skin. Cover the rest of the wrapping plastic in overlapping rows of tape. Do this step twice. There should be no weak points. If you feel like one side is weak, that means you forgot the plastic wrap. Cover it with a piece of duct tape! [5]
- The taped plastic will have a bit of excess, which is fine. It should not be soft, like fabric.
- You must use clear packing tape. Otherwise, you won't be able to see the hairline in the next step.
4
Trace the hairline and ears with a permanent marker. It is recommended that you get someone to help you with this step, especially when you reach the rear. If you see yourself in the mirror, you should see the hairline through the plastic wrap. Trace around the hairline, from the forehead to the nape of the neck. Make sure to include the ears as well. [6]
- Don't worry if the marker stains your skin or hair. That is why you extended the plastic wrap past the hairline!
- If you don't have a helper, look into the mirror and hold a smaller mirror in front of you so that you can see the back of your head.
5
Remove the plastic wrap covered in duct tape. You should be able to slide it off your head easily. If not, dip your finger in the water, then run it along the inside edge of the hat to separate it from your skin. [7]
- If you still can't remove the plastic, make a careful cut (preferably at the back), then slide it off.
- If you previously put on a nylon wig cap, it could come off along with the plastic wrapper. Just remove it.
6
Use scissors to cut off excess tape and plastic wrap. Follow the line you drew with the marker, leaving a 1⁄2 to 1 inch (1 to 3 cm) border. Make sure to also trim the part of the ears. When you are done, you should have a hat that fits perfectly on your head, follows the hairline and the ears. [8]
7
Reinforce the inside of the plastic mold with more tape. If you make a cut in the mold, you will need to close it and tape it first. Next, cut small pieces of masking tape and use them to cover the inside of the mold, overlapping them as you go. For a nicer finish, you can wrap the masking tape around the cut edges of the hat. [9
Part 2 Modify the mannequin head
1
Get a styrofoam wig mannequin head. You can purchase styrofoam wig mannequin heads at well-stocked arts and crafts stores, wig stores, and beauty supply stores.
2
Place the mannequin head on a wig stand. You can find them online, wig stores, or some beauty supply stores. It can be the type of tall supports that you place on the floor or the shorter type that you put on the table.
- If you don't have a wig stand, insert a dowel into a Christmas tree stand and use it as a wig stand. You can also insert the mannequin's head into a bucket full of rocks.
- If you need a homemade wig stand board, you can use a paper towel holder. However, you may need to break the outer stick that comes in contact with the outer part of the paper towel.
3
Fill the inner part of the head mold to fit the wig mannequin head. You can do this with polyester padding, paper towels, or even cotton pads. The amount of filler you put in will depend on how large the head is compared to the head of the wig mannequin. Most styrofoam wig mannequin heads are small, so you may not have to overfill the mold. [10]
- If you decide to use paper towels or even pieces of paper, be sure to tear them up and not bend them. This will make it easier to insert the pins later. [eleven]
4
Slide the head cast over the mannequin head and add more padding if necessary. Slide the mold with the filling onto the wig mannequin head. It should be padded enough so that it feels firm to the touch, without leaving too much room. If you see any dents you will need to fill the mold a bit more.
5
Secure the head mold to the wig mannequin head mold with pins. Place them along the edges of the mold, below the drawn hairline. It is best to use simple all-metal pins that look like nails. If you use the type of pins that have round glass or plastic heads on the ends, you will have a difficult time fitting the net into the wig cap. Once you do, you are ready to make a wig cap.
- You can also secure the head-to-head wig mold with tape. Masking tape will work best for this purpose. If you cover the drawn hairline, be sure to trace it again. [12]
Part 3 Pinning the wig cap
1
Purchase a wig-weaving net from a wig-making supply store. It will be even better if you buy two nets and place them one on top of the other. That way, you will have a stronger base. You can buy them online and in stores that sell wig-making supplies. [13]
- If you're buying nets from a fabric store, you'll need enough to cover your head and hairline, plus a few more inches.
- You can also use French lace or other types of lace used to make wigs. If you are going to vent the fibers of the wig, you will need to purchase lace to vent wigs.
2
Pull the net tightly across the forehead and secure with sewing pins. Cover the mannequin head with a wig net with the front edge 1 to 2 inches (3-5 cm) below the hairline. Pull the net tightly across the forehead and secure with sewing pins. You will need a pin at the front center of the web and another at each temple. [14]
- Insert the pins at a slight angle. This will prevent the net from slipping past the head of the pins.
3
Repeat the process for the back of the mannequin head. Work your way towards the back of your head. Pull the net down until it is snug across the top of your head. Secure it to the nape with more sewing pins. Place them about 1 inch (2.5 cm) below the drawn hairline. [fifteen]
4
Secure the sides of the net over the ears. Lower the net as you pin so it is snug and looks good. You need a pin in the front and behind each ear hole. Make sure the lace goes beyond the hairline. Otherwise, it will be off-center or too narrow. [16]
- If the lace is too narrow, you will have to cut a larger piece and start over.
- If the lace is not centered, you will need to snap it back into place and re-pin it.
5
Pin the net to create darts and make it tighter. You will need to create a clip in the front and behind each ear. Hold the edges of the net so that it stretches smoothly against the mannequin's head. Secure the clamp with pins following the curve of the mannequin's head. When you're done, the net should run neatly across the top of the mannequin head. [17]
- Make sure to only pin the length of the web. Do not insert them into the mannequin head.
Part 4 Sewing and finishing the wig cap
1
Remove the pins from the edge, and then pull the hat off the mannequin head. Remove the pins securing the net to the mannequin head, then pin it out. Do not remove the pins that hold the clips together. Also, do not remove the mold that you previously secured to the mannequin head with pins. [18]
2
Sew the darts together using the inserted pins as a guide. You can do this on a sewing machine, overlocker, or by hand. If you are using a sewing machine, be sure to backstitch at the beginning and end of the seam. Remove the pins as you sew and be sure to use a colored thread that matches the lace. [19]
3
Cut the seams. In case you sewed the darts with a sewing machine or by hand, you will still see triangle flaps sticking out of the seams. Cut them until the seams are 1⁄4 to 1⁄2 inch (6 mm to 2 cm) wide.
- Skip this step if you used a serger, as the machine will have already done it for you.
4
Run the machine over the raw edges using a zigzag stitch if desired. You don't have to, especially if you used a serger, but it will give you a nicer finish. Remember to use a matching thread color and topstitch (if you are using a sewing machine).
- Skip this step if you used a serger. The seams will already be finished.
5
Cut loose threads. Check the wig cap and cut off any strands that are loose or dangling. For a nicer finish, consider hand-setting the seams so that they lie flat.
6
Finish the wig cap as desired. At this point, you can trim the excess lace to match your hairline. You can also hem the lace as desired, or sew it onto an elastic. Another alternative is to sew an elastic or a ventilation panel towards the top. Then cut the net under it. [twenty]
- If you are making a lace front wig , do not cut the excess lace along the front hairline. You will need it to paste the wig.
Advice
- You can find most supplies in beauty supply stores and wig stores. Online stores that specialize in wig-making supplies also have the products you need.
- The exact type of lace you use will depend on the type of wig you are making. If you are simply sewing braids over the wig, you will only need to use lace to weave wigs. If you are going to make a vented wig, you will need something thinner.
Things you will need
- Nylon wig cap (optional)
- plastic wrap
- clear packing tape
- permanent marker
- pair of scissors
- mannequin head for styrofoam wigs
- wig stand
- sewing pins
- net for weaving wigs, lace for airing wigs, etc
- sewing machine
- thread