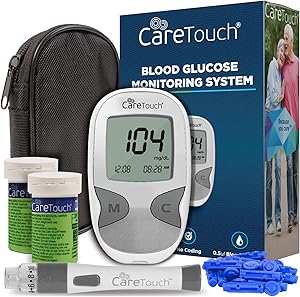
Care Touch Diabetes Testing Kit – Care Touch Blood Glucose Meter, 100 Blood Test Strips, 1 Lancing Device, 30 gauge Lancets-100 count and Carrying Case
- FAST RESULTS – Get results in as little as 5 seconds.
- NO CODING – Our monitors recognize batch codes encrypted on each test strip, so there is no need for you to manually insert any code with each new batch.
- HYGIENIC STRIP EJECTION – Our state-of-the-art monitoring system includes a single touch strip ejection, so you no longer have to worry about manually removing the soiled strip.
- MEMORY – Keep a survey of your health using the memory storage capable of saving up to 300 readings, while also keeping a continuous 14-day average.
- Care Touch Diabetes Testing Kit – Care Touch Blood Glucose Meter, 100 Blood Test Strips, 1 Lancing Device, 30 gauge Lancets-100 count and Carrying Case

How to measure glucose in the blood
People with diabetes try to keep their blood glucose (sugar) level as close to normal as possible. Keeping your blood glucose level within the desired range can help prevent or delay the onset of diabetes complications, such as nerve, eye, kidney, and vascular damage.
Once you discover that you have diabetes, you and your doctor make a plan for your diabetes care. The goal of the plan is to balance the foods you eat, the exercises you do, and possibly the medications you take to treat diabetes (pills or insulin).
There are two kinds of checks to help you see how your plan is working. They are blood glucose controls and urine ketones controls.
Checks for monitoring blood glucose
Glucose monitoring is the main tool that we have to control diabetes. With this control, you can know your blood glucose level at any time. It is essential to keep a record of the results. When you review this record with your doctor, you will have a better idea of how your body responds to your diabetes care plan. Blood glucose checks let you know what works and what doesn't. With that information, you and your doctor, dietitian, or diabetes educator can make the necessary changes.
Glycemic control
A1C: <7.0%
- Pre-prandial glucose (fasting): 70-130 mg / dl (5.0-7.2 mmol / l)
- Post-prandial glucose (after eating): <180 mg / dl (<10.0 mmol / l)
- Blood pressure: <130/80 mmHg
Lipids
- LDL cholesterol: <100 mg / dl (<2.6 mmol / l)
- Triglycerides: <150 mg / dl (<1.7 mmol / l)
- HDL cholesterol: > 40 mg / dl (> 1.1 mmol / l)
Who should carry out the checks?
Experts say that everyone with diabetes can benefit from measuring their blood glucose level. The American Diabetes Association recommends blood glucose monitoring if you have diabetes and if:
- You need insulin or take diabetes pills
- You are undergoing intensive insulin therapy
- Are pregnant
- Finding it very difficult to measure blood glucose levels
- Have blood glucose levels that are too low or have ketones due to high blood glucose levels
- You have low blood glucose levels but without the usual warning signs
Urine checks
Urine glucose tests are not as accurate as blood glucose tests. Urine glucose monitoring is not recommended unless blood glucose monitoring is impossible.
Testing your urine for ketones is different. That control is important when diabetes is out of control or when the person is sick. Moderate or large amounts of ketones can be detected in the urine when the body burns fat instead of glucose for food. This happens when there is very little insulin in the body. Everyone with diabetes needs to know how to check their urine for ketones.
How is glucose in the blood measured?
Your finger must be pricked with a special needle called a lancet to remove a drop of blood. With some gauges, you can also use your forearm, thigh, or a fleshy part of your hand. There are devices equipped with spring loaded lancets to make drawing blood less painful. Before using the lancet, wash your hands or the area chosen to draw blood with soap and water. If you use the fingertip, insert the needle into the area of the fingertip closest to the nail to avoid pain in the part of the finger that you use most frequently.
How to control with a glucose meter?
Blood glucose meters (or glucometers) are small computerized devices that "read" glucose in the blood. On all meters, the blood glucose level appears as numbers on a screen (just like on a pocket calculator). Consult with your doctor or diabetes educator to teach you how to use the meter correctly. With all the advancements in blood glucose meters, using a glucometer is better than visual monitoring.
How to choose a glucometer?
There are many glucometers to choose from. There are glucometers for people with vision problems. Others include memory so you can save the results to the meter itself. The American Diabetes Association does not endorse or recommend any particular glucometer. If you plan to buy one, here are some questions to help you with your selection:
- Which glucometer does your doctor or diabetes educator prefer? Perhaps there are some in particular that they use more often and know better.
- How much does a glucometer cost? Some insurance companies only pay for certain models of glucometers. Before purchasing a meter, contact your insurance company and find out how to get a meter and supplies. If your insurance company does not cover glucose monitoring supplies, you can often get them at a discount at the place where the meter is purchased. In addition, you must also take into account the cost of the corresponding test strips and lancets. Check prices.
- Is it easy to use the glucometer? The methods differ. Some have fewer steps than others.
- Is it easy to maintain the glucometer? Is it easy to clean? How is the meter calibrated? That is, how do you properly fit the batch of test strips you are using?
How do I measure my blood glucose?
After washing your hands, insert the test strip into your meter.
Prick the side of your fingertip to get a drop of blood.
Touch and hold the tip of the test strip on the drop of blood, wait for the results.
Your blood glucose level will appear on the meter.
To avoid errors or bad measurements. Here is a list of problems that can cause the meter to read incorrectly:
- A dirty meter
- A meter or test strip that is not at room temperature
- Expired test strips
- An uncalibrated meter (that is, one that was not programmed to fit the test strip container in use)
- A drop of blood too small
- Check with your doctor to see if you are using the meter correctly, at least once a year. Over time, mistakes can be made.
How to record the results?
After you finish testing your blood glucose, write down the results and use them to see how diet, physical activity, and stress affect your blood glucose levels. Pay particular attention when checking your blood glucose log to see if the level is too high or too low for several days in a row and around the same time. If that situation recurs, it may be time to change the plan. Check with your doctor or diabetes educator to find out what the results mean for you. That takes time. Check with your doctor or nurse if you should immediately contact by phone, in case the recorded results are not within the desired parameters.
Be aware that blood glucose results often provoke strong emotions. Your blood glucose results can make you feel upset, confused, frustrated, angry, or depressed. It is common to be tempted to use the results to judge yourself. Remember that your blood glucose level is one way to see how your diabetes care plan is working. It is not an opinion about you as a person. The results will likely indicate that you need a change in your diabetes care plan.
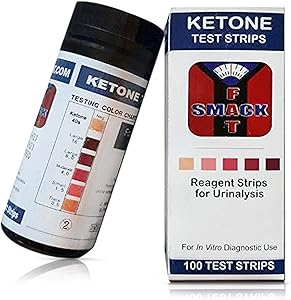
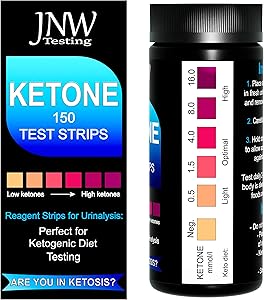
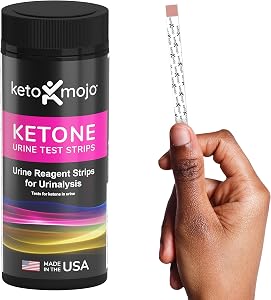
How to detect ketones?
From time to time, you may need to test your urine for ketones. Ketones in the urine are an indication that the body is using fat for energy instead of glucose, because it does not have enough insulin to use glucose for energy. The presence of ketones in the urine is more common in type 1 diabetes.
Urinalysis is easy, but to get reliable results, you must follow the instructions carefully. Check that the test strip is not expired. Read the leaflet that came with the test strips. Go over the correct way again with your doctor or nurse.
The following is how most urine tests are done:
Place a urine sample in a clean container
Put the test strip in the sample (or you can put the test strip directly under the urine stream)
Gently remove excess urine from the test strip
Wait until the absorbent device on the test strip changes color. The instructions specify how long to wait
Compare the absorbent device on the test strip with the color chart on the test strip vial. This will give you a parameter of the amount of ketones in your urine
Take note of the results
What do those results mean?
If trace amounts or small amounts of ketones are detected, it may be the beginning of ketone build-up. In that case, wait a few hours and repeat the test. Large or moderate amounts are a sign of danger. Ketones alter the chemical balance of the blood and can poison the body. Never do physical activity if your urine tests detect moderate or large amounts of ketones and your blood glucose is high. Those are signs that diabetes is out of control. If your urinalysis results show moderate or large amounts of ketones, see your doctor immediately.
It is important that you keep a record of the results and related episodes. The logbook provides the information that you, your doctor, and your diabetes educator need to tailor your diabetes care plan to your needs.
When to perform the analysis?
Check with your doctor or nurse about when to check your urine. Your doctor will likely advise you to test your urine for ketones when:
- Blood glucose level is above 300 mg / dl
- Nausea, vomiting, or abdominal pain
- You are sick (for example, you have a cold or the flu)
- It feels continuously
- Thirsty or very dry mouth
- Has red skin
- Difficulty breathing
- Your breath smells "fruity"
- You feel confused or "groggy"
Check with your doctor as these can be signs of high ketone levels.