Friday, February 12, 2021
Thursday, February 11, 2021
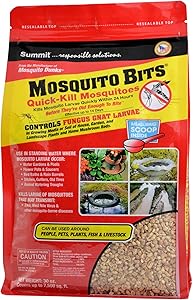
Summit Responsible Solutions Mosquito Bits - Quick Kill, 30 Ounce
Summit Responsible Solutions Mosquito Bits - Quick Kill, 30 Ounce
- Environmentally Sound Biological Mosquito Control
- Sprinkle Mosquito Bits to quickly annihilate the larval population; Corn cob granules coated in Bti, the Bits (do not last long but) provide a punch, turning water black with larvae, to a clear pool void of future mosquitoes
- The Mosquito Bits are labeled to control Fungus Gnats in plant beds or pots
- Bits can be sprinkled on the soils surface or mixed with potting soil prior to planting will kill fungus gnat larvae with the same safety and target specific control offered for mosquito larvae

The 8 easiest homemade insecticides to make to eliminate pests from your garden
Infocampo brings information about how to make homemade pesticides, with few elements, for any green space, easy to get and that give excellent results.
Inside your garden , garden or green space , it is very likely to find certain pathogens that damage our crops . From insects to fungi and bacteria , they are the ones we must fight so that our harvest is optimal.
Within this framework, Infocampo provides information about how to make homemade pesticides , with few elements, easy to obtain and that give excellent results .
Here are some of the easiest and most efficient options:
GARLIC INSECTICIDE SPRAY
Vegetable garden specialists assure that garlic is a powerful natural repellent for insects, with the ability to dissuade and scare away.
To prepare it, you need to crush a head of garlic in the blender, with some cloves, and add two glasses of water.
Then let it rest for a day and then mix this solution again in 3 liters of water. The mixture obtained can be vaporized directly on the leaves of the plants.
• Mainly attacks aphids .
FUNGICIDE WITH MILK
The predisposing conditions for the appearance of fungi in our plants are usually high temperatures and humidity. So in summer, it is very easy for them to appear.
To prepare this fungicide, you need 8 parts of water, preferably from rain, and if not from the tap, and let the water rest for two days. Then, add two parts of milk (for a liter it would be 800 ml of water and 200 ml of milk), preferably skimmed since we are interested in the product are the salts and amino acids and not the cream (what interests us the most about milk it is lactic acid which is a powerful fungicide).
Next, 20 g of sodium bicarbonate is added for each liter of the mixture. It has a great disinfecting and healing power, and finally it is placed in a sprayer, and it mixes well. It is applied two days in a row, always at dusk or after a storm. Then it is applied preventively every 15 days.
• It is used to combat powdery mildew, mildew and rust
INSECTICIDE WITH TOMATO
They claim that tomato leaves are rich in alkaloids, an excellent repellent for various insects.
For its preparation, you need to fill two cups with chopped tomato leaves and add water. Let it sit for at least one night and dilute the mixture in two glasses of water.
With these simple steps, the plants are sprayed with tomato spray and after a few days the results will be seen. Important: keep away from pets as it can become toxic to them.
• Mainly attacks aphids, worms and caterpillars
EGGSHELLS
These egg residues are excellent for the garden, since they have a double impact: they can be used as fertilizer, and at the same time as a repellent, in pieces or shredded.
The powder can be crushed and spread at the base of the plants, creating a kind of "ring" at the base of the plant, creating a barrier so that snails and caterpillars cannot enter.
• Mainly attacks caterpillars and snails
INSECTICIDES FOR SNAILS AND SLUGS
The snails and slugs are often one of the biggest problems that must be faced, because the leaves are eaten, but mostly feed on buds newly planted plants.
The ideal is to apply it when the snails or slugs become a plague, if we have few snails and the damage is not very serious, the specialists recommend not to apply anything.
There are three ingredients that manage to end this plague.
PEPPER INSECTICIDE
To prepare the spray, you must beat a handful of pepper with two cups of water in a blender on high speed for 2 minutes . Leave the mixture overnight. The next day, filter and add a glass of water.
ONION INSECTICIDE
Mix three onions with water in the blender. Then place the mixture in a jar with water and let it sit overnight. The next day, filter and you are ready to apply.
• Mainly attacks the spider mite, whitefly and aphid
CITRIC ORANGE OIL
Mix three tablespoons of organic liquid soap with 30 ml of orange oil and add four liters of water. Then apply the product to the plants
• Mainly attacks ants and cockroaches
For more information on vegetable garden, Infocampo recommends the following publications
The seven most efficient homemade organic fertilizers for your garden
What to sow in January: the most appropriate crops to start a garden
GARLIC INSECTICIDE SPRAY
Vegetable garden specialists assure that garlic is a powerful natural repellent for insects, with the ability to dissuade and scare away.
To prepare it, you need to crush a head of garlic in the blender, with some cloves, and add two glasses of water.
Then let it rest for a day and then mix this solution again in 3 liters of water. The mixture obtained can be vaporized directly on the leaves of the plants.
• Mainly attacks aphids .
FUNGICIDE WITH MILK
The predisposing conditions for the appearance of fungi in our plants are usually high temperatures and humidity. So in summer, it is very easy for them to appear.
To prepare this fungicide, you need 8 parts of water, preferably from rain, and if not from the tap, and let the water rest for two days. Then, add two parts of milk (for a liter it would be 800 ml of water and 200 ml of milk), preferably skimmed since we are interested in the product are the salts and amino acids and not the cream (what interests us the most about milk it is lactic acid which is a powerful fungicide).
Next, 20 g of sodium bicarbonate is added for each liter of the mixture. It has a great disinfecting and healing power, and finally it is placed in a sprayer, and it mixes well. It is applied two days in a row, always at dusk or after a storm. Then it is applied preventively every 15 days.
• It is used to combat powdery mildew, mildew and rust
INSECTICIDE WITH TOMATO
They claim that tomato leaves are rich in alkaloids, an excellent repellent for various insects.
For its preparation, you need to fill two cups with chopped tomato leaves and add water. Let it sit for at least one night and dilute the mixture in two glasses of water.
With these simple steps, the plants are sprayed with tomato spray and after a few days the results will be seen. Important: keep away from pets as it can become toxic to them.
• Mainly attacks aphids, worms and caterpillars
EGGSHELLS
These egg residues are excellent for the garden, since they have a double impact: they can be used as fertilizer, and at the same time as a repellent, in pieces or shredded.
The powder can be crushed and spread at the base of the plants, creating a kind of "ring" at the base of the plant, creating a barrier so that snails and caterpillars cannot enter.
• Mainly attacks caterpillars and snails
INSECTICIDES FOR SNAILS AND SLUGS
The snails and slugs are often one of the biggest problems that must be faced, because the leaves are eaten, but mostly feed on buds newly planted plants.
The ideal is to apply it when the snails or slugs become a plague, if we have few snails and the damage is not very serious, the specialists recommend not to apply anything.
There are three ingredients that manage to end this plague.
- 1. Spread remains of ash from the wood
- 2. Beer : snails are attracted by the smell of it. If we place a jar full of this liquid in the soil of our garden, the slugs will advance towards this suggestive aroma and will die drowned.
- 3. Caffeine : you should mix water with 2% caffeine around the flowers, the next day, they ensure that most of the snails will have died.
PEPPER INSECTICIDE
To prepare the spray, you must beat a handful of pepper with two cups of water in a blender on high speed for 2 minutes . Leave the mixture overnight. The next day, filter and add a glass of water.
ONION INSECTICIDE
Mix three onions with water in the blender. Then place the mixture in a jar with water and let it sit overnight. The next day, filter and you are ready to apply.
• Mainly attacks the spider mite, whitefly and aphid
CITRIC ORANGE OIL
Mix three tablespoons of organic liquid soap with 30 ml of orange oil and add four liters of water. Then apply the product to the plants
• Mainly attacks ants and cockroaches
For more information on vegetable garden, Infocampo recommends the following publications
The seven most efficient homemade organic fertilizers for your garden
What to sow in January: the most appropriate crops to start a garden
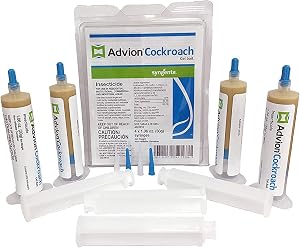
advion 383920 4 Tubes and 4 Plungers Cockroach German Roach Pest Control Inse, Brown
advion 383920 4 Tubes and 4 Plungers Cockroach German Roach Pest Control Inse, Brown
- The Package Length of the Product is 5.08 centimeters
- The Package Height of the Product is 17.78 centimeters
- The Package Width of the Product is 16.51 centimeters
- Package Weight : 0.272 kilograms
16 plants that help us control pests in an ecological way
Farmers have always experimented with wild plants, interspersing them among their crops. With this they intend to create associations of plants that protect crops from pests in a natural and ecological way . Increasing biodiversity seems to be the right way.
Today we are going to learn a way to naturally repel unwanted insects or pests . Having an organic garden requires care and dedication. A good way to keep it naturally, without using chemicals such as pesticides or pesticides, is to plant one of the varieties of plants listed below with our crops.
In case you have to use pesticides, I recommend these organic homemade pesticides .
Pathogens normally find their host plants by sight and / or smell . Interspersing aromatic or strong-smelling plants can cause them to become disoriented. Planting showy flowers can distract pathogens that are normally looking for less visible plants. With this type of plants what we are going to achieve is to increase the attraction on some pathogens or reduce it or mask it in others.
Calendula .
Repels aphids, bed bugs, whiteflies and nematodes. Repels the asparagus beetle. It attracts many beneficial insects to your garden. The scent of its flowers attracts hoverflies, great aphid eaters.
Garlic .
In addition to being one of the most widely used spices in the kitchen, growing garlic in your garden is very beneficial, especially if you want to grow tomatoes , as it is a natural bactericide and fungicide. The plant acts as a repellent for pests that normally attack them. Repels nematodes. It is also used in carrot and strawberry crops. Sown between carrots helps us repel the carrot fly.
Romero .
Rosemary is considered an easy plant to grow and suitable for beginning gardeners, it has a good tolerance to pests. This shrub is capable of defending itself against the cabbage butterfly and the carrot fly. Sage is a great companion to rosemary. It attracts pollinators.
Tansy .
Known by the names of tansy, worm grass, atanasia, seizure herb or St. Mark's herb, the strong aroma of this medicinal plant repels flying insects. It can be planted in any garden or orchard.
Mint .
A herbaceous plant that is widely cultivated in the world due to its aromatic essences. The scent of peppermint repels lepidoptera, such as the kale butterfly, ants and rats. It is a good option to cultivate bordering crops. At the edges of the garden it slows down the ants. It also repels rodents. Attracts bees, bumblebees, and butterflies. Helps control insect pests.
Thyme .
This plant, widely used for cooking in condiments and sauces, requires little care and prefers dry land. Thyme has practically no enemies. Cabbage butterfly repellent. It attracts bees and repels harmful insects.
Salvia .
With long, stubby leaves, sage has a strong, yet refreshing flavor, slightly similar to rosemary. Repels whiteflies, cabbage moths and slugs .
Carnation of the Dead .
It is planted to kill nematode, mealybug and other animal pests that attack plant roots.
Cilantro .
Coriander, widely used in cooking, is effective in controlling aphids and mites.
Geranium.
In addition to being a very beautiful plant and having flowers of various colors, geraniums help protect the garden. It is a natural repellent for insects.
Citronella .
Citronella is a medicinal plant used as an insect repellent, being very effective against flies, mosquitoes and ants.
Nasturtium .
Also popularly known as peló, blood flower and watercress from Mexico, it is a flower that can be edible, as long as it is grown without the use of pesticides. Repels nematodes, worms that attack and kill plants, and insects. Keeps broccoli free of aphids. Worm-free pumpkins. Keep cottony aphids away, common aphids, squash bugs, striped beetles, snails and ants.
Wormwood .
Medicinal plant as well as a natural insecticide. It will make the animals go away to your garden or orchard. Repels weevils, mites and caterpillars in corn plantations.
Basil .
How to reproduce basil indefinitely by cutting
The basil repels and repels whiteflies, mosquitos, flies and bedbugs. Widely used in tomato and pepper crops. It attracts pollinators by increasing production.
Lavender .
It attracts bees, bumble bees and butterflies.
Dill .
Dill is an ideal plant to grow alongside cabbages, cucumbers, lettuce, corn, or onions. It attracts hoverflies, bees and wasps, which will help us against pests as predators that they are. It serves as a repellent against aphids, spiders or mites.
Neatmaster Ultrasonic Pest Repeller Electronic Plug in Indoor Pest Repellent, Pest Control for Home, Office, Warehouse, Hotel (White)
Neatmaster Ultrasonic Pest Repeller Electronic Plug in Indoor Pest Repellent, Pest Control for Home, Office, Warehouse, Hotel (White)
- Fine tuned the range of ultrasonic frequencies
- Three function modes, green, blue and red, green and blue is inaudible, red is audible
- It can cover an area of 80 to 120 square meters
- Put one in one room as ultrasonic wave can not penetrate through walls and solid objects
- Working with low frequency ultrasonic wave

10 homemade pesticides to eliminate pests in the garden or garden
Often our gardens and orchards are affected by an infestation of aphids, ants, slugs or mites. Often the easy recourse is to buy a pesticide to save the crop, or if we want to have totally organic food, the harvest may be reduced or lost.
The pesticides that we find in many stores are chemicals that are used in agriculture to protect crops against insects, fungi, weeds and other pests. According to the WHO, pesticides are also potentially toxic to humans. They can have harmful effects on health, for example, cause cancer or have consequences for the reproductive, immune or nervous systems. Before their use is authorized, pesticides must be studied for all their possible health effects.
Long before chemical pesticides were invented, farmers had home remedies to get rid of insect invasions that affect plants. These natural alternatives to chemical pesticides can be easily made at home and can save our garden harvest.
Garlic
Garlic is a powerful insect repellent, capable of driving them away. To prepare this spray, a head of garlic with some cloves (species) must be crushed in the blender, together with two glasses of water until a homogeneous mixture is obtained. Let this mixture rest for a whole day and then add 3 more liters of water. It can be applied by directly steaming the leaves of the plants.
Tomato
leaves are rich in alkaloids, an excellent repellent for aphids, worms and caterpillars. Fill two cups with chopped tomato leaves and add water. Let it sit for at least one night and dilute the mixture in two glasses of water. It is important to keep it away from pets because it can be toxic to them.
Eggshell
Shells can be a good fertilizer for the soil and also a repellent for snails and some caterpillars. The husks are crushed and the powder is sprinkled at the base of the plants.
Cilantro
To kill mites, coriander is a great remedy. This plant should be boiled with water for about 10 minutes, strain the mixture and pour it into the garden or garden with the help of a spray.
Vegetable oil
To kill aphids, mealybugs, mites or caterpillars a good solution is to mix 2 cups of vegetable oil with half a cup of pure liquid soap, shake until it is a white mixture, dilute it in water and spray it with a spray. It is preferable to use it in the morning or afternoon when the sun is not out, because at more than 30 degrees Celsius it can damage the plant.
Calendula or Basil
Planting calendula or basil around plants is a great solution to ward off whiteflies.
Cow's milk
To kill insect eggs, mix half a cup of fresh, unpasteurized milk with 4 cups of flour and 20 liters of water.
Nettle
Nettle, besides being an annoying plant that causes irritation if you touch it, is an excellent pesticide for aphids and fertilizer for the soil. Mix 100 grams of nettle with 10 liters of water, let it rest for 4 days and it is ready to use.
Tobacco
With natural tobacco we can combat the annoying plague of red spider mites. 60 grams of tobacco should be mixed with 1 liter of water and 10 grams of natural soap. Spread the mixture every 7 days for two months.
Lavender
Lavender is a great solution for repelling ants. An infusion should be made with 300 grams of fresh lavender leaves with 1 liter of water. Let cool and spray on the attacked plants.
VIVOSUN 5-Pack 7 Gallon Plant Grow Bags, Heavy Duty Thickened Nonwoven Fabric Pots with Handles
VIVOSUN 5-Pack 7 Gallon Plant Grow Bags, Heavy Duty Thickened Nonwoven Fabric Pots with Handles
- STURDY FABRIC MATERIAL: Made of 300g thickened nonwoven fabric, these pots are moderately permeable, environmentally friendly, and BPA-free
- GREAT DRAINAGE: Nonwoven fabric means the pots do not retain excess water, allowing your roots to breathe, translating to a healthier, more vigorous growth
- DURABLE, REINFORCED HANDLES: While the competition uses flimsy handles that are a continuation of the same fabric the pot is made from, we use serging stitches to sew handles onto the pot so they can support a full bag of soil
- PORTABLE BAGS: Both heavy-duty handles and rugged material means you can move bags full of soil and plants with ease
- USE IT FOR YEARS: Bags prevent circling root structure. Combined with pruning and trimming roots, these bags can be reused for years. Comes with a 1-year warranty

Infographic to make a container system with recycled bags for crops
One of the new trends in today's agriculture, even at a commercial level, are bags for growing plants. Today we will explain why to use them, what plants you can grow, what substrate to use, how to water and fertilize them.
Benefits of bags for growing plants
The grow bags are made of breathable fabric. This means better drainage and aeration . Precisely aeration is what makes these garden bags superior to many pots.If a container does not aerate the roots reach the walls of the container, then they signal the plant to make more roots. Resulting in a mass of tangled roots.
This will not happen in a grow bag. Here, if a root reaches the wall of the bag it dehydrates, causing the plant to produce new and healthy roots . This is known as air-pruning.
This picture shows very well how the roots got to the wall of the bag, but the roots are not tangled.
Plants in grow bags develop a fibrous root mass. This allows them to acquire more nutrients and water.
Substrate for bagged crops
Soil is the heart of any container grow. A recommended mix is 1/3 moss (or coir), 1/3 compost mix (eg, chicken manure, horse manure, and mushroom compost), and 1/3 vermiculite . This mix preserves the moisture that is very important for growing bag gardens.To conserve more moisture, add chips to the top of the substrate.
How to water the plants in grow bags?
One downside of grow bags is how fast the growing medium dries. It really makes it impossible to soak the earth as the water runs straight out. Drainage and aeration of the grow bag lead to more frequent irrigation needs. Below we will review two ways you can water your plants in garden bags.Self-watering system
Place a shallow container or tray of water under the grow bag. The substrate will absorb the water.Drip system
Install a drip system. It doesn't have to be complicated. You can use a bottle drip system or install a plumbing system.How to fertilize the plants in growing bags?
Due to the little soil in the containers, the plants need to be fertilized. You can use compost or humus tea. Remember to water your plants before fertilizing them.What plants can you grow in garden bags?
Grow plants with shallow roots. Some options are tomatoes, bell peppers, aubergines, cucumbers, kidney beans (beans), carrots, lettuce, herbs, flowers, and shallow-rooted berries like blueberries.
Step by step to make containers with garbage bags
01 - You need a pack of plastic bags (ideally 50x70 cm), scissors and adhesive tape.
02 - Each bag allows you to make 1 pot.
03 - Extend the bag completely and then fold it in half so that 4 layers of plastic remain.
04 - Tape the open end of the bag together, leave a little extra tape around the edges.
05 - Fold the adhesive tape inwards, once it is done at both ends, a tubular rectangle will remain, like a plastic sleeve.
06 - Fold one of the open edges, calculating a third of the plastic tube.
07 - Take the previous fold, forming a square base with 2 triangles as shown in the image.
08 - Fold the lower corner back towards the center of the square.
09 - Glue the fold to the base with adhesive tape.
10 - Now fold the upper part of the square down and join with adhesive tape.
11 - Ready the planter, the process is the same as that used for gift packaging and paper bags.
12 - Open the bag and fill with leaf soil or substrate, you can also add humus or another vegetable compound.
13 - Fill the bag with about 30 cm of soil, leaving a border of about 10 cm.
14 - In the center of the earth, make a space with the necessary size to make the transplant.
15 .- Take a small plant with roots already formed from the seedbed.
16 - Place the plant in the space in the center of the pot.
17 - Verify that the ground surface of the plant is at the same height as the rest of the ground.
18 - Press gently on the earth to fix the plant.
19 - Water with about 2 lts. of water.
20 - Once the plant is watered, with the tip of the scissors, make 4 holes at the base of the bag, one in each corner of the pot.
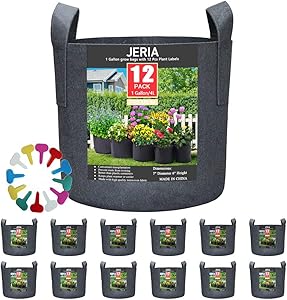
JERIA 12-Pack 1 Gallon, Vegetable/Flower/Plant Grow Bags, Aeration Fabric Pots with Handles (Black), Come with 12 Pcs Plant Labels
JERIA 12-Pack 1 Gallon, Vegetable/Flower/Plant Grow Bags, Aeration Fabric Pots with Handles (Black), Come with 12 Pcs Plant Labels
- MATERIALS: Non-woven fabric. Fabric allows roots to breathe and grow healthier, boosts plant growth and yields. Decreased risk of transplant shock, creates improved overall root structure.
- DESIGN: It Provides Water drainage through the soil to eliminate over watering. Keeps plant warmer in winter and cooler in the summer.
- MOVE AND STORAGE: The plants planted in the bag can be transported anywhere and anytime, Built-in study handles for easy movement, indoor or outdoor use and easy to fold for storage.
- ADVENTAGE: Grow more in less space-multiple varieties in one grow bags. Create a quick and easy garden.
- PAKAGE: 12 pack 1 gallons grow bags with 12 pcs plant labels. 1 gallons pot dimension: 7" Diameter 6" Height.
Growing vegetables in plastic bags
Plastic bags of different colors and sizes that are normally used in supermarkets, shops and businesses for the transport of merchandise, are reused as containers for waste or other purposes; or they are thrown directly into the garbage, polluting the environment, directly or indirectly. To reduce this inconvenience, these bags can be used even better as containers for growing vegetables in urban, peri-urban areas or where there is not enough space to install a larger garden.
This simple and practical method is an excellent alternative to having healthy, fresh food rich in vitamins and mineral salts. For this reason, it is important to make the decision to load the bag with soil and organic fertilizer and start sowing seeds, vegetables, whether they are leaves, roots, fruits or flowers.
In addition to having no additional cost, the bags are readily available and growing in them offers several advantages.
ADVANTAGES
- To grow the vegetables, there is no need to buy the bags, just reuse them. In the same way, a small space is required; the only condition is that sunlight arrives. On the other hand, organic compost can be prepared in the same bag at home.
- In the case of soil, the one used in the first crop can be reused in another, after "solarization", which means subjecting it to high temperatures (hermetically closing the bag and leaving it in full sun for a while). In this way, the soil will be free of pests and diseases for the next crop.
- Another advantage is that it does not require a lot of work, except at the beginning, to prepare the substrate or mix.
- This practice is an excellent instrument to promote and awaken interest in the cultivation of vegetables among children, youth and adults. Many consider it a true therapy for the elderly or chemically dependent.
DISADVANTAGES
- The bags must remain in the same place where they are sown, because due to the weight of the soil, there is a risk that they will break when moved. These can only be used once.
REGARDING IRRIGATION
- When developing the production system in small spaces, as in this case using polyethylene bags, we recommend using a shower or hose, but gently. In summer it is recommended to irrigate every day depending on what types of vegetables are involved. For example, for a leafy vegetable, one liter of water is used per day in the harvest cycle, which is more than enough. It is also important to remember that it is not necessary to drill holes in the bag and that good quality water should always be used.
- Making a comparison with fruit trees, in the case of a tomato that has a greater amount of soil, it is necessary to water 1 ½ to 2 liters in the summer, even if it is very hot it should be done in the morning and afternoon. Everything will depend on the amount of sunlight it receives.
- In winter, the watering is much less; If the soil has enough moisture, it is not watered as it maintains moisture. If watering is exaggerated and the bag gets flooded, it can favor the presence of pathogenic microorganisms that could affect our little plant.
SEED QUANTITY
BY BAGS- It is good to know how many seeds should be used per bag, as it should be one to two depending on the species. In the case of lettuce, a small seedling must first be prepared for the vegetables that later must be transplanted to their final place. At most, one seedling per bag will be transplanted; If the bag is very large, you can put 2 to 3 plants at the same time. But since the goal is to use more bags, it is recommended to do it one at a time.
- In the case of tomato and pepper (locote), a small seedling is also made and then a single plant is transplanted. There are vegetables that can be sown in the final place, that is, in the bag directly, such as chard with 4 or 5 seeds directly, without the need to make seedlings.
- Remember that seedlings can be made from trays, wooden boxes, a disused bucket or another element.
- It should also be taken into account that it is not necessary to buy many seeds, because for example, in 1 gram of lettuce seed there are approximately 800 to 1000 seeds. It is not necessary to buy ½ kilo of seeds. It should also be remembered that leafy vegetables have a more superficial root system than tomatoes, peppers, chiavo and others that are pivoting, that is, they grow rapidly towards the bottom of the bag.
IN COLD SEASON
- It is not advisable to move the bags a lot, since due to the weight of the sand they contain, they can break.
- The climate we are currently experiencing, with warm days and cold nights and mornings, is good for cabbage, cauliflower, broccoli and others, and has no negative impact. In any case, what can be done is to cover the plant with sheets of newspaper and water it both on the foliar part and on the ground. When you know there are frost hazards, you should cover the plant with plastic bags or at least newspaper.
USE OF DEFENSIVE
- In the first place, it must be remembered that the productive base is essential for the success of this work, that is, that the substrate or organic matter where the seed will be planted must be well prepared. Only if there is a need are controls or removal of leaves that have spots, and only in extreme cases resort to recipes based on garlic, horsetail or others. There are many natural recipes, but one has to know well the sources or how to do it. Summer is the time when more attacks of pests and diseases occur.
- One point that people who carry out this type of work must consider is that they must constantly monitor their plants, but they must not only look at the upper part of the leaves (front), but also the underside (back), which is the place where the microorganisms that begin to colonize in those places appear.
DO NOT REUSE
THE BAGSIt is not recommended to reuse the bags, because it is normal for them to break; what can be reused is the soil. But we recommend that before using it again go through a period of solarization, which can be done within the same bag. This is subjected to high temperatures to eliminate as many harmful microorganisms as possible.
THE THEME OF LIGHT
It is known that sunlight is the engine that gives life to plants and helps them continue to grow through photosynthesis. In this case of small-scale production or at home, that light must be used to the maximum; So it is that the plant must be in a place where it will receive the sun's rays for at least 2 to 4 hours. The more sunlight it gets, the better.
CONCLUSION
The cultivation of vegetables in plastic bags is a valid alternative for production in small spaces, especially for those who wish to enter the fascinating world of growing these edible and nutritious plants.
VIVOSUN 5-Pack 1 Gallon Grow Bags Heavy Duty Thickened Nonwoven Fabric Pots with Handles
VIVOSUN 5-Pack 1 Gallon Grow Bags Heavy Duty Thickened Nonwoven Fabric Pots with Handles
- STURDY FABRIC MATERIAL: Made of 300g thickened nonwoven fabric, these pots are moderately permeable, environmentally friendly, and BPA-free
- GREAT DRAINAGE: Nonwoven fabric means the pots do not retain excess water, allowing your roots to breathe, translating to a healthier, more vigorous growth
- DURABLE, REINFORCED HANDLES: While the competition uses flimsy handles that are a continuation of the same fabric the pot is made from, we use serging stitches to sew handles onto the pot so they can support a full bag of soil
- PORTABLE BAGS: Both heavy-duty handles and rugged material means you can move bags full of soil and plants with ease
- USE IT FOR YEARS: Bags prevent circling root structure. Combined with pruning and trimming roots, these bags can be reused for years. Comes with a 1-year warranty

How to use grow bags for plants
Grow bags are plastic or cloth bags used to grow plants with shallow roots. They are ideal for balconies or small gardens, where space is a luxury. Grow bags are also great because they are reusable and produce very little waste. To use a grow bag, prepare the grow bag for your chosen plant, set up the plant, and care for the bag so you have a healthy plant all season long.
Part 1 Prepare the culture bag
1
Buy the grow bag. You can buy a grow bag at a nursery or home repair store. You can choose a plastic or cloth bag, but cloth bags often need to be watered more than plastic bags. Choose the bag according to the size of the roots. Don't buy a very large bag unless you are planting something large. [1]
- For example, you will need a 50 gallon bag if you plant something as large as a grapefruit tree.
2
Cover the grow bag with clay rocks to aid drainage. If the type of potting mix you use is not prone to drainage, you may need to cover the bottom of your grow bag. You can line the bag with clay stones or coarse pearlite. Put enough pebbles or perlite in the bottom of the bag to cover it completely. [two]
- Use at least 1 inch (2.5 centimeters) of stones or perlite in the bag.
3
Add soil to the grow bag. You can use compost-like garden soil, a compost made specifically for containers, or you can make your own mix. An ideal mix for grow bags is one-third moss, one-third compost mix (such as chicken manure or mushroom compost), and one-third vermiculite (a moisture-retaining mineral). Fill the grow bag almost to the end, leaving a 2-inch (5.1-centimeter) gap at the top of the bag. [3]
4
Loosen and shape the bag if you don't already have one. Once the compost is in the bag, shake it a bit and knead it like a pillow to loosen it. Next, shape the bag into a scrub (hill shape). It is to ensure the soil is evenly distributed. [4]
5
Drill the drainage holes in the bag if you don't have any. Pierce the bottom of the bag with scissors. The holes should be the size of the hole drilled with the scissors, and should be approximately 0.5 inches (1.3 centimeters) apart. The holes are only made to release excess moisture. [5]
- If the bag already has drainage holes, you can skip this step.
Part 2 Add plants
1
Choose plants with shallow roots for best results. Shallow-rooted plants are ideal for your bag because they won't stunt at the bottom of the bag. Good choices include tomatoes, bell peppers (paprika), eggplants, zucchini, cucumbers, marrow, strawberries, green beans, lettuce, potatoes, herbs, and flowers. [6]
- However, you can grow larger products, such as trees, if you bought a very large grow bag.
2
Place the bag where the plants will grow. The grow bags are easy to move and can be placed in a variety of locations. They can be placed on a balcony, outside in a garden or in a greenhouse. Consider the amount of sunlight and heat your plants will need when choosing a location. [7]
3
Scoop up the soil to make room for the plants. Scoop out the dirt with your hands or a spatula. Make sure you get enough soil to cover the entire root of the plant as you plant it. [8]
4
Place the root ball in the ground. Insert the root ball in the place where you removed the soil. Make sure the entire root ball is covered in soil. Then cover the top of the root ball with some of the dirt you dug. [9]
Part 3 Take care of the plants
1
Water the bag often. Grow bags generally require more water than potted plants. Check the grow bags daily. Water the soil whenever you see that it is dry. Plastic heats up the peat mixture considerably, so keeping the soil moist is essential for growing plants to be successful. [10]
- Cloth bags generally need to be watered more often than plastic bags.
2
Install an authorization system. It can be difficult to keep a grow bag well watered, so a self-watering system is often beneficial. One option is to install a drip system. Essentially, a drip system is where a container slowly and steadily releases water onto the ground. Or, you can put a container under the grow bag and fill it with water. [eleven]
- If you place a deep container under the grow bag, you may need a container to collect the overflow.
3
Fertilize heavy feeder plants. Heavy feeder plants are plants like corn, tomatoes, and familiar cabbage crops. You can buy a fertilizer or make your own natural fertilizer. You can make your own fertilizer with Epsom salts and egg shells, worm castings, and compost tea. Spread a thin layer of fertilizer over the soil. There should be space if you left 2 inches (5.1 cm) at the top of the bag. Fertilize your plants at least once a week. [12]
4
Support tall plants as needed. You may need to add support to tall or tall plants. You can use cane poles to do it. Insert a cane stick into the soil next to the plant. Then tie the plant to the cane and attach the cane to a frame. [13]
5
Plant smaller plants under tall plants to make the most of limited space. When space is a luxury and this type of gardening is the only opportunity you have to grow your own vegetables, you can increase your harvest by growing small plants under large ones. For example, if you grow tomatoes, add a little lettuce or radishes under the tomatoes. Just be sure to wait until the tomatoes grow well before planting the small plants under the large ones. [14]
- If you plant more than one plant in the same bag, make sure you water them well.
6
Reuse the land when the crops are done. If the soil still looks healthy, you can reuse it next season. The soil can be conserved and reused for up to 2 to 3 seasons, as long as the soil is modified with compost, organic matter, or fertilizer. Even the bag can be used for one more season if you wash it, let it dry, and then store it in a dry place until the next growing season. [fifteen]
Tips
- You don't need to store grow bags with permanent crops, but you may have to bring fall crops indoors during unusually cold weather. [16]
- If your grow bag has unwanted advertising, you can cover it with a jute bag or sack. Or, accommodate stones or pots to hide text and colors.
- Potted marigolds will help keep pests away.
Warnings
- Don't grow deep-rooted vegetables like carrots or beets, as they won't thrive in shallow bag soil.
Things you will need
- grow bag or make your own equivalent
- additional fertilization treatments
- scissors or garden knife to cut the bag and make drainage holes
- shallow rooted plants
- irrigation containers
Subscribe to:
Posts (Atom)