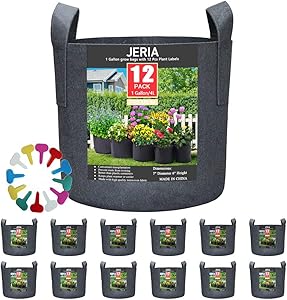
JERIA 12-Pack 1 Gallon, Vegetable/Flower/Plant Grow Bags, Aeration Fabric Pots with Handles (Black), Come with 12 Pcs Plant Labels
MATERIALS: Non-woven fabric. Fabric allows roots to breathe and grow healthier, boosts plant growth and yields. Decreased risk of transplant shock, creates improved overall root structure.
DESIGN: It Provides Water drainage through the soil to eliminate over watering. Keeps plant warmer in winter and cooler in the summer.
MOVE AND STORAGE: The plants planted in the bag can be transported anywhere and anytime, Built-in study handles for easy movement, indoor or outdoor use and easy to fold for storage.
ADVENTAGE: Grow more in less space-multiple varieties in one grow bags. Create a quick and easy garden.
PAKAGE: 12 pack 1 gallons grow bags with 12 pcs plant labels. 1 gallons pot dimension: 7" Diameter 6" Height.
Growing vegetables in plastic bags
Plastic bags of different colors and sizes that are normally used in supermarkets, shops and businesses for the transport of merchandise, are reused as containers for waste or other purposes; or they are thrown directly into the garbage, polluting the environment, directly or indirectly. To reduce this inconvenience, these bags can be used even better as containers for growing vegetables in urban, peri-urban areas or where there is not enough space to install a larger garden. This simple and practical method is an excellent alternative to having healthy, fresh food rich in vitamins and mineral salts. For this reason, it is important to make the decision to load the bag with soil and organic fertilizer and start sowing seeds, vegetables, whether they are leaves, roots, fruits or flowers. In addition to having no additional cost, the bags are readily available and growing in them offers several advantages.
ADVANTAGES
To grow the vegetables, there is no need to buy the bags, just reuse them. In the same way, a small space is required; the only condition is that sunlight arrives. On the other hand, organic compost can be prepared in the same bag at home.
In the case of soil, the one used in the first crop can be reused in another, after "solarization", which means subjecting it to high temperatures (hermetically closing the bag and leaving it in full sun for a while). In this way, the soil will be free of pests and diseases for the next crop.
Another advantage is that it does not require a lot of work, except at the beginning, to prepare the substrate or mix.
This practice is an excellent instrument to promote and awaken interest in the cultivation of vegetables among children, youth and adults. Many consider it a true therapy for the elderly or chemically dependent.
DISADVANTAGES
The bags must remain in the same place where they are sown, because due to the weight of the soil, there is a risk that they will break when moved. These can only be used once.
REGARDING IRRIGATION
When developing the production system in small spaces, as in this case using polyethylene bags, we recommend using a shower or hose, but gently. In summer it is recommended to irrigate every day depending on what types of vegetables are involved. For example, for a leafy vegetable, one liter of water is used per day in the harvest cycle, which is more than enough. It is also important to remember that it is not necessary to drill holes in the bag and that good quality water should always be used.
Making a comparison with fruit trees, in the case of a tomato that has a greater amount of soil, it is necessary to water 1 ½ to 2 liters in the summer, even if it is very hot it should be done in the morning and afternoon. Everything will depend on the amount of sunlight it receives.
In winter, the watering is much less; If the soil has enough moisture, it is not watered as it maintains moisture. If watering is exaggerated and the bag gets flooded, it can favor the presence of pathogenic microorganisms that could affect our little plant.
SEED QUANTITY
BY BAGS
It is good to know how many seeds should be used per bag, as it should be one to two depending on the species. In the case of lettuce, a small seedling must first be prepared for the vegetables that later must be transplanted to their final place. At most, one seedling per bag will be transplanted; If the bag is very large, you can put 2 to 3 plants at the same time. But since the goal is to use more bags, it is recommended to do it one at a time.
In the case of tomato and pepper (locote), a small seedling is also made and then a single plant is transplanted. There are vegetables that can be sown in the final place, that is, in the bag directly, such as chard with 4 or 5 seeds directly, without the need to make seedlings.
Remember that seedlings can be made from trays, wooden boxes, a disused bucket or another element.
It should also be taken into account that it is not necessary to buy many seeds, because for example, in 1 gram of lettuce seed there are approximately 800 to 1000 seeds. It is not necessary to buy ½ kilo of seeds. It should also be remembered that leafy vegetables have a more superficial root system than tomatoes, peppers, chiavo and others that are pivoting, that is, they grow rapidly towards the bottom of the bag.
IN COLD SEASON
It is not advisable to move the bags a lot, since due to the weight of the sand they contain, they can break.
The climate we are currently experiencing, with warm days and cold nights and mornings, is good for cabbage, cauliflower, broccoli and others, and has no negative impact. In any case, what can be done is to cover the plant with sheets of newspaper and water it both on the foliar part and on the ground. When you know there are frost hazards, you should cover the plant with plastic bags or at least newspaper.
USE OF DEFENSIVE
In the first place, it must be remembered that the productive base is essential for the success of this work, that is, that the substrate or organic matter where the seed will be planted must be well prepared. Only if there is a need are controls or removal of leaves that have spots, and only in extreme cases resort to recipes based on garlic, horsetail or others. There are many natural recipes, but one has to know well the sources or how to do it. Summer is the time when more attacks of pests and diseases occur.
One point that people who carry out this type of work must consider is that they must constantly monitor their plants, but they must not only look at the upper part of the leaves (front), but also the underside (back), which is the place where the microorganisms that begin to colonize in those places appear.
DO NOT REUSE
THE BAGS It is not recommended to reuse the bags, because it is normal for them to break; what can be reused is the soil. But we recommend that before using it again go through a period of solarization, which can be done within the same bag. This is subjected to high temperatures to eliminate as many harmful microorganisms as possible.
THE THEME OF LIGHT It is known that sunlight is the engine that gives life to plants and helps them continue to grow through photosynthesis. In this case of small-scale production or at home, that light must be used to the maximum; So it is that the plant must be in a place where it will receive the sun's rays for at least 2 to 4 hours. The more sunlight it gets, the better.
CONCLUSION The cultivation of vegetables in plastic bags is a valid alternative for production in small spaces, especially for those who wish to enter the fascinating world of growing these edible and nutritious plants.
VIVOSUN 5-Pack 1 Gallon Grow Bags Heavy Duty Thickened Nonwoven Fabric Pots with Handles
STURDY FABRIC MATERIAL: Made of 300g thickened nonwoven fabric, these pots are moderately permeable, environmentally friendly, and BPA-free
GREAT DRAINAGE: Nonwoven fabric means the pots do not retain excess water, allowing your roots to breathe, translating to a healthier, more vigorous growth
DURABLE, REINFORCED HANDLES: While the competition uses flimsy handles that are a continuation of the same fabric the pot is made from, we use serging stitches to sew handles onto the pot so they can support a full bag of soil
PORTABLE BAGS: Both heavy-duty handles and rugged material means you can move bags full of soil and plants with ease
USE IT FOR YEARS: Bags prevent circling root structure. Combined with pruning and trimming roots, these bags can be reused for years. Comes with a 1-year warranty
How to use grow bags for plants
Grow bags are plastic or cloth bags used to grow plants with shallow roots. They are ideal for balconies or small gardens, where space is a luxury. Grow bags are also great because they are reusable and produce very little waste. To use a grow bag, prepare the grow bag for your chosen plant, set up the plant, and care for the bag so you have a healthy plant all season long.
Part 1 Prepare the culture bag
1 Buy the grow bag. You can buy a grow bag at a nursery or home repair store. You can choose a plastic or cloth bag, but cloth bags often need to be watered more than plastic bags. Choose the bag according to the size of the roots. Don't buy a very large bag unless you are planting something large. [1]
For example, you will need a 50 gallon bag if you plant something as large as a grapefruit tree.
2 Cover the grow bag with clay rocks to aid drainage. If the type of potting mix you use is not prone to drainage, you may need to cover the bottom of your grow bag. You can line the bag with clay stones or coarse pearlite. Put enough pebbles or perlite in the bottom of the bag to cover it completely. [two]
Use at least 1 inch (2.5 centimeters) of stones or perlite in the bag.
3 Add soil to the grow bag. You can use compost-like garden soil, a compost made specifically for containers, or you can make your own mix. An ideal mix for grow bags is one-third moss, one-third compost mix (such as chicken manure or mushroom compost), and one-third vermiculite (a moisture-retaining mineral). Fill the grow bag almost to the end, leaving a 2-inch (5.1-centimeter) gap at the top of the bag. [3]
4 Loosen and shape the bag if you don't already have one. Once the compost is in the bag, shake it a bit and knead it like a pillow to loosen it. Next, shape the bag into a scrub (hill shape). It is to ensure the soil is evenly distributed. [4]
5 Drill the drainage holes in the bag if you don't have any. Pierce the bottom of the bag with scissors. The holes should be the size of the hole drilled with the scissors, and should be approximately 0.5 inches (1.3 centimeters) apart. The holes are only made to release excess moisture. [5]
If the bag already has drainage holes, you can skip this step.
Part 2 Add plants
1 Choose plants with shallow roots for best results. Shallow-rooted plants are ideal for your bag because they won't stunt at the bottom of the bag. Good choices include tomatoes, bell peppers (paprika), eggplants, zucchini, cucumbers, marrow, strawberries, green beans, lettuce, potatoes, herbs, and flowers. [6]
However, you can grow larger products, such as trees, if you bought a very large grow bag.
2 Place the bag where the plants will grow. The grow bags are easy to move and can be placed in a variety of locations. They can be placed on a balcony, outside in a garden or in a greenhouse. Consider the amount of sunlight and heat your plants will need when choosing a location. [7]
3 Scoop up the soil to make room for the plants. Scoop out the dirt with your hands or a spatula. Make sure you get enough soil to cover the entire root of the plant as you plant it. [8]
4 Place the root ball in the ground. Insert the root ball in the place where you removed the soil. Make sure the entire root ball is covered in soil. Then cover the top of the root ball with some of the dirt you dug. [9]
Part 3 Take care of the plants
1 Water the bag often. Grow bags generally require more water than potted plants. Check the grow bags daily. Water the soil whenever you see that it is dry. Plastic heats up the peat mixture considerably, so keeping the soil moist is essential for growing plants to be successful. [10]
Cloth bags generally need to be watered more often than plastic bags.
2 Install an authorization system. It can be difficult to keep a grow bag well watered, so a self-watering system is often beneficial. One option is to install a drip system. Essentially, a drip system is where a container slowly and steadily releases water onto the ground. Or, you can put a container under the grow bag and fill it with water. [eleven]
If you place a deep container under the grow bag, you may need a container to collect the overflow.
3 Fertilize heavy feeder plants. Heavy feeder plants are plants like corn, tomatoes, and familiar cabbage crops. You can buy a fertilizer or make your own natural fertilizer. You can make your own fertilizer with Epsom salts and egg shells, worm castings, and compost tea. Spread a thin layer of fertilizer over the soil. There should be space if you left 2 inches (5.1 cm) at the top of the bag. Fertilize your plants at least once a week. [12]
4 Support tall plants as needed. You may need to add support to tall or tall plants. You can use cane poles to do it. Insert a cane stick into the soil next to the plant. Then tie the plant to the cane and attach the cane to a frame. [13]
5 Plant smaller plants under tall plants to make the most of limited space. When space is a luxury and this type of gardening is the only opportunity you have to grow your own vegetables, you can increase your harvest by growing small plants under large ones. For example, if you grow tomatoes, add a little lettuce or radishes under the tomatoes. Just be sure to wait until the tomatoes grow well before planting the small plants under the large ones. [14]
If you plant more than one plant in the same bag, make sure you water them well.
6 Reuse the land when the crops are done. If the soil still looks healthy, you can reuse it next season. The soil can be conserved and reused for up to 2 to 3 seasons, as long as the soil is modified with compost, organic matter, or fertilizer. Even the bag can be used for one more season if you wash it, let it dry, and then store it in a dry place until the next growing season. [fifteen]
Tips
You don't need to store grow bags with permanent crops, but you may have to bring fall crops indoors during unusually cold weather. [16]
If your grow bag has unwanted advertising, you can cover it with a jute bag or sack. Or, accommodate stones or pots to hide text and colors.
Potted marigolds will help keep pests away.
Warnings
Don't grow deep-rooted vegetables like carrots or beets, as they won't thrive in shallow bag soil.
Things you will need
grow bag or make your own equivalent
additional fertilization treatments
scissors or garden knife to cut the bag and make drainage holes
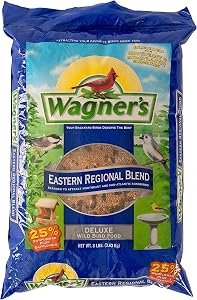
Wagner's 62011 Eastern Regional Blend Wild Bird Food, 8-Pound Bag
Attracts many beautiful perching and ground feeding Eastern songbirds
Contains seeds that Eastern songbirds desire including sunflower and safflower
Can be fed in a tube, hopper, or platform feeders
Highest quality grains used in blending
Made in the USA
Learn about the different seeds for birds
There is a huge variety of bird seeds that are suitable for your pet's nutrition; The most important thing, in any case, is to take into account the preferences and nutritional requirements of each type of bird
The seeds, along with other foods such as fruits and vegetables, are a fundamental part of the feeding of birds. If you have a pet bird, you are dedicated to raising it or you simply want to learn more about birds, in this article we give you some information that will allow you to know more about seeds for birds.
You must bear in mind that each bird is different and that, likewise, there are several types of seeds for birds, so it is necessary to choose the appropriate ones in order for their diet to be optimal and their life healthy.
Depending on their species, birds must consume a specific type of seed or combinations of these. In veterinarians and specialized stores you will find a variety of seeds to choose the one your bird needs, according to its characteristics, type and conditions. It should be taken into account that the nutrients of each seed are different.
To know the type of seed that each bird needs, the first thing is to know the needs of each species. For example, canaries can only feed on seeds. However, other birds such as parrots or pigeons need pieces of vegetables and fruits so that their diet is complete and balanced.
Homemade food for your parrot
Type of bird seeds According to experts, these are the types of seeds for birds and their composition :
Birdseed: it is oval in shape, bright yellow and pointed. It is what all birds usually eat for nutrition and also for entertainment. They are low in fat and high in starch.
Millet : its shape is rounded and easy to recognize. It is essential when feeding small birds such as parakeets , although the larger ones tend to ignore it. During the rearing stage it is possible that many birds reject this seed, in which case the panizo would have to be used.
Sunflower : there are three types of seeds, which are white, striped and black. Granivorous birds prefer small striped ones, while parrots prefer white ones. They are the favorite food of domestic birds. However, you have to control the amount a lot, since they have a high fat content that tends to cause overweight, especially if the bird does not leave the cage much to exercise.
Hemp: if you want to give your bird the best hemp seed, choose the one that has a grayish-bronze color, with a slight greenish touch. Thanks to its high content of oils and vitamin E, it is a perfect food for canaries , especially if you have them for breeding.
Flax: it is the perfect food to make the plumage of birds shine like never before. Especially, it is a type of seed that must be given to the bird when it is in its feather change season.
Poppy: it is easy to recognize because it is kidney shaped. Generally, almost all birds like them, especially small granivorous species.
Oats: an excellent option for birds that are in the process of rearing, since they are easy to digest. Generally, they are preferred by small birds, but also by some large birds.
Uses of birdseed
Bird seeds are the most common food for these animals. Therefore, you must choose them very well, depending on the type of bird in question. Each species has different preferences and tastes. Remember these recommendations to know which is the right seed for your bird:
Cardinals, small or large finches, and finches prefer black-shelled sunflower seeds. For their part, small finches also like shelled sunflower seeds and thistles.
Other birds such as chickadees, titmouses, nuthatches, and woodpeckers prefer black-shelled sunflower seeds and peeled peanuts, cut in half.
Birds that feed on the land, such as reeds, sparrows, scratchers, and pigeons, like to feed on common millet.
There are other birds, such as hummingbirds that, more than the seeds, prefer the nectar that is in them.
In any case, you must observe what the behavior of the birds is while they feed. This way you will be able to know what their preferences are and which seeds they like the most and which suit them best.
Birds are excellent company. As pets they are very easy to have and maintain. A good diet is essential in its care, hence it is necessary to know which seeds are better and more nutritious.
Seeds for domestic birds: types and recommendations
To offer a balanced diet to your birds, it is necessary to know the essential nutrients for their healthy development. That is, the seeds for domestic birds. We know them.
The importance of seeds for domestic birds
When the birds that are best adapted to captivity are analyzed, most are usually partially or exclusively granivorous. That means their diet is based entirely or mostly on dry or fleshy seeds . These seeds can be derived from arboreal and / or herbaceous vegetables.
There are a variety of commercial fodder for domestic birds that consist of mixtures of seeds, vegetables and nuts. The proportions are appropriate according to the species and age of the animal. These products can be used without inconvenience as the basis of a balanced diet for your birds.
However, many specialists defend the advantages of supplementing the feed with seeds for domestic birds , fresh and dried fruits and vegetables. Respecting the specific needs of each animal, of course.
Why include seeds for domestic birds in the feeding of your birds? Most of the seeds consist of the fertilized ovule of plants that have a sexual reproduction cycle. When developed under optimal conditions, the seeds give rise to new plants similar to the mother plants.
To allow the germination of a new plant, the seeds must have a high concentration of energetic substances inside . When they begin to germinate, they give rise to shoots that synthesize vitamins and phytohormones.
Therefore, embryonic seeds and vegetable sprouts are considered excellent sources of essential nutrients . And they generate many benefits for the diet of different animals, including human beings.
Seeds for domestic birds are a natural source of carbohydrates, fats and vegetable proteins . They provide energy for the development of your metabolism, allowing the strengthening of your immune system.
How to combine seeds for domestic birds in the diet?
Feeding birds includes very different types of diets . There are carnivorous, insectivorous, granivorous and frugivorous birds. The organism of each bird is adapted to a diet from the shape of the beak to its digestive system.
Most domesticable birds need a high content of seeds in their daily diet . Which should be supplemented with fruits, vegetables and animal proteins.
However, there is no single diet suitable for all birds . Each species needs a certain amount of energy, vitamins and minerals to preserve its health.
Variations in the different stages of life
The feeding of birds also varies according to the stage of their life . When they are still young, most need a high protein intake to develop their muscles and wings. In their natural habitat, the mother would offer insects already partially digested.
For captive breeding, there are pasta made specifically for the rearing of chicks and chicks. They are highly recommended. They have balanced amounts of nutrients and tend to keep better than homemade potatoes.
In the case of adult birds, the case is a little different . It is important that your daily diet includes grains of corn , sorghum, oats, wheat, birdseed, barley, rice, lentils, carob, flax, beans and sunflower.
Types of birds and seeds for domestic birds
Common parrots : 70% to 80% of their diet should be made up of fruits and vegetables. The other 20% or 30% should combine the seeds for domestic birds with nuts and small portions of boiled egg and yogurt. Rice should not be offered raw or too often.
Las parejas de Agapornis pasan mucho tiempo juntos
Canaries : it is recommended to choose specific mixtures for canaries, as they contain adequate proportions of seeds and vegetables. To complement, the ideal is to offer grated carrot, peas and broccoli.
Pigeons: they are almost 100% granivorous. Ideally, offer 90% seeds for domestic birds and 10% small pieces of fruits and vegetables.
Gray parrots : their diet needs a high supply of minerals and calcium. 70% of their diet is based on seeds, and 30% on fresh fruits, dried fruits and vegetables. It is recommended to prefer vegetables rich in calcium: cabbages, broccoli, mustard greens, carrots, endives, apricots and figs.
Exotic birds : 40% of their diet should favor fresh fruits and vegetables, 30% should be made up of seeds and 20% of nuts and mixes prepared for birds. It is important to offer vegetables rich in vitamin A and calcium: pumpkin, carrots, sweet potatoes, papaya, mango, walnuts and chestnuts, broccoli and peas.
In addition to balancing the proportions, it is essential to properly store the seeds for domestic birds . This prevents the proliferation of microorganisms that can affect the health of your birds.
How to feed wild birds
Installing a feeder to feed wild birds can give you an opportunity to observe birds from a closer distance, see different types of birds, and learn more about local birds in an enjoyable way. It is definitely a way to expose your children to the world of birds. Feeding wild birds is also a way to help sustain wild bird populations, particularly in urban and affected environments, as long as you feed them the right food. Because wild birds are such adaptable creatures and humans leave food for them, many native birds have increased in numbers in many parts of the world.
Method 1 Choosing bird food
1 Keep in mind that not all seeds are the same. Seeds are the most common bird food used to feed wild birds, but you need to choose them wisely. Each type of bird prefers different types of seeds.
Cardinals , small or large finches, and finches prefer to stay at the feeder while they eat. These birds enjoy black-shelled sunflower seeds, while small finches prefer shelled sunflower seeds and thistles.
Other birds tend to take their food and eat it away from the feeder. These birds include chickadees, tits, nuthatches, and woodpeckers . They prefer black-shelled sunflower seeds and peeled peanuts cut in half (whole peanuts).
Choose common millet for land-feeding birds such as reeds, sparrows, scratchers, and pigeons.
Some birds prefer nectar to seeds, like hummingbirds.
Above all, observe the behavior of the bird species in your neighborhood to discover which seeds they will prefer.
2 Buy nectar or make it yourself . The nectar, used to attract hummingbirds and orioles, should be four-fifths warm water to one-fifth sugar. Bring the water and sugar to a quick boil, stir the mixture, remove it from the heat, and let it cool completely before using. Don't leave it in the pot boiling for a long time, as this will cause the water to evaporate and change the ratio of water to sugar.
Avoid using artificial sweeteners, as these do not contain the calories that birds need to survive, and they actually starve them. Also, chemicals in artificial or manufactured products, such as gelatin, can cause digestive problems in birds.
You don't have to add food coloring to the solution to attract the birds. Most commercial hummingbird feeders are bright enough to attract birds without the need for additives.
Once you've made a standard solution, store it in a clean, airtight bottle in the refrigerator, but make sure the "nectar" is at room temperature before offering it to the birds. [2]
You can also buy nectar commercially in liquid or powdered form. This may be more appropriate when the balance of nutrients in the nectar is important to maintaining the health of the birds. Look for brands that explain how they have nutritionally balanced nectar for specific species in your area.
In the meantime, plant some trees that produce nectar flowers to enhance the local natural supply.
3 Consider providing other types of bird food. Tallow is the preferred food of many species, including woodpeckers, nuthatches, chickadees, Carolina mice, and blue tit. Fat or shortening can also be used. Birds like orioles and nightingales enjoy eating fruits like apples, bananas, oranges, and raisins.
Insectivorous (meat-eating) birds, such as bluebirds, crows, magpies, and wagtail fans, will appreciate insects, particularly mealworms. However, this kind of food should be prepared fresh every time you feed it to the birds and you should generally limit yourself to feeding it once a day.
You should also provide water for wild birds. You can provide it from a birdbath or other type of container. Many birds enjoy the opportunity to visit an open body of water such as a birdbath, as this allows them to clean their feathers as well as drink.
4 Look for specific recipes for bird food. There are many good ideas for making your own bird food targeting specific species. Seek advice from places like conservation centers, national park resource providers, veterinarians, local bird rescuers, and bird experts. Preparing a balanced meal can help ensure certain species get their much-needed nutrients, and it's also a lot of fun for the whole family to get involved. These are just a few recipe ideas you can look up online:
Homemade tallow cakes
Tallow and mealworm cakes for tiles
Homemade bird food
Peanut Butter Bird Food
Oat cake for birds
Hummingbird food
5 Take note of how much food you feed the wild birds. If there is food to spare at the end of the day, you are probably overfeeding the birds. Reduce the amount you leave on them each day, making sure all the seeds are consumed.
To avoid the possibility of food left over or food left out for a long time, take note of the times that the birds prefer to feed and focus on adding new food at these times (also note the increase in needs during the breeding season). Birds will soon get used to your routine fitting in with theirs.
Method 2 Choosing a feeder
1 Look for a feeder that is easy to fill, doesn't have sharp edges, and is easy to clean . Also, you need to make sure that it keeps the seeds protected from the rain and that it has adequate drainage.
When buying a feeder, keep in mind the kind of seed you want to put in it. Make sure that the feeder you choose can distribute the seed you choose to the other birds.
Make sure the feeder you choose is strong and won't be damaged if it falls. Feeders can take a good beating, especially from squirrels, so buy one that's strong and made of quality materials so you don't have to quickly replace it.
2 Provides "platform feeders" for large birds or birds that feed on the ground. A platform feeder is a tray with a roof over it and holes on the sides or bottom for drainage. Hang platform feeders from trees or poles at least 12 inches (30 cm) above the ground. Among the birds that are attracted to platform feeders are sparrows, pigeons, jays and cardinals.
Platform feeders are best suited for fruit-eating birds. Chopping grapes, apples, or pomegranates and placing them on a platform helps attract these birds. However, make sure the fruit is fresh. Also remove it once it is no longer damp, as this will attract vermin like rats. [3]
3 Choose a tube feeder if you want to feed small birds. Tube feeders are designed with short perches and large holes; the former are so that small birds can feed without being intimidated by larger birds, and the latter are so that they can feed on large seeds, such as sunflower seeds. Hang tube feeders from trees or on your porch or place them on tall, flat surfaces.
4 Let the hummingbirds feed on nectar feeders. The nectar feeders have a tubular shape and small holes and are designed for hummingbirds. Clean nectar feeders frequently to ensure meticulous hygiene. Since you will need to clean it frequently, choose a container that is easy to take apart.
The sugar solution not only feeds the birds but also stimulates the growth of bacteria. In order for the birds not to ingest infected nectar, it is important to change it regularly and clean the feeder. In cold temperatures (below 20 ° C or 70 ° F), once a week is sufficient, but if the temperature is above 32 ° C (90 ° F), you need to clean the feeder and change the solution daily. [4]
5 Keep tallow in tallow feeders. Tallow feeders, which are square wire cages, are designed to feed birds tallow. They can be attached to the cages as they eat the tallow. It is advisable to have more than one of these feeders in your garden to avoid conflicts between the largest and smallest birds.
If you have grease or lard left over after cooking, you can tape small pieces onto clean, upright nails or similar items along the top of the gates so that birds can perch and peck at them. Don't use nails or rusty objects, and don't let sharp points stick out.
For woodpeckers, for example, consider rubbing tallow against the bark of a tree, which will help attract them to your garden. [5]
Many tallow-eating birds don't like to feel exposed, so placing the feeder near the canopy of trees is a great way to help them feel at home. Woodpeckers like to store their food in crevices in trees and enjoy eating from high branches, but will move to a lower level if necessary. [6]
If the sebum begins to smell strongly or becomes moldy, it has likely gone rancid. Birds can get sick from moldy sebum, so throw it out. [7]
6 Choose a feeder with a hopper for a decorative look. Looking similar to a small house, hoppers can house a variety of seeds and can have perches to suit small and large birds. However, hoppers are a favorite with squirrels, so extra protection is needed to keep them at bay.
Method 3 Install a bird feeder
1 Choose the appropriate location to observe. Since you will want to watch the birds as they feed, it is advisable to install the feeder next to a window in a room where you are frequently found. Keeping the feeder up to 3 feet (90 cm) from a nearby window will also prevent birds from accidentally bumping into it.
2 Choose the right location for the birds. Choose a location that provides protection from the wind. Although some feeders do not need this, pole mounted feeders will sway if exposed to high winds.
Also keep the feeders close to trees and shrubs. These provide a place for birds to hide if predators get too close, something that birds are constantly on the lookout for.
Make sure that predators, like your beloved dog or cat, cannot reach the feeder. Place the feeder in a location that your pets cannot reach.
When feeding nectar-eating birds, such as hummingbirds, mount the feeder in the shade so that the sugar solution stays cooler longer. Although you can place the feeder in the sun, be aware that you will need to change the nectar more often to avoid contamination of bacteria. [8]
3 Assemble the feeder. There are different ways to mount the feeders and these depend largely on the type of feeder you are going to use. The feeder can be hung from a shepherd's hook, mounted on a pole, hung from a tree, or placed in a stable or flat surface. Certain feeders can even be attached to windows, giving you an up-close look at the birds.
Remember to follow the assembly instructions that accompany the design you have purchased. If you've made your own feeder, be sure to mount it safely.
Method 4 Keep pests away
1 Keep unwanted birds away. Your food and feeders will influence the kind of birds that will come to your garden. For example, if you want to keep black thrushes and house sparrows away, avoid common millet. If you prefer smaller birds, choose feeders that larger birds cannot use (such as tube feeders).
2 Keep insects at bay. The sugar-rich nectar that you offer to birds is highly attractive to insects, such as ants and bees. Using a hanging hummingbird feeder instead of a window-mounted device can be helpful, or choose a feeder with a built-in ant shield, which prevents ants from reaching the nectar.
Be careful using other methods, such as applying petroleum jelly or sticky agents, because there is a risk of injuring the birds you feed, dirtying their feathers and reducing their ability to fly.
Bees are a bigger problem because they fly. The best remedy is to be careful when filling the feeder so that there are no splashes of the sugary solution at first that attract the bees. [9]
Never use insecticides to kill ants or other insects. Different types of birds eat different things, and what might be good for one hummingbird could be very bad for a different type of bird, such as a woodpecker, which eats ants. [10]
3 Keep predators at bay. Choose a tube feeder or other small feeder that raptors cannot access. Keep the feeder near a native bush with dense foliage that can offer protection from predator attacks.
Think carefully about leaving out bird food if you have cats used to being outdoors or if there are a lot of cats in your neighborhood. By attracting the birds to the feeder, you may inadvertently set up a buffet for the cats.
4 Keep mice and rats at bay . Mice and rats are often attracted to discarded seeds, so minimizing the amount of seeds will keep them at bay. To do this, choose seeds (like black-shelled sunflower seeds) that the birds in your area will enjoy and eat quickly, add a seed catcher tray to the base of a tube feeder, or give the birds an entirely different meal.
Also remove food that is dry and no longer attractive to birds. It might still be palatable to mice and rats. [eleven]
5 Keep squirrels at bay . Consider using a deflector, a dome-shaped piece of plastic that can be placed under or on top of the feeder, or a bird-safe squirrel repellent, such as one that contains cayenne pepper. Hang the feeder at least 4 feet (1.2 m) off the ground. If you are hanging the feeder from a tree, place it as far away from the trunk as possible. If the feeder is mounted on a pole, keep it away from trees or structures.
6 Be careful about encouraging fruit-eating birds to come to your garden if you grow fruit for your own consumption. You may find that your fruits are eaten too ! Consider using a bird netting around your prized fruit trees and shrubs so that both you and the birds can live in harmony.
Grow native food plants to attract native birds to your garden and discourage them from eating human food crops. This should also work well to save water in your garden and decrease the intensity of your gardening work, as native plants thrive best in their local environment.
Avoid feeding problem plants to the birds. Birds will spread them by excreting the seeds, causing invasive plant problems beyond your garden.
Tips
Feeding orphaned baby birds is very different from feeding adult birds. It requires special attention and specialized knowledge of the particular needs of the species. Read up on the needs of that species or speak to a veterinarian or a member of an animal or bird rescue organization for appropriate details.
Avoid feeding the birds bread unless you are absolutely sure that it is pure and whole and that the birds you are feeding it to can actually digest it (not all can). Many birds love it, from small species such as sturnids, finches and starlings, to larger species such as ducks, geese, swans, etc. However, a steady supply of bread as a food source can encourage pest species to prevail over native species. Also, bread is high in salt and salt is bad for birds, so either avoid feeding the birds bread or keep the levels of bread you feed low. It is recognized that there may be times when high energy complex carbohydrates in the form of bread may be helpful for some birds,[12] However, this should be the exception, not the rule. Never feed moldy bread to birds.
Warnings
Do not recycle the nectar; throw leftovers in the trash.
If you're using store-bought bird food, never give it to the birds if it's past its expiration date.
Know what you should not feed the birds. Avoid foods like dehydrated coconut and peanuts; These are harmful to birds. [13]
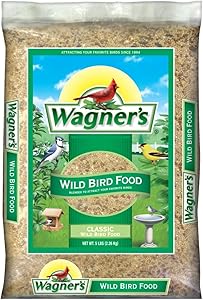
Wagner's 52001 Classic Blend Wild Bird Food, 5-Pound Bag
Attracts a range of backyard feeder birds
Contains sunflower and general purpose seeds
Can be fed in a tube, hopper, or platform feeders
Highest quality grains used
Made in the USA
Feed Wild Birds In Your Home With These Tips
My wife and I love to watch birds, enjoy their colors, behavior and songs. We are always looking for ways to attract more of them to our yard.
We live in Florida and at the end of August we get a little anxious to put the bird feeders with bird seed waiting for our first painted finch and goldfinches.
In this post, we share some essential tips on how to feed wild birds in your home that we have learned from our own experience over the years as well as from our neighbors who also share a passion for feeding wild birds.
There are three basic elements that one can offer the birds to come to your gardens and stay there.
A source of fresh water for drinking and bathing.
A good plant cover for nesting and hiding.
And a variety of quality food to eat.
Patience and Consistency are Very Important
After installing a bird feeder, it can take days or weeks for birds to discover your feeder. If a bird feeder is installed during the summer and spring when food is readily available to birds, it may take longer for them to start using your feeder. During the cold months of the year, birds need to consume more food to thermoregulate their bodies and they are hungry more often, therefore they are more likely to find feeders faster.
It seems that in areas where people regularly feed the birds, they will easily find and use new feeders in a shorter period of time.
Once the birds discover and use their feeder, it is very important to be consistent in keeping the feeder stocked. Birds are highly territorial and depend on food sources within their territories. They follow daily routes to forage and rely on their feeder as a food source. If the feeder is empty at times, the birds do not consider it a food source and may not include your yard in the daily feeding route.
What is the Best Season to Feed the Birds in Your House?
During winter, when insects, seeds and berries are scarce and depending on the region, snow cover can make it difficult to access food.
For birds that overwinter in regions where cold weather is prevalent, feeders can be a lifesaver during extremely cold periods. For migratory birds, feeders help them put on the fat and weight necessary for a successful migration flight.
Although food is more available during the spring and summer months, some birds will still visit your feeders if food is available.
Water for Drinking and Bathing
When it comes to water, birds get most of what they need from natural sources and rainwater. However, when they find a convenient source of water, such as a water feature in your yard, they will prefer it to distant natural sources. What better for a bird than to have to eat and drink in one place!
During periods of dry weather or in dry regions, a water feature will attract a large number and variety of birds.
It is very important that water is constantly available in your yard so that the birds depend on it and return when they are thirsty or need a bath. The water source will need to be filled or completely replaced depending on how you use it. If several birds drink and bathe in a water source, it will get dirty faster. Over time one will be able to determine how often the water needs to be changed.
Vegetable Cover
All birds need trees and shrubs for nesting, to hide from predators, and to protect themselves from the weather. Even if your yard is small, a mixture of shrubs and trees can give them hiding places in the summer and protection from the cold in the winter. While having a vegetative cover helps, feeders in yards with few or no trees and shrubs also attract common birds.
Some birds are quite shy and do not approach a feeder if there is not enough plant cover near the feeder, others do not need much cover. A good example is the goldfinches that only use the feeders near bushes. Neighbors who have little or no vegetative cover appear not to attract goldfinches to their feeders.
Food and Feeders
Nothing works better at attracting birds than the right food and feeders. It is especially true in areas where harsh winters and prolonged snow coverage make natural food sources difficult to access during winter. Additionally, birds burn more calories to keep warm during cold winter temperatures. For example, studies have shown that some birds eat twice as much in winter than in summer, this difference comes from the need to thermoregulate their body temperature.
Types of Wild Bird Food
Birds eat a wide range of seeds and food mixes. Depending on the season, many stores sell seeds that serve as food for birds. Some of the packages are labeled to indicate the type or combination of seeds contained in the package and the type of birds that these seeds or mixes attract.
The best thing is to buy quality food. If it is only one type of seed or mixes of seeds it is good to see what type of seeds are included in these mixes.
Seed mixes are popular because different mixes attract a wide variety of birds. However, be sure to choose mixes that don't have a lot of fillers that the birds won't eat and that are discarded by the birds creating a build-up of food and seed hulls under the feeder. Low-quality foods that birds often discard include sorghum, oats, and wheat. However, some birds, such as pigeons, turtle doves and sparrows, eat this food without problem.
Sunflower seed
If you are starting to feed wild birds, sunflower seed is the food to start with. The sunflower seed in its natural form has a shell that birds can open to eat the contents. However, the husks fall to the ground and this can create a build-up of debris that needs to be cleaned. Peeled sunflower seed is also sold on the market.
Thistle Seed
Thistle seed is highly preferred by all birds, particularly those with small beaks, such as finches and goldfinches. The thistle seed also has a seed that the birds peel and discard. Thistle seed is cultivated and consumed by people in parts of Africa, India, and Asia, but is known as a seed for feeding birds in other parts of the world. This seed must be sterilized before export, which in addition to the cost of importing from abroad results in one of the most expensive bird seeds.
Seed Mixes
Seed mixes are an option for those starting to feed birds. Various types of food attract a wide variety of birds. Seed mixes sometimes include additives that birds do not eat and dump from the feeder creating a build-up of litter under the feeder. It is recommended to choose seed mixtures with few additives.
Millet Seed
Millet seed is a common ingredient in most wild bird food mixes. This seed comes in various colors such as gold, red and striped, all of which have similar nutritional content. Millet seed is relatively easy to produce and cheap. These seeds can last a long time in the feeder, as the grains are tiny compared to sunflower seeds.
Prepared tallow
The tallow is for birds that normally do not go near seed feeders, such as warblers, woodpeckers, thrushes, nightingales and magpies among others. These tallow are made from animal fat mixed with seeds, worms and even pieces of meat. These tallow can soften and even melt during hot weather and can permeate the feathers causing problems for the birds. It is recommended that the tallow be offered to the birds during the winter months.
Nectar
Natural nectar is an energy-rich liquid produced by some flowers to attract pollinators. Hummingbirds like nectar, but orioles, honeys, and tanagers also enjoy it. Artificial nectar can be purchased in powder, concentrate, and ready-to-drink forms. Nectar can also be easily made at home using a simple recipe that mimics the concentration of sugar in natural nectar. If you prefer commercially produced nectar, avoid varieties that include colors, flavorings, or preservatives that could be dangerous to birds.
Ground corn
Other types of foods that can be fed to birds include fruit, ground corn, birdseed, mustard seed, and peanut butter. These can be offered to birds alone or as mixtures of two or more types. Sorghum, oats, and wheat are also consumed by some birds.
Which Feeder is Good for Feeding Wild Birds?
Some birds prefer a particular type of feeder. Some species forage for food on the ground, others in bushes, and others in trees. Some normally perch on horizontal branches, while others have no problem holding on to vertical perches or even eating with their head down.
The birds that normally feed on the ground are reluctant to use feeders placed above the ground, while that feed on trees and shrubs are reluctant to use feeders on or near the ground. Ideally, one would use several types of feeders with various types of food placed at various levels in height to attract a wide variety of birds.
Platform or Tray Type Feeder
Platform feeders are the simplest and most effective for feeding a wide variety of birds. When filled with a diverse type of food, platform feeders attract many species of birds. Raised feeders have the advantage that the seed does not spoil as quickly as seeds placed directly in the ground.
Tube Type Feeder
The tube feeder is the best option if you are going to have only one type of feeder in your yard. Fill it with a seed mixture and you will attract a lot of birds. Some tube feeders are specifically made for thistle and millet seeds for birds with small beaks.
Tallow Feeder
There are several types of tallow feeders. Cage-type feeders are the most popular and are typically made from coated wire. Esebado trunk consists of a trunk with pre- drilled holes, which are used to insert small blocks of tallow. Mesh bags , which are filled with tallow and hung for small birds which cling to the bag to eat the tallow. Open trays are good for setting chunks of tallow for many birds to taste. This is also a great way to get birds that don't know tallow to taste it.
House Type Feeder
Hopper or house-type feeders can hold a good amount of food for birds. These types of feeders are easily used by many species. If your feeder is newly installed and the birds haven't found it yet, be sure to fill the feeder only a third full so the seed doesn't spoil. Once the birds find their feeder and the demand for feed increases, then you can fill the feeder a bit more.
Window Feeder
Window feeders are great for seeing birds up close through your window. These feeders are easy to install and maintain. This type of trough is used in apartment buildings and also in windows in houses. There are two types of window feeder: those that stick to the glass through suction cups and those that are attached to the base of the window. Some window base feeders protrude into the house through the open window, while others are secured outside the closed window.
Where to Place the Feeders for Wild Birds?
Bird feeders can be hung from an existing structure, such as a porch or wooden column. You can also cross a wire across part of your patio and hang the feeder in the middle; or also use another creative way to place a feeder. The most common way to mount a feeder is by using a pole with hooks to hang the feeders. These poles can be purchased ready-made or made by yourself.
feeders for wild birds
Mount feeders in an open area at least 10 feet away from trees and shrubs. This will give the birds a chance to flee from predators, such as raptors, which may hide in bushes or trees.
Hang the feeder at least 5 feet off the ground to prevent squirrels or mice from reaching the feeder. Deflectors or other obstacles can also be used to prevent other animals from destroying the bird food.
Tallow feeders can be placed on tree trunks for the birds that normally feed there. Platform feeders can be mounted several inches off the ground or higher. Some put seeds directly into the ground.
If you plan to put a bird feeder near a window, be sure to do so within two to three feet of the window. Birds can be confused by the reflection in the glass and try to fly through it thinking it is an open space. But with the feeder so close they can't get enough speed to injure themselves.
What Size and How Many Bird Feeders?
This will depend on the number of birds visiting your yard and your willingness to feed more birds. Large feeders at various sites will provide food for all birds. Multiple feeders help prevent certain birds from taking over a feeder and not letting others get close to eating.
The birds that take over the feeder may be a particular individual of a species that for some reason scares off other birds. It can also be a whole group of birds such as house sparrows because they come in flocks and are aggressive towards each other and other birds.
Some bird enthusiasts increase the number of feeders during winter when food is more difficult to obtain from the environment. Others maintain a single feeder throughout the year.
feed hummingbirds
Feeding the Hummingbirds, Hummingbirds, or Buzzers People love to feed hummingbirds and feeding them can help them survive before and during migration when they need a lot of nectar to double their body mass. This is particularly important in regions where hummingbirds migrate.
Hummingbirds are known as hummingbirds or hummingbirds in different regions of South America.
The nozzles that deliver nectar to hummingbirds are similar in almost all hummingbird drinkers, but the bottle that contains the nectar varies in size and shape.
The typical hummingbird feeder or trough consists of a glass bottle that is screwed to the base that contains the plastic flowers and nozzles that supply the hummingbirds with nectar . There is also the type of trough which is a flat and wide plastic container where the lid with the flowers and feeding nozzles closes the trough above. Both types are easy to clean, which is very important when feeding hummingbirds.
To install a hummingbird waterer , find a shady spot to hang it to prevent the nectar from spoiling quickly if not consumed by hummingbirds. Many people like to enjoy hummingbirds from inside their home and hang feeders on shady porches or against windows. Hummingbirds adapt quickly to the presence of people.
feed birds in your house
Dealing With Mice and Squirrels Squirrels and mice can be a problem and will eat the contents of the feeder in a short period of time if they are not controlled. It really wouldn't matter if they ate the food on the ground discarded by the birds. The problem is that the squirrels and mice make it to the feeder and park there for a long time eating the bird's food.
Practical ways to prevent squirrels and mice from reaching the feeder include:
Add a squirrel and mouse deflector. If your bird feeder is on a pole, install a squirrel baffle, which consists of a plastic dome with the hollow part facing down. Squirrels and mice cannot climb up the pole and reach the feeder. Make sure the feeder is at least five feet off the ground and 10 feet from a tree, branch, or other structure that squirrels and mice can use to jump onto the deflector.
Hang the feeder from a wire between two trees, but far enough away from any branches.
Use a 4 x 4-inch power pole and put PVC tubing or wrap the pole with metal sheet. Squirrels and mice cannot scale these obstacles.
Other bird enthusiasts put a spring on the feeder post, use hot sauce on the seeds, or Vaseline on the post. All of these methods work for some, but squirrels and mice often find their way around these obstacles.
Dealing With Cats Studies have shown that even well-fed house cats hunt and kill many birds. It is very important to keep your cat indoors as the "only" solution to prevent birds from falling victim to a cat.
The solutions given on the Internet to prevent cats from marrying and killing birds in their feeders make little sense. These solutions include:
Place your feeders in the middle of your yard to give the birds a chance to avoid the cat. Planting a belt of cacti around the feeder. Put a collar with bells on the cat so that they warn the birds.
Make a fence around the feeder. Those who propose this idea suggest making a belt of cut plastic bottles, in the upper third, filled with water to prevent cats from approaching the feeder.
These solutions can work to some extent to prevent cats from trapping birds in the feeder. But when you attract birds to your yard, the birds typically hang out in trees, bushes, and on the ground inside your yard when they're not eating at the feeder. Cats are a patient predator that can lie still for long periods of time and surprise birds that spend time in your yard. Attracting birds to your garden will increase the likelihood of fatal bird-cat encounters.
If you are going to implement a wild bird feeding plan in your backyard, it is very important to keep your cat indoors or let him out under your supervision for a period of time.
How to Store Food for Birds How you manage and store bird food will largely depend on the scale at which you feed the birds. If you keep only one feeder, the most practical way to use and store the feed is to keep it indoors, taking it out only to fill the feeder. We keep only one feeder during the summer and keep the seeds in the bag it came in until it is finished. Other people use a plastic container with a special lid and spoon to fill the feeder. The plastic container is kept inside.
If you keep multiple feeders and feed a lot of birds , then buying bulk bird food and storing it is a good idea. It is important to consider where and how to store the bird feed, as one will be refilling the feeders often. You would want to keep food close to the feeders.
This often means keeping bird food in an outside shed in aluminum metal containers (trash cans, but new and clean) with a lid or 5-gallon buckets. Depending on the amount of food you feed, you could have several vials or one for each type of food or you could also store the food in bags inside the larger metal can with a lid. Metal containers and plastic wallets are tough and will prevent squirrels and mice from chewing on it and making holes to get food inside.
Nectar Storage If you are new to hummingbird feeding and your feeders have not been discovered by them, making a small amount of homemade nectar would be ideal.
Depending on the region you live in, hummingbirds may find your drinking fountain the same morning you put it in, or it may take days and only a few hummingbirds will visit.
Knowing how much hummingbirds that visit your drinker regularly consume will determine how much nectar you prepare. Making enough nectar for a week and refrigerating it until all is used is not a problem. Some hummingbird feeding enthusiasts claim to store nectar refrigerated for a period of three weeks without noticing any cloudiness and odor. More importantly, they report that their hummingbirds didn't notice a difference when the chilled nectar was put into the trough. Nectar is so easy to make that brewing small amounts each time it is needed would make more sense. Cleaning the Bird Feeders Many birds interacting around a safe feeder that results in body fluids and droppings in the feeder which can transmit disease. It is recommended to clean the seed feeders every two weeks during heavy use time.
Hand wash the feeder with a brush using a diluted bleach solution of 1 part bleach to 9 parts water. Thoroughly dry the feeder before refilling it with bird food.
Hummingbird waterers should be cleaned once a week. Soak the fountain in hot water and use a bottle brush to clean the inside and outside of the fountain. You can also fill the bottle with a diluted bleach solution by forcing this solution through the plastic nozzles and flowers that supply the nectar.
Alternatively, you can soak the entire open sprue in the diluted bleach solution. Be sure to air dry the waterer before refilling. The use of soap and detergent is not recommended.
Final remarks
Feeding birds in your home will make your yard a charming place for you and a more attractive place for birds. Birds will be a good excuse to sit outside and commune with nature.
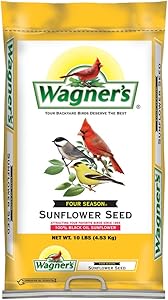
Wagner's 76025 Four Season Black Oil Sunflower Seed Wild Bird Food, 10-Pound Bag
Attracts the widest variety of birds
Thin shelled sunflower - makes it easy for small beaked birds to open
This seed has the high energy content that all birds need to maintain their healthy lifestyle
Highest quality grains used
Made in the USA
7 types of seeds for birds: characteristics and properties
Seeds are the most common food for birds, but you should know that they are not all the same, so it is very important to know how to choose them wisely. And is that each type of bird prefers a different type of seed. For example, while cardinals tend to like black-shelled sunflower seeds better, finches prefer shelled and thistles. And birds that feed on the ground, such as pigeons, sparrows, scratchers, and reeds like millet seeds best. Next, we explain which are the most common bird seeds and what properties each of them have.
1. Canary seed seeds
Canary grass is an oval seed, bright yellow in color and with a pointed shape . They are usually consumed by the same species of bird that include millet in their usual diet, which in addition to serving as food, serves as entertainment . They have a high starch content and have very little fat, so it is advisable to mix them with others that have a higher proportion of fat.
2. Millet seeds
Millet is a rounded seed that is essential in the diet of inseparable birds and parakeets . In contrast, large parrots tend to despise and ignore this type of bird seed, with the exception of the Eclectus. In the case of the birds that are raising, the best choice is the panizo, since being softer, it can be digested more easily by the chicks.
3. Sunflower seeds
It is a white seed with black stripes, oval in shape and flattened in appearance . We can find them white, listed and black. The preferred ones by the parrots are the white ones, but the granivores prefer the small striped ones. Although most birds like them very much, they should never be the only food in the diet . Also, salty foods should never be provided for human consumption, but purchased from a specialized bird food store . Remember to always choose large ones, since there are many birds that do not even make the effort to open the small ones, which means that a large part of the amount we buy will not be used by our birds.
4. Hemp seeds
The best hemp seed is the greyish-bronze one with a slight hint of green . The grain is white and has a flavor very similar to that of walnuts. A very strong seed that can be crushed to make it easier for birds to eat them. In small quantities it is one of the most valuable foods for canaries , since they are rich in oils and vitamin E. In addition, it greatly improves the condition for their reproduction. With which, if you want to breed, it is advisable to supply a teaspoon for each one a day.
5. Flax seeds
Flax seeds are dark in color and flat in shape . Very good for brightening plumage . In fact, during the molt, it is necessary to increase the ration. In addition, in small doses it helps to improve digestion.
6. Poppy seeds
Red poppy produces very small blue-gray kidney-shaped birdseeds. But the white ones give rise to a cream-colored seed that is preferred by most birds, especially by small granivores. However, it is necessary to avoid supplying it in excess, since it favors the retention of liquids and makes the stools are much more liquid.
7. Oat seeds
The oat seed is yellow in color and can be found in whole or broken seed bags, and can be supplied to our birds dry or soaked . An ideal food for canaries that are breeding, since oats are an easy to digest seed that can be easily disposed of. In addition, they help to stimulate the metabolism.
Food to attract birds to the garden or balcony
We have already spoken on several occasions about the importance of biodiversity in the garden on other occasions, in the case of birds, it is easy to turn a simple garden or balcony into a cozy space for them, making life easier for them in urban environments and incidentally benefiting from its presence for the control of pests of our ornamental plants and crops. If you want to discover the benefits of attracting birds to your garden, check this post.
The subject of food is essential to accustom the birds to visit our garden, to help the birds survive in periods of unfavorable weather and are in good reproductive conditions in spring- Here are some ideas of simple meals according to the birds that we want Attract:
Fresh or dried fruit
The fruit is highly prized by birds, especially among thrushes and blackcap. Pieces of apple or pears, even very ripe, strung on a wire and hanging from a branch will attract many birds. They will also appreciate half a coconut hanging upside down. The most appropriate feeders for this type of food are those of the “click and hang” methodology, like the one shown below.
Seeds It is very common to find seed mixtures to feed the birds, although it is important to control the quality. Some examples of seeds are:
Pipes: adored by parrots, excellent hunters of mosquitoes and other invertebrates, it is interesting to have them around.
Millet: The favorite of sparrows, accents, greenfinches, bunting and turtledoves
Corn: For blackbirds and accentors
Thistle seeds: their high oil content makes them quickly devoured.
The feeders for this type of food are shown in different formats. It is important to be able to hang it from branches where they are protected from predators (such as cats).
Bread It is eaten by many species. Opting for the integral one is the best option, since we will also provide them with an extra seed. Important: Moisten the bread before feeding it to the birds so that it does not swell in their stomachs.
Grated cheese If you want to attract robins to the garden (which, by the way, usually accompany their snack with a second plate of flies and mosquitoes), the grated cheese does not fail. Robins like to eat on the ground, a small plate in a visible place and away from predators.
Tallow The tallow cakes are a very nutritious and attractive food for birds, especially during autumn and winter, but a good supplement all year round. Chickadees and titmouses, woodpecker, nuthatch, warblers, redstart, etc. will approach.
You can buy them already made and make them yourself, here you have a simple recipe to make them.
Leftovers Boiled eggs, cooked rice (the best wholegrain, but they won't turn down a good bowl of white rice either), stale cookie scraps, and salads.
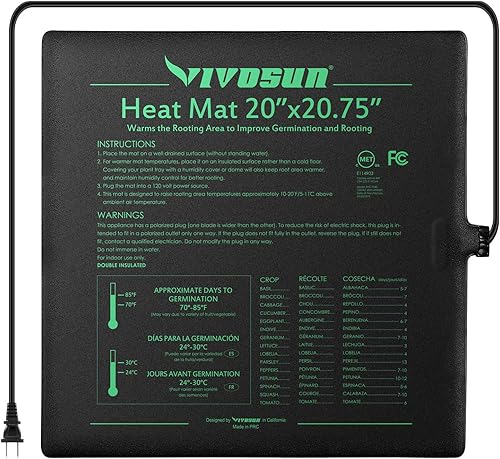
VIVOSUN Durable Waterproof Seedling Heat Mat Warm Hydroponic Heating Pad 20" x 20" MET Standard
RELIABLE RESULTS: VIVOSUN’s professional heat mat maintains temperatures in the sweet spot of around 20-30℃(68-86℉)- perfect for seed starting and cutting propagation
STABLE, UNIFORM HEAT: VIVOSUN's strengthened heating film ensure this durable mat never scorches your roots and produces lots of revitalizing dew when used with a humidity dome
BUILT TO LAST: Supple, flexible and ultra-durable, VIVOSUN goes beyond stringent MET standards, water-resistance that enables safe scrubbing and a 1-year warranty
BEST SAVINGS IN THE MARKET: This 20" x 20.75" mat is perfect for two standard 1020 trays and slightly larger than comparable mats on the market; it also runs on only 40 Watts to help you save on electricity
INNOVATIVE HEATING: With radiate far-infrared light wave, making the heat source softer, and proving the seeds with enough heat, it can be heated up to 40 ℃(104℉)at an ambient temperature of 20-25 ℃(68-77℉)in minutes; Recommended for use with VIVOSUN's thermostat
How to protect plants from the cold
In these months when temperatures drop extremely at night it is recommended that you know how to protect plants from the cold . And there are many trees and plants in your garden that can deteriorate or die from night frosts and the extreme cold of winter.
Clear and calm nights, where there are few or no clouds to reflect the heat on the ground and little or no wind to disperse the warmer parts of the air, are ideal for frost. Cold air then settles at the lowest point, while warm air rises and moves away from the ground.
The frost cause ice crystals to form in plant cells, damaging them severely. Ice makes water unavailable to plant tissues and disrupts the movement of fluids within the plant. Frost-damaged leaves appear soaked in water, wilted, and turn dark brown or black. Its tissues are not able to absorb water, and the plant dies due to desiccation.
The protection of plants and trees in cold weather requires some advance planning. Likewise, it is necessary to know in advance what type of trees and plants are best resistant to low temperatures. That way, it will be easier for you to keep your garden in good health.
Here's what to consider before choosing a plant if you live in a cold and frost-prone area.
Tips for choosing trees and plants in cold climates
Know the resistance of plant species
The first thing to assess before planting is that plants are classified according to the minimum temperatures that they normally tolerate. So-called " hardy plants " tolerate a certain amount of short-term freezing. While the " tender plants " die or are damaged by freezing temperatures.
Thus, we find that the best cold-resistant plants for a garden are broccoli, carrots, lettuce, cabbage, chives, radish, spinach, chard or leeks.
In contrast, young plants are more sensitive to frost. Among this class of plants we find avocados, tomatoes, peppers, aubergines, corn, bougainvilleas, fuchsias, begonias, geraniums or citrus trees. Also shrubs and trees that bloom in spring, such as cherry and azalea.
Choose the best location
There are a number of factors that can influence whether the life of a tree or plant is extended or not. Terrain elevation, surface reflectivity, soil properties, canopy cover, and proximity to other structures or plants can all affect the heat radiation your plants receive.
Avoid planting young species in open, exposed areas or in low places where cold air settles. These types of plants are best placed near a wall facing south or west, which absorbs heat during the day and radiates it at night. Fences, boulders, walls, bushes and other plants can also serve as a protection function for other nearby plantations.
The areas with depressions in the soil are very susceptible to freezing , avoid planting them. Cold air drains into these "pockets" and cannot get out. When this happens, plants located in depressed areas can suffer frost damage. Therefore, try not to sow seeds or plant new plants in these low places.
Tricks to protect plants from the cold
When the cold arrives, not only people need to protect ourselves. To ensure that your plants and trees survive low temperatures, it may be necessary to cover them just like we do ourselves.
1. Add mulch A layer of mulch can help protect perennials and newly planted shrubs and trees when cold temperatures hit. As the soil freezes and melts, it can expose some surface roots of the soil, making them even more vulnerable. Mulch helps provide a layer of protection to the roots of the plant in these cases.
2. Cover trees and plants If you have young trees or varieties that have a thin bark (including some fruit trees), wrap their trunks with cardboard, blankets, or cloth. Otherwise, as the crust expands when the temperature is warm and contracts when it cools, it is likely to break. You can also use plastic to cover trees and plants, but make sure it is black so that it reflects the sun's rays and does not have a greenhouse effect on the trunk.
If you are covering your plants before a hard frost, it is best to do it before dark. If you wait until darkness falls, most of the heat stored in the garden will have dissipated.
No matter what type of cover you use, make sure it extends to the ground on each side. Do not leave any openings so that the heat does not escape. Stakes are also recommended to prevent the protective material from coming into contact with the foliage. Put the protector over the plant, preventing it from sticking to the trunk. Thus the heat that radiates from the soil will reach the plant.
In the morning, after the frost has thawed, remove the covers. If you don't, the plant could break its dormancy and begin to actively grow again, making it even more susceptible to frost damage in the future.
3. Wet the floor Water the soil thoroughly (except around succulents). Moist soil holds heat better than dry soil, protecting roots and warming the air near the ground. This prevents freezing of the roots of the plant. During the night, moist soil will release moisture into the air, which will raise the temperature and keep the plants warmer.
It is recommended that you keep the most delicate plants in pots, so that you can take them to a sheltered place when the temperatures drop.
4. Harden the seedlings Before planting the seedlings, you can acclimate them outdoors by gradually exposing them to outside conditions. This process is known as hardening, and it can help you grow stronger plants that are more likely to withstand inclement weather.
The hardening process should begin about 14 days before transplantation. When the weather is mild and above 7 ° C, place the seedlings outside during the day in a warm, shady place that is protected from the wind. At night, take them back inside.
After two weeks, the seedlings will be stronger and more resistant plants and will be ready for transplanting.
What to do if my plants have frost damage?
Just because you see that your plants have been damaged by frost does not necessarily mean that you should take drastic measures. Many plants are surprisingly very hardy and will likely sprout again in spring.
So the best option is to wait until the temperatures begin to rise again (usually around March) and see if new leaves sprout.
VIVOSUN Durable Waterproof Seedling Heat Mat Warm Hydroponic Heating Pad 10" x 20.75" MET Standard
RELIABLE RESULTS: VIVOSUN’s professional heat mat maintains temperatures in the sweet spot of around 20-30℃(68-86℉)- perfect for seed starting and cutting propagation
STABLE, UNIFORM HEAT: VIVOSUN's strengthened heating film ensure this durable mat never scorches your roots and produces lots of revitalizing dew when used with a humidity dome
BUILT TO LAST: Supple, flexible and ultra-durable, VIVOSUN goes beyond stringent MET standards, water-resistance that enables safe scrubbing and a 1-year warranty;This product didn't specify any expiration date
BEST SAVINGS IN THE MARKET: This 10" x 20.75" mat is perfect for standard 1020 trays and slightly larger than comparable mats on the market; It also runs on only 18 Watts to help you save on electricity
INNOVATIVE HEATING: With radiate far-infrared light wave, making the heat source softer, and proving the seeds with enough heat, it can be heated up to 40 ℃(104℉)at an ambient temperature of 20-25 ℃(68-77℉)in minutes; Recommended for use with VIVOSUN's thermostat
How to help your indoor plants through the winter
During the winter the days get shorter, the temperatures drop and the houses are heated. All these conditions make life more difficult for indoor plants. A little care will help them get through this time.
The perfect location
Many plants use this low light season as a resting phase. They stop growth and reduce metabolism. Indoor plants prefer a slightly warm environment, while people generally like to have a very warm indoor temperature. For a large number of plants it is sufficient to place them further from the radiator. If you have plants in front of a window, make sure it doesn't get a cold breeze. Also keep in mind that the leaves do not touch the cold window, otherwise the plant will have a thermal shock and its leaves will turn brown and fall off. The root ball of the plant should not be located in a cold place, nor too hot. The most sensitive plants react with the loss of their leaves.
Proper maintenance
Indoor plants don't need as much water in winter. That is why you should check the soil moisture before watering them.
The air dries up due to the heating. This is uncomfortable for humans and plants. There are a few ways to make it more enjoyable. One way is to fill a plate with clay granules and water and put it under the pot. The water evaporates and moistens the air.
Another possibility is to spray the plant with warm softened water a couple of times a week. The spray mist prevents the plant from losing a large amount of moisture, covering the leaves. This also works against unwanted dust that reduces light. Therefore you should regularly clean the dust with a damp cloth. By doing this, photosynthesis will not be affected.
Especially in winter, small animals such as spider mites or mealybugs are comfortable in indoor plants. Pests multiply rapidly in hot, dry air. The best bet is to check the leaves and soil once a week. If the leaves have sticky spots, they indicate a pest infestation. In this case, you must separate the plant from the others, put them in the bathtub and give it a shower. Before starting the shower, put a plastic bag around the pot so that the plant does not absorb too much water. In case of not getting rid of pests, a suitable pesticide can be purchased. To avoid infestation by aphids pests you can place pieces of garlic in the pot. Make sure they are covered by soil so the garlic smell stays in the pot.
Here we have summarized the most important points
Do not water too much
Increase humidity
The plant should not be placed in too cold / hot soils
Avoid gusts of cold
Beware of pests
Make sure the plants have enough light
How to protect plants from the cold
If the weather is too cold or if your plants are too delicate, there are things you can do to help your garden get through the winter. It all depends on how delicate the plants are, how cold the climate is, how long the low temperatures will last, and how much energy and time you are willing to invest. No help will be enough to protect the growth of certain plants in certain climates, but in many cases a little extra care can help temporarily.
Protect Plants from the Cold Step 1
1 Bring potted plants indoors. The first and easiest solution to the cold is simply to protect the plants from low temperatures. If you have potted plants or hanging baskets outside, put them indoors. Even moving them to the garage or onto a verandah is beneficial as it carries a temperature rise of at least 10 Fahrenheit (5 degrees Celsius). If possible, the best solution is to place the plants inside the house as decoration. They will get the necessary heat without taking up additional space.
Place potted plants near windows according to their solar needs. Windows facing east and west receive the most light, while windows facing north and south receive the least.
Avoid placing potted plants near vents, as they can dry out and begin to die.
Placing plants too close to the window can be harmful if it's very cold outside. Freezing temperatures can travel from the window to the plant if they are in contact.
2 Lay out a layer of mulch . Mulch serves as an insulator, retaining heat and moisture from the soil. It is used to protect the root system of plants from cold temperatures. Sometimes the low temperatures are not what damages the plant, but the freeze-thaw cycle that affects the soil and causes it to "reject" the plant. Likewise, cold soil can prevent water from spreading easily from the plant. Regardless of the reason, applying a layer of mulch that is 2 to 3 inches (5 to 8 cm) thick will prevent these problems.
Mulch made from wheat or pine straw works well, being easy to remove when the soil is ready to be rediscovered. Also, it traps heat well.
Some plants, like roses and strawberries, can get through the winter by covering them completely with clean mulch.
Isolation works in both directions. It prevents the floor from cooling down too quickly, but it also prevents it from heating up early when the time comes. It is advisable to move it away from the plant when spring begins to warm. [one]
3 Cover the plants. Put an old sheet, blanket, or canopy over delicate plants. If the plants need to be protected from a few especially cold nights, a simple shelter like an old sheet may suffice. Choose the cover and spread it carefully so that it does not touch the leaves or branches of the plant. You may need to put in some stakes to support it if you don't want it to damage the plants. This method works best for frost protection rather than low temperatures, as the cover will not raise the temperature much.
Remove it during the day so that the plants get air and light.
You may need to put weight on it or tie the blanket so it doesn't fly off.
4 Build a nursery or greenhouse. Build a simple temporary nursery by bending metal poles into arches and embedding the ends in the soil along the rows of the garden. Then, place a clear plastic sheet over the arches to enclose the plant. This serves to trap heat and block frost and is the best solution to keep plants safe and warm during the winter. The bad news is that it requires construction work and is not the most visually pleasing solution.
Build a somewhat more permanent nursery by placing a hinged window or shutter on the open side of a box made of scraps of wood.
Build a greenhouse out of PVC arches.
Make sure the plants in the greenhouse or nursery receive adequate ventilation. Think how hot the interior of the car gets on a sunny day. If the temperatures are hot during the day, open the shelter to let the air circulate. Failure to do so can cause the plants to overheat or create too much humidity indoors.
5 Water the plants. Water the soil around the plants liberally before a very cold night or frost. Soil traps heat better when wet rather than dry, and water slowly evaporates, warming the air around the plants. Don't do this if you expect a severe frost, as it could backfire. However, to protect against light frost, abundant watering can help retain the heat of the day at night.
Do not water frozen soil, as it will not be helpful and can actually make conditions for the plants worse.
Don't over-water the soil around succulents, as they don't tolerate humidity levels. [2]
6 Provides a source of heat. If there is an episode of extreme cold that the plants will not survive, you can help them by providing a source of heat. Cover them with a plastic canopy, blanket, or homemade greenhouse (as described above) and place the heat source inside. Some possible sources of heat are Christmas lights or a 100 watt light bulb, as they are not hot enough to damage plants, but they are hot enough to increase the temperature. Do not place the heat source in direct contact with the plants, but rather far away, so that it increases the temperature without burning the plants.
Use extension cords and safe outdoor materials to avoid a dangerous situation.
Uncover the plants and turn off the heat source during the day to allow them to ventilate. Also, this prevents a fire from starting from an overheated bulb. [3]
7 Choose plants suitable for the climate. It is the simplest and least demanding option. Find out the hardiness zone in which you live, if your country has that classification system, or at least the lowest and highest temperatures possible during the year to get plants that resist them. In the United States, this classification system is run by the USDA. Some plants may dry out, lose their leaves, or become dormant in winter, so take the time to learn which plants are well adapted to the climate. The disadvantage of this method is that the selection of plants is obviously limited.
Annual plants dry out every year and must be replanted if not self-seeded. In cold climates, some perennials can be grown as annuals if there is no other way for them to survive the winter. The growing season for some annuals can be extended with shelters or by planting them indoors or in a greenhouse.
Perennials continue to grow year after year. In the case of these, you should find out the additional care required for them to survive the winter, if there is any.
Talk to people at your favorite nursery about what to expect of a plant during winter in the area. Also ask where to plant and how to care for a plant before buying it.
Look for varieties and types of plants suitable for the climate. There are more robust cultivated varieties than others, which makes them a better option for cold environments. [4]
Tips
Find out about the plants you have to find out how cold they tolerate, how they behave in it and what is the best way to help them get through the winter or protect them from frost. Some plants tolerate being covered, transplanted, or digged better than others.
If a plant has been indoors for a long time or if you are planting a seedling indoors, bring them outside gradually, starting with an hour a day and increasing the time. This is called "hardening" and it helps the plant adapt to the outdoors and become resistant.