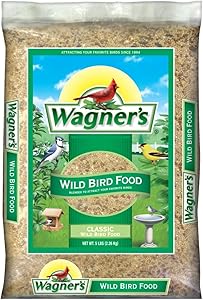
Wagner's 52001 Classic Blend Wild Bird Food, 5-Pound Bag
- Attracts a range of backyard feeder birds
- Contains sunflower and general purpose seeds
- Can be fed in a tube, hopper, or platform feeders
- Highest quality grains used
- Made in the USA

Feed Wild Birds In Your Home With These Tips
My wife and I love to watch birds, enjoy their colors, behavior and songs. We are always looking for ways to attract more of them to our yard.We live in Florida and at the end of August we get a little anxious to put the bird feeders with bird seed waiting for our first painted finch and goldfinches.
In this post, we share some essential tips on how to feed wild birds in your home that we have learned from our own experience over the years as well as from our neighbors who also share a passion for feeding wild birds.
There are three basic elements that one can offer the birds to come to your gardens and stay there.
- A source of fresh water for drinking and bathing.
- A good plant cover for nesting and hiding.
- And a variety of quality food to eat.
- Patience and Consistency are Very Important
After installing a bird feeder, it can take days or weeks for birds to discover your feeder. If a bird feeder is installed during the summer and spring when food is readily available to birds, it may take longer for them to start using your feeder. During the cold months of the year, birds need to consume more food to thermoregulate their bodies and they are hungry more often, therefore they are more likely to find feeders faster.
It seems that in areas where people regularly feed the birds, they will easily find and use new feeders in a shorter period of time.
Once the birds discover and use their feeder, it is very important to be consistent in keeping the feeder stocked. Birds are highly territorial and depend on food sources within their territories. They follow daily routes to forage and rely on their feeder as a food source. If the feeder is empty at times, the birds do not consider it a food source and may not include your yard in the daily feeding route.
What is the Best Season to Feed the Birds in Your House?
During winter, when insects, seeds and berries are scarce and depending on the region, snow cover can make it difficult to access food.For birds that overwinter in regions where cold weather is prevalent, feeders can be a lifesaver during extremely cold periods. For migratory birds, feeders help them put on the fat and weight necessary for a successful migration flight.
Although food is more available during the spring and summer months, some birds will still visit your feeders if food is available.
Water for Drinking and Bathing
When it comes to water, birds get most of what they need from natural sources and rainwater. However, when they find a convenient source of water, such as a water feature in your yard, they will prefer it to distant natural sources. What better for a bird than to have to eat and drink in one place!During periods of dry weather or in dry regions, a water feature will attract a large number and variety of birds.
It is very important that water is constantly available in your yard so that the birds depend on it and return when they are thirsty or need a bath. The water source will need to be filled or completely replaced depending on how you use it. If several birds drink and bathe in a water source, it will get dirty faster. Over time one will be able to determine how often the water needs to be changed.
Vegetable Cover
All birds need trees and shrubs for nesting, to hide from predators, and to protect themselves from the weather. Even if your yard is small, a mixture of shrubs and trees can give them hiding places in the summer and protection from the cold in the winter. While having a vegetative cover helps, feeders in yards with few or no trees and shrubs also attract common birds.Some birds are quite shy and do not approach a feeder if there is not enough plant cover near the feeder, others do not need much cover. A good example is the goldfinches that only use the feeders near bushes. Neighbors who have little or no vegetative cover appear not to attract goldfinches to their feeders.
Food and Feeders
Nothing works better at attracting birds than the right food and feeders. It is especially true in areas where harsh winters and prolonged snow coverage make natural food sources difficult to access during winter. Additionally, birds burn more calories to keep warm during cold winter temperatures. For example, studies have shown that some birds eat twice as much in winter than in summer, this difference comes from the need to thermoregulate their body temperature.Types of Wild Bird Food
Birds eat a wide range of seeds and food mixes. Depending on the season, many stores sell seeds that serve as food for birds. Some of the packages are labeled to indicate the type or combination of seeds contained in the package and the type of birds that these seeds or mixes attract.The best thing is to buy quality food. If it is only one type of seed or mixes of seeds it is good to see what type of seeds are included in these mixes.
Seed mixes are popular because different mixes attract a wide variety of birds. However, be sure to choose mixes that don't have a lot of fillers that the birds won't eat and that are discarded by the birds creating a build-up of food and seed hulls under the feeder. Low-quality foods that birds often discard include sorghum, oats, and wheat. However, some birds, such as pigeons, turtle doves and sparrows, eat this food without problem.
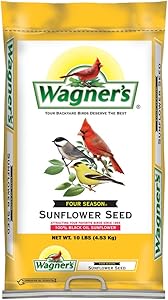
Sunflower seed
If you are starting to feed wild birds, sunflower seed is the food to start with. The sunflower seed in its natural form has a shell that birds can open to eat the contents. However, the husks fall to the ground and this can create a build-up of debris that needs to be cleaned. Peeled sunflower seed is also sold on the market.
Thistle Seed
Thistle seed is highly preferred by all birds, particularly those with small beaks, such as finches and goldfinches. The thistle seed also has a seed that the birds peel and discard. Thistle seed is cultivated and consumed by people in parts of Africa, India, and Asia, but is known as a seed for feeding birds in other parts of the world. This seed must be sterilized before export, which in addition to the cost of importing from abroad results in one of the most expensive bird seeds.
Seed Mixes
Seed mixes are an option for those starting to feed birds. Various types of food attract a wide variety of birds. Seed mixes sometimes include additives that birds do not eat and dump from the feeder creating a build-up of litter under the feeder. It is recommended to choose seed mixtures with few additives.
Millet Seed
Millet seed is a common ingredient in most wild bird food mixes. This seed comes in various colors such as gold, red and striped, all of which have similar nutritional content. Millet seed is relatively easy to produce and cheap. These seeds can last a long time in the feeder, as the grains are tiny compared to sunflower seeds.
Prepared tallow
The tallow is for birds that normally do not go near seed feeders, such as warblers, woodpeckers, thrushes, nightingales and magpies among others. These tallow are made from animal fat mixed with seeds, worms and even pieces of meat. These tallow can soften and even melt during hot weather and can permeate the feathers causing problems for the birds. It is recommended that the tallow be offered to the birds during the winter months.
Nectar
Natural nectar is an energy-rich liquid produced by some flowers to attract pollinators. Hummingbirds like nectar, but orioles, honeys, and tanagers also enjoy it. Artificial nectar can be purchased in powder, concentrate, and ready-to-drink forms. Nectar can also be easily made at home using a simple recipe that mimics the concentration of sugar in natural nectar. If you prefer commercially produced nectar, avoid varieties that include colors, flavorings, or preservatives that could be dangerous to birds.
Ground corn
Other types of foods that can be fed to birds include fruit, ground corn, birdseed, mustard seed, and peanut butter. These can be offered to birds alone or as mixtures of two or more types. Sorghum, oats, and wheat are also consumed by some birds.
Which Feeder is Good for Feeding Wild Birds?
Some birds prefer a particular type of feeder. Some species forage for food on the ground, others in bushes, and others in trees. Some normally perch on horizontal branches, while others have no problem holding on to vertical perches or even eating with their head down.The birds that normally feed on the ground are reluctant to use feeders placed above the ground, while that feed on trees and shrubs are reluctant to use feeders on or near the ground. Ideally, one would use several types of feeders with various types of food placed at various levels in height to attract a wide variety of birds.
Platform or Tray Type Feeder
Platform feeders are the simplest and most effective for feeding a wide variety of birds. When filled with a diverse type of food, platform feeders attract many species of birds. Raised feeders have the advantage that the seed does not spoil as quickly as seeds placed directly in the ground.
Tube Type Feeder
The tube feeder is the best option if you are going to have only one type of feeder in your yard. Fill it with a seed mixture and you will attract a lot of birds. Some tube feeders are specifically made for thistle and millet seeds for birds with small beaks.
Tallow Feeder
There are several types of tallow feeders. Cage-type feeders are the most popular and are typically made from coated wire. Esebado trunk consists of a trunk with pre- drilled holes, which are used to insert small blocks of tallow. Mesh bags , which are filled with tallow and hung for small birds which cling to the bag to eat the tallow. Open trays are good for setting chunks of tallow for many birds to taste. This is also a great way to get birds that don't know tallow to taste it.
House Type Feeder
Hopper or house-type feeders can hold a good amount of food for birds. These types of feeders are easily used by many species. If your feeder is newly installed and the birds haven't found it yet, be sure to fill the feeder only a third full so the seed doesn't spoil. Once the birds find their feeder and the demand for feed increases, then you can fill the feeder a bit more.
Window Feeder
Window feeders are great for seeing birds up close through your window. These feeders are easy to install and maintain. This type of trough is used in apartment buildings and also in windows in houses. There are two types of window feeder: those that stick to the glass through suction cups and those that are attached to the base of the window. Some window base feeders protrude into the house through the open window, while others are secured outside the closed window.
Where to Place the Feeders for Wild Birds?
Bird feeders can be hung from an existing structure, such as a porch or wooden column. You can also cross a wire across part of your patio and hang the feeder in the middle; or also use another creative way to place a feeder. The most common way to mount a feeder is by using a pole with hooks to hang the feeders. These poles can be purchased ready-made or made by yourself.feeders for wild birds
Mount feeders in an open area at least 10 feet away from trees and shrubs. This will give the birds a chance to flee from predators, such as raptors, which may hide in bushes or trees.
Hang the feeder at least 5 feet off the ground to prevent squirrels or mice from reaching the feeder. Deflectors or other obstacles can also be used to prevent other animals from destroying the bird food.
Tallow feeders can be placed on tree trunks for the birds that normally feed there. Platform feeders can be mounted several inches off the ground or higher. Some put seeds directly into the ground.
If you plan to put a bird feeder near a window, be sure to do so within two to three feet of the window. Birds can be confused by the reflection in the glass and try to fly through it thinking it is an open space. But with the feeder so close they can't get enough speed to injure themselves.
What Size and How Many Bird Feeders?
This will depend on the number of birds visiting your yard and your willingness to feed more birds. Large feeders at various sites will provide food for all birds. Multiple feeders help prevent certain birds from taking over a feeder and not letting others get close to eating.The birds that take over the feeder may be a particular individual of a species that for some reason scares off other birds. It can also be a whole group of birds such as house sparrows because they come in flocks and are aggressive towards each other and other birds.
Some bird enthusiasts increase the number of feeders during winter when food is more difficult to obtain from the environment. Others maintain a single feeder throughout the year.
feed hummingbirds
Feeding the Hummingbirds, Hummingbirds, or Buzzers
People love to feed hummingbirds and feeding them can help them survive before and during migration when they need a lot of nectar to double their body mass. This is particularly important in regions where hummingbirds migrate.
Hummingbirds are known as hummingbirds or hummingbirds in different regions of South America.
The nozzles that deliver nectar to hummingbirds are similar in almost all hummingbird drinkers, but the bottle that contains the nectar varies in size and shape.
The typical hummingbird feeder or trough consists of a glass bottle that is screwed to the base that contains the plastic flowers and nozzles that supply the hummingbirds with nectar . There is also the type of trough which is a flat and wide plastic container where the lid with the flowers and feeding nozzles closes the trough above. Both types are easy to clean, which is very important when feeding hummingbirds.
To install a hummingbird waterer , find a shady spot to hang it to prevent the nectar from spoiling quickly if not consumed by hummingbirds. Many people like to enjoy hummingbirds from inside their home and hang feeders on shady porches or against windows. Hummingbirds adapt quickly to the presence of people.
feed birds in your house
Dealing With Mice and Squirrels
Squirrels and mice can be a problem and will eat the contents of the feeder in a short period of time if they are not controlled. It really wouldn't matter if they ate the food on the ground discarded by the birds. The problem is that the squirrels and mice make it to the feeder and park there for a long time eating the bird's food.
Practical ways to prevent squirrels and mice from reaching the feeder include:
- Add a squirrel and mouse deflector. If your bird feeder is on a pole, install a squirrel baffle, which consists of a plastic dome with the hollow part facing down. Squirrels and mice cannot climb up the pole and reach the feeder. Make sure the feeder is at least five feet off the ground and 10 feet from a tree, branch, or other structure that squirrels and mice can use to jump onto the deflector.
- Hang the feeder from a wire between two trees, but far enough away from any branches.
- Use a 4 x 4-inch power pole and put PVC tubing or wrap the pole with metal sheet. Squirrels and mice cannot scale these obstacles.
- Other bird enthusiasts put a spring on the feeder post, use hot sauce on the seeds, or Vaseline on the post. All of these methods work for some, but squirrels and mice often find their way around these obstacles.
Dealing With Cats
Studies have shown that even well-fed house cats hunt and kill many birds. It is very important to keep your cat indoors as the "only" solution to prevent birds from falling victim to a cat.
The solutions given on the Internet to prevent cats from marrying and killing birds in their feeders make little sense. These solutions include:
Place your feeders in the middle of your yard to give the birds a chance to avoid the cat.
Planting a belt of cacti around the feeder.
Put a collar with bells on the cat so that they warn the birds.
- Make a fence around the feeder. Those who propose this idea suggest making a belt of cut plastic bottles, in the upper third, filled with water to prevent cats from approaching the feeder.
- These solutions can work to some extent to prevent cats from trapping birds in the feeder. But when you attract birds to your yard, the birds typically hang out in trees, bushes, and on the ground inside your yard when they're not eating at the feeder. Cats are a patient predator that can lie still for long periods of time and surprise birds that spend time in your yard. Attracting birds to your garden will increase the likelihood of fatal bird-cat encounters.
If you are going to implement a wild bird feeding plan in your backyard, it is very important to keep your cat indoors or let him out under your supervision for a period of time.
How to Store Food for Birds
How you manage and store bird food will largely depend on the scale at which you feed the birds. If you keep only one feeder, the most practical way to use and store the feed is to keep it indoors, taking it out only to fill the feeder. We keep only one feeder during the summer and keep the seeds in the bag it came in until it is finished. Other people use a plastic container with a special lid and spoon to fill the feeder. The plastic container is kept inside.
If you keep multiple feeders and feed a lot of birds , then buying bulk bird food and storing it is a good idea. It is important to consider where and how to store the bird feed, as one will be refilling the feeders often. You would want to keep food close to the feeders.
This often means keeping bird food in an outside shed in aluminum metal containers (trash cans, but new and clean) with a lid or 5-gallon buckets. Depending on the amount of food you feed, you could have several vials or one for each type of food or you could also store the food in bags inside the larger metal can with a lid. Metal containers and plastic wallets are tough and will prevent squirrels and mice from chewing on it and making holes to get food inside.
Nectar Storage
If you are new to hummingbird feeding and your feeders have not been discovered by them, making a small amount of homemade nectar would be ideal.
Depending on the region you live in, hummingbirds may find your drinking fountain the same morning you put it in, or it may take days and only a few hummingbirds will visit.
Knowing how much hummingbirds that visit your drinker regularly consume will determine how much nectar you prepare. Making enough nectar for a week and refrigerating it until all is used is not a problem. Some hummingbird feeding enthusiasts claim to store nectar refrigerated for a period of three weeks without noticing any cloudiness and odor. More importantly, they report that their hummingbirds didn't notice a difference when the chilled nectar was put into the trough. Nectar is so easy to make that brewing small amounts each time it is needed would make more sense.
Cleaning the Bird Feeders
Many birds interacting around a safe feeder that results in body fluids and droppings in the feeder which can transmit disease. It is recommended to clean the seed feeders every two weeks during heavy use time.
Hand wash the feeder with a brush using a diluted bleach solution of 1 part bleach to 9 parts water. Thoroughly dry the feeder before refilling it with bird food.
- Hummingbird waterers should be cleaned once a week. Soak the fountain in hot water and use a bottle brush to clean the inside and outside of the fountain. You can also fill the bottle with a diluted bleach solution by forcing this solution through the plastic nozzles and flowers that supply the nectar.
- Alternatively, you can soak the entire open sprue in the diluted bleach solution. Be sure to air dry the waterer before refilling. The use of soap and detergent is not recommended.
Final remarks
Feeding birds in your home will make your yard a charming place for you and a more attractive place for birds. Birds will be a good excuse to sit outside and commune with nature.