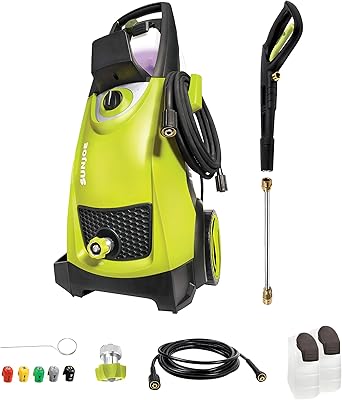
Sun Joe SPX3000 2030 Max PSI 1.76 GPM 14.5-Amp Electric High Pressure Washer, Cleans Cars/Fences/Patios
Brand Sun Joe Power Source Corded-electric Color Cleans Cars/Fences/Patios Item Dimensions LxWxH 15.6 x 13.5 x 33.9 inches Maximum Pressure 1450 Pound per Square Inch Item Weight 31 Pounds Hose Length 20 Feet
About this item
Power Source Type: Corded-Electric
HOW TO CLEAN CONCRETE SURFACES OF GREASE, OIL AND DIRT
In Concrete Surface Preparation - Part I , we discussed the detection, removal, and repair of unsound concrete. The next step is to remove the contaminants from the concrete. However, we cannot proceed directly to sandblasting, for the same reasons that steel sandblasting does not start immediately. Dirt, dust, and other loose contaminants will inhibit build-up and can be removed by first sweeping, vacuuming, blowing with air, or spraying with water.
Hydrophobic materials, such as oil, grease, and stripping lubricants also inhibit adhesion and must be removed. It's tempting to remove them by sandblasting the contaminated layer, but that can exacerbate the problem by spreading contaminants over previously uncontaminated areas. Recommended methods of removal are scrubbing with a brush, water and detergent, steam cleaning, and low pressure washing (less than 5000 psi) . Some chemical cleaning methods are appropriate, but solvent cleaning is not. Unlike steel, concrete has pores and cracks that solvents can enter, which inhibits adhesion formation.
A detailed discussion of acceptable methods for surface cleaning can be found in SSPC SP 13 / NACE No. 6 - Concrete Surface Preparation.
Efflorescence
Efflorescence is a powdery, crystalline deposit that slowly forms as moisture seeps soluble salts to the concrete surface.
Efflorescence is an aesthetic problem, not a structural one, but must be addressed when the concrete surface serves as a cover. If not done, efflorescence will cause unsightly stains under sealers and decorative finishes.
Being a soluble salt, efflorescence can be removed by scrubbing with a brush and water, power washing, or with a light blast of abrasive steam . However, unless the underlying moisture problem is resolved, the efflorescence will return.
Humidity problems
If the relative humidity of the air is less than that of the cured concrete slab, the moisture will be drawn from under the slab to the surface, causing efflorescence, mold, and emulsion of flooring adhesives. Where sealants and other waterproof coatings block vapor flow, delaminations and blistering can occur. The solution is to install a vapor barrier under the slab.
There are two common tests for the relative humidity of concrete:
Plastic sheeting test. A plastic sheet is glued to the concrete surface and left for 16 hours or more, then removed and inspected for condensation. See ASTM D4263
Calcium chloride test. A plate with calcium chloride is weighed, placed on the concrete surface, and sealed under a dome. About sixty or seventy-two hours later, the plate is weighed again. The increased weight of the sample indicates the amount of moisture absorbed, which is used to calculate the moisture vapor emission rate (MVER).
Grout
Grout is a weak, friable layer of cement and fine aggregate materials carried to the surface by water exiting the concrete. It is the result of excess water in the mix or excess water that has occurred during curing, and is always present to some degree in new concrete.If grout is not removed, repairs, layers and coatings, because the friable layer has poor material strength. However, cement grout is tough enough to warrant removal by abrasive blasting, sandblasting, grinding, high pressure water blasting, or acid washing.
Grout appears when the concrete surface is scraped with a sharp object, leaving a dusty residue.
Curing compounds are applied during the curing process to seal the concrete and retain water for cement hydration. By sealing the pores in concrete, curing compounds inhibit the adhesion of mortars and coatings. Adhesive layers and coatings above present the same problem. The solution is to remove the concrete layer below the penetration level of the compound by abrasive blasting, shot blasting, high pressure water blasting, or by mechanical means.
With healthy, contaminant-free concrete, all that's left is to properly scrape the surface, but to what extent? In Part III of our series on Concrete Surface Preparation, we will discuss the specifications of structures and blasters to agree on the number of profiles needed, and examine the various concrete surface preparation methods, their advantages and disadvantages, and their applications.
Sun Joe SBJ597E-SJB 6-Amp 155 MPH Electric Leaf Blower, Blue
About this item
VERSATILE: Clean sweeping patios, driveways, decks and garages
POWERFUL: 6-amp motor creates up to 155 mph air speed (max)
NO LOAD SPEED: 12,000/13,500 RPM
LIGHTWEIGHT: Only weighs 3.9 lbs!
Rated Voltage 120 V ~ 60 Hz
How to dispose of fall leaves
In many places, fall is the time of year that is characterized by falling leaves from trees and other vegetation. Although the leaves will end up decomposing if you leave them on the ground, you can speed up the process. You can also collect and recycle them or throw them away. No matter what you decide to do with them, making a plan will make fall cleaning easier.
Method 1 Plan ahead
1 Build growing beds near deciduous trees. Make grow beds with plants that love natural mulch near the shedding trees in your yard. When there are leaves on the ground, run the mower over them once. Then, rake them up and carry them to the beds. [1]
For the beds, consider including shrubs, garlic, roses, and young perennials. [2]
2 Decide if you need to collect the leaves. It is natural that there is a layer of leaves of several centimeters and this can even host an ecosystem. Wildlife such as salamanders, turtles, squirrels, and other species survive in such small habitat. [3] The layer of fallen leaves (litter) also provides shelter for beneficial insects and worms during winter. However, if thick layers of leaves are suffocating your lawn, you should shred them if you are not collecting them. [4] Consider collecting the leaves if they cover more than a third of the garden and you can't see the surface of the blade of grass. [5]
It may be necessary to collect them if you belong to a homeowners association that has specific requirements about fall cleaning.
If you decide to collect them, don't try to complete an entire season's leaf collection in one day. Plan to clean the leaves for several days during the fall.[6]
3 Rake the pine needles first. You should separate the fallen foliage of the pine tree from the fallen leaves of the deciduous trees. Pine needles are acidic, and some plants love acidic soil and others don't. Therefore, it is beneficial to separate the pine needles to use as a separate mulch. [7]
Rake them as soon as you notice them on the ground, since they tend to fall before the leaves.
Put them in garbage bags and store them in a dry place. Use them when you need acid mulch.
4 Decide whether you want to rake the wet or dry leaves. Wet leaves will make a more stable pile, but they are also more difficult to rake. [8] Choose dry leaves if you want to use a leaf vacuum, as wet leaves will clog the vacuum. [9] Don't rake damp leaves if you have any allergies, as the mold and mildew they contain can cause sinus discomfort.
5 Pick up the branches. You can do it before or during the cleaning of sheets. Collect the branches from your garden and place them aside in a pile. Consider keeping the pile there as a refuge for birds, squirrels, and other wildlife. You can also reserve the branches to use as firewood. [10]
If you want to move the pile of branches to another part of the garden, use a wheelbarrow or a yard waste container.
Method 2 Collect the leaves
1 Rake the leaves. Raking is ideal if you have a small lawn or garden. [11] Use a quality rake , preferably with a soft grip. Rakes larger than 36 inches (90 cm) require more force, so choose one with a standard 24 inches (60 cm) width. You can opt for an ergonomic rake with a curved handle.[12]Do not go back. Work across the lawn in a zigzag. [13]
With each line you rake, move the leaves to the area where there are leaves that you have not yet raked. Every time you create a leaf ridge, push it a few feet into the unraked area. Repeat until the pile is 2 feet (60 cm) high or becomes difficult to move.
You can buy ergonomic handles separately and attach them to your rakes by screwing them on. If you do it with two rakes, you can rake the leaves with both arms and without bending over. [14]
2 Transfer the leaves with a tarp or bag. Use a sheet, tarp, or tablecloth to carry large piles of leaves. Place the four corners of the canvas and move the pile of leaves by dragging the canvas. You can use this method in conjunction with or as a replacement for leaf bags.
A 2.4 x 2.4 m (8 x 8 ft) tarp is ideal for this purpose.
You can buy bags of seasonal leaves like the large pumpkin lantern face bags to decorate the garden while getting the leaves out of the way.
3 Trim grass and leaves. This is a good option if you have a large lawn. Use the mower with a grass catcher to collect the cut leaves. [16] Raise the mower deck to the second highest position before mowing.[17]
If the leaves are wet, use the mower's side discharge mode for the first pass to loosen and lift the leaves. Then switch to shredding or bagging mode and run the pruner over the leaves again.
4 Use a blower or leaf vacuum. Consider using a leaf blower, especially if you have a large yard with lots of trees. [18] Blowing the leaves is very useful if you live next to a forest, since you can blow them towards the forest floor.[19]You can use the blower with a vacuum attachment or just a leaf vacuum. Portable leaf vacuum cleaners are useful for small areas or gardens.
If you're buying a leaf blower or vacuum, look for one with the shredding feature. Consider the reduction ratio. For example, if the product offers a reduction ratio of 10: 1, it will convert 10 bags of uncut leaves to 1 bag of shredded leaves.
Be aware that the leaf blower is noisy. In addition, the most efficient one runs on gasoline, which uses fossil fuels that contribute to air pollution. [twenty-one]
5 Hire a professional. If you decide to hire a professional to clean the sheets, you will have to pay for each job, several times per season. [22] If you don't have time to do sheet cleaning, this might be a good option for you. Another alternative is to rent a wheeled leaf blower like the one the pros use for $ 50 a day.[2. 3]
Most homeowners pay between $ 180 and $ 500, but the cost depends on the size of your lawn. Expect to pay 75 to $ 900. [24]
Contact a professional and have the measurements of your garden ready, as well as the number of trees in it. Ask if he can give you a quote for cleaning sheets.
Method 3 Discard the leaves
1 Turn them into mulch for your lawn. Optionally, you can first aerate your lawn to make the nutrients penetrate deeper into the soil. [25] Shred the leaves into small pieces (about the size of a dime) with the pruner. It may be necessary to give them several passes with the mower if they are large or the coat is deep. [26] When you do this type of garden cleaning, you will leave the small pieces on the lawn to make their way into the dirt. Leaf mulch suppresses weeds and fertilizes the soil, as well as enriching the soil in spring. [27]
If you want them to break down fast, you should be able to see half the grass through the shredded leaves.
2 Mulch your growing beds or flower beds. Once you have collected the leaves, you can shred them for use in composting or creating mulch. Put the leaves in a large trash can. Then tear them up with a grass trimmer. [28] You could also use a leaf shredder. [29] Leaves make an excellent natural mulch because they do not carry black spores into homes and buildings like wood mulch does, which can damage house siding and plants. [30]
3 Compose them. Turn the leaves into "black gold." Compost is an excellent natural fertilizer for your lawn and garden. You should mulch them before putting them in the compost pile if you want them to break down faster. The decomposed leaves will serve to fertilize your garden in spring. [31]
You can leave the pile of leaves out in the open and add it to the compost pile in spring. [32]
4 Drive them into the ground with a cultivator. Crush the leaves first. Then drive them into the ground with a cultivator. The goal is to provide organic matter and nutrients to feed the lawn in spring. [33]
5 Contact your municipality to find out if they have a fall cleaning policy. If not, find out how to dispose of leaves and other yard waste. Some municipal authorities have specific regulations that you must follow when cleaning the garden. [3. 4]
You can ask them “Do you have a community recycling program for fall leaves? Is there a municipal composting system with collection on the sidewalk? ”. If a municipal fall cleaning program has not been implemented, ask how to dispose of yard waste in general.
In some cities, you just bag the leaves and leave them on the curb so a designated person can pick them up on a specific day of the week. In other areas, leaves are swept into the street gutter for leaf pickers to collect by car.
6 Offer them to a neighbor. Trees should look healthy without fungus or other known diseases. Bag the leaves and offer them to neighbors who want to mulch or compost. This will be especially useful for neighbors with cultivation beds or flower beds. [35]
7 Burn the leaves. You can burn them if it is allowed to do so in your area. You may need an outdoor fire permit to dispose of the leaves this way. Some cities require the presence of a member of the fire department for the duration of the fire, while others require you to notify them in advance.
Check with your local government by contacting their authorities or by searching their website for keywords such as "burn" and "make fire."
8 Make crafts. You can use fall leaves as fun craft projects. There are several ways to preserve the leaves . Then you can use them to make bookmarks, coasters, wall decorations, candle holders, and many other crafts for kids or adults.
Tips
Choose a windless day to get rid of the leaves to prevent them from spreading throughout the garden.
If you live with children, they can help rake and dive into leaf piles.
Warnings
If you don't clean your yard in the fall, you will have additional work in the spring.
If you plan to burn the leaves when cleaning the yard, you should have a metal screen and a closed container or other fire protection equipment. If you can't contain the fire, the wind could blow burning debris into wooded areas, gardens, or other flammable locations.
Do not throw the leaves in the trash. They will remain underground in a landfill where they will take a long time to decompose and will be of no use to anyone. [37]
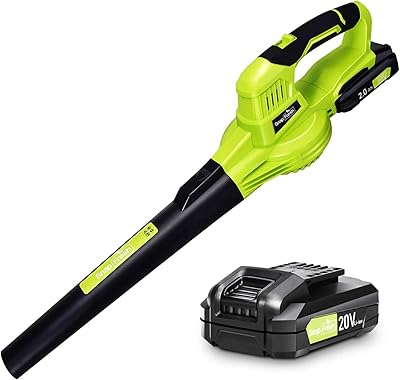
Leaf Blower - 20V Leaf Blower Cordless with Battery & Charger, Electric Leaf Blower for Lawn Care, Battery Powered Leaf Blower Cordless Lightweight for Snow Blowing (Battery & Charger Included)
About this item
Advanced Motor and Turbo Engine Tech; Snapfresh leaf blower equipped copper motor, with advanced turbo techs the motor could provide longer product life span and reduce energy consumption than traditional engine; Besides, snapfresh cordless leaf blower applied turbocharging technology which increased the max air output to 130mph; Snapfresh is the mark of better user experience with higher sustainability
Dual Speed Mode with Adjustable Blowing Tubes; Snapfresh cordless leaf blower cordless carries speed adjusting function; The 2 in 1 design realizes the aim of changing operating scenario by simply pushing the switch; Two modes, 60mph to 130mph, could help you easily convert from indoor work to outdoor work; With adjustable blowing tubes, people with all height would find out a comfortable using experience
Ultra-lightweight and Ergonomic Design; Snapfresh understand customer’s needs of house working tool; Snapfresh cordless leaf blower designed for family work has a super light body which weight less than 2.7lb, can be comfortably operated by one hand; The handgrip is wrapped with flexible rubber, helps you prevent slipping when using; Snapfresh, refresh your house working experience
Full Accessory, Battery, and Charger Included; Snapfresh leaf blower is the first choice for your family, we provide all accessories you need to start your work immediately; No need for extra purchase like other brands; The included 2.0ah 20v battery could support you for 15-25min work depending on mode; A full charge will take 1 hour using included fast charger (please do not charge overnight)
Quick Assembly, All for The User; Snapfresh’s mission is ‘to make people’s life easier’, all product by Snapfresh is designed base on this mission; our products are lightweight, well fitted and could be assembly within minutes
How to deal with fallen leaves in the fall
I love fall . After a long, hot summer (it's been really humid on the east coast!), It's a relief to enjoy the fresh air the season brings. But with autumn comes the fall of the leaves and, if you live in a house with a garden, you need a good plan to get rid of these in an effective and good way for you and your home.
1. Sweep the leaves with a rake
For most of us who live in houses with a little garden, sweeping the leaves is one of the autumn traditions. It is undoubtedly a good exercise and you enjoy the outdoors, but I advise you to choose the right materials to facilitate your work. Start by choosing a rake that is light and has an ergonomic handle… you will notice the difference in your hands and on your back! Also look for a model whose end is shaped like a curved fan to collect the maximum number of sheets in each pass. The best rakes are designed so that their tines pick up leaves without damaging the grass or digging into the ground. Do not forget to wear gloves to avoid blisters, caused by rubbing with the handle, and to wear closed shoes. If you suffer from allergies, do this work with a mask.
The most effective method of grouping the leaves is to sweep and accumulate them on a large tarp on the ground. The tarp is easy to transport from one place to another just by dragging it and, when you have all the sheets together, it will be easier to put them in the bags they sell for this purpose or simply put them next to the curb for the trucks to vacuum of recycling . To collect the leaves quickly and efficiently, I advise you to make a small investment ( about $ 15) in one of the devices that collect leaves ( leaf scoop ), since these are adjusted in each hand to make them larger and collect more leaves at the same time .
2. Shred the leaves with a lawnmower
The mower is not only for cutting grass in the spring and summer. When autumn comes, also use it to cut and shred fallen leaves on the lawn. You will save a lot of time and work! Just be careful to put the mower blade in the highest position and remove the bag where the grass clippings collect. Then run the mower over the blades over and over again until they are reduced to very small pieces. In addition to avoiding the hassle of sweeping, collecting and disposing of leaves, the advantage of this method is that it turns the remnants of shredded leaves (mixed with blades of grass) into a layer of mulch that is excellent for fertilizing your lawn. If after cutting the leaves into small pieces you prefer to remove them from the lawn, He puts his bag back on the mower and runs the mower through the grass again. Remember that this mixture of pieces of dried leaves and blades of grass is very good for yourcomposting or, if you have them, for raised beds in the garden.
3. Blow the leaves with the most convenient device
The leaf blowing method is one of the most popular for removing leaves from around the house and garden, then bundling them up on a tarp for easy collection. It is a particularly effective system to reach those leaves that are trapped in corners or in areas that are difficult to access. Try to blow the leaves on calm and dry days, as if they are wet they are much heavier. To choose the model that best suits your needs, take these criteria into account:
Power source Among the main options are blowers that run on electricity or gas. Among the electric, you can find wireless models that work with batteries and allow you to move freely around all outdoor spaces. By not having cables, you will avoid more than one trip and even a fall! They usually last about 30 minutes. The models that are plugged into the electrical current have the disadvantage of dragging a cable, but they have the advantage of operating without interruptions. Gas blowers are cordless and typically the most powerful, but also the loudest; they also emit a strong odor.
Power If you buy a leaf blower, consider two numbers: miles per hour (MPH) and cubic feet per minute (CFM). The latter is the most important indicator as it gives you an idea of the power of the blower, while the MPH measures the speed of the air (they usually range between 120 and 250 MPH). A blower that is at least 130 CFM is usually sufficient for a medium garden.
Noise Noise level, measured in decibels, is always an important consideration when choosing a blower. In fact, most municipalities have strict rules on what days and between what hours you can blow the leaves. They emit a noise between 64 and 107 decibels, so it is always advisable to use them with hearing protection. As there are small objects that can fly around you, it is also advisable to wear eye protection.
Weight Leaf blowers average between 5 and 20 pounds. My recommendation is that you choose the lightest and most efficient model for the size of your garden to alleviate the impact on your hands, arms and back. If you decide on a blower that uses gas for fuel, consider one of the backpack models. By hanging on the back, they distribute the weight better.
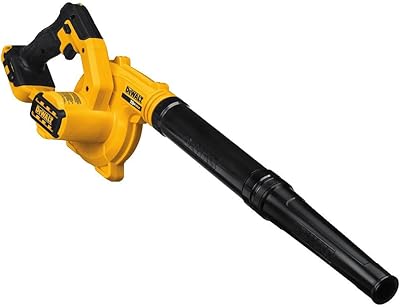
DEWALT 20V MAX Blower for Jobsite, Compact, Tool Only (DCE100B)
About this item
Max air flow at 100CFM. Air Speed:135 mph
3 speed variable speed switch provides control while in use
Variable speed trigger also allows adjustment of blowing power
A lightweight and compact design for ease of use
Battery sold separately
Battery & Charger Sold Separately
Clean your garden of dry leaves
Keep your garden clean and remove the annoying leaves that not only dirty your exterior but can generate diseases and pests in your green areas. For this task you can use rakes or flexible tine brooms and blowers and vacuum cleaners. We help you choose the most convenient for you.
Litter (the accumulation of dry leaves) on plants or grass hinders the beneficial action of the sun and prevents the sun's rays from bathing the grass, preventing photosynthesis and ventilation. In this way, when the litter decomposes, due to the effect of humidity, it can favor the development of fungi and diseases that are harmful to plants and lawns and lead to the appearance of bald spots and yellowish areas. In addition, harmful rodents and insects may seek shelter under the canopy of leaves. Also, wet leaves on trails or paved floors should be removed for safety, as they can cause slipping.
What tools do you need to remove the dried leaves?
You can do it manually or with electrical devices.
* If your garden is not very large, you can do a manual cleaning using a special garden broom, which has arched tines to facilitate the task. You just have to make piles of dry leaves and put them in bags so that the wind does not scatter them.
Garden brooms can be made of galvanized or laminated steel or plastic, and the tines are usually flat or round. They come in many sizes, and even adjustable, allowing you to select the sweep width.
* In addition, garden brooms are also good for raking and leveling the soil.
* In large areas, sweeping with a broom can be unproductive if large amounts of leaves have to be piled up and removed. In that case, cleaning is done with the help of blowers and vacuum cleaners that reduce time and labor. There are machines that are just blowers and others that are blowers and vacuums and, in some cases, even leaf shredders as well.
They are very easy to use and their handling requires little effort. They work by projecting jets of air (thanks to a narrow nozzle tube to focus the blow) to sweep and accumulate the dry leaves. The suction blowers include a second tube with a wider nozzle to suck the leaves, which also allows them to be stored in the bag that is part of the tool. Some models carry out both tasks with the same tube and only enough to activate a device to change from one to another. There are other machines that also have the function of shredding, which significantly reduces the volume occupied by the remains in the bag (up to 10 times less) and facilitates its reuse as mulching for the garden or orchard or to make compost.
The power supply of the blowers and vacuum cleaners can be electric, by cable (they need to have a nearby outlet) or lithium battery, or gasoline. Electric ones are suitable for small surfaces. For large gardens, those recommended for their autonomy and power are gasoline equipment. The higher the power, the easier it is to move the litter and less work time. The speed of the air flow is adjustable and, depending on the model, varies between 190 and more than 400 km / h. The capacity of the waste storage bag can be up to 50 l.
They are manufactured in light materials and their weight varies between little more than 1 and 10 kg; the heaviest include a harness.
How to remove dry leaves?
Start from the outside towards the center of the garden. If the surface is very large, plan the cleaning by sectors.
Check that all the accessories of the machine (tubes, nozzles and storage bag) are in the correct position for each function.
If the engine is gasoline, always check the oil level before starting work.
Never vacuum dirt, pine needles, or hard or non-organic debris.
Empty the waste bag after each use, clean it and ventilate it well if it is dirty to avoid the appearance of fungus.
And then ... what do you do with the dry leaves?
Compost them. With dried leaves and other plant residues, such as lawn mowing, some trimmings, and vegetable scraps that you use in the kitchen, you can make compost at home. It is a sustainable and ecological practice that will allow you to recycle these natural products to obtain a quality organic fertilizer that you can use for the bottom and cover fertilizer of the garden and orchard.
Composting in a traditional way in a pile is not complicated; however, it is much more effective to use a composter, which will allow you to control adequate levels of ventilation, temperature and humidity to regulate the rate of decomposition of organic matter.
Use the shredded leaves as mulching. At the foot of garden and orchard plants and in tree stands, those dry leaves that you have removed from the lawn or from over the hedges, shrubs and flowering plants, can become an extremely useful mulch. Not only will they shelter the roots from the effect of the cold and help conserve the humidity of the substrate, but as they disintegrate as a result of the weather conditions they will contribute to an increase in the microbial activity of the soil and will release useful nutrients for the plants. , especially phosphorus and potassium.
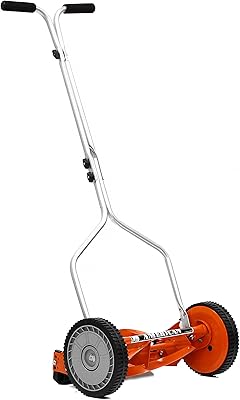
American Lawn Mower Company 1204-14 14-Inch 4-Blade Push Reel Lawn Mower, Red
About this item
4-blade reel with a cutting width of 14” and durable 8.5” polymer wheels for maximum maneuverability
Mechanical lawn mower with an adjustable blade height of 0.5”-1.75” with scissor action cut
Manual grass cutter blades made of heat-treated alloy steel that stays sharp for years
Environment-friendly alternative to gas-powered lawn mowers which is pollution-free and noise-free; Low maintenance, lightweight and easy to use
Capable of cutting grass up to 4 inches tall
How to mow the lawn on slope
Many homeowners view lawn mowing as an unpleasant task, while others see it as an opportunity to beautify their property. When done properly, this activity helps keep your lawn green and healthy. Plus, it reduces weeds and bare areas. With a little practice, you can even form interesting patterns when mowing your lawn.
Part 1 Preparing the mower and lawn
1 Use a lawnmower suitable for your type of lawn. Gasoline powered walk-behind mowers tend to be the most common choice for typical suburban garden lawns, but you actually have several options:
Manual reel mowers activate only when you push them. In addition, they are an affordable and ecological option for very small and flat gardens.
Electric walk-behind mowers are quieter and easier to operate than gasoline models, but they are also heavier and more expensive. In particular, corded models are best suited for small gardens, 1000 square meters (0.25 acres) or less.
Gasoline mowers come in both manual and self-propelled varieties. Either is considered suitable for fields up to approximately 2000 square meters (0.5 acres).
Mower tractors cost more than manual models, but save significantly more time when mowing fields larger than 2,000 square meters (0.5 acres). However, it is not safe to use them on slopes that are too steep.
2 Keep the mower blades sharp and free of debris. Dull blades produce uneven cuts in grass blades, leading to brown tips and disease. If your grass looks uneven after cutting, it's probably time to sharpen the blades. [1]
You may need to sharpen them 1-2 times a year.
You can extract and sharpen the blades on your own with a few tools and a little mechanical knowledge, or you can type “lawnmower sharpeners near my area” into a search engine to find professionals in your area.
Even if the blades don't seem to need sharpening, you should check them for damage every 3-4 cuts and brush or rinse off any accumulated grass debris from the blades and on the underside of the mower.
3 Set the cutting height according to the type of grass and the weather. Many people tend to mow their lawn too much in an effort to reduce the frequency of mowing. However, this procedure causes the gardens to turn brown and leads to the growth of weeds. Ideal cutting heights vary based on a number of factors, but are typically 2 to 3 inches (5 to 8 cm). [2]
You should measure from the ground to the bottom of the mower deck and then from this point to the blades. This total equals the cutting height.
You can find specific cutting guides for your grass type (for example, at the following link: https://www.lowes.com/projects/lawn-and-garden/mow-your-lawn-correctly/project ).
You can also contact your local agricultural extension program for advice.
4 Check the fuel and oil levels before starting the mower. It is not safe to add fuel to a hot mower engine, so fill the fuel tank before starting to mow. Also check the oil level every 2 to 3 cuts and add oil as needed before starting the engine. [3]
You should also change the oil from time to time and clean the fuel lines, or have a professional perform this routine maintenance for you. Consider adjusting your mower once a year in early spring.
5 Mow your lawn in good time, not yours. Some people mow like clockwork every Saturday afternoon, but it's best to mow based on your height. Use the "rule of one third" and avoid cutting more than one third of the total height of the grass at each cut. [4]
Therefore, if you keep the height of your grass at 2 inches (5.1 cm), you should wait until it is 3 inches (8 cm) tall before mowing it.
You should also check the weather forecast for dry weather days. Wet grass can clog the mower. Also, it makes the garden compact and too slippery to be mowed safely.
It is best to mow at night after a dry day. In this way, accumulation, damage and heat stress are reduced. Therefore, you should plan your cuts accordingly. [5]
6 Clear grass debris and remove pets and children before mowing. You should walk around the lawn and pick up branches, rocks, toys, pet waste, or other obstructions that could damage the mower or make a mess. Even more important, you should send pets and children indoors, or at least to a safe area away from where you will be working. [6]
Some lawnmowers can shoot rocks or other debris at dangerous speeds, so it's always best to keep other people and pets out of that area.
7 Wear safety glasses, hearing protectors and suitable clothing. You should wear safety glasses to protect yourself from flying debris and hearing protectors to silence the mower engine. You should also wear sturdy closed shoes and long pants to protect your feet and legs. [7]
Apply sunscreen and wear a hat, even on cloudy days or if it's early or late in the day.
Make sure you stay hydrated. You can take breaks if you go to work in a large garden, feel agitated, or start feeling drained.
Part 2 Mowing the lawn efficiently
1 Mow around the perimeter and over any obstacles first. Unless you have a square or rectangular garden, your initial goal should be to create a square cut area. You should work your way around trees or along curved beds, and then create straight lines and angles in those areas. You can turn the remaining grass into one or more rectangles for easier cutting. [8]
You can cut around the perimeter first to square your lawn and give yourself room to turn the mower as you go in rows.
You may want to go around the perimeter twice to create an even larger turning area.
2 Cut back and forth over sloped areas. You must account for any sloping areas when creating rectangular cut areas. You should never cut a slope that is too light. Instead, you should proceed in a straight line perpendicular to the slope. [9]
If you have trouble going up or down the slope on wet grass, avoid mowing it up or down, even if the grass is dry.
Manual reel mowers are less dangerous than larger, heavier powered models on slopes. However, you could still be injured if you slip and fall.
Instead of using a lawnmower on a slope, try using a brush cutter or consider planting or placing something other than grass in that area.
3 Mow the lawn from back to front in straight lines forming a slight overlap. For each rectangular area you have created, you should start at one side and work your way from one end to the other. Then turn the mower over and cut an adjacent row in the opposite direction. Continue this procedure until you have cut the entire section. [10]
The amount of overlap required will depend on the configuration of your mower. However, you should generally place the wheels (on one side) just above the cut line you created with the previous row.
Front-to-back turns will be easier if you use a zero turn mower. If not, you should turn on the rear wheel closest to the next row and readjust as necessary to get into position.
4 Discard the clippings in the previously cut row. The fine clippings help nourish your lawn, so you can leave them scattered throughout your yard when possible. If you have a side discharge mower, you should point the clippings towards the row you just cut. A mulch mower is used to cut and disperse the grass blades. [eleven]
However, you should avoid leaving clumps of clipped grass on your lawn, as this is more likely to happen if you have a dull blade or the lawn is wet. You can place the clippings in a bag or use a rake to spread the accumulations.
If you want to reduce thatch from your lawn, you can use a bag and attach it to the mower to collect clippings. You can place the clippings in a compost pile, use it as mulch, or throw it away in the trash or a compost collection system.
5 Change the direction of the rows by cutting regularly. For example, you shouldn't mow square grass on the same north and south lines every time. If you do this, the grass will start to lean permanently in the direction of the row and will show the marks of the mower wheels. [12]
Instead, consider switching between the north and south to east and west lines with each subsequent cutting session.
6 Use a brush cutter or brush cutter after you finish mowing the lawn. These tools are not that fast or efficient, so it is best to use the mower to cover as much grass as possible. You can then use other tools to take care of the remaining grass that the mower couldn't reach. [13]
However, some people prefer to cut the edges first, as it is easier to spread out the heavy clippings this way. This is a viable option, but you will spend more time than necessary cutting the edges. Also, these methods tend to be more damaging to the lawn than the mower (for example, it is easier to cut the grass too much at certain points).
Part 3 Create stripes on the lawn
1 Form simple rows back and forth to create basic grass strips. The lightest and darkest stripes that you can see on the well-groomed lawn of a professional sports field are created simply by bending the grass in the direction you are cutting it. Grass that bends away from you is lighter, while grass that is bent toward you is darker. [14]
So a traditional back-and-forth cutting method will create straight lines that alternate between lighter and darker shades (depending on your viewing angle).
To enhance the fringe effect when folding your lawn more completely, you should get a garden roller and use it to repeat the pattern you just cut.
2 Create chessboard-like stripes by cutting the grass in perpendicular rows. To create a checkerboard style that alternates light and dark squares, you simply mow the same area twice.
First, you need to cut it with standard lines back and forth (for example, north to south). Then cut the same area on the east and west lines from one side to the other. Once you are done, you should observe the characteristic pattern of a chessboard. [fifteen]
You should finish the job by going around the perimeter once more at the bottom to eliminate any irregularities caused by the mower's turns.
3 Use an interesting diamond or zigzag pattern. A diamond-shaped pattern is actually not much more difficult than a checkerboard. You simply need to rotate the alternate cutting lines 45 degrees, so that you can essentially cut from one corner to the other within the square cutting area. [16]
To make a zigzag pattern, you must first create a diamond pattern. Then you should do a repeating series of alternating 90 degree turns each time you cut more than 3 diamonds (either in series of light-dark-light or dark-light-dark in the shadow). This pattern takes practice, and it may be easier for you to create a diagram beforehand to use as a guide.
Warnings
To make getting started easier and safer, you should start the mower on a sidewalk, driveway, or other solid surface.
You should keep pets and children away from the area where you are going to work and the mower you are going to operate.
You must choose your hearing protectors carefully. Although the goal is to protect yourself from the noise of a gasoline engine, you should not isolate yourself too much from the sound so as not to be aware of what is happening around you. Ideally, use a quality pair of earplugs that offer protection while allowing warning sounds to enter (for example, a car horn or a person yelling).
Power mowers are dangerous equipment. If operated improperly, they can cause serious injury and even death.
Check the manufacturer's instructions. You should inform yourself about the power, functions and limitations of the mower. In addition, you must know the safety devices, their operation and how they should be maintained. Try to understand the difference between a safe operation and a potentially dangerous one.
You must be especially careful when pulling the mower in your direction so that you don't trip or fall. Instead of pulling the mower towards your body, consider standing on the opposite side of the discharge. Then walk forward while pulling the mower from the side.
When mowing the lawn, you should always wear hearing and eye protectors, as well as sturdy shoes. Professional lawn care experts wear long work pants and lightweight, long-sleeved shirts to protect themselves from electrical equipment, debris, sun exposure, and insects.
If the blade becomes clogged with clippings or other debris, avoid using your hands to clear it. Instead, you should turn off the gasoline mower and spray water on the blade with a garden hose to clear it. Even if the mower is off, the blade can start turning once you clear the obstruction. This is due to the torque built up in the motor.
You should wear safety glasses to protect your eyes from flying debris. Versions that have wraparound strips are ideal. Although modern mowers are designed to keep this problem to a minimum, there is always the possibility of an incident occurring.
It is a bad decision to use a portable device to listen to music (for example, an iPod) while mowing the lawn. While headphones can block sound, listening to music provides a dangerous mental distraction at a time when full concentration is required to properly control this dangerous machinery.
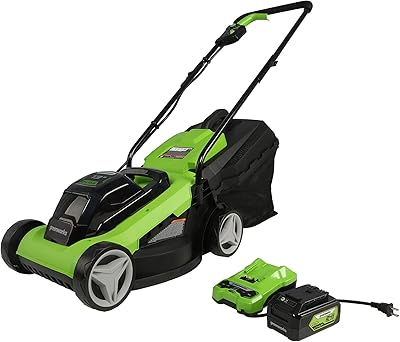
Greenworks 24V 13" Lawn Mower, 4Ah USB Battery and Charger Included MO24B410
About this item
Greenworks 24V Lithium-Ion battery provides 20% more power and run-time, and delivers fade-free power with no memory loss after charging
Up To 35 Minutes Run-Time With Fully Charged 4Ah Battery. Run-Time Varies Based on Grass Condition and Operator Technique
13 in. rust-resistant lightweight deck designed for easy maneuverability. 2-In-1 feature provides mulching and rear bagging capabilities
USB port in battery charges all portable electronic devices, including phones and tablets. USB Battery Portable Power Station (24000 mAh Power Bank)
3 Year Tool / Battery Protects Your Investment
The parts are located in the battery compartment.
How to Mow Slopes Safely
A typical lawn mowing day can turn deadly with a wrong turn
The accident:A 43-year-old temp worker is part of a crew that maintains a rest area on an interstate highway. The worker begins to cut the grass along the hillside that borders one of the parking lots of the rest area. There is a 15 foot high slope with a 35 degree incline to one side of the parking lot. The crew chief instructs the worker to cut the grass on the slope crosswise and only halfway due to the steepness of the slope. The worker is instructed to use an edger to finish cutting the grass at the top of the hillside. Another crew member is outside helping clean up and informs the worker that he is going inside to take a break. The crew member returns 30 minutes later and finds the lawn mower upside down, with the worker crushed underneath it. Call the rest of the crew to help lift the machine and call the Emergency Medical service. The worker dies from massive trauma to the head and chest.
Bottom Line : Workers should not mow on slopes hotter than 15 degrees. The cutting machine should be operated on the slopes in a cross way and never from the top down Additionally, the worker should not have been left alone when cutting the grass on a steep ramp.
Tips for cutting grass on slopes:
Make sure ride-on mowers are equipped with a roll over protection system (ROPS).
Always wear a seat belt.
Do not operate mowers on inclines that exceed the limit angles specified by the manufacturer.
If you do not have the instructions available to you, evaluate the terrain and slope conditions to make sure the mower is operated safely.
Avoid mowing on slopes at a 15 degree angle.
Use a slope indicator, also called a "clinometer" or "inclinometer"
Do not leave workers unsupervised in potentially dangerous conditions.
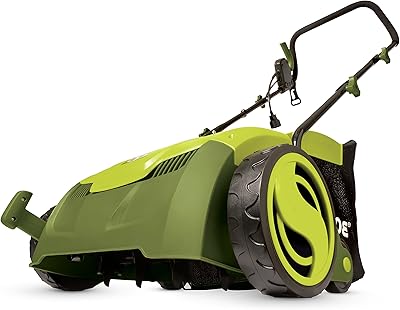
Sun Joe AJ801E 13 in. 12 Amp Electric Scarifier + Lawn Dethatcher w/Collection Bag, Green
About this item
Powerful: 12-amp motor rakes a 13" wide path to get your job done faster
Adjustable deck: tailor raking depth with 5-position depth control
Scarified: use the Scarified function to cut grass roots for thicker growth, healthier lawns
Air boost technology: spring Steel tines for maximum thatch pickup
Accessories: detachable thatch collection bag for easy disposal
How to mow the lawn on a slope
Once you have a lawn mower and the grass in your garden does not stop growing, it's time to get down to work.
Wait, don't you have your own machine yet !? Don't you know which one is the right one? In maquinacortacesped.com we have a step-by-step guide to help you make the decision without margin of error and to make sure you can see the analysis of the different types:
Now yes, there is no excuse for not having the essential tool and we are going to explain step by step how to cut the lawn, from the most basic to the most advanced.
How to mow the lawn
If you still do not control when you have to read our article.
Once the right moment is clarified, what you have to know is how the lawn should be cut so that it looks good and you can enjoy it as soon as possible without making the typical mistakes.
If, like mortals, you do not have the budget for a lawn mowing service or if you enjoy taking care of what has cost you so much to achieve, we are going to teach you all the secrets so that you finally have the garden of your dreams.
The first thing to be clear about is that organization is key to not turning a relatively simple task into hours of insufferable work. To do this, check the following before starting:
Remove the obstacles that may impede your freedom of movement, especially the typical pots that are placed on the edges of the lawn. If you do it at the beginning you will not have to be constantly stopping and starting the machine.
Collect all the material that you are going to use:
Your cutting machine: check that it is ready (blades, gasoline, oil, battery ...)
Bag for waste. We recommend that you make use of a garden container that will prevent the bag from closing when filling it.
Decide how high you want to leave the grass and what cutting technique is best for you, so you don't have to improvise and ruin the aesthetic stripes.
Evaluate if you are interested in taking advantage of other lawn maintenance tasks such as replanting an area, fertilizing, or scarifying.
General Rules for Mowing Lawn
The most basic thing is that to cut the grass you have to make parallel paths passing with the machine on the grass. It's that easy, you start in one corner and end in the opposite.
Now, if your terrain is an irregular surface, it is best to divide it into sectors and cut one by one.
If you have slopes , it is recommended that the lines be perpendicular, that is, do not go uphill-downhill, but from one side to the other at the same level of inclination. You will appreciate it especially if your machine has a motor and manual traction because you will not have to push all its weight up.
On the other hand, you should avoid mowing wet grass . Two reasons: the grass will be more caked, which makes it difficult to cut and damages its quality, and the mechanisms of the tool you are using can also get stuck, especially if it is a manual lawnmower. That is why we advise you to cut the grass before watering.
We know, it is true that sometimes the grass cannot be cut dry simply because the environment moistens it. In these cases, as we have said above, try to remove as much water as possible with a garden broom, but be very careful not to damage the grass.
Another difficulty you may encounter is that the grass has grown a lot, it has happened to all of us. But then the question is, how do you cut the grass when it is very high ? To do it well, it is best to first pass a lawn rake trying to align the stems and remove small branches and stones that make it difficult for the blades to work.
Select the maximum cutting height and lower it with different passes until you reach the desired level. If you try to cut long lengths from the first moment, it is possible that the machine will jam or that there will be uncut areas.
That is not all but it is enough to get out of the way and leave the grass short. If what you want to have is a spectacular green carpet, you must know the cutting techniques that most do not apply due to ignorance but that turn your effort into a professional cut. In the next few lines we will tell you how to do it in an easy way to enjoy its results.
Special features of each Tool
You already know the bases to leave your lawn short, regular and uniform. Now, depending on the tool you use, the procedure can vary.
How to cut the lawn with a machine?
Whether manual or motorized, using a lawn mower will be necessary in almost all cases.
The mower without a motor has no mystery, you have to pass its cutting cylinder through every meter of grass. We recommend incorporating (if you do not have it) a basket that collects the grass chips that are leaving, since if you are not going to mulch you will have to sweep them later.
If you are going to use a corded electric lawnmower, the most important thing is that you make sure it is long enough, you can guarantee it with an extension cord . The only difficulty you can find is that the cable unravels while you use it.
To avoid this, place it on the floor free of obstacles so that it can be unrolled as you pull. Of course, cut away more and more from the plug and not the other way around because that way you will avoid stepping on the cable meters when you return.
It would be different if you were to use a battery powered mower . Then the only thing you have to worry about is that it is sufficiently charged to last the whole day.
In both cases, starting is really simple, consisting of pressing a button that, depending on the model, will have to be combined with operating a lever for more safety.
If your tool is addicted to gasoline it is no longer so simple. The greater power has to have something against it and that is that it requires a little more preparation.
Check that you have full oil and gasoline tanks according to the instructions for use. You may need to prime the engine to start it, this is usually a rubber button that is pressed multiple times. Then yes, you give a tug on the starter strap while operating, if necessary, the safety crank and voila! Ready to mow.
Regardless of how your machine's engine is powered, take extra care when making U-turns while mowing the lawn. These machines usually weigh a minimum of about 10 kg so if you turn them the wrong way you can tear up grass and dirt.
To do it well, lift the rear wheels and turn a little, then with the front wheels and so on until you get the desired position. It is slower without a doubt, but destroying your garden to gain a few seconds is not profitable.
How to cut the lawn with a tractor?
If you are lucky enough to have a very large garden and you envy those perfectly arranged sports stadiums by wondering how they will cut the grass of a football field, we have the answer: lawn mowing tractors.
It does not necessarily have to be yellow, you can choose the color you like, yes, the type of tractor is the right one. These machines run on gasoline and require a lot of space to maneuver.
In addition, if you want to get that professional cut and attention to detail, you will have to use a built-in roller to leave those spectacular stripes, as we tell you in the second part.
The operation is similar to a vehicle: key to start, accelerator and brake, and you turn with the steering wheel. Like driving a car, it is fun and precisely for that reason, maximum caution.
How to cut the lawn without a machine?
This question may seem surprising but the truth is that many people find that none of the mower options are perfectly suited to their needs and then they choose not to make that financial outlay. We present the alternatives that you can take advantage of, to cut the lawn without a lawnmower.
Cutting the grass with a brush cutter is, in these cases, the best option. Keep in mind that the land must be small if not, choose a machine with more capacity. The trimmers work with a motor that can be electric or gasoline, in addition, depending on the width of the cut, the type of blades and the resistance of its materials, various prices are offered.
Although they are a familiar tool, many people do not know how to cut grass with an edger. You will have to hold it with the strength of your arms, so we recommend that your model have handles for both hands.
The truth is that they are incredibly useful as a complement to a traditional machine because they allow you to reach difficult areas such as that grass that grows between the stones of a path, or the limits of the lawn with the house.
Ok it's true, the brush cutter is a machine too… If what you are looking for is something even simpler, even rudimentary, you still have other possibilities such as cutting the lawn with scissors , with a machete or with a flock of sheep.
Seriously, be very careful if you try to use a machete or similar (there are people who do), but in the case of scissors it can certainly work. Logically you will not be able to cut 100 meters with scissors, but they can be a good substitute for the brush cutter to outline those areas where you cannot reach with your main machine.